You can import local image files to Edge Node Service (ENS) to create custom images. You can then use these custom images to create instances with specific operating system settings and pre-installed applications. This method improves deployment efficiency. This topic describes how to import a custom image.
Usage notes
ENS nodes must be upgraded to support cloud-init.
This feature supports x86-based instance types.
This feature supports the Linux operating system.
Supported image formats include RAW, VDI, VMDK, and VHD. You can also import compressed tar.gz files. The QCOW2 format is not supported. If your image file is in another format, convert it before you upload the file.
The total size of the compressed image files for the system disk and data disks cannot exceed 1 TB.
Procedure
Upload the local image file to Object Storage Service (OSS). For more information, see Upload files. If you want to import an image that includes a data disk, prepare separate image files for the system disk and the data disk, and upload them to OSS.
Log on to the ENS console.
In the navigation pane on the left, choose .
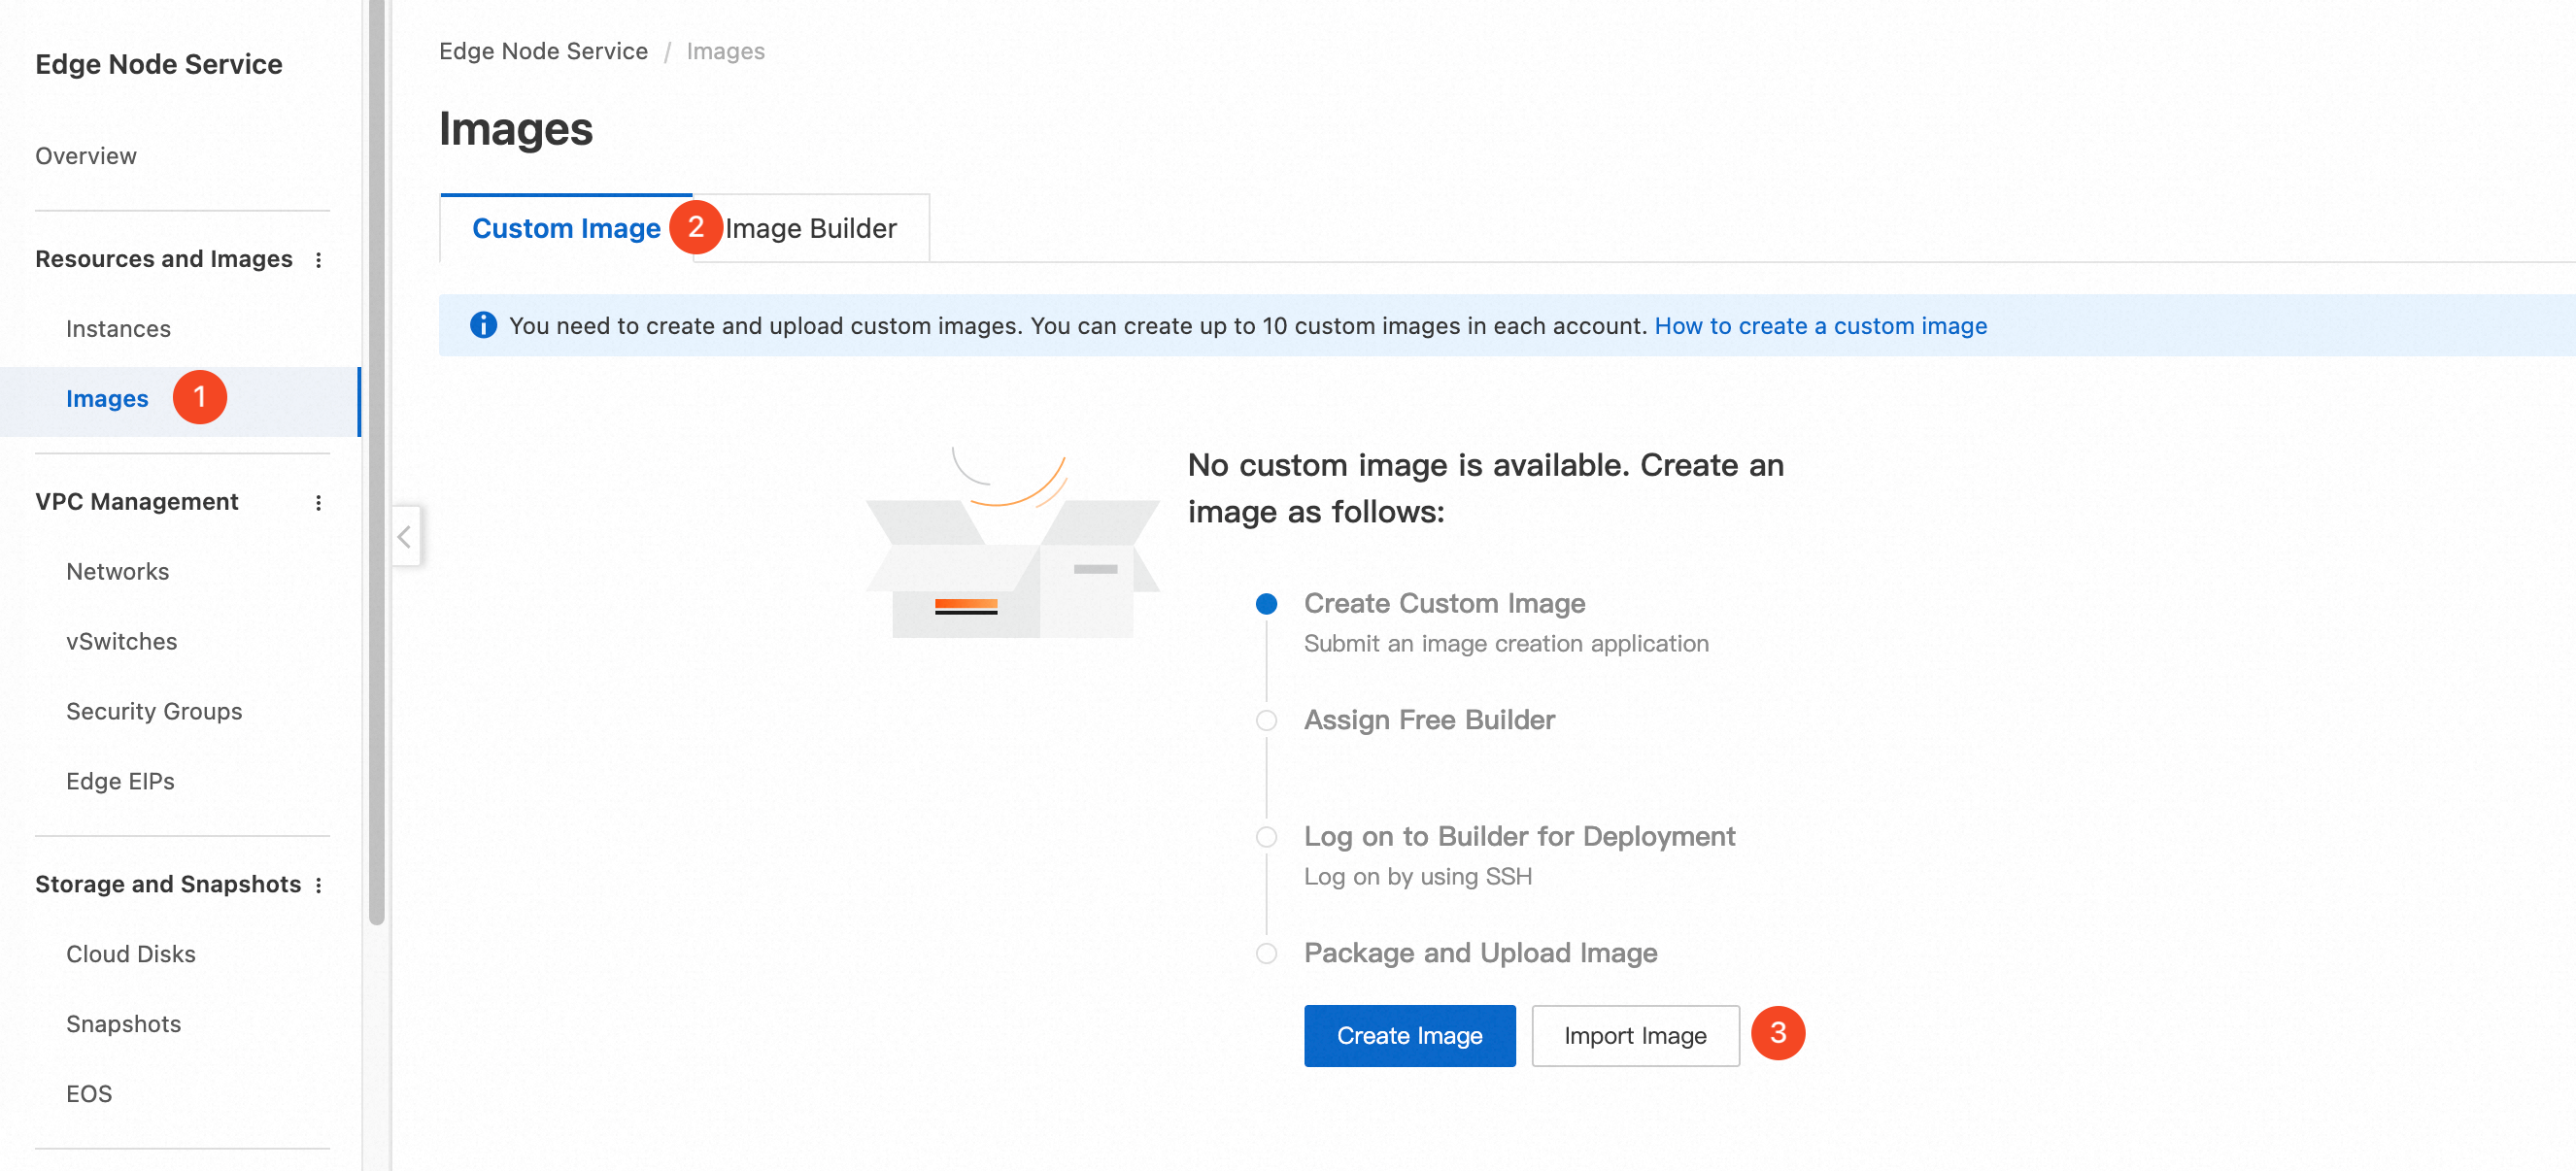
Click the Images tab. On the Custom Image tab, click Import Image.
Confirm that you have completed all preparations and click Next.

Enter an Image Name, select the Image File URL to import, and select the correct OS.
NoteFor Windows operating systems, you can select the license type. Instances created from images that use an Alibaba Cloud-provided license incur a license fee and are automatically activated. Instances created from Bring Your Own License (BYOL) images do not incur a license fee, and you must activate the operating system.
You can store the custom image in different regions, such as Beijing and Singapore.
To import a data disk image, expand Advanced Configurations and select the OSS image file for the data disk. The image format and capacity are automatically detected.
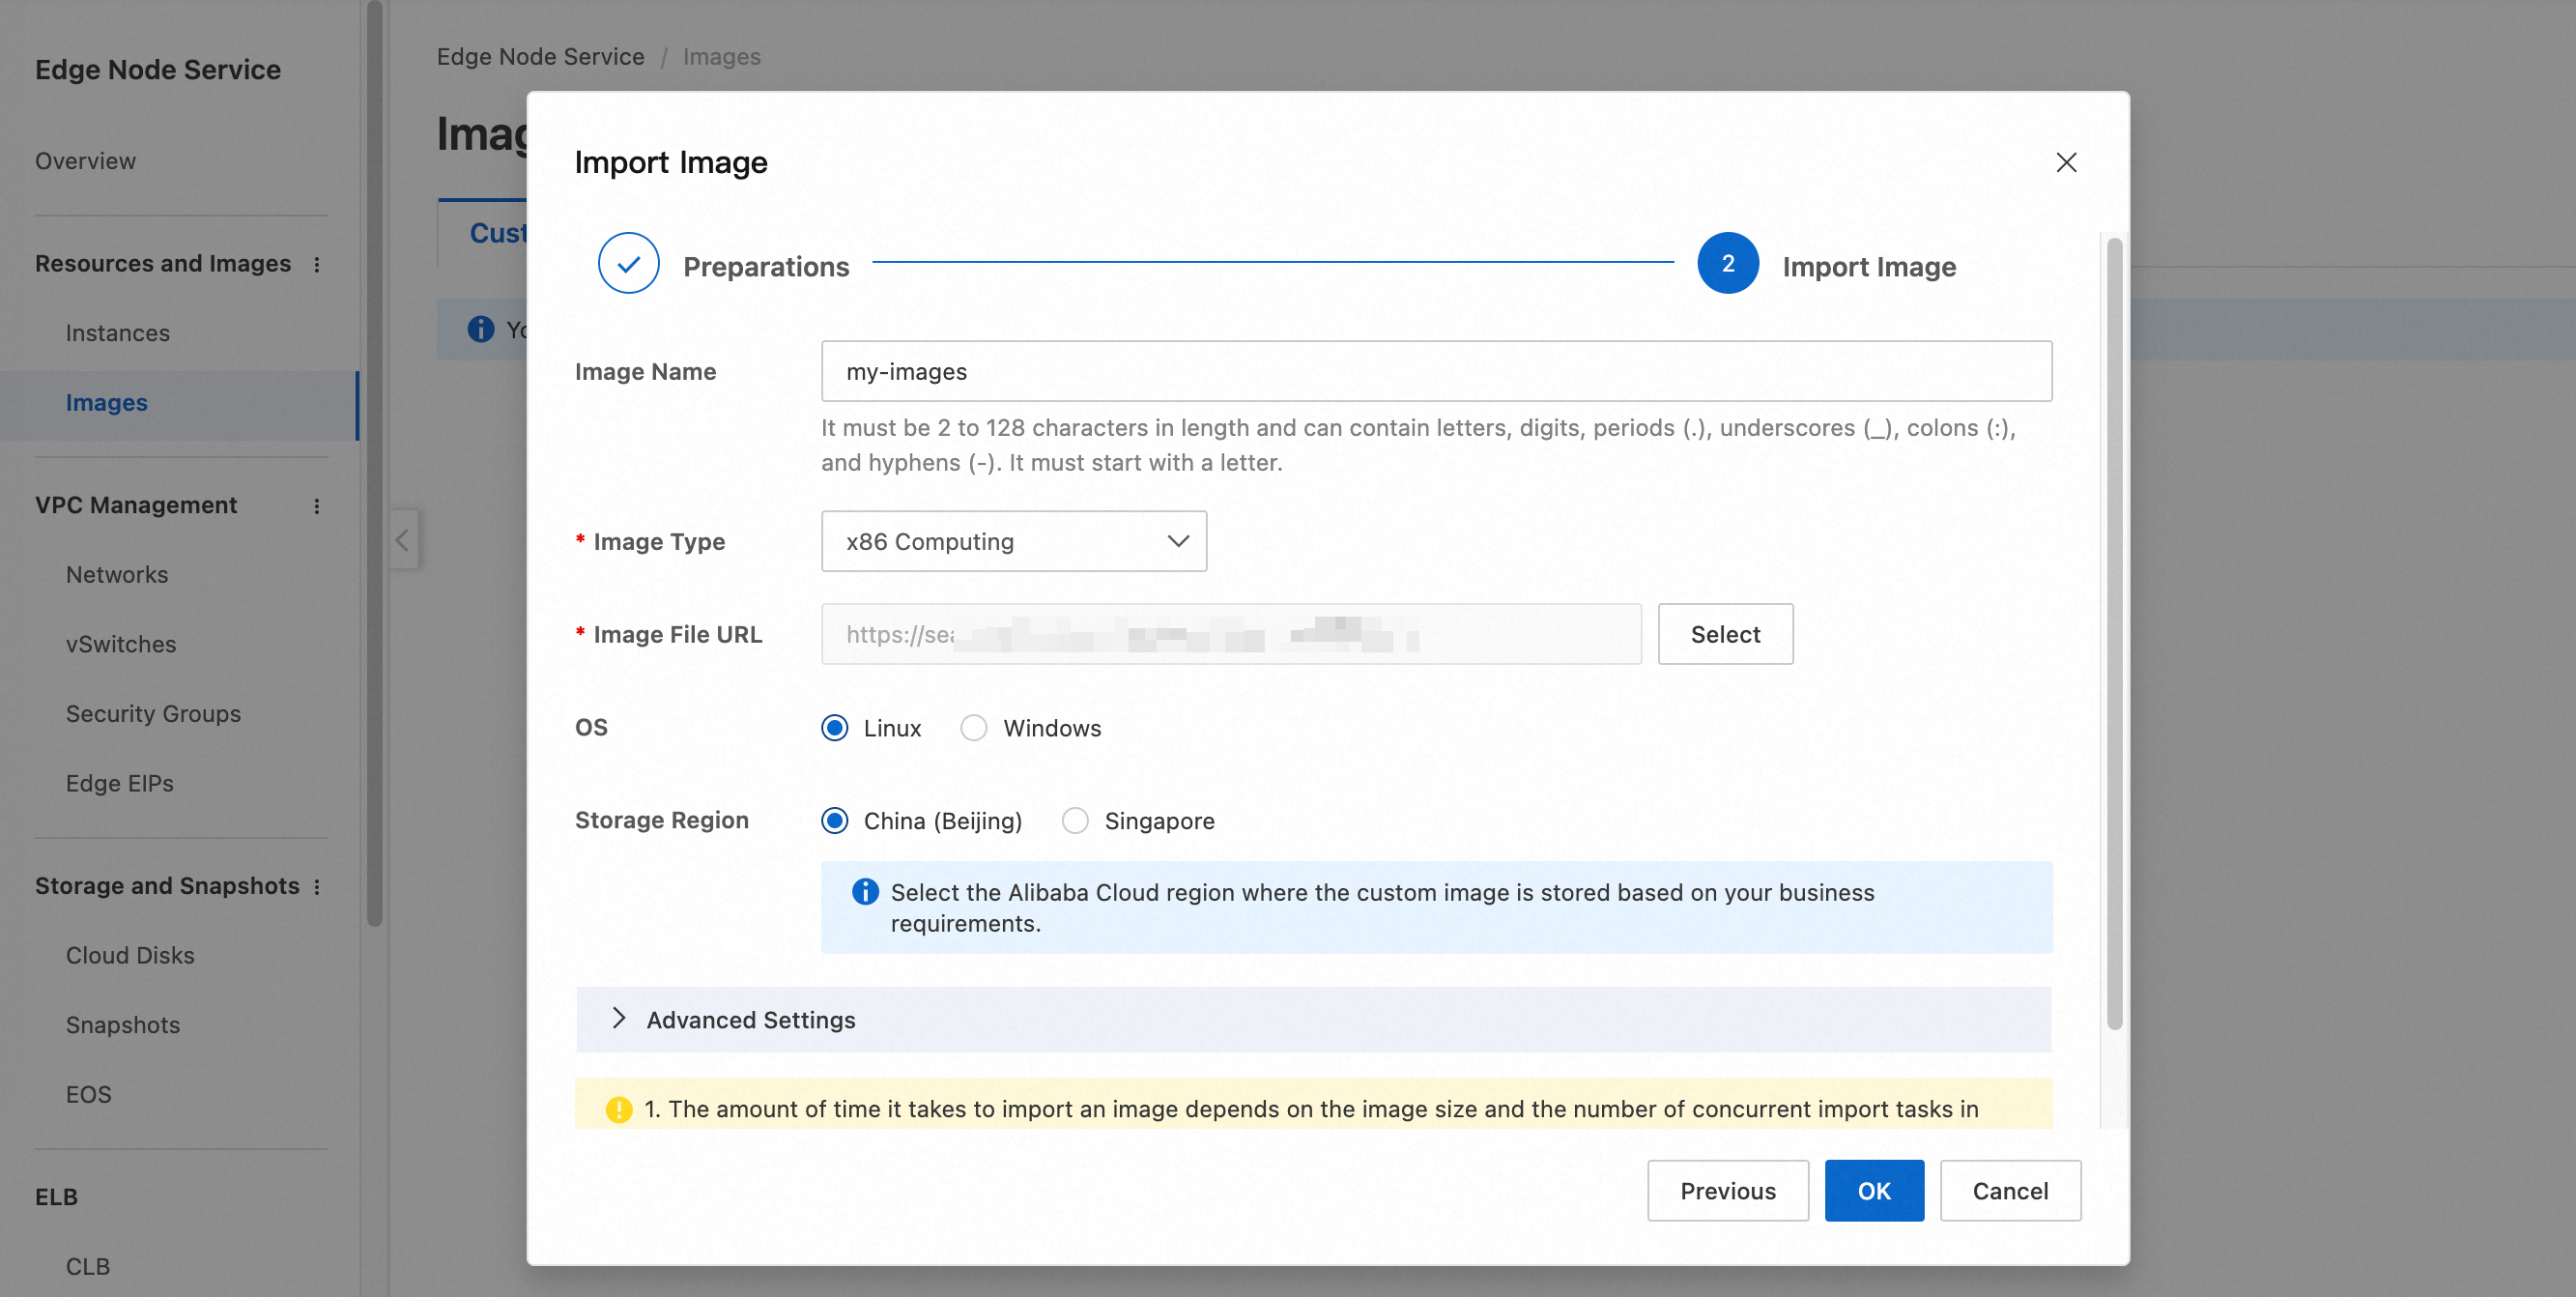
Verify that all the information is correct and click OK. The import takes several hours, depending on the task queue load and the image file size.