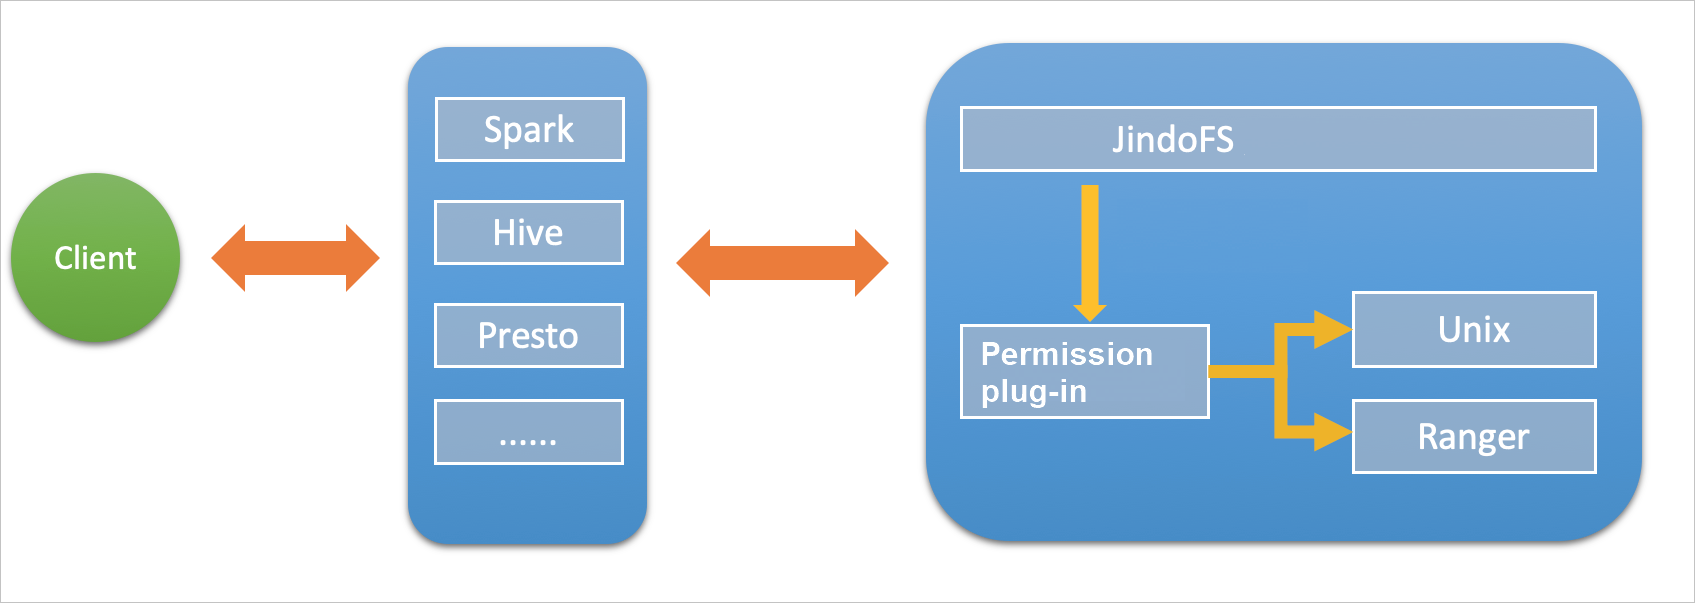
Control access to JindoFS files using Unix-based permissions or Apache Ranger, depending on your namespace storage mode.
Permission methods by storage mode
| Storage mode | Unix permissions | Ranger permissions |
|---|---|---|
| Block storage mode | Supported | Supported |
| Cache mode | Not supported | Supported (only option) |
Unix permissions (block storage mode only): Set rwxrwxrwx permissions on files and configure owners and groups, similar to HDFS.
Apache Ranger (both modes): Supports advanced access control, including wildcards in paths.
You cannot switch between block storage mode and cache mode.
Enable Unix-based permission management
Unix-based permissions are available only in block storage mode.
Prerequisites
Before you begin, ensure that you have:
-
An E-MapReduce (EMR) cluster with the SmartData service deployed
-
Access to the Alibaba Cloud EMR console
-
Cluster admin permissions
Configure and restart
-
Go to the SmartData service.
-
Log on to the Alibaba Cloud EMR console.
-
In the top navigation bar, select the region where your cluster resides. Select the resource group as required. By default, all resources of the account appear.
-
Click the Cluster Management tab.
-
On the Cluster Management page, find the target cluster and click Details in the Actions column.
-
In the left-side navigation pane, click Cluster Service and then SmartData.
-
-
Go to the namespace tab for the SmartData service.
-
Click the Configure tab.
-
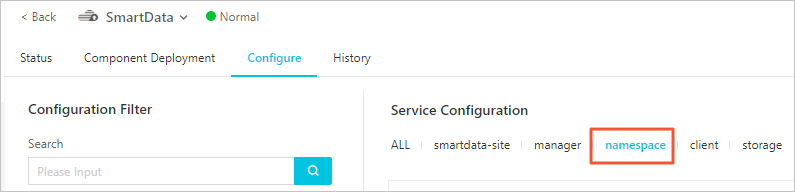
Click the namespace tab in the Service Configuration section.
-
-
Click Custom Configuration in the upper-right corner. In the Add Configuration Item dialog box, set Key to
jfs.namespaces.<namespace>.permission.methodand Value tounix, and click OK. -
Save the configurations.
-
In the upper-right corner of the Service Configuration section, click Save.
-
In the Confirm Changes dialog box, enter a description and turn on Auto-update Configuration.
-
Click OK.
-
-
Restart the Namespace Service.
-
Choose Actions > Restart Jindo Namespace Service in the upper-right corner.
-
In the Cluster Activities dialog box, enter a description and click OK. In the confirmation message, click OK.
-
After the service restarts, manage JindoFS permissions with the same Unix commands you use for HDFS:
hadoop fs -chmod 777 jfs://{namespace_name}/dir1/file1
hadoop fs -chown john:staff jfs://{namespace_name}/dir1/file1
If a user lacks permissions on a file, the following error is returned:

Enable Ranger-based permission management
Ranger-based permissions are available in both block storage mode and cache mode.
Prerequisites
Before you begin, ensure that you have:
-
An EMR cluster with the Apache Ranger component installed
-
The Ranger plug-in activated in JindoFS
-
Access to the Ranger web UI
Configure and restart
-
Set Ranger as the permission method in JindoFS.
-
On the namespace tab for the SmartData service, click Custom Configuration.
-
In the Add Configuration Item dialog box, set Key to
jfs.namespaces.<namespace>.permission.methodand Value toranger, and click OK. -
Save the configurations.
-
In the upper-right corner of the Service Configuration section, click Save.
-
In the Confirm Changes dialog box, enter a description and turn on Auto-update Configuration.
-
Click OK.
-
-
Restart the Namespace Service.
-
Choose Actions > Restart Jindo Namespace Service in the upper-right corner.
-
In the Cluster Activities dialog box, enter a description and click OK. In the confirmation message, click OK.
-
-
-
Add the HDFS service on the Ranger web UI and configure the required parameters.
-
Log on to the Ranger web UI. For more information, see Overview.
-
Add the HDFS service on the Ranger web UI.

-
Configure the following parameters.
Parameter Description Service Name Use the format jfs-{namespace_name}. Example:jfs-test.Username Enter a custom username. Password Enter a custom password. Namenode URL Use the format jfs://{namespace_name}/.Authorization Enabled Keep the default value No. Authentication Type Keep the default value Simple. dfs.datanode.kerberos.principal Leave blank. dfs.namenode.kerberos.principal Leave blank. dfs.secondary.namenode.kerberos.principal Leave blank. Add New Configurations — -
Click Add.
-
Enable LDAP user group synchronization in JindoFS
When using Ranger permissions with LDAP-based Ranger Usersync, configure JindoFS to resolve LDAP user groups for permission checks.
-
On the namespace tab for the SmartData service, click Custom Configuration.
-
In the Add Configuration Item dialog box, configure the following LDAP parameters and click OK. Configure the parameters based on the open-source HDFS configuration. For more information, see core-default.xml.
Parameter Example hadoop.security.group.mappingorg.apache.hadoop.security.CompositeGroupsMappinghadoop.security.group.mapping.providersshell4services,ad4usershadoop.security.group.mapping.providers.combinedtruehadoop.security.group.mapping.provider.shell4servicesorg.apache.hadoop.security.ShellBasedUnixGroupsMappinghadoop.security.group.mapping.provider.ad4usersorg.apache.hadoop.security.LdapGroupsMappinghadoop.security.group.mapping.ldap.urlldap://emr-header-1:10389hadoop.security.group.mapping.ldap.search.filter.user(&(objectClass=person)(uid={0}))hadoop.security.group.mapping.ldap.search.filter.group(objectClass=groupOfNames)hadoop.security.group.mapping.ldap.baseo=emr -
Save the configurations.
-
In the upper-right corner of the Service Configuration section, click Save.
-
In the Confirm Changes dialog box, enter a description and turn on Auto-update Configuration.
-
Click OK.
-
-
Restart all components of the SmartData service.
-
Choose Actions > Restart All Components in the upper-right corner.
-
In the Cluster Activities dialog box, enter a description and click OK. In the confirmation message, click OK.
-
-
Log on to the
emr-header-1node of the EMR cluster via SSH and connect Ranger Usersync to the LDAP server. For more information, see Integrate Ranger UserSync with an LDAP server server. After integration, you can grant LDAP users or user groups access permissions when you configure Ranger policies.").