Apache Ranger integration with Trino gives you fine-grained access control at the catalog, schema, table, and column level. This topic walks you through enabling the Trino plugin in Ranger and creating access policies.
Prerequisites
Before you begin, make sure you have:
-
A DataLake cluster or custom cluster running EMR V3.45.0 or later, or EMR V5.11.0 or later
-
Both Trino and Ranger selected as services when the cluster was created
For instructions on creating a cluster, see Create a cluster.
Enable Trino in Ranger
-
Go to the Services tab.
-
Log on to the EMR console. In the left-side navigation pane, click EMR on ECS.
-
In the top navigation bar, select the region where your cluster resides and select a resource group based on your business requirements.
-
On the EMR on ECS page, find your cluster and click Services in the Actions column.
-
-
Enable the Trino plugin.
-
On the Services tab, click Status in the Ranger-plugin section.
-
In the Service Overview section of the Status tab, turn on enableTrino.
-
In the Confirm message, click OK.
-
-
Restart Trino.
-
On the Services tab, click the
 icon and select Trino.
 -
In the upper-right corner, choose More > Restart.
-
In the dialog box, set the Execution Reason parameter and click OK.
-
In the Confirm message, click OK.
-
Configure permissions
The Ranger plugin for Trino supports fine-grained access control across catalogs, schemas, tables, and columns. You can create grant policies and apply them to individual users.
After enabling Trino in Ranger, use the trino user to access table data by default:
trino --server master-1-1:9090 --user trinoAccess the Ranger web UI
Before configuring policies, access the Ranger web UI. For instructions, see Overview.
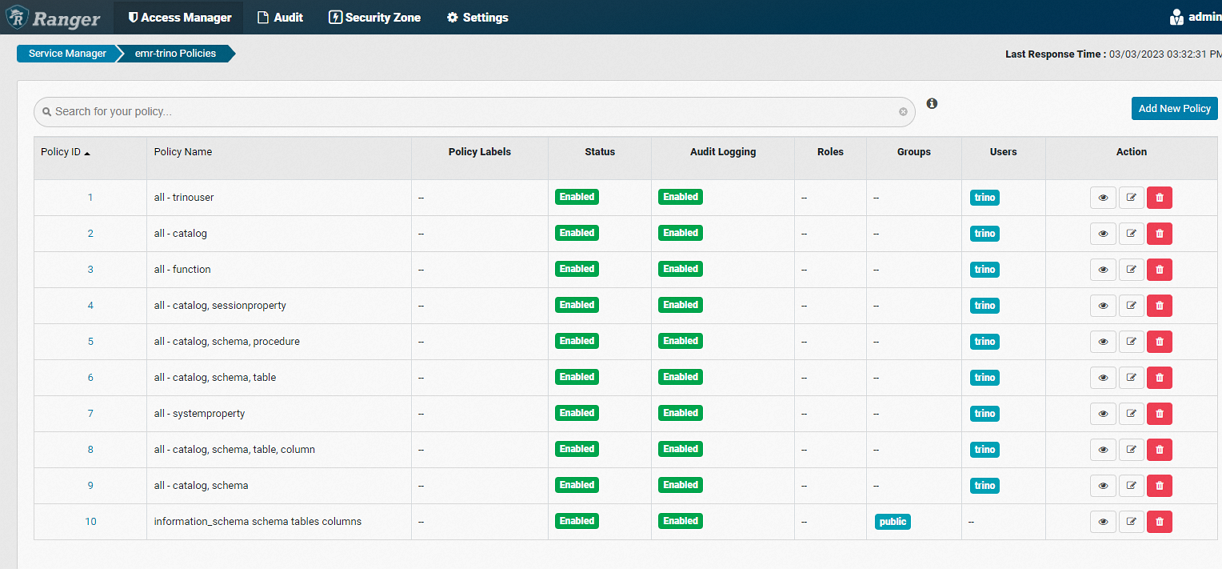
In the Ranger web UI, click emr-trino in the TRINO section to open Trino policy management.

The emr-trino page lists all configured policies.
Create a policy
-
Access the Ranger web UI. For instructions, see Overview.
-
Click emr-trino.
-
In the upper-right corner, click Add New Policy.
-
Configure the policy parameters.
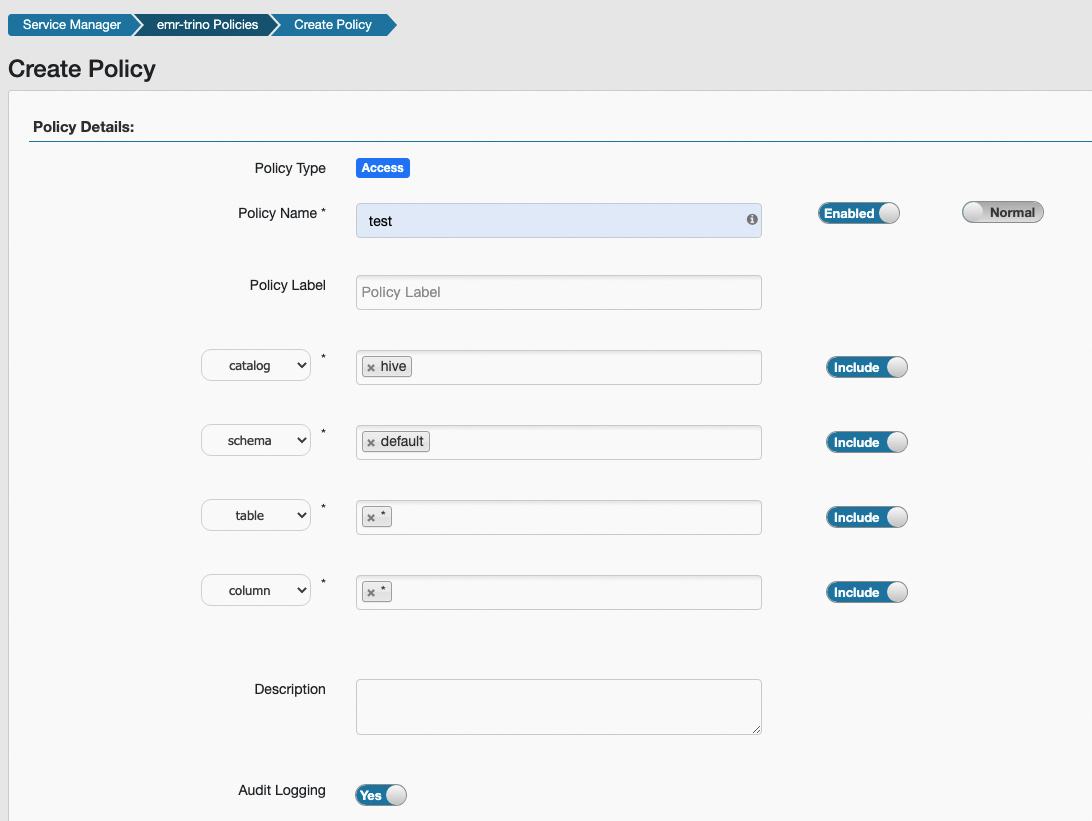
Parameter Description Policy Name A custom name for the policy. catalog The catalog to apply the policy to. Multiple catalogs can be selected. schema The schema to apply the policy to. Multiple schemas can be selected. Use an asterisk ( *) to include all schemas.table The table to apply the policy to. Multiple tables can be selected. Use an asterisk ( *) to include all tables.column The column to apply the policy to. Multiple columns can be selected. Use an asterisk ( *) to include all columns.Permissions The permissions to grant. -
Click Add.