Enable Apache Ranger access control for Hive to enforce fine-grained, policy-based permissions on databases, tables, columns, and storage URLs.
Prerequisites
Before you begin, ensure that you have:
-
A DataLake cluster with the Ranger service enabled
-
Access to the EMR on ECS console
For instructions on creating a cluster, see Create a cluster.
Usage notes
Ranger permission verification applies only to SQL jobs submitted through HiveServer2. Access through other methods bypasses permission checks entirely.
| Access method | Permission verification |
|---|---|
| Beeline client (via HiveServer2) | Supported |
| JDBC URL (via HiveServer2) | Supported |
| Hive client (directly to Metastore) | Not supported |
| Hive-Client API (directly to Metastore) | Not supported |
Enable Ranger access control for Hive
Step 1: Go to the Cluster Service page
-
In the top navigation bar, select a region and a resource group.
-
On the EMR on ECS page, click Service in the Actions column for your cluster.
Step 2: Enable Hive in Ranger
-
On the Services page, in the Ranger-plugin service area, click Status.
-
In the Service Overview area, turn on the enableHive switch.
-
In the dialog box, click OK.
Step 3: Restart HiveServer
-
On the Service page, select
 > Hive.
 -
In the Components area, find HiveServer and click Restart in the Actions column.
-
Enter an Execution Reason and click OK.
-
In the Confirm dialog box, click OK.
Configure Ranger Hive permissions
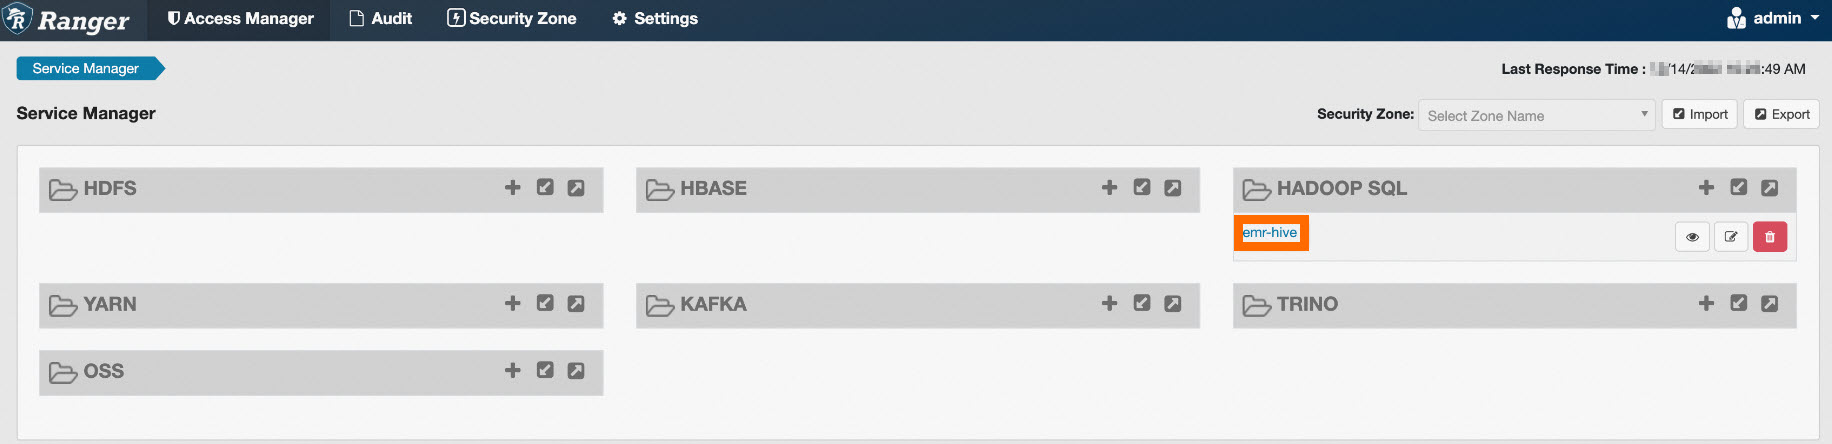
Access the Ranger UI to create and manage Hive policies. For instructions on opening the Ranger UI, see Ranger overview.
On the Ranger UI, click emr-hive under HADOOP SQL to open the Hive policy list.
Ranger includes two default policies:
-
One grants the hive user (the account that starts HiveServer) full access to all resources — databases, tables, columns, user-defined functions (UDFs), and URLs.
-
One grants all users the Create permission on databases and within the default database.
Add an access policy
Click Add New Policy in the upper-right corner. Each policy requires three elements:
| Field | Description |
|---|---|
| Policy Name | A unique name for the policy. Required. |
| Resource | The Hive resource the policy controls: database, table, column, url, or udf. The policy form shows database, table, and column by default. Click a resource name to switch to a different resource type. Enter * to match all resources of that type. |
| Select User | The user to whom the policy applies. |
| Add Permissions | The access type granted. Click Add Permissions and select the required permission in the add/edit permissions section. |
Example resource values:
| Resource | Example value |
|---|---|
| database | testdb |
| table | test |
| column | id |
| url | oss://test-bucket/test/tmp |

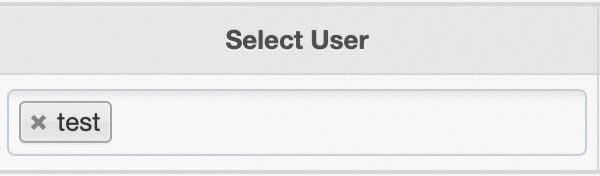
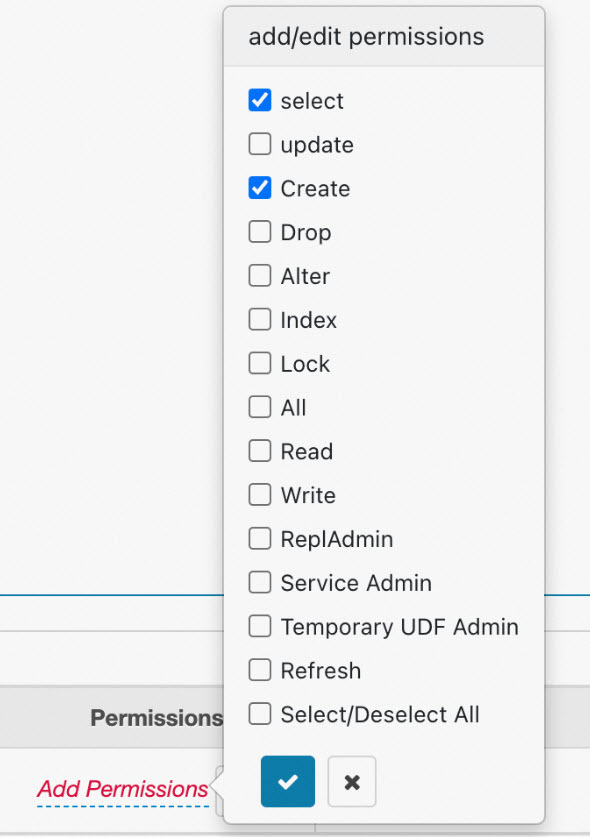
Example 1: Column-level SELECT permission
The following policy grants the test user the Select permission on the id column of testdb.test:

With this policy, the test user can run:
SELECT id FROM testdb.test;To allow SELECT on all columns, set column to *.
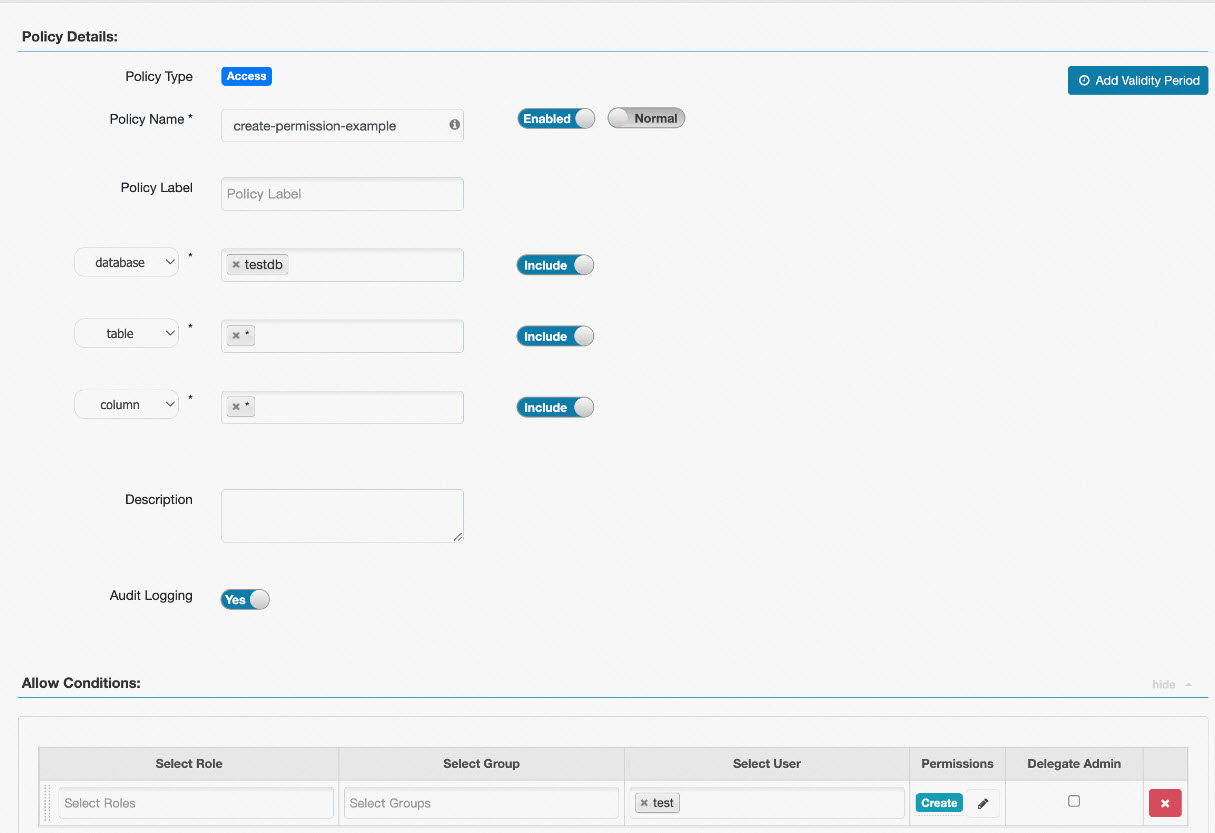
Example 2: Table creation permission
In Ranger, table-level Create permissions are scoped by both the database and the specific table name.
| Goal | database | table | column |
|---|---|---|---|
Allow creating only the test table |
testdb |
test |
* |
Allow creating any table in testdb |
testdb |
* |
* |
The following image shows the configuration for allowing any table creation within testdb:
Example 3: URL permission for OSS locations
When a Hive SQL statement contains location information and the scheme of the location is oss, Ranger checks whether the user has the required permission on that URL. For example, when you execute create external table test(id int, name string) location 'oss://test-bucket/test', the system checks whether you have the read permission on oss://test-bucket/test.
To grant a user access to a specific OSS path, switch the resource type to url and create a policy for that path. See Add an access policy for instructions on switching the resource type.
The following image shows an example URL policy configuration:

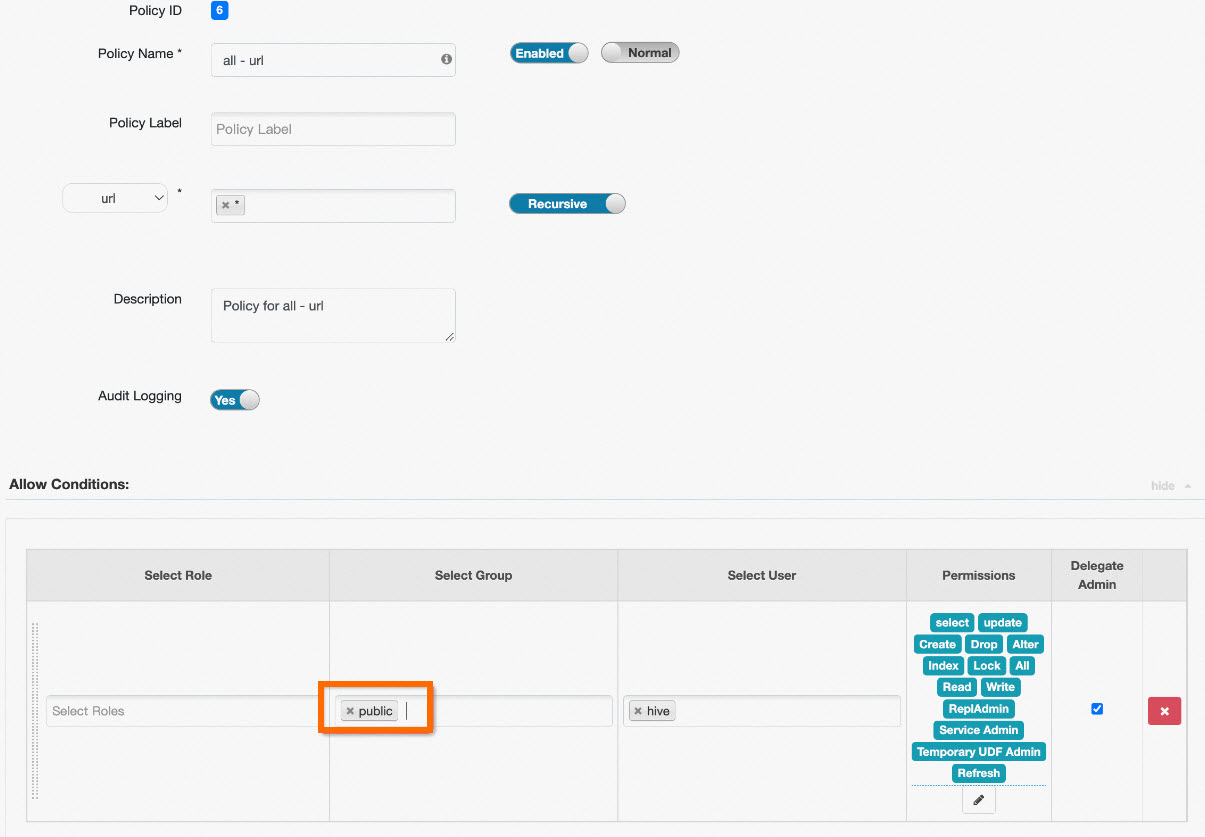
To grant all users read and write access to all URLs, modify the built-in all - url policy instead of creating a new one: open the policy and add public to the Select Group field.
In Ranger, public is a special group that includes all users. Adding public to a policy applies it to every user in the cluster.