This tutorial shows you how to run a Spark Streaming WordCount job that consumes messages from a Kafka topic in real time. The setup uses two E-MapReduce (EMR) clusters: a DataLake cluster (runs Spark 3) and a Dataflow cluster (runs Kafka).
By the end of this tutorial, you will have:
Created a DataLake cluster and a Dataflow cluster in the same security group
Submitted a Spark Streaming job that reads from a Kafka topic
Published messages with a Kafka producer and confirmed word counts appear in real time
Verified the job status in the Spark History Server
Prerequisites
Before you begin, ensure that you have:
An activated EMR account
The required roles assigned to EMR. See Assign roles
How it works
The two clusters communicate over a shared security group:
The Dataflow cluster hosts Kafka brokers and ZooKeeper. A Kafka producer publishes text messages to a topic named
demo.The DataLake cluster runs Spark 3. A Spark Streaming job subscribes to the same topic, counts words in each micro-batch, and prints the results to the console in real time.
When Spark reads from Kafka, each message is represented as a row with the following fields:
| Field | Type | Description |
|---|---|---|
key | binary | Message key |
value | binary | Message payload (cast to STRING to read text) |
topic | string | Source topic name |
partition | int | Kafka partition number |
offset | long | Offset within the partition |
timestamp | timestamp | Message timestamp |
timestampType | int | Timestamp type (0 = CreateTime, 1 = LogAppendTime) |
Step 1: Create a DataLake cluster and a Dataflow cluster
Both clusters must belong to the same security group so Spark can reach the Kafka brokers. For general cluster creation steps, see Create a cluster.
Create the DataLake cluster
This example uses Spark 3, which is included in the DataLake cluster type.

Create the Dataflow cluster
Select Kafka when choosing services. The console automatically selects Kafka-Manager and ZooKeeper as dependencies.

Step 2: Upload the demo JAR to the DataLake cluster
Download spark-streaming-demo-1.0.jar.
Upload the file to
/home/emr-useron the master node of the DataLake cluster.
Step 3: Create a Kafka topic
Run this step on the master node of the Dataflow cluster. See Log on to a cluster if you need help connecting.
Log on to the master node of the Dataflow cluster.
Create a topic named
demo:kafka-topics.sh --create \ --bootstrap-server core-1-1:9092,core-1-2:9092,core-1-3:9092 \ --replication-factor 2 \ --partitions 2 \ --topic demo
Keep this terminal session open. You will use it in Step 5 to run the Kafka producer.
Step 4: Submit the Spark Streaming job
Run this step on the master node of the DataLake cluster.
Log on to the master node of the DataLake cluster.
Go to the directory where you uploaded the JAR:
cd /home/emr-userSubmit the WordCount streaming job:
spark-submit \
  --class com.aliyun.emr.KafkaApp1 \
  ./spark-streaming-demo-1.0.jar \
  <broker-addresses>:9092 \
  demogroup1 \
  demo
The following table describes the positional arguments passed to the JAR:
Argument Required Default Description <broker-addresses>:9092Yes None Internal IP addresses and port of one or more Kafka brokers in the Dataflow cluster. Separate multiple addresses with commas. Example: 172.16.**.**:9092,172.16.**.**:9092,172.16.**.**:9092. To find the broker IPs, go to the Kafka service page, click the Status tab, locate KafkaBroker, and click the expand icon.demogroup1Yes None Consumer group name. Change this value if multiple jobs read the same topic concurrently. demoYes None Topic name. Must match the topic created in Step 3. The job runs continuously, processing each new batch of messages as they arrive.
Step 5: Publish messages and confirm output
In the Dataflow cluster terminal (from Step 3), start the Kafka producer:
kafka-console-producer.sh \
  --topic demo \
  --bootstrap-server core-1-1:9092,core-1-2:9092,core-1-3:9092
Type any text and press Enter. Each line is published as a Kafka message. Example input (Dataflow cluster terminal):

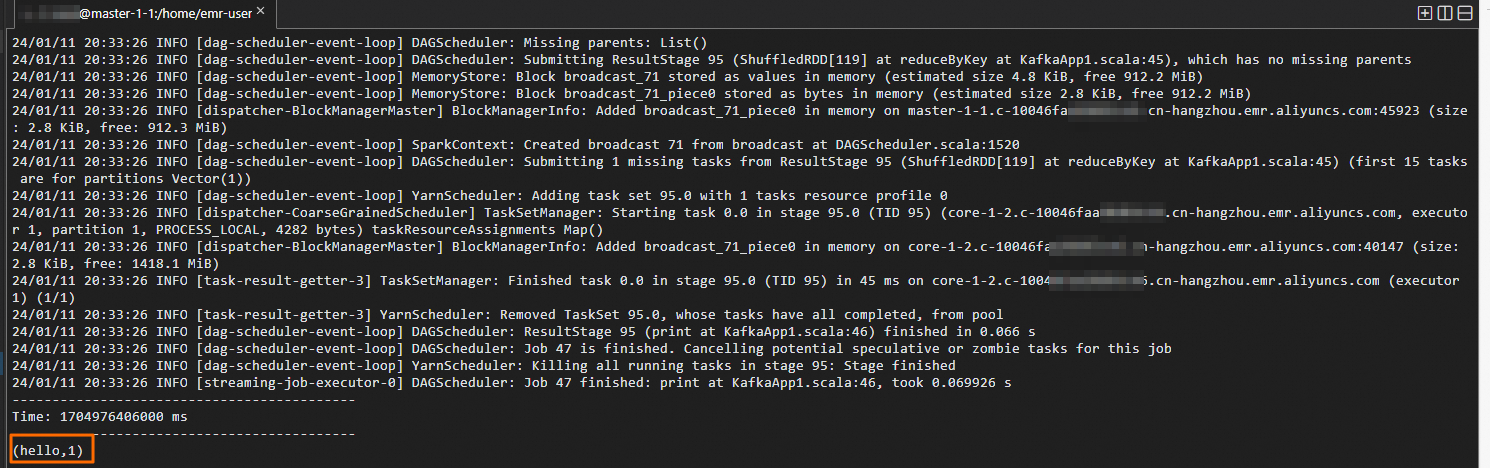
Switch to the DataLake cluster terminal. Word counts appear in real time as each micro-batch is processed. Example output (DataLake cluster terminal):
Step 6: Check job status in Spark History Server
On the EMR on ECS page, click the name of the DataLake cluster.
Click Access Links and Ports.
Open the Spark web UI. See Access the web UIs of open source components for access instructions.
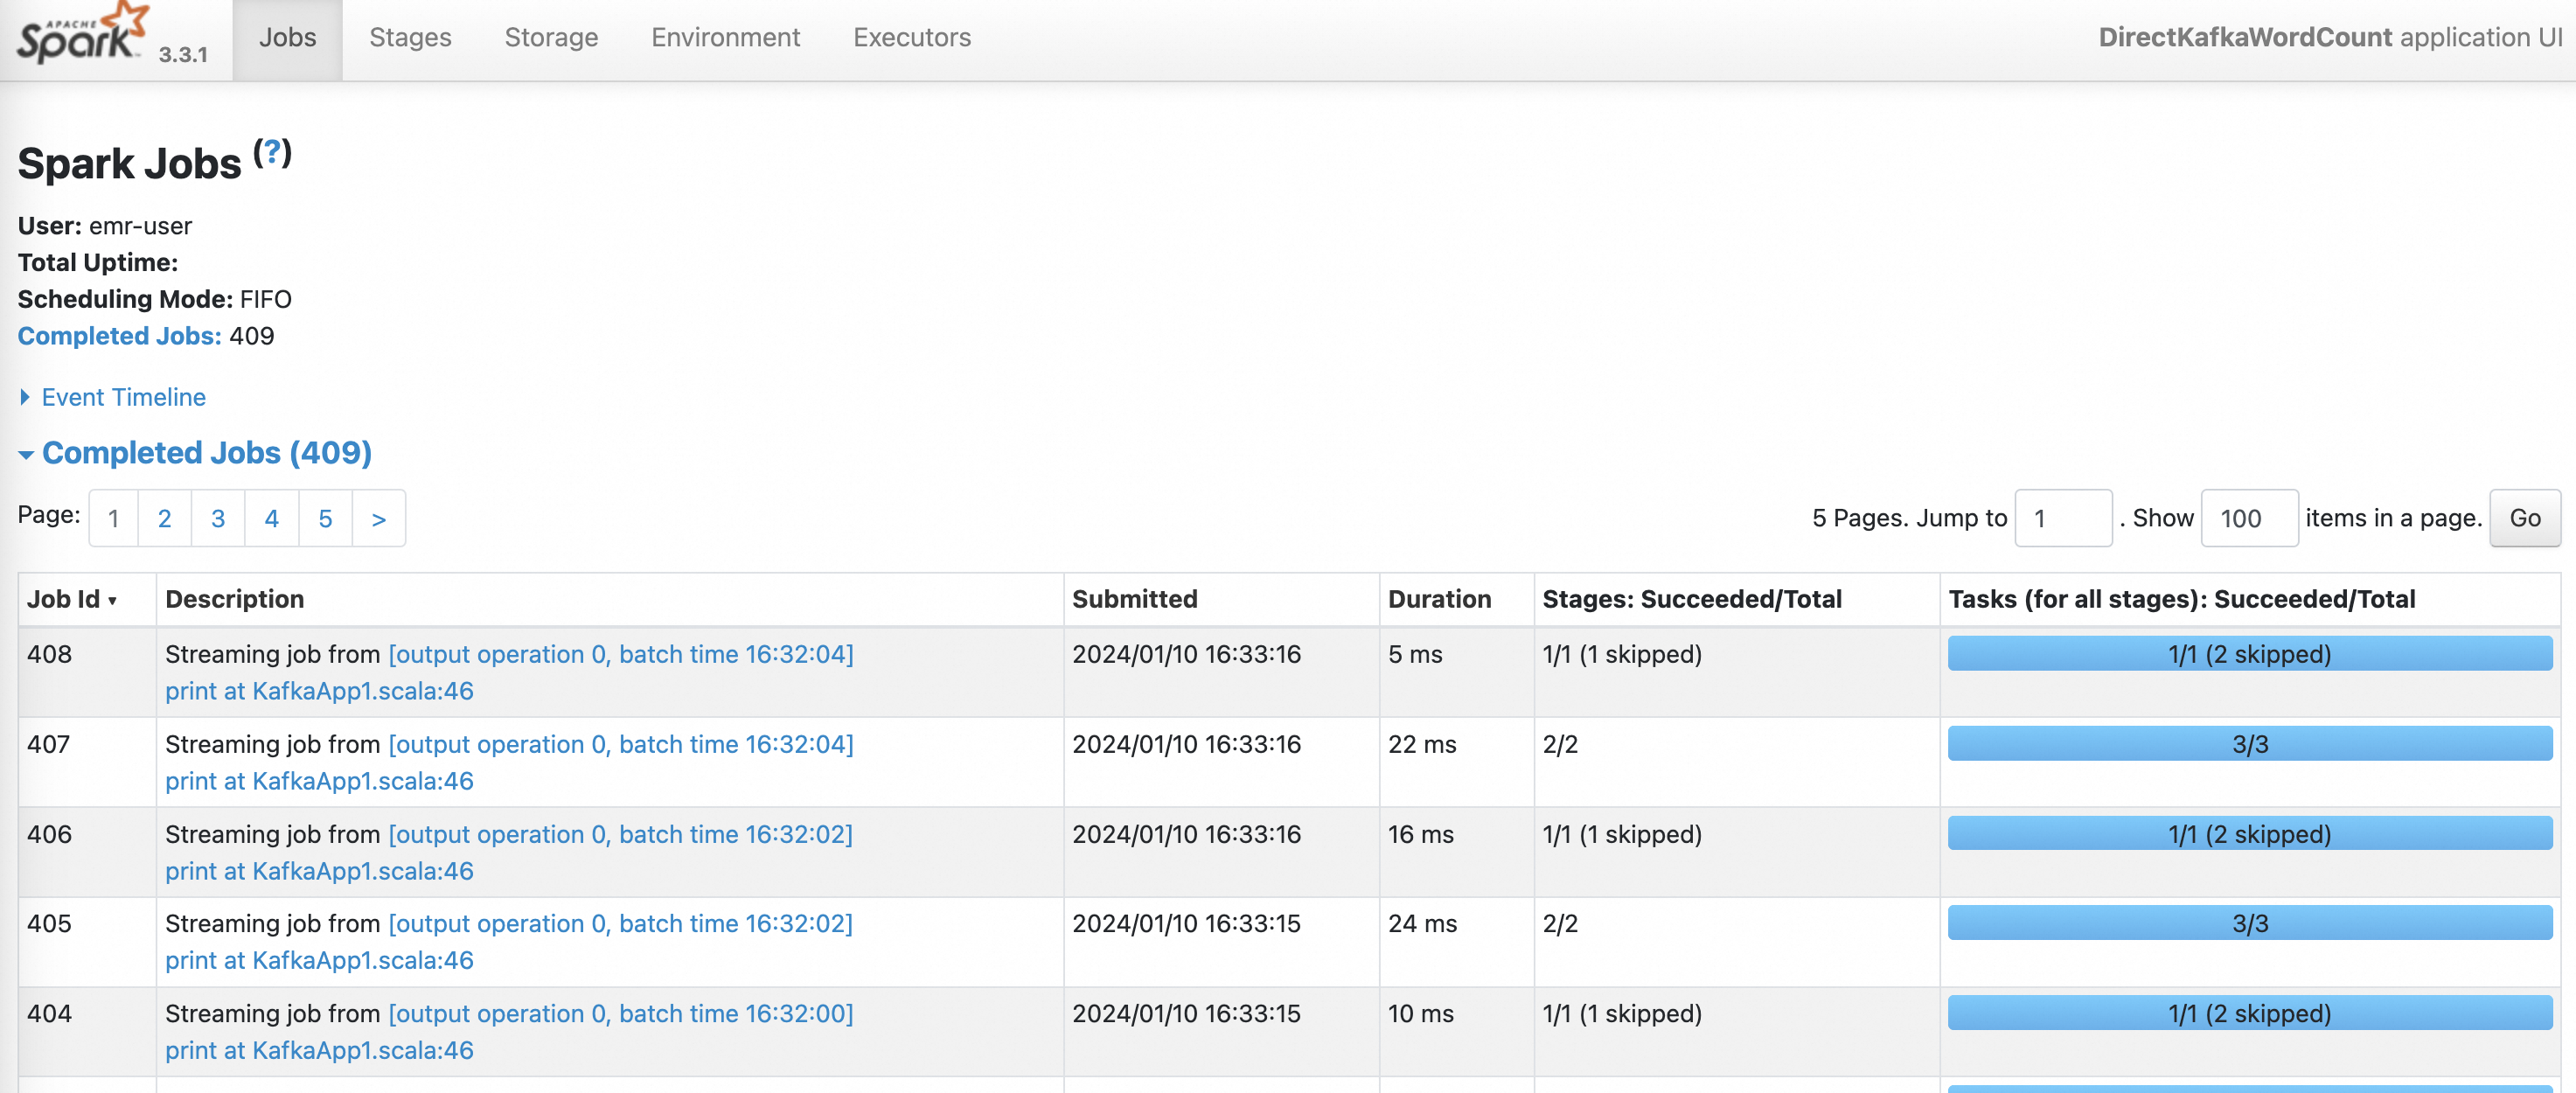
On the History Server page, click the App ID of the Spark Streaming job to view its status, batch statistics, and processing times.
What's next
To run your own processing logic instead of WordCount, replace the demo JAR with your own Spark application and update the
--classargument accordingly.To understand what fields are available when your Spark code reads from Kafka (such as
key,value,topic,partition,offset, andtimestamp), see Structured Streaming + Kafka Integration Guide.For production deployments, choose an offset management strategy based on your delivery requirements:
Strategy Reliability Complexity When to use Spark checkpoints Medium Low Development and testing Kafka-managed offsets ( commitAsync)High Medium Standard production use Custom data store (transactional) Highest High Exactly-once delivery required