When you use an E-MapReduce (EMR) cluster built on instance families with local disks — such as instance families with local SSDs (i series) and big data instance families (d series) — a local disk may fail. When this happens, EMR reports a disk event and you need to isolate the damaged disk, request a hardware replacement through the ECS console, and then remount and reconfigure the new disk. This topic walks you through each step.
Usage notes
-
Alternative approach: Remove the damaged node and add a new one. This prevents any long-term impact on your workloads.
-
Data loss: Data on the damaged disk is permanently lost after replacement. Make sure your data has enough replicas and is backed up before you proceed.
-
Downtime planning: The process involves stopping services, unmounting the disk, mounting the new disk, and restarting services. The replacement is usually completed within five business days. Before starting, verify that your cluster's remaining capacity can sustain your workloads while the affected node's services are stopped.
Prerequisites
Before you begin, ensure that you have:
-
Access to the ECS console to view the disk event details (instance ID, status, damaged disk ID, event progress, and related operations)
-
Secure Shell (SSH) access to the node that contains the damaged disk. For more information, see Log on to a cluster
-
Access to the EMR console to manage cluster services
Step 1: Identify the damaged disk
SSH into the node that contains the damaged disk, then run the following commands to record the device name and mount path you'll need in later steps.
-
View the block device layout.
lsblkThe output is similar to:
NAME MAJ:MIN RM SIZE RO TYPE MOUNTPOINT vdd 254:48 0 5.4T 0 disk /mnt/disk3 vdb 254:16 0 5.4T 0 disk /mnt/disk1 vde 254:64 0 5.4T 0 disk /mnt/disk4 vdc 254:32 0 5.4T 0 disk /mnt/disk2 vda 254:0 0 120G 0 disk └─vda1 254:1 0 120G 0 part / -
View the disk details.
sudo fdisk -lThe output is similar to:
Disk /dev/vdd: 5905.6 GB, 5905580032000 bytes, 11534336000 sectors Units = sectors of 1 * 512 = 512 bytes Sector size (logical/physical): 512 bytes / 4096 bytes I/O size (minimum/optimal): 4096 bytes / 4096 bytes -
From the two outputs, record the device name (
$device_name) and mount path ($mount_path) of the damaged disk. For example, if the disk event identifies devicevdd, then$device_nameis/dev/vddand$mount_pathis/mnt/disk3.
Step 2: Isolate the damaged disk
Stop services that use the disk
In the EMR console:
On the Cluster Services tab of the cluster, find the services that read from or write to the damaged disk. Storage services such as Hadoop Distributed File System (HDFS), HBase, and Kudu are typically affected. For each affected service, in the area where the endpoint is deployed, choose  > Stop.
To see the full list of processes using the disk, run the following command on the node and then stop any additional services from the EMR console.
sudo fuser -mv $device_nameOn the node (SSH):
Stop the management processes.
sudo crontab -l | grep -v "exporter_check.sh" | sudo crontab -
sudo service taihao_exporter stop
sudo service ilogtaild stop
sudo service ilogtaildclt stopStopping these processes temporarily disables metric collection and log monitoring for the node. Both features recover automatically after the disk is replaced and the processes are restarted.
Fence the disk and unmount it
-
Set read/write fencing on the mount path to block application-layer access.
sudo chmod 000 $mount_path -
Unmount the disk.
ImportantIf you skip this step, the device name may change after the hardware is repaired. Applications could then read from or write to the wrong disk.
sudo umount $device_name;sudo chmod 000 $mount_path
Update the fstab file
-
Back up the
/etc/fstabfile. -
Delete the entry for the damaged disk from
/etc/fstab. For example, if the damaged disk isdev/vdd, remove its line from the file as shown below.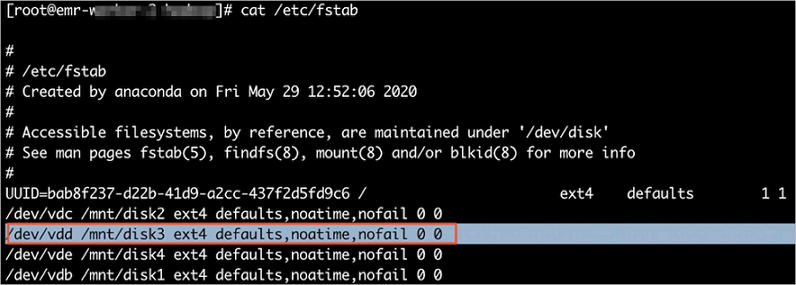
Restart stopped services
In the EMR console, on the Cluster Services tab, find the services you stopped earlier. For each service, in the area where the endpoint is deployed, choose > Start.
Step 3: Replace the disk
In the ECS console, submit the repair request for the disk. For detailed instructions, see Isolate or repair local disks.
Step 4: Mount the new disk
After the hardware replacement is complete, mount the new disk and restore the directory structure.
-
Normalize the device name.
device_name=`echo "$device_name" | sed 's/x//1'`This converts names like
/dev/xvdkto/dev/vdk. -
Create the mount directory.
mkdir -p "$mount_path" -
Mount the disk.
mount $device_name $mount_path;sudo chmod 755 $mount_pathIf the mount fails, format the disk first, then mount again.
fdisk $device_name << EOF
n
p
1

wq
EOF
mount $device_name $mount_path;sudo chmod 755 $mount_path -
Add the disk entry to
/etc/fstab.NoteRun
which mkfs.ext4to check whether ext4 is available. Set$fstypetoext4if it exists, orext3otherwise.echo "$device_name $mount_path $fstype defaults,noatime,nofail 0 0" >> /etc/fstab -
Create and run the setup script to recreate the service directories on the new disk. The script creates directories for all EMR services and sets the correct ownership and permissions. Select the script that matches your cluster type. DataLake, DataFlow, OLAP, DataServing, and Custom clusters
while getopts p: opt
do
case "${opt}" in
  	p) mount_path=${OPTARG};;
  esac
done

sudo mkdir -p $mount_path/flink
sudo chown flink:hadoop $mount_path/flink
sudo chmod 775 $mount_path/flink

sudo mkdir -p $mount_path/hadoop
sudo chown hadoop:hadoop $mount_path/hadoop
sudo chmod 755 $mount_path/hadoop

sudo mkdir -p $mount_path/hdfs
sudo chown hdfs:hadoop $mount_path/hdfs
sudo chmod 750 $mount_path/hdfs

sudo mkdir -p $mount_path/yarn
sudo chown root:root $mount_path/yarn
sudo chmod 755 $mount_path/yarn

sudo mkdir -p $mount_path/impala
sudo chown impala:hadoop $mount_path/impala
sudo chmod 755 $mount_path/impala

sudo mkdir -p $mount_path/jindodata
sudo chown root:root $mount_path/jindodata
sudo chmod 755 $mount_path/jindodata

sudo mkdir -p $mount_path/jindosdk
sudo chown root:root $mount_path/jindosdk
sudo chmod 755 $mount_path/jindosdk

sudo mkdir -p $mount_path/kafka
sudo chown root:root $mount_path/kafka
sudo chmod 755 $mount_path/kafka

sudo mkdir -p $mount_path/kudu
sudo chown root:root $mount_path/kudu
sudo chmod 755 $mount_path/kudu

sudo mkdir -p $mount_path/mapred
sudo chown root:root $mount_path/mapred
sudo chmod 755 $mount_path/mapred

sudo mkdir -p $mount_path/starrocks
sudo chown root:root $mount_path/starrocks
sudo chmod 755 $mount_path/starrocks

sudo mkdir -p $mount_path/clickhouse
sudo chown clickhouse:clickhouse $mount_path/clickhouse
sudo chmod 755 $mount_path/clickhouse

sudo mkdir -p $mount_path/doris
sudo chown root:root $mount_path/doris
sudo chmod 755 $mount_path/doris

sudo mkdir -p $mount_path/log
sudo chown root:root $mount_path/log
sudo chmod 755 $mount_path/log

sudo mkdir -p $mount_path/log/clickhouse
sudo chown clickhouse:clickhouse $mount_path/log/clickhouse
sudo chmod 755 $mount_path/log/clickhouse

sudo mkdir -p $mount_path/log/kafka
sudo chown kafka:hadoop $mount_path/log/kafka
sudo chmod 755 $mount_path/log/kafka

sudo mkdir -p $mount_path/log/kafka-rest-proxy
sudo chown kafka:hadoop $mount_path/log/kafka-rest-proxy
sudo chmod 755 $mount_path/log/kafka-rest-proxy

sudo mkdir -p $mount_path/log/kafka-schema-registry
sudo chown kafka:hadoop $mount_path/log/kafka-schema-registry
sudo chmod 755 $mount_path/log/kafka-schema-registry

sudo mkdir -p $mount_path/log/cruise-control
sudo chown kafka:hadoop $mount_path/log/cruise-control
sudo chmod 755 $mount_path/log/cruise-control

sudo mkdir -p $mount_path/log/doris
sudo chown doris:doris $mount_path/log/doris
sudo chmod 755 $mount_path/log/doris

sudo mkdir -p $mount_path/log/celeborn
sudo chown hadoop:hadoop $mount_path/log/celeborn
sudo chmod 755 $mount_path/log/celeborn

sudo mkdir -p $mount_path/log/flink
sudo chown flink:hadoop $mount_path/log/flink
sudo chmod 775 $mount_path/log/flink

sudo mkdir -p $mount_path/log/flume
sudo chown root:root $mount_path/log/flume
sudo chmod 755 $mount_path/log/flume

sudo mkdir -p $mount_path/log/gmetric
sudo chown root:root $mount_path/log/gmetric
sudo chmod 777 $mount_path/log/gmetric

sudo mkdir -p $mount_path/log/hadoop-hdfs
sudo chown hdfs:hadoop $mount_path/log/hadoop-hdfs
sudo chmod 755 $mount_path/log/hadoop-hdfs

sudo mkdir -p $mount_path/log/hbase
sudo chown hbase:hadoop $mount_path/log/hbase
sudo chmod 755 $mount_path/log/hbase

sudo mkdir -p $mount_path/log/hive
sudo chown root:root $mount_path/log/hive
sudo chmod 775 $mount_path/log/hive

sudo mkdir -p $mount_path/log/impala
sudo chown impala:hadoop $mount_path/log/impala
sudo chmod 755 $mount_path/log/impala

sudo mkdir -p $mount_path/log/jindodata
sudo chown root:root $mount_path/log/jindodata
sudo chmod 777 $mount_path/log/jindodata

sudo mkdir -p $mount_path/log/jindosdk
sudo chown root:root $mount_path/log/jindosdk
sudo chmod 777 $mount_path/log/jindosdk

sudo mkdir -p $mount_path/log/kyuubi
sudo chown kyuubi:hadoop $mount_path/log/kyuubi
sudo chmod 755 $mount_path/log/kyuubi

sudo mkdir -p $mount_path/log/presto
sudo chown presto:hadoop $mount_path/log/presto
sudo chmod 755 $mount_path/log/presto

sudo mkdir -p $mount_path/log/spark
sudo chown spark:hadoop $mount_path/log/spark
sudo chmod 755 $mount_path/log/spark

sudo mkdir -p $mount_path/log/sssd
sudo chown sssd:sssd $mount_path/log/sssd
sudo chmod 750 $mount_path/log/sssd

sudo mkdir -p $mount_path/log/starrocks
sudo chown starrocks:starrocks $mount_path/log/starrocks
sudo chmod 755 $mount_path/log/starrocks

sudo mkdir -p $mount_path/log/taihao_exporter
sudo chown taihao:taihao $mount_path/log/taihao_exporter
sudo chmod 755 $mount_path/log/taihao_exporter

sudo mkdir -p $mount_path/log/trino
sudo chown trino:hadoop $mount_path/log/trino
sudo chmod 755 $mount_path/log/trino

sudo mkdir -p $mount_path/log/yarn
sudo chown hadoop:hadoop $mount_path/log/yarn
sudo chmod 755 $mount_path/log/yarn
Data lake (Hadoop) clusters
while getopts p: opt do case "${opt}" in p) mount_path=${OPTARG};; esac done mkdir -p $mount_path/data chown hdfs:hadoop $mount_path/data chmod 1777 $mount_path/data mkdir -p $mount_path/hadoop chown hadoop:hadoop $mount_path/hadoop chmod 775 $mount_path/hadoop mkdir -p $mount_path/hdfs chown hdfs:hadoop $mount_path/hdfs chmod 755 $mount_path/hdfs mkdir -p $mount_path/yarn chown hadoop:hadoop $mount_path/yarn chmod 755 $mount_path/yarn mkdir -p $mount_path/kudu/master chown kudu:hadoop $mount_path/kudu/master chmod 755 $mount_path/kudu/master mkdir -p $mount_path/kudu/tserver chown kudu:hadoop $mount_path/kudu/tserver chmod 755 $mount_path/kudu/tserver mkdir -p $mount_path/log chown hadoop:hadoop $mount_path/log chmod 775 $mount_path/log mkdir -p $mount_path/log/hadoop-hdfs chown hdfs:hadoop $mount_path/log/hadoop-hdfs chmod 775 $mount_path/log/hadoop-hdfs mkdir -p $mount_path/log/hadoop-yarn chown hadoop:hadoop $mount_path/log/hadoop-yarn chmod 755 $mount_path/log/hadoop-yarn mkdir -p $mount_path/log/hadoop-mapred chown hadoop:hadoop $mount_path/log/hadoop-mapred chmod 755 $mount_path/log/hadoop-mapred mkdir -p $mount_path/log/kudu chown kudu:hadoop $mount_path/log/kudu chmod 755 $mount_path/log/kudu mkdir -p $mount_path/run chown hadoop:hadoop $mount_path/run chmod 777 $mount_path/run mkdir -p $mount_path/tmp chown hadoop:hadoop $mount_path/tmp chmod 777 $mount_path/tmp -
Run the script, then delete it. Replace
$file_pathwith the path to the script file.chmod +x $file_path sudo $file_path -p $mount_path rm $file_path -
Restart services and verify the disk. In the EMR console: On the Cluster Services tab, restart the services running on the node. On the node (SSH): Start the management processes.
sudo service taihao_exporter start
sudo service ilogtaild start
sudo service ilogtaildclt start
(sudo crontab -l; echo "*/5 * * * * bash /usr/local/taihao_exporter/exporter_check.sh") | sudo crontab -
Verify that the disk is working correctly.