SSL-VPN is a virtual private network (VPN) established on OpenVPN by using the Secure Sockets Layer (SSL) protocol. After you deploy the necessary resources, load the SSL client certificate into OpenVPN and initiate an SSL-VPN connection between OpenVPN and your virtual private cloud (VPC). This enables access to applications and services deployed within your VPC from OpenVPN. This topic describes how to use SSL-VPN to connect an on-premises client to the VPC of an office network created in Elastic Desktop Service (EDS) Enterprise. This enables access from the on-premises client to cloud computers over the VPC.
Preparations
Before you begin, carefully review the Access cloud computers over VPCs topic and complete the following preparations:
Create a Cloud Enterprise Network (CEN) instance. For more information, see Create a CEN instance.
Create a VPC and attach the VPC to the CEN instance. For more information, see Create a VPC and a vSwitch or Attach a network instance to a CEN instance.
Create an office network and attach its VPC to the CEN instance. For more information, see Create and manage convenience office networks and Create and manage an enterprise AD office network.
ImportantBefore you create an office network, you must plan the IPv4 CIDR block of the office network to prevent CIDR block conflicts between the office network and the CEN instance or between the office network and your data center. For more information, see Plan a CIDR block.
If you already created a office network, attach the convenience office network to the CEN instance.
If you deploy your Active Directory (AD) system on an Elastic Compute Service (ECS) instance, you must attach the VPC of the AD server to the CEN instance. If you deploy your AD system on an on-premises server, you must connect the on-premises network to the cloud network. You can create an enterprise AD office network and establish connectivity between the on-premises server and the cloud. Then, you can configure the AD domain.
Create a cloud computer and an account. Then, assign the cloud computer to the account.
For more information about how to create an account, see Create a convenience account or Create and manage enterprise AD accounts.
For more information about how to create and assign cloud computers, see Create cloud computers and Assign cloud computers to users.
Set up an on-premises device to install OpenVPN and an Alibaba Cloud Workspace terminal (Note that OpenVPN and the Alibaba Cloud Workspace terminal must be installed on the same device).
NoteIn this solution, the following Alibaba Cloud Workspace terminals can be used: Windows client and macOS client.
Step 1: Configure SSL-VPN
When you configure SSL-VPN, you must create a VPN gateway, create an SSL server, publish the CIDR block of the Alibaba Cloud Workspace terminal to Cloud Enterprise Network (CEN), and then create an SSL client certificate.
Create a VPN gateway and enable SSL-VPN. For more information, see Create a VPN gateway.
The following table describes the parameters required to create a VPN gateway.
Parameter
Description
Example
Name
The name of the VPN gateway.
test-vpn
Region
The region where you want to deploy the VPN gateway.
The VPN gateway must be deployed in the same region as the VPC that you want to associate with the VPN gateway.
China (Hangzhou)
Network Type
The network type of the VPN gateway. Valid values:
Public: The VPN gateway can be used to establish VPN connections over the Internet.
Private: The VPN gateway can be used to establish VPN connections over a VPC.
Public
VPC
The VPC with which you want to associate the VPN gateway.
test-vpc
VSwitch
Specifies whether to associate the VPN gateway with a specified vSwitch. Valid values:
No: does not associate the VPN gateway with a specified vSwitch. If you select No, the VPN gateway is associated with a random vSwitch of the VPC.
Yes: associates the VPN gateway with a specified vSwitch. If you select Yes, the VPN gateway is associated with the specified vSwitch of the VPC.
No
Maximum Bandwidth
The peak bandwidth of the VPN gateway. Unit: Mbit/s.
200 Mbit/s
Traffic
The metering method of the VPN gateway. Default value: Pay-by-data-transfer.
Pay-by-data-transfer
IPsec-VPN
Specifies whether to enable IPsec-VPN for the VPN gateway. Default value: Enable.
You can use the IPsec-VPN feature to establish a secure connection between a data center and a VPC or between two VPCs.
Disable
SSL-VPN
Specifies whether to enable SSL-VPN for the VPN gateway. Default value: Disable.
SSL-VPN allows you to establish secure connections between sites without the need to deploy customer gateways. For example, you can establish SSL-VPN connections between Linux clients and VPCs.
Enable
SSL Connections
The maximum number of concurrent SSL-VPN connections for the VPN gateway.
NoteThis parameter is available only after you enable SSL-VPN.
5
Duration
The billing cycle of the VPN gateway. Default value: By Hour.
1 Month
Service-linked Role
The service-linked role of the VPN gateway. If you click Create Service-linked Role, the system automatically creates the service-linked role AliyunServiceRoleForVpn.
The VPN gateway assumes this role to access other cloud resources. For more information, see AliyunServiceRoleForVpn.
If Created is displayed, the service-linked role has already been created and does not need to be created again.
N/A
Create an SSL server. For more information, see Create and manage an SSL server.
The following table describes the parameters required to create an SSL server.
Parameter
Description
Example
Name
The name of the SSL server.
The name must be 2 to 128 characters in length, and can contain digits, hyphens (-), and underscores (_). The name must start with a letter.
test-ssl
VPN Gateway
The VPN gateway that you want to associate with the SSL client certificate.
Make sure that the SSL-VPN feature is enabled for the VPN gateway.
test-vpn
Local Network
The CIDR block that the client needs to access by using the SSL-VPN connection.
This CIDR block can be the CIDR block of a VPC, a vSwitch, a cloud service, such as Object Storage Service (OSS) or ApsaraDB RDS, or a data center that is connected by using a VPC or an Express Connect circuit.
Click Add Local Network to add more CIDR blocks.
NoteThe subnet mask of a CIDR block of the local network must be 8 to 32 bits in length.
You need to specify the following CIDR blocks:
CIDR block of the office network VPC: 172.16.111.0/24
CIDR block of the user VPC: 192.168.0.0/16
CIDR block of the DNS network in the VPC and CIDR block of the Alibaba Cloud OpenAPI that can be accessed from the internal network: 100.64.0.0/10
Client CIDR Block
The CIDR block from which an IP address is allocated to the virtual network interface controller (NIC) of the client. Do not enter the private CIDR block of the client. When the client accesses the destination network through an SSL-VPN connection, the VPN gateway allocates an IP address from the client CIDR block to the client.
Make sure that the number of IP addresses in the client CIDR block is at least four times the maximum number of SSL-VPN connections that can be initiated based on the VPN gateway.
ImportantThe subnet mask of the specified client CIDR block must be 16 to 29 bits in length.
Make sure that the local network CIDR block and the client CIDR block do not overlap with each other.
We recommend that you use the 10.0.0.0/8, 172.16.0.0/12, 192.168.0.0/16, or one of their subnets as the client CIDR block. If you want to specify a public CIDR block as the client CIDR block, you must specify the public CIDR block as the user CIDR block of the VPC. This way, the VPC can access the public CIDR block. For more information, see the What is a user CIDR block? and How do I configure a user CIDR block?
10.10.111.0/24
Advanced Configuration
In the Advanced Configuration section, you can configure advanced settings, including the protocol and encryption algorithm, of the SSL server. This example omits details on advanced settings.
You can use default values.
Publish the client CIDR block that is specified on the SSL-VPN server to CEN.
In the left-side navigation pane, click Route Tables.
On the Route Tables page, find the VPC to which you want to connect and click the ID of the route table instance that uses the VPC.
On the Route Entry List tab, click the Custom Route tab.
Find the client CIDR block that is configured in the SSL-VPN server settings and click Publish.
If Published is displayed in the CEN Status column, the CIDR block is advertised.
Creates an SSL client certificate. For more information, see Create and manage an SSL client certificate.
On the SSL Clients page, find the SSL client certificate that you want to download and click Download in the Actions column.
The SSL client certificate is downloaded to your computer and is used when you configure the client in the following steps.
Step 2: Install and connect to OpenVPN
Install OpenVPN on your on-premises computer.
Windows computer
Click OpenVPN to download OpenVPN.
Install OpenVPN.
Decompress the package of the SSL client certificate that you downloaded and copy the SSL client certificate to the
OpenVPN\configdirectory.ImportantCopy the certificate to the corresponding directory in which OpenVPN is installed. For example, if OpenVPN is installed in the
C:\Program Files\OpenVPNdirectory, you must decompress the certificate package, and then copy the certificate to theC:\Program Files\OpenVPN\configdirectory.
macOS computer
Run the following command to install OpenVPN:
brew install openvpnBefore you perform the following operations, you must install Homebrew.
Decompress the package of the SSL client certificate and copy the certificate to the \config directory of OpenVPN.
Launch OpenVPN on your on-premise computer and initiate a connection.
Windows computer
Launch OpenVPN and initiate a connection.
macOS computer
Run the following command to initiate a connection:
sudo /usr/local/opt/openvpn/sbin/openvpn --config /usr/local/etc/openvpn/config.ovpn
Step 3: Configure an enterprise VPC IP address or a cloud service route
You can select one of the following solutions based on your business requirements: Solution 1 and Solution 2 explain how to configure the IP address for an enterprise VPC. The main difference is that Solution 1 uses a static IP address, which makes the process easier for end users because they do not need to configure a custom IP address.
Solution 1: Configure a static IP address for an enterprise VPC
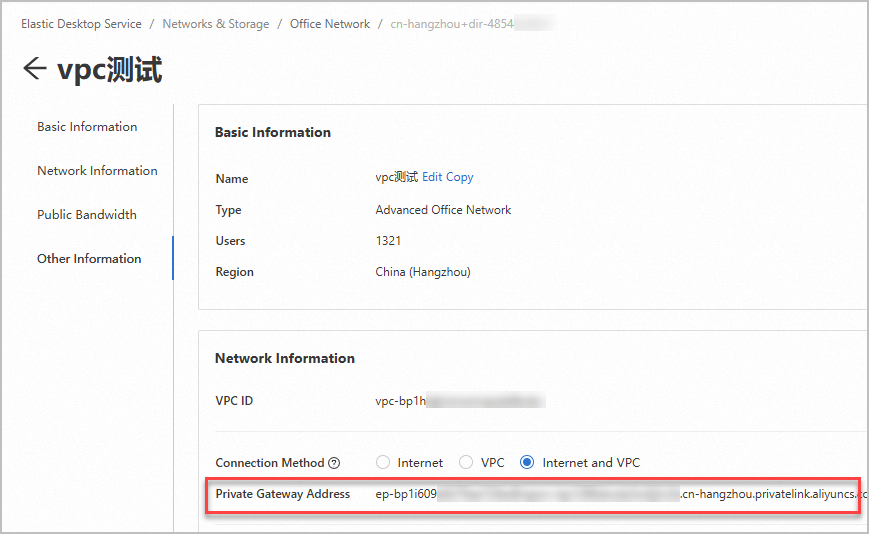
Obtain the private gateway address of the office network.
Log on to the EDS Enterprise console.
In the left-side navigation pane, choose .
On the Office Networks page, find the desired office network and click the network ID.
In the Network Information section of the office network details page, find the Private Gateway Address parameter and copy the parameter value. The private gateway address is required in subsequent steps.
Configure a CNAME record on the enterprise DNS server and point the
private.wuying.comdomain name to the private gateway address.Configure the network access mode on an Alibaba Cloud Workspace client as an end user.
Open a Windows client.
In the upper-right corner of the logon page, click the icon and then click Connection Configuration.
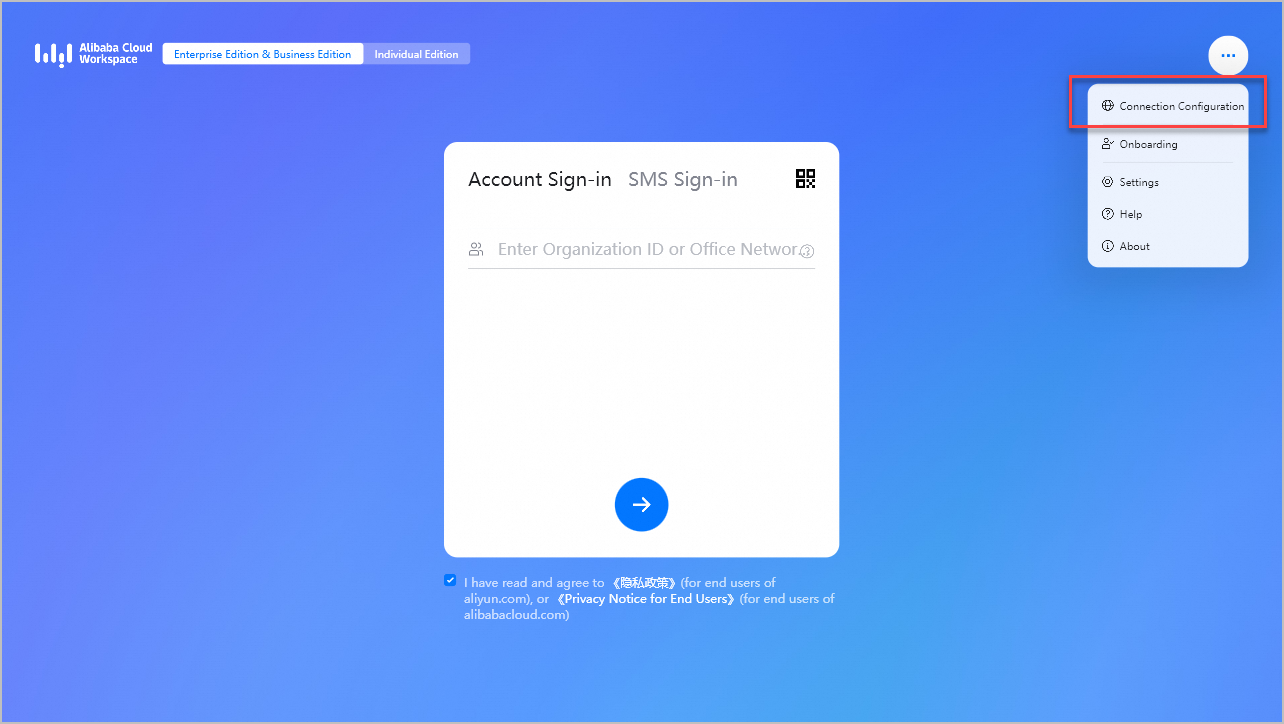
In the Connection Configuration dialog box, configure the following parameters:
ImportantMake sure that the version of your Windows client is 7.7 or later. Otherwise, you cannot configure an enterprise VPC IP address.
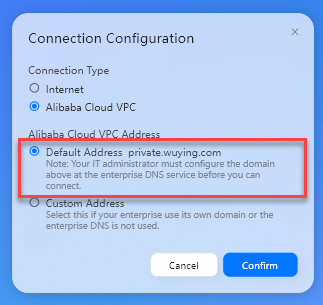
Connection Type: Set the value to Alibaba Cloud VPC.
Alibaba Cloud VPC Address: Set the value to Default Address.
Click Confirm.
Solution 2: Configure a custom IP address for an enterprise VPC
Obtain the private gateway address of the office network.
Log on to the EDS Enterprise console.
In the left-side navigation pane, choose .
On the Office Networks page, find the desired office network and click the network ID.
In the Network Information section of the office network details page, find the Private Gateway Address parameter and copy the parameter value. The private gateway address is required in subsequent steps.
Configure the network access mode on an Alibaba Cloud Workspace client as an end user.
Open a Windows client.
In the upper-right corner of the logon page, click the icon and then click Connection Configuration.
In the Connection Configuration dialog box, configure the following parameters:
ImportantMake sure that the version of your Windows client is 7.7 or later. Otherwise, you cannot configure an enterprise VPC IP address.
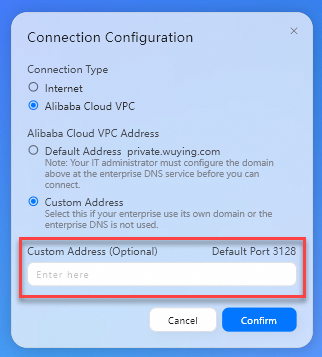
Connection Type: Set the value to Alibaba Cloud VPC.
Alibaba Cloud VPC Address: Set the value to Custom Address.
Custom Address: Enter the obtained private gateway address of the office network.
Click Confirm.
Solution 3: Configure routing and DNS for cloud services
Configure cloud services for the CEN instance. For more information, see Manage access to cloud services.
You can manage the access to EDS Enterprise by using a Basic Edition or Enterprise Edition transit router to allow the CCN instance can access EDS Enterprise.
NoteIf you want to use cloud computers in multiple regions, specify
100.96.0.0/11as the CIDR block of EDS Enterprise. If you want to configure more detailed network settings, specify CIDR blocks by referring to Port overview. Note that the IP address of a domain name associated with a VPC service matches the IP address of the cloud service.(Optional) Before you configure DNS, run the following command to test whether the domain name can be resolved:
nslookup ecd-vpc.cn-hangzhou.aliyuncs.comIf an IP address is returned, the domain name can be resolved. In this case, you can skip the next step. If no IP address is returned, perform the following steps to configure DNS.
Configure DNS on your on-premises computer.
a. Add 100.100.2.136 or 100.100.2.138 to the DNS server list.
In this example, an on-premises computer that runs Windows 10 is used.
i. Open the Start menu and search for Control Panel.
ii. In the Control Panel window, click Network and Sharing Center under the Network and Internet category.
iii. In the left-side navigation pane, click Change adapter settings.
iv. Right-click the network adapter that corresponds to OpenVPN and select Properties.
v. In the This connection uses the following items section, double-click Internet Protocol Version 4 (TCP/IPv4).
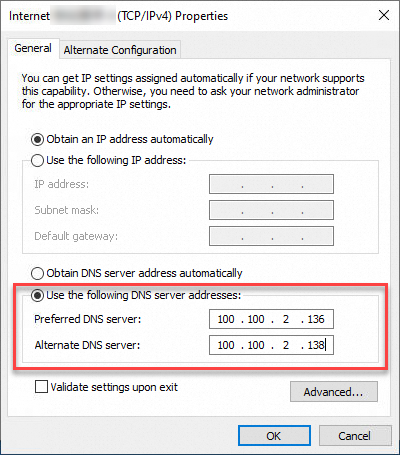
vi. In the panel that appears, enter the specified DNS server address.
You can set the IP address of your preferred DNS server to 100.100.2.136 and the IP address of your alternative DNS server to 100.100.2.138.
b. Run the following command to check whether the DNS server settings take effect:
nslookup ecd-vpc.cn-hangzhou.aliyuncs.comStep 4: Check whether a cloud computer can be connected over the VPC
In this section, the Windows client of Alibaba Cloud Workspace V7.7 is used as an example to check whether the cloud computer can be connected over the VPC. The actual type of the Alibaba Cloud Workspace client that you use prevails.
Open a Windows client.
In the upper-right corner of the logon page, click the icon and then click Connection Configuration.
In the Connection Configuration dialog box, set the Connection Type parameter to Alibaba Cloud VPC.
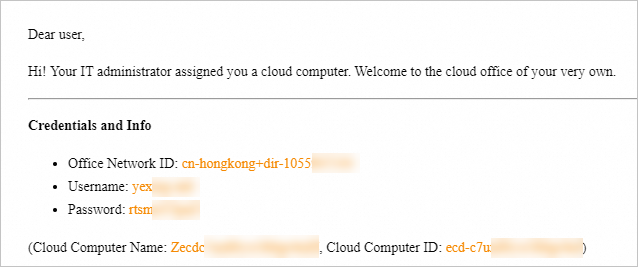
Enter the logon credentials sent to your email address, which includes an office network ID or organization ID, username, and password. Then, click the Next icon to proceed.
Find the cloud computer from the resource list. Then, start and connect to the cloud computer.
NoteIf errors such as network request timeout occur, network connectivity is not established. Check whether the preceding network settings are correctly configured. Then, re-log on to the client and connect to the cloud computer.