This guide walks you through the recommended first steps for securing your website with ESA: enabling smart rate limiting, adjusting your security level, and using security analytics to create targeted WAF and bot management rules.
Set up general protection
Enable smart rate limiting
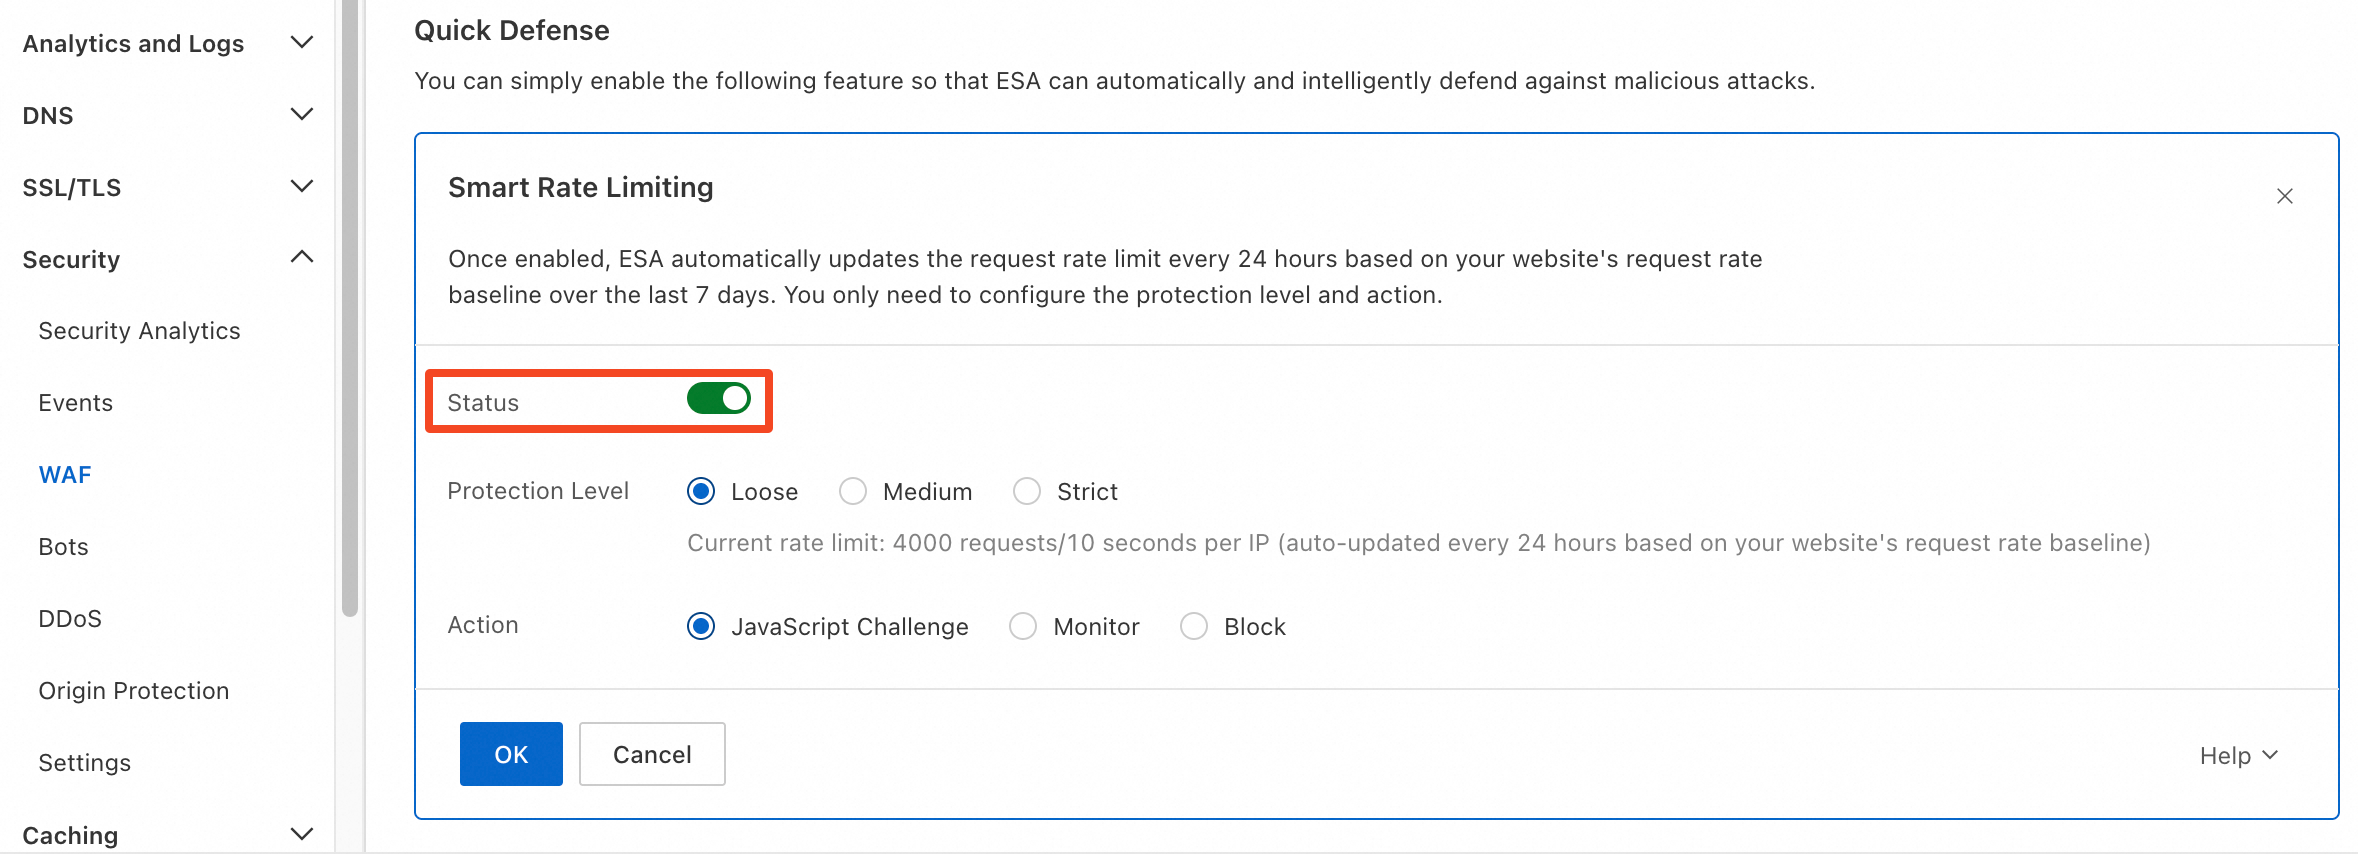
ESA smart rate limiting automatically learns a baseline from your past seven days of traffic and updates it daily. When request frequency exceeds the baseline, ESA blocks the excess traffic to prevent CC attacks and sudden spikes.
Do not enable this feature if your business naturally experiences sudden traffic surges.
In the left navigation pane, choose to find the smart rate limiting switch.
Adjust the security level
ESA evaluates incoming requests against a threat intelligence database. Based on the security level you select, ESA challenges requests from IPs with varying threat scores and only allows requests that pass. You can adjust the security level at any time.
In the left navigation pane, choose to find the security configuration options.

Configure targeted protection
Smart rate limiting applies a blanket limit to all requests. When you need to handle specific threats, such as anomalous access patterns, bot traffic, or DDoS attacks, ESA offers the following targeted options.
By default, ESA provides basic DDoS protection that mitigates attacks up to 10 Gbps. For more configurations, see DDoS protection.
Configure WAF with security analytics
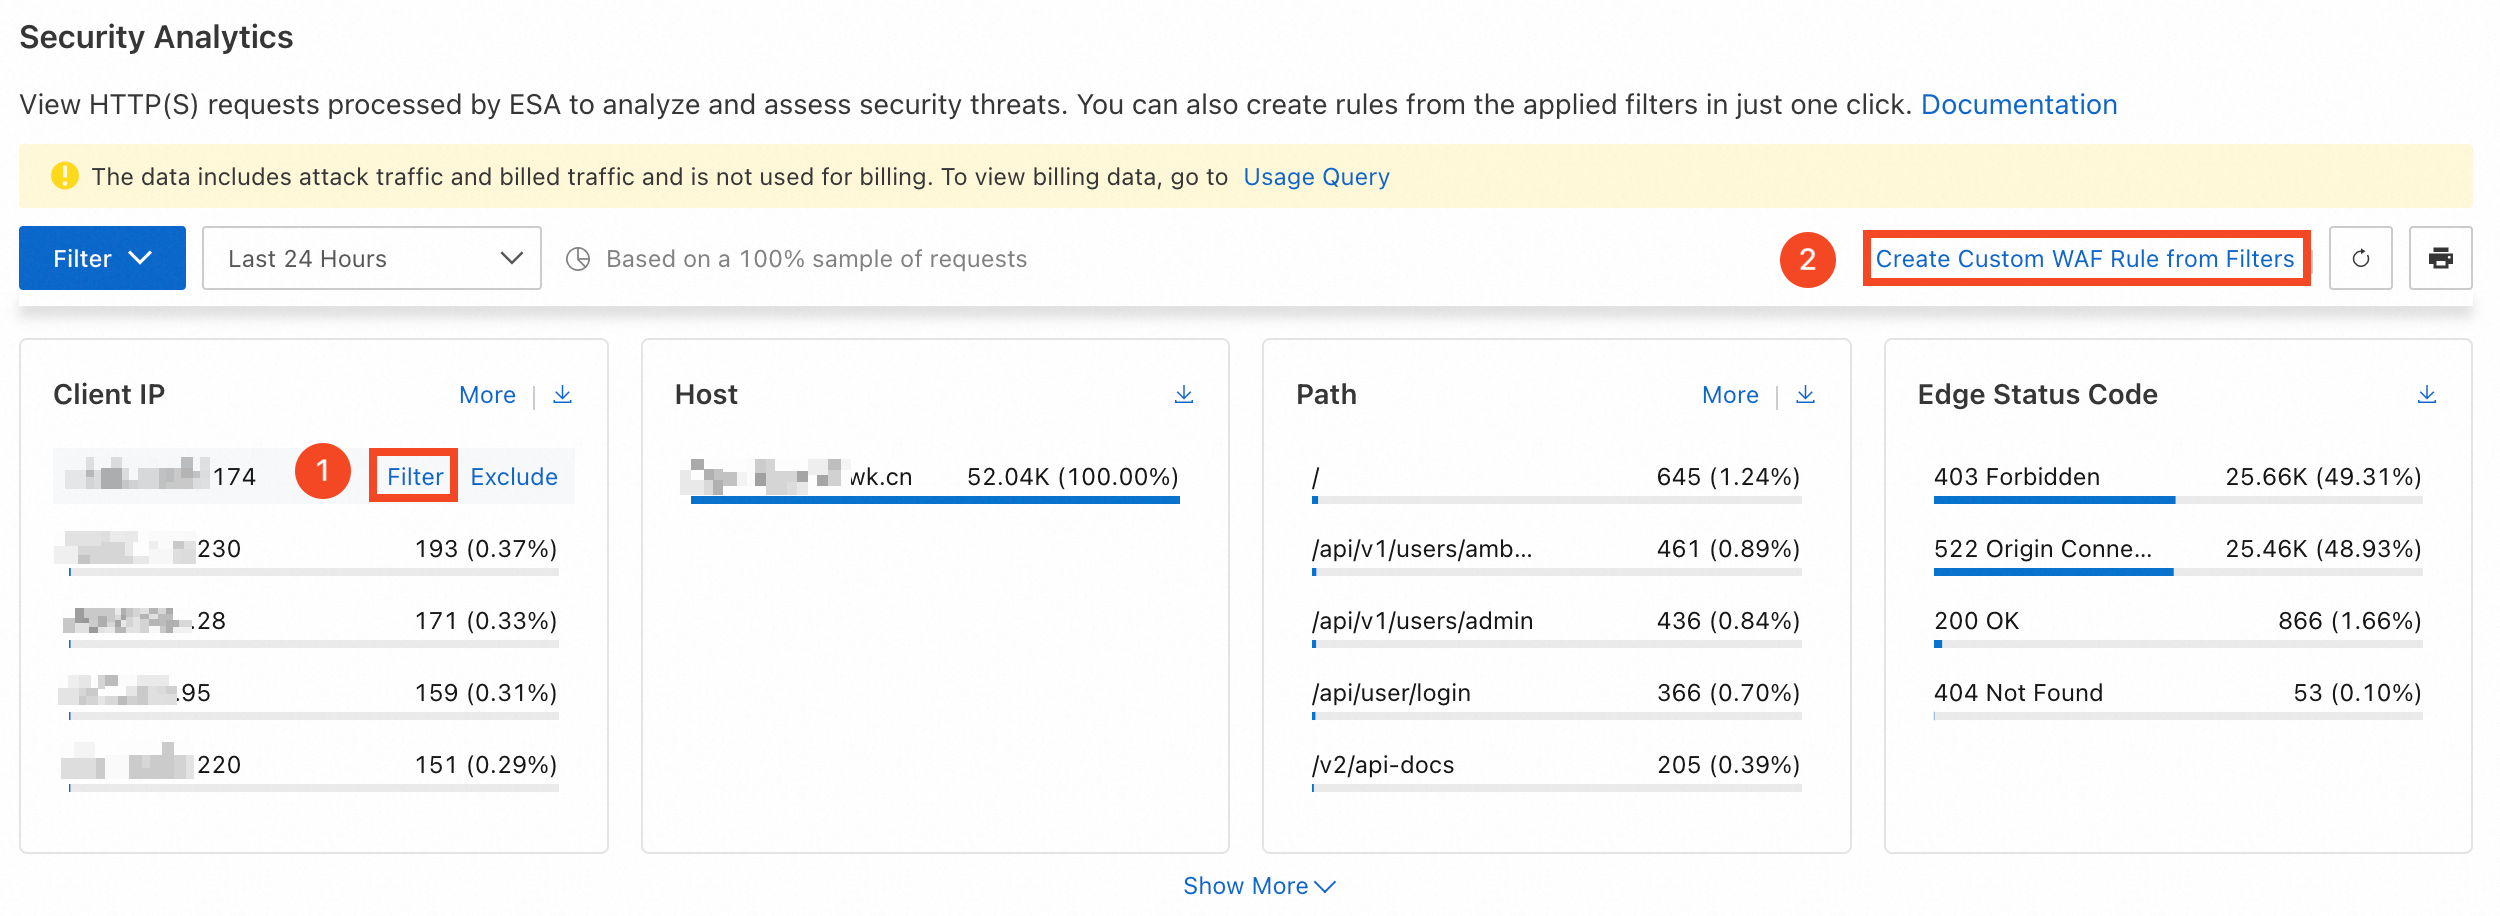
The security analytics page ranks request characteristics (such as client IP, path, and User-Agent) by access count, showing the top five for each. Use this data to identify malicious request patterns and create WAF rules in a few clicks.
In the ESA console, select Websites, and in the Website column, click the target website.
In the left navigation pane, choose .
Next to an anomalous characteristic (for example, a client IP with an unusually high request rate), click Filter. Then click Create Custom WAF Rule from Filters.
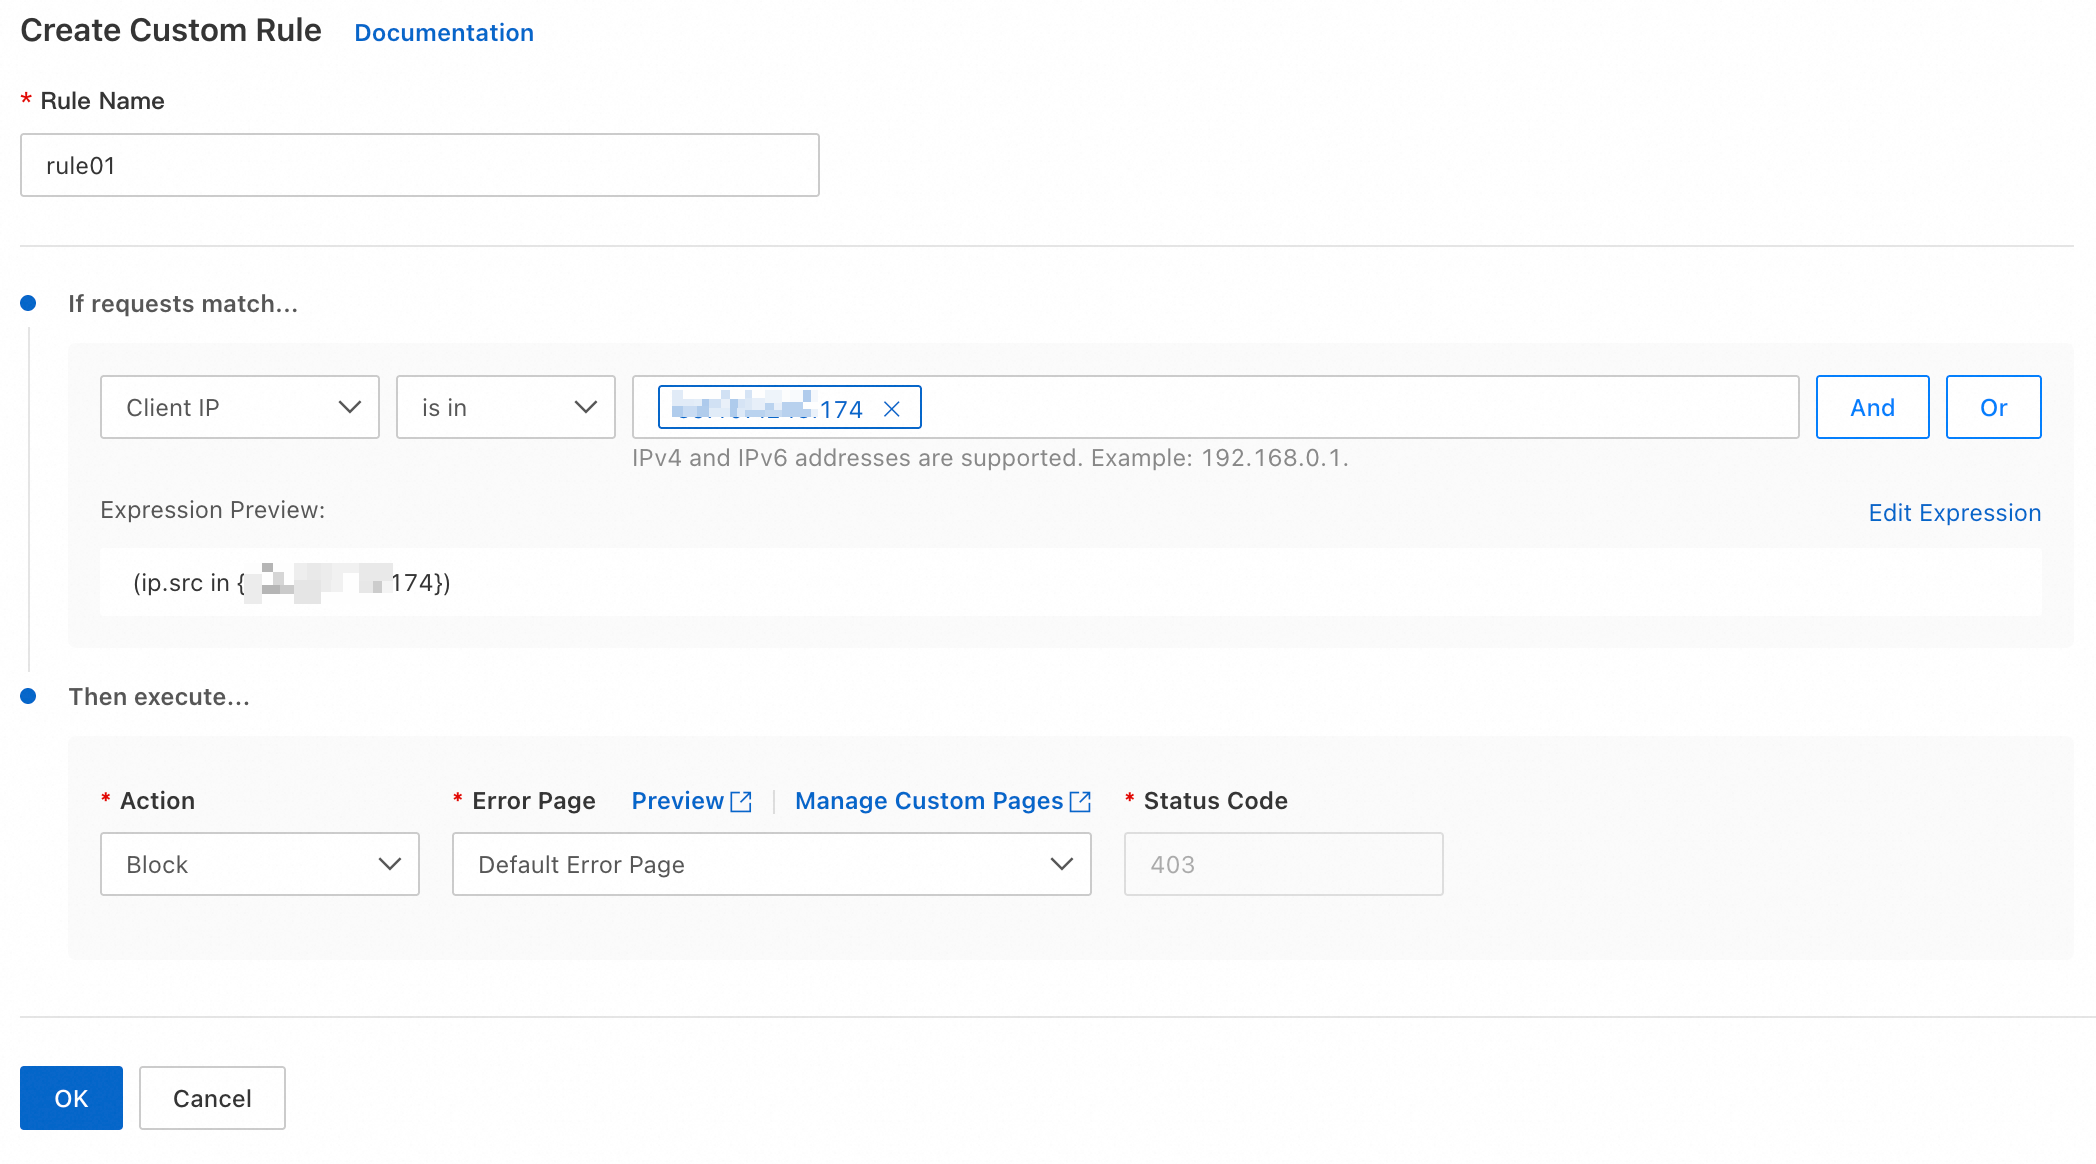
ESA auto-generates a rule expression from the selected filters. Enter a Rule Name and select an Action to complete the rule.
NoteNot all filter conditions support automatic rule generation. Verify that the generated rule is complete before saving.
Configure bot management
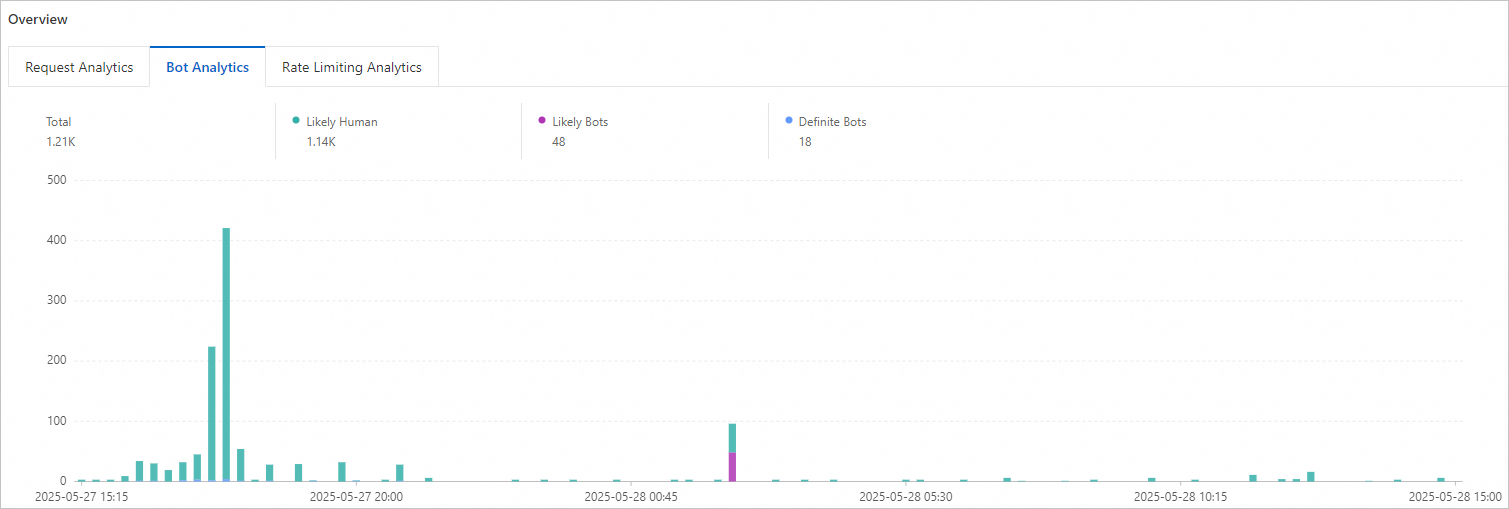
ESA classifies traffic into categories such as Likely Human, Definite Bots, and Likely Bots. You can assign different actions to each category.
In the left navigation pane, choose . On the Overview page, click the Bot Analytics tab to view the analysis.
To block bot traffic, we recommend the following settings:
In the ESA console, select Website Management, and in the Website column, click the target website.
In the left navigation pane, choose .
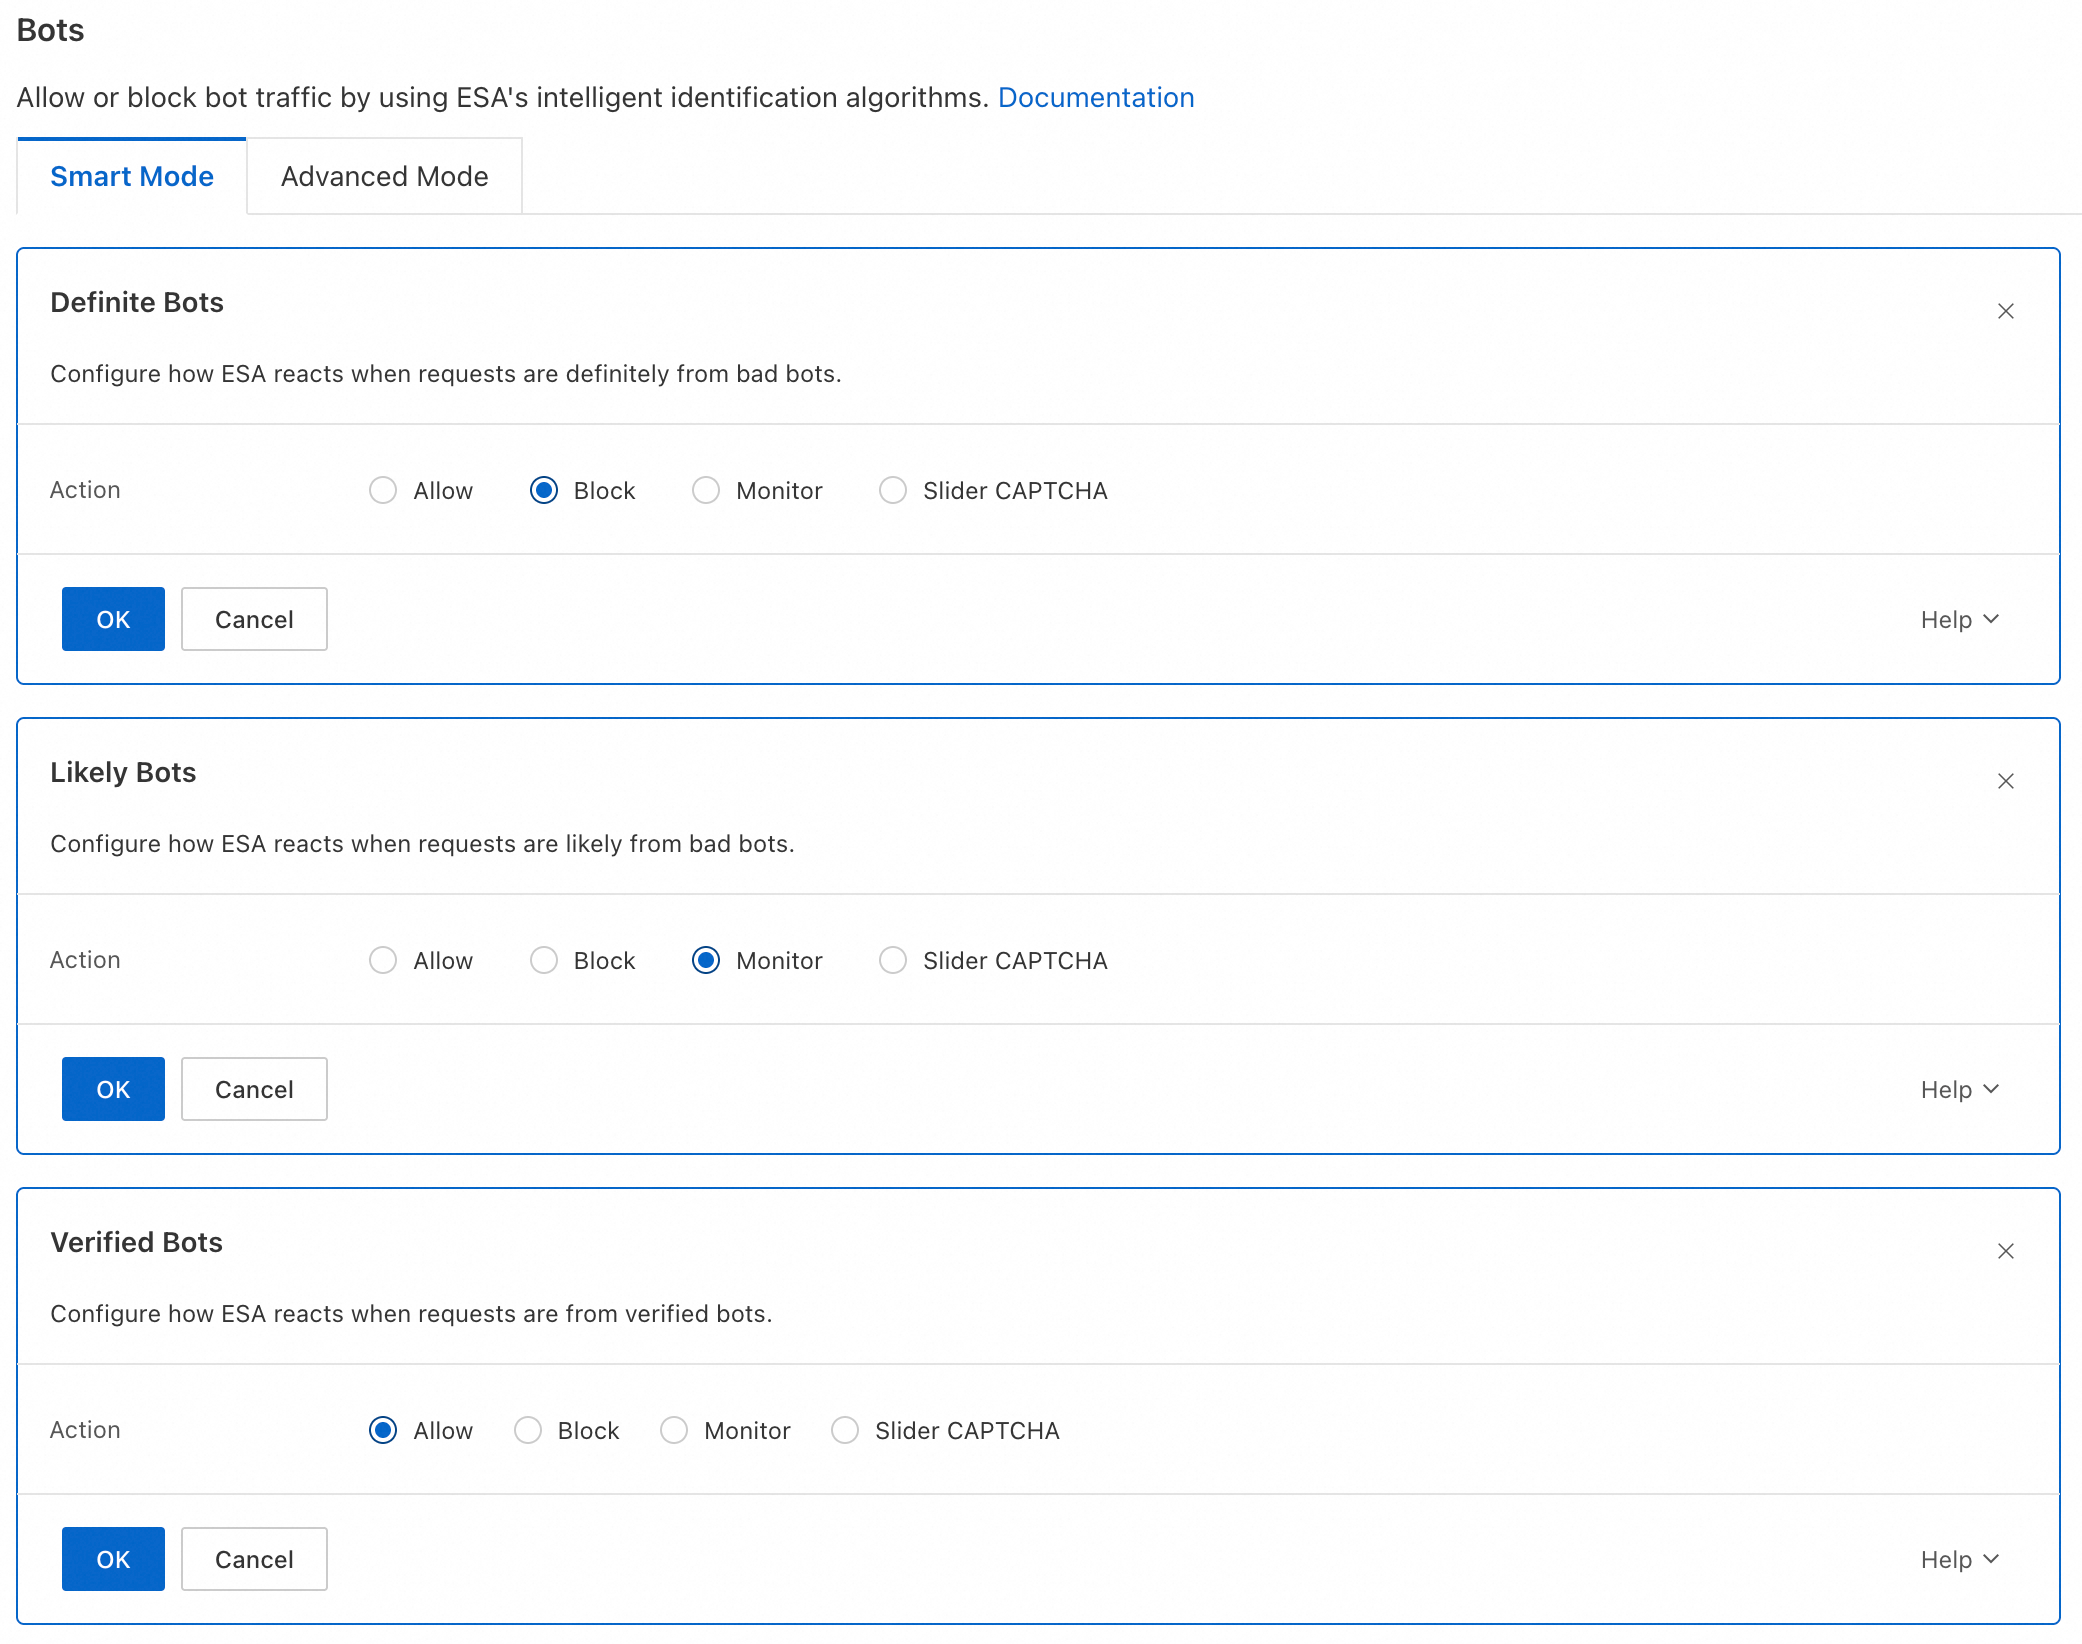
In Smart Mode, configure the action for each bot type and click OK. Recommended settings:
Definite Bots: Block
Likely Bots: Monitor
Verified Bots: Allow
Configure bot management with security analytics
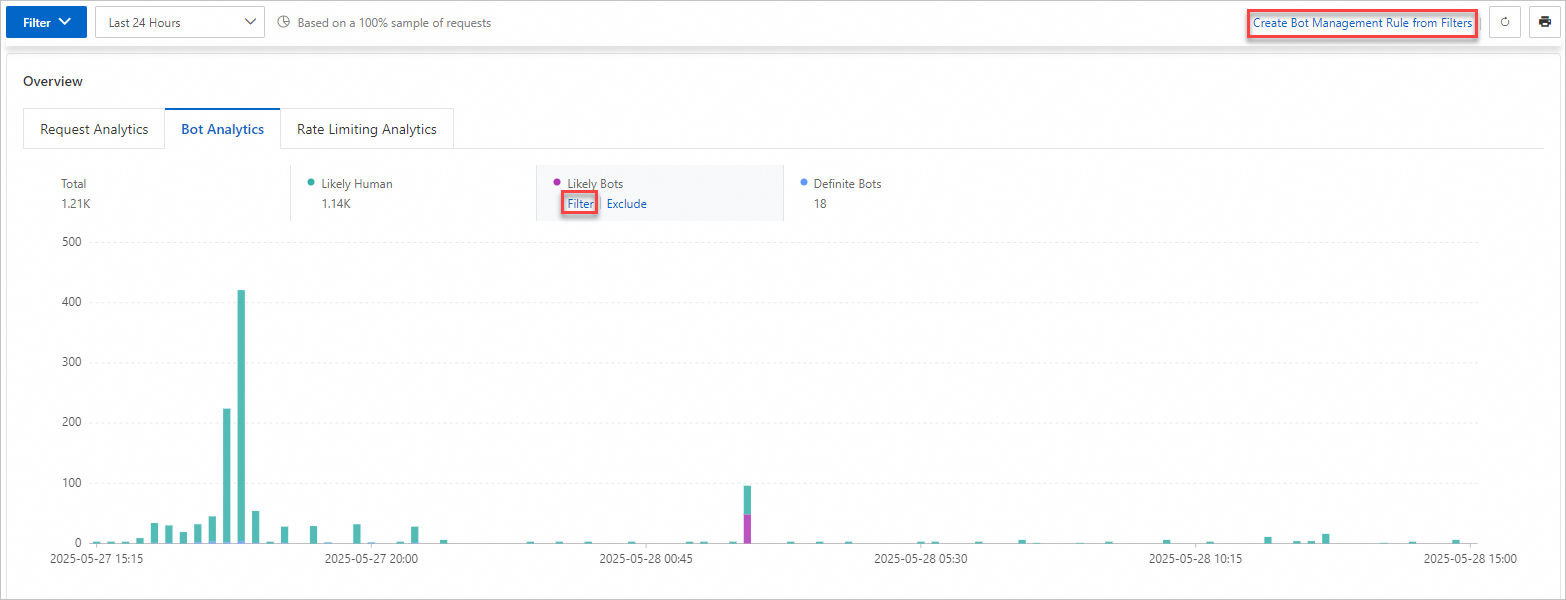
Security analytics also breaks down bot traffic to your website. You can create bot management rules directly from these insights.
Only the Enterprise plan supports Create Bot Management Rule from Filters. The Basic and Advanced plans do not.
In the ESA console, select Website Management, and in the Website column, click the target website.
In the left navigation pane, choose .
On the Overview tab, click the Bot Analytics tab. Next to a characteristic you want to configure, such as Definite Bots, click Filter. Then, click Create Bot Management Rule from Filters.
On the Create Ruleset page for the Bots feature, see Get started with Bots for instructions on configuring anti-crawling settings for your website or application.