Quickly establish a security baseline for new websites and applications by enabling managed rules and scan protection. These foundational policies help mitigate common threats, reduce the risk of security incidents, and ensure stable operations.
Why a security baseline matters
Any web application on the public internet is a target for automated, low-cost attacks. These include vulnerability scans, malicious crawlers, and scripts designed to exploit common weaknesses like the OWASP Top 10.
A strong security baseline is your first line of defense. It provides a foundation for more advanced, fine-tuned policies and helps solve several key problems:
Prevent unprotected exposure: Avoids leaving applications directly exposed to internet threats without foundational security.
Block automated attacks: Defends against indiscriminate, large-scale attacks from botnets and automated tools.
Stop information leakage: Prevents scanners from discovering sensitive information about your technology stack, directory structure, or potential vulnerabilities.
Reduce security log noise: Filters out the high volume of automated scan traffic, allowing security teams to focus on legitimate threats and sophisticated attacks.
Mitigate common exploits: Blocks common web attacks such as SQL injection (SQLi), Cross-Site Scripting (XSS), and Remote Code Execution (RCE).
Procedure
Enable managed rules
Managed rules are curated WAF rulesets, continuously updated by Alibaba Cloud security experts to defend against known web attacks. These rules provide the fastest way to protect your application from common exploits including SQLi, XSS, RCE, CRLF injection, remote file inclusion, and WebShell attacks.
The Entrance plan includes a basic ruleset for critical vulnerabilities such as Log4j. To use the full managed ruleset, your website requires a Pro plan or higher.
In the ESA console, choose Websites, and then click your target website.
On the Websites page, choose Security > WAF > Managed Rules, and then click Enable.
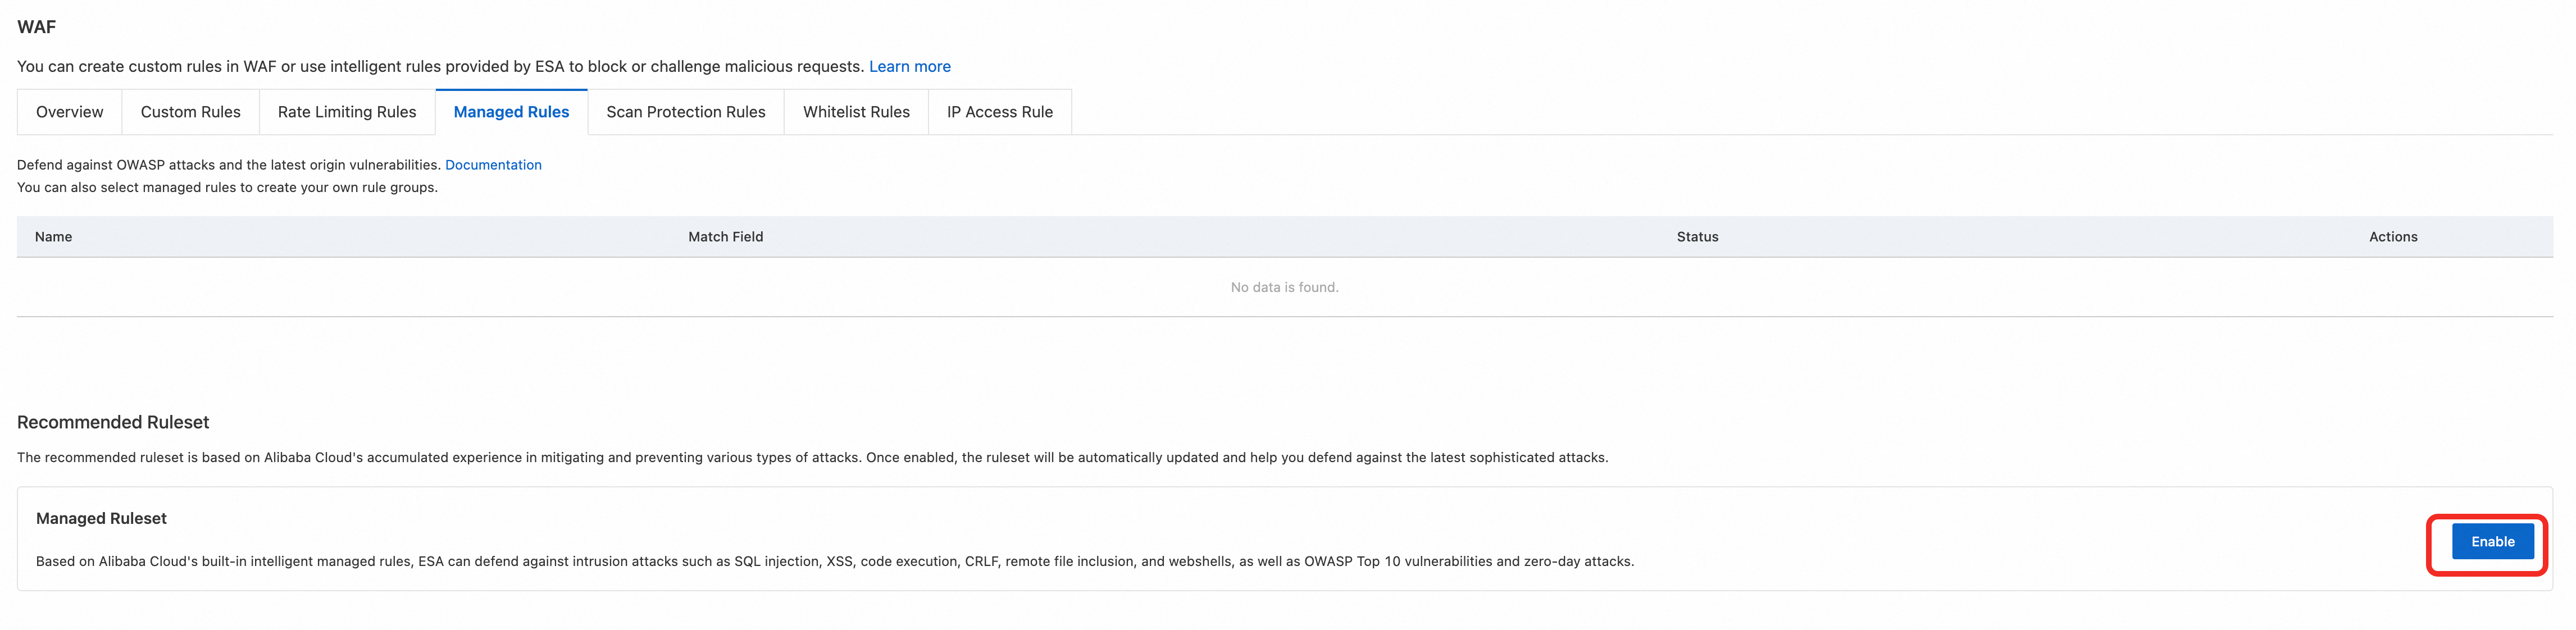
(Optional) Click Edit to view or modify the mitigation policies in the Edit Managed Ruleset panel.

Configure scan protection rules
Scan protection rules are designed to detect and block automated scanning tools. The rules protect against brute-force attacks and directory traversal, effectively preventing attackers or scanners from performing large-scale scans on your website.
Scan protection is available on the Pro plans and higher.
Protect against brute-force attacks
This rule identifies and blocks clients that repeatedly trigger security rules, which is characteristic of a brute-force attack. It uses the High-frequency Scanning Blocking configuration to block malicious clients for one day when they trigger managed rules.
Managed rules must be enabled for this configuration to work, as it relies on analyzing managed rule triggers.
In the ESA console, choose Websites, and then click your target website.
In the website details page, choose .
Enter a Ruleset Name, such as
Brute-force Protection.In the If requests match... section, keep the default settings for request features and select the domain name of your website for the hostname.
Select High-frequency Scanning Blocking and click Configure. Set the blocking rule as follows:
If the same client IP address triggers basic protection rules 10 times within 1 minute and triggers more than 2 unique rules, block the IP address for 1 day.
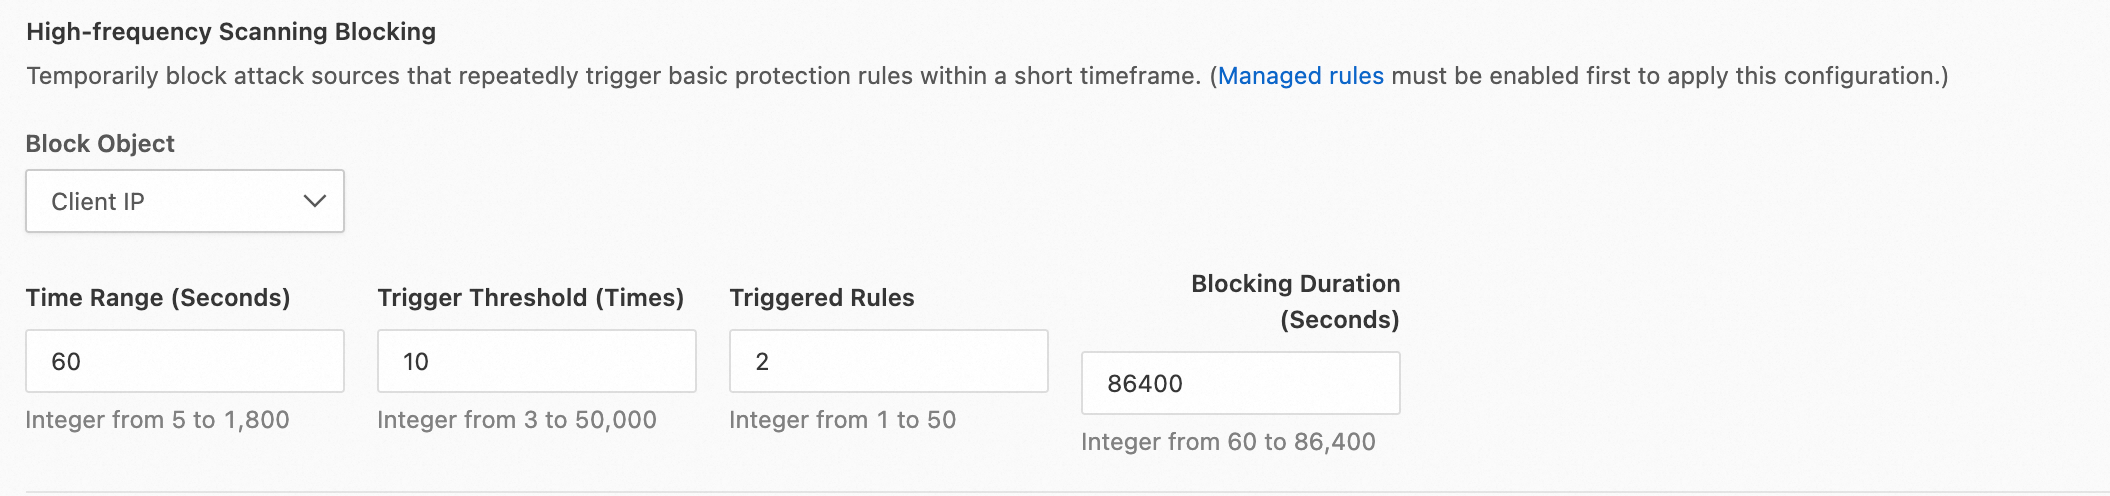
Turn on Scanner Blocking.
In the Then execute... section, select the Block action and the Default Error Page.
Click OK to activate the rule.
Protect against directory and vulnerability scanning
This rule blocks clients that systematically scan your site for non-existent directories and files, a common technique for finding vulnerabilities. It uses the Directory Traversal Blocking configuration to block requests from scanning tools and IP addresses that scan for directories that return a 404 status code.
In the ESA console, choose Websites, and then click your target website.
In the website details page, choose .
Enter a Ruleset Name, such as
Site Scan Protection.In the If requests match... section, keep the default settings for request features and select the domain name of your website for the hostname.
Select Directory Traversal Blocking and click Configure. Set the blocking rule as follows:
If the same client IP sends more than 20 requests within 10 seconds, the 404 response rate exceeds 70%, and more than 5 non-existent directories are requested, block the IP address for 30 minutes.
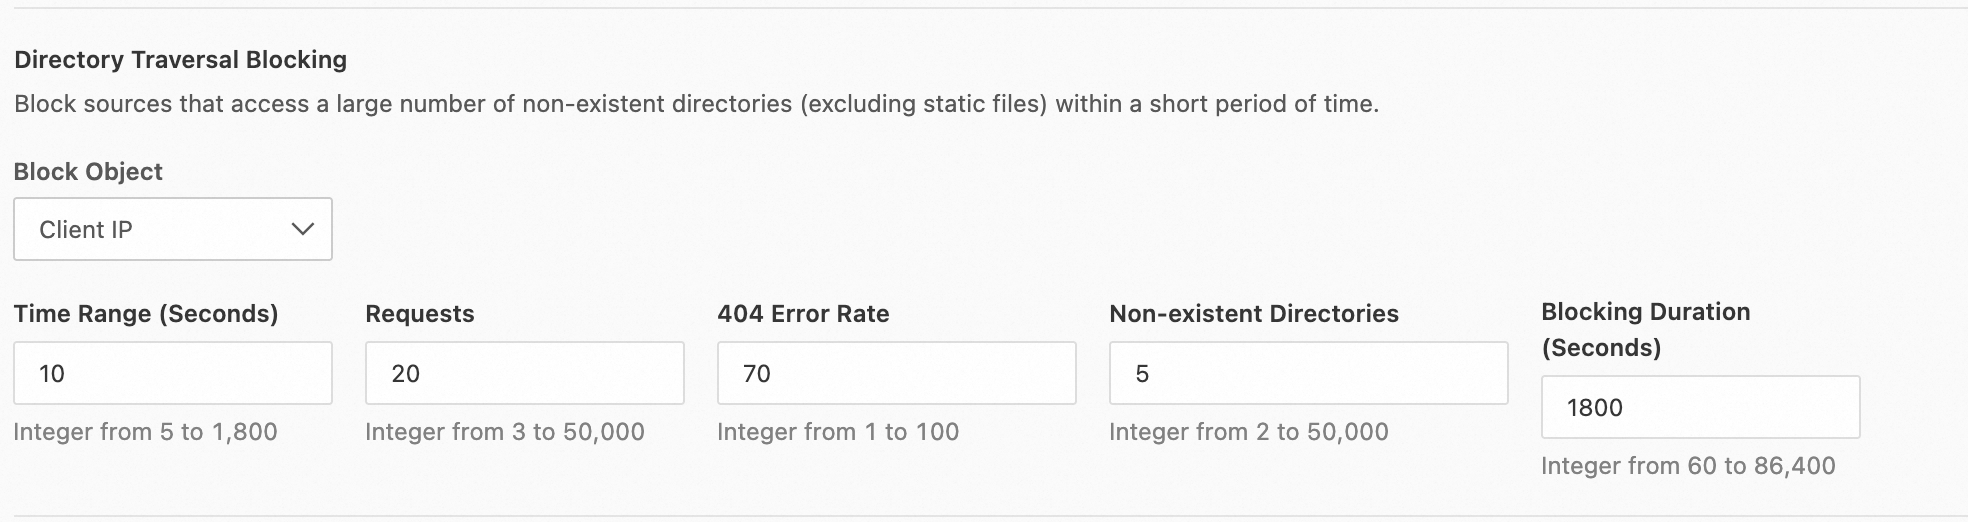
Turn on Scanner Blocking.
In the Then execute... section, select the Block action and Default Error Page.
Click OK to activate the rule.