For daily operations and maintenance (O&M) on Linux instances, you can use the visual panel in Workbench to manage users, services, and Cron tasks. This method eliminates the need for complex command-line operations and improves configuration efficiency.
Scope
This feature is available only for Linux instances.
This feature is not supported when you log on to an instance using Session Manager.
When you log on to an instance using password-free logon, the system might prioritize a Session Manager connection, depending on your configuration. In this case, you cannot use the features described in this topic.
Manage operating system users
You can use a visual interface instead of complex commands, such as useradd, to efficiently manage the full lifecycle of users, including creation, password changes, and deletion.
How can I determine if the current Workbench version is 1.0 or 2.0?
Workbench 2.0
At the top of the terminal, choose
 > User Management.
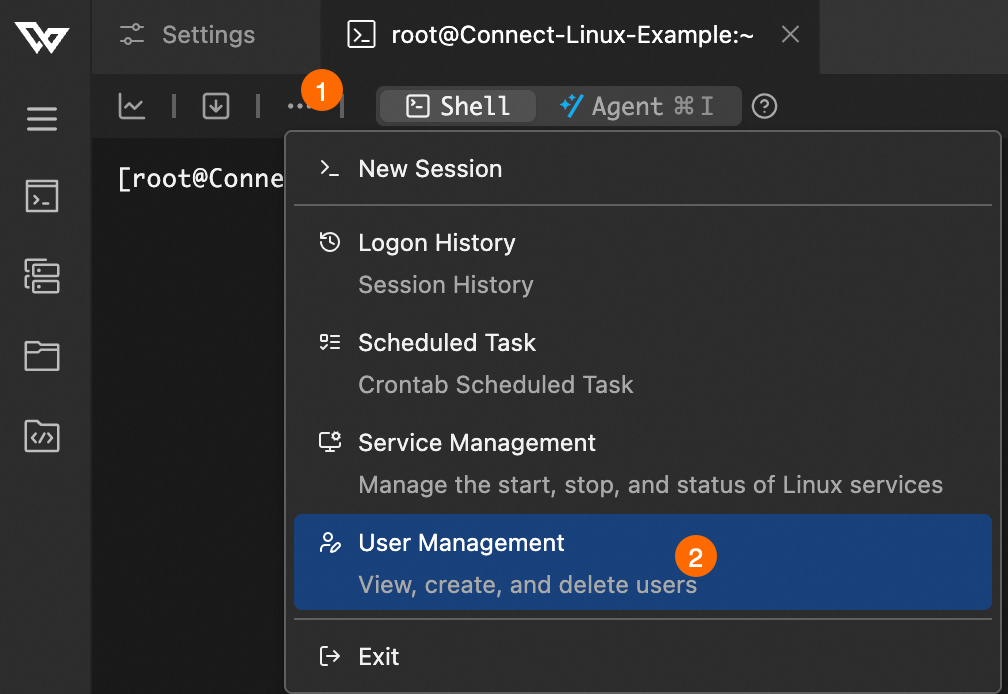
On the User Management page, perform the following operations:
Create user: Click Add User, and enter a Username (such as
developer_a) and a Password.Change password: In the Actions column for the target user, click Change Password.
ImportantSet a strong password that includes uppercase and lowercase letters, digits, and special characters.
Delete user: In the Actions column for the target user, click Delete.
ImportantDo not delete the root user. Deleting the root user can cause issues, such as being unable to log on to the instance.
Workbench 1.0
On the top menu bar, choose .
On the User Management page, perform the following operations:
Create user: Click Create User, and enter a Username (such as
developer_a) and a Password.Change password: In the Actions column for the target user, click Change Password.
ImportantSet a strong password that includes uppercase and lowercase letters, digits, and special characters.
Delete user: In the Actions column for the target user, click Delete.
ImportantDo not delete the root user. Deleting the root user can cause issues, such as being unable to log on to the instance.
View logon history
Workbench provides a visual logon log viewer, similar to the last command. You can use it to quickly trace historical access records for security investigations.
How can I determine if the current Workbench version is 1.0 or 2.0?
Workbench 2.0
At the top of the terminal, choose
> Logon History.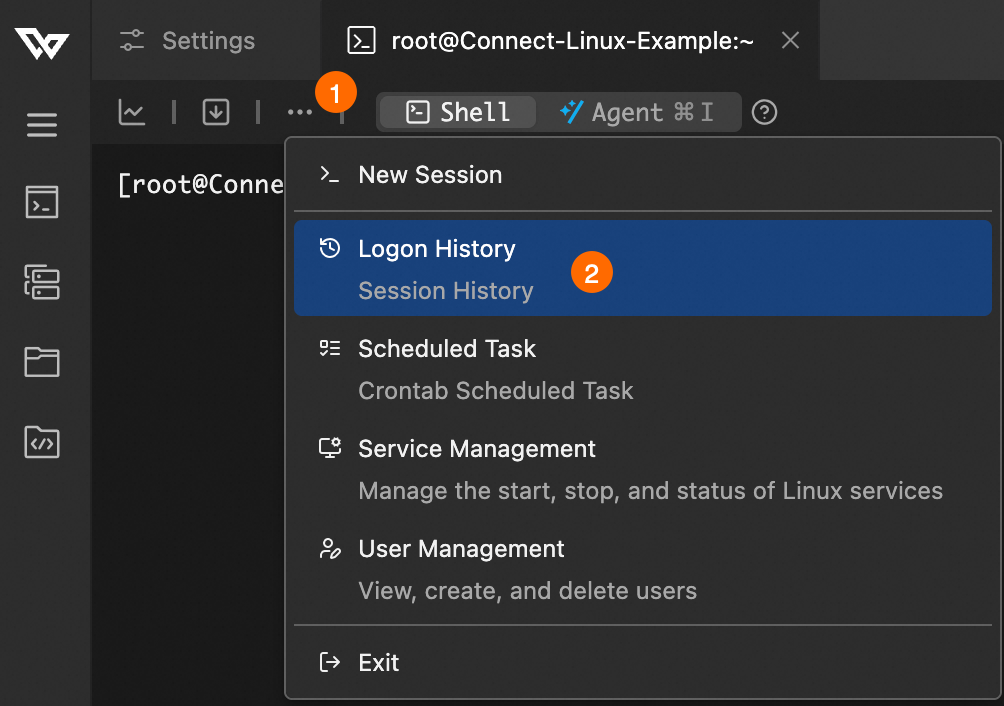
On the Logon History page, you can view the logon history for operating system users.

Workbench 1.0
On the top menu bar, choose .
On the Logon History page, you can view the logon history for operating system users.

Manage Systemd system services
Workbench provides a visual service management panel. You can use it to quickly view the running status of services and perform start, stop, or restart operations. This allows for easy management of core business processes, such as web servers and databases.
How can I determine if the current Workbench version is 1.0 or 2.0?
Workbench 2.0
At the top of the terminal, choose
> Service Management.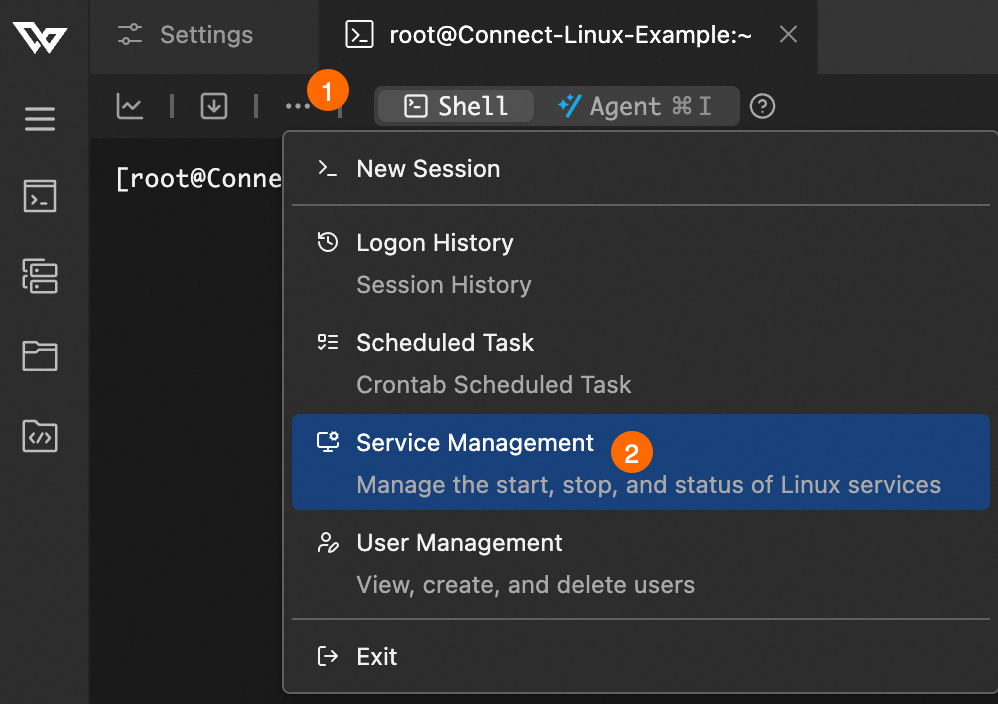
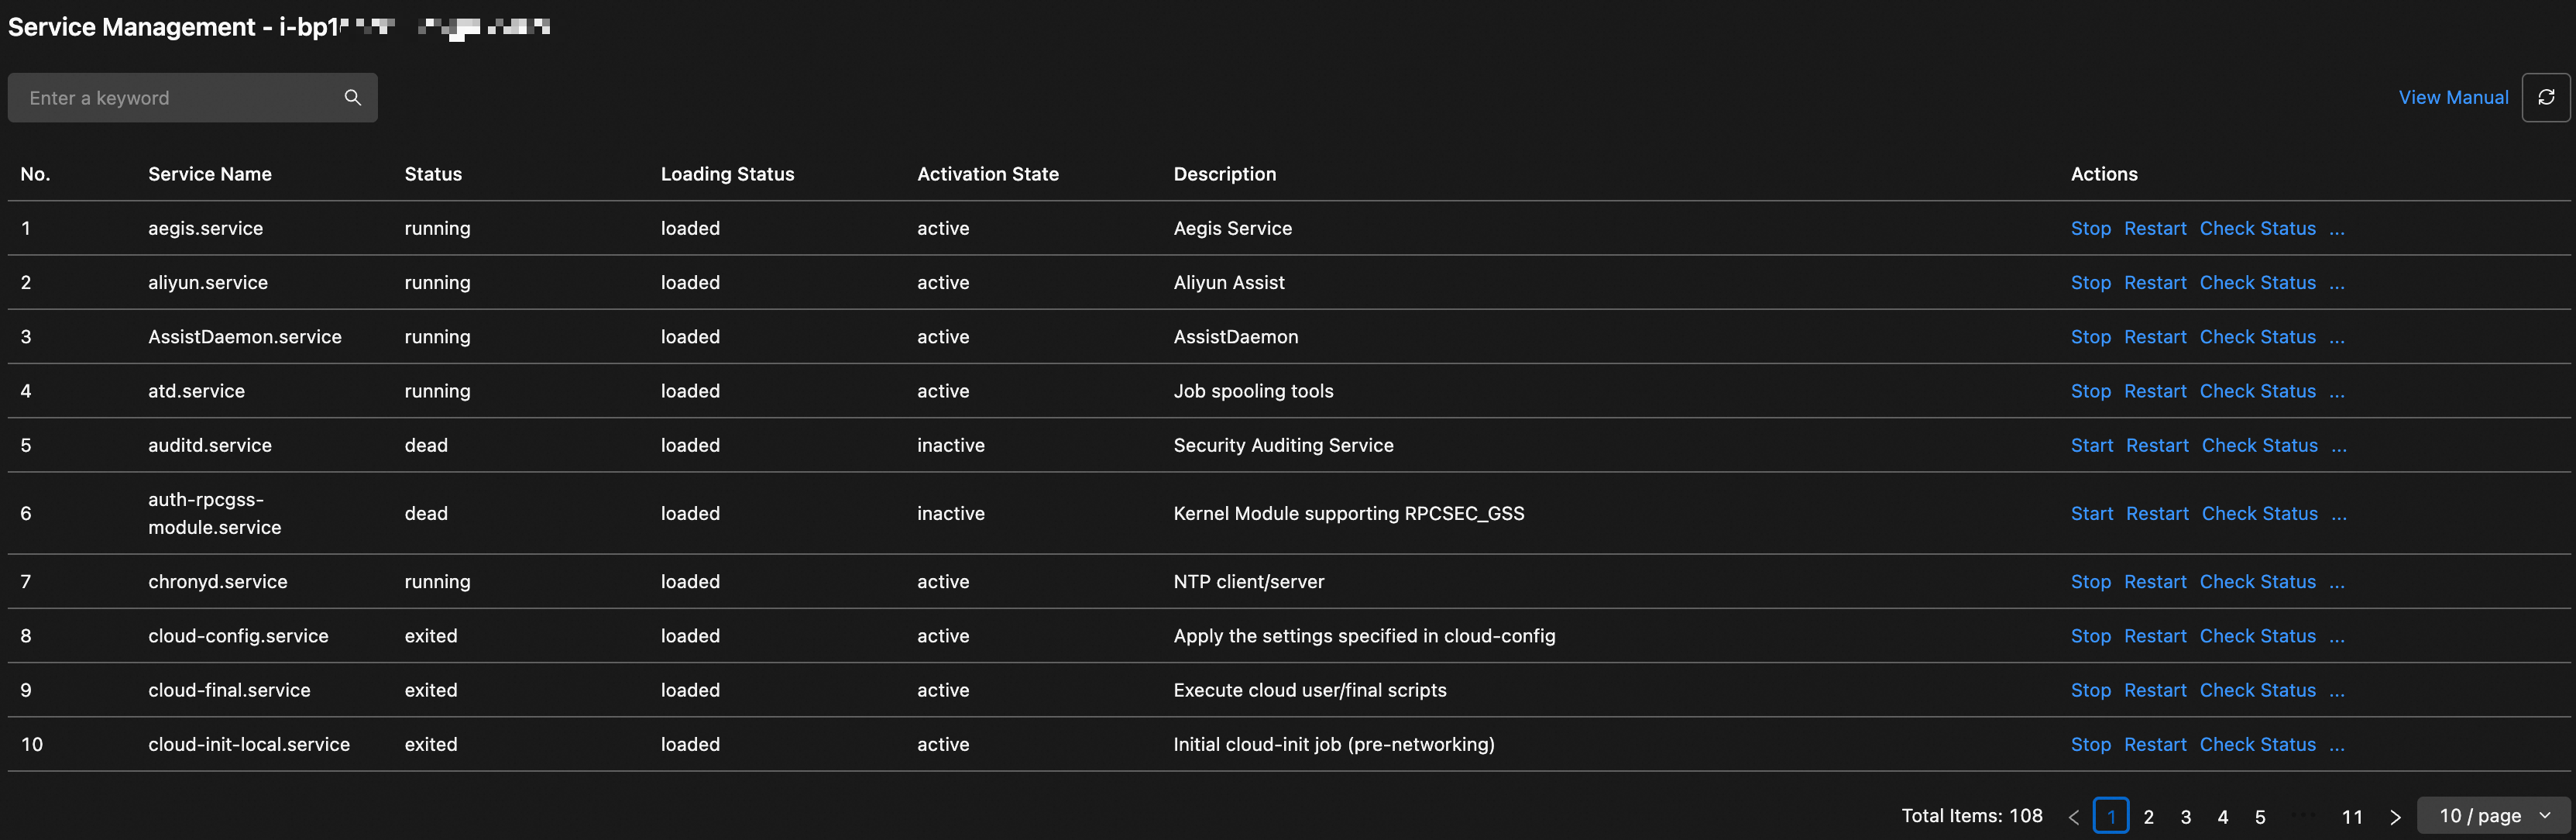
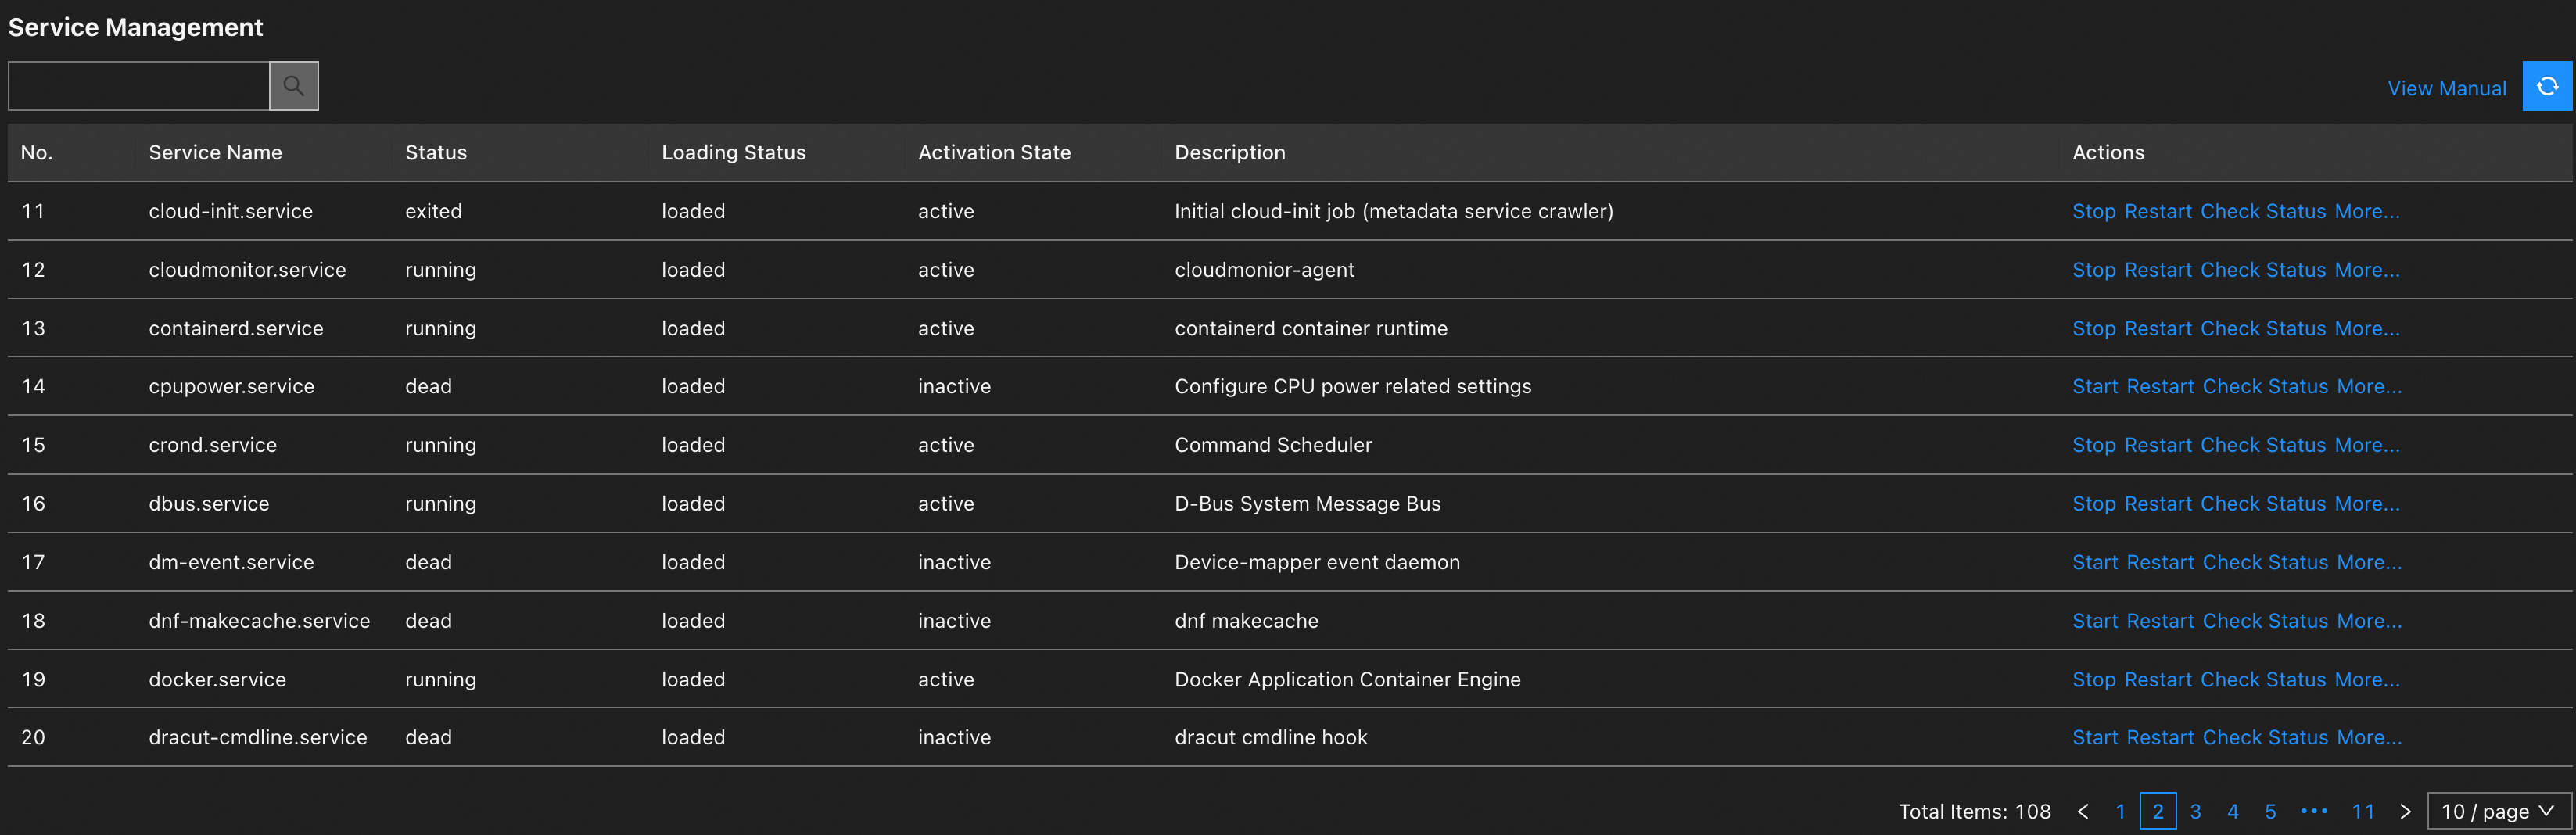
On the Service Management page, view the status of services. If necessary, perform the required operations in the Actions column.
ImportantOperations such as stopping or restarting a service can interrupt your business. Perform these operations during off-peak hours.
Workbench 1.0
On the top menu bar, choose .
On the Service Management page, view the status of services. If necessary, perform the required operations in the Actions column.
ImportantOperations such as stopping or restarting a service can interrupt your business. Perform these operations during off-peak hours.
Configure Crontab scheduled tasks
You can use the visual interface to configure Crontab rules. This lets you automate O&M tasks, such as log cleaning and data backup, to eliminate repetitive work and ensure that tasks run on time.
How can I determine if the current Workbench version is 1.0 or 2.0?
Workbench 2.0
At the top of the terminal, choose
> Scheduled Tasks.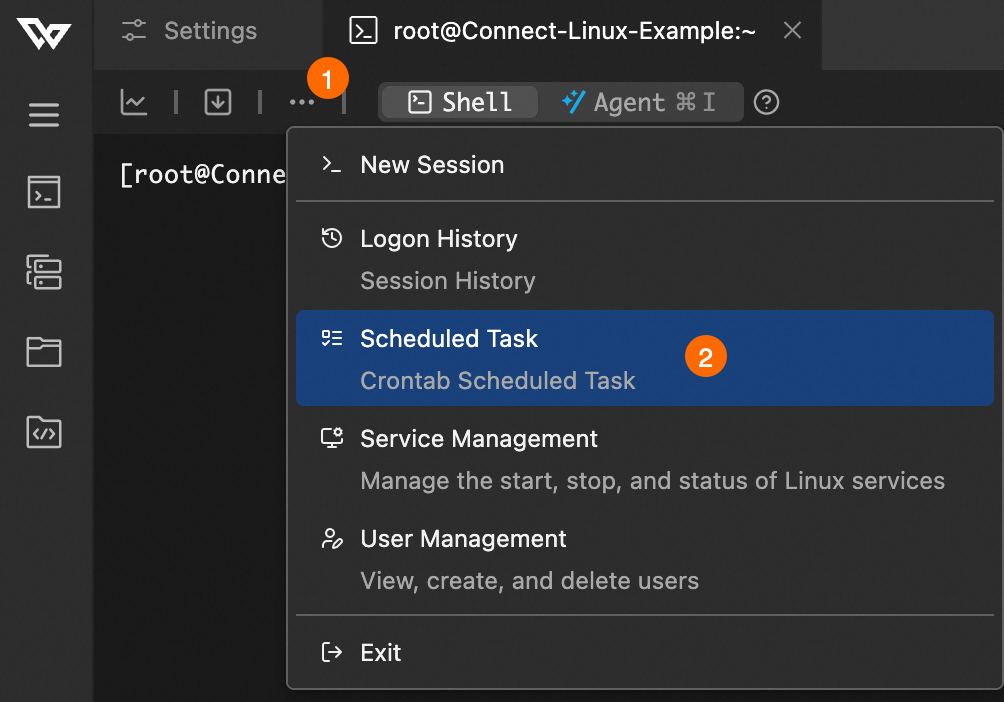
Click Create Task. After you finish configuring the task, click OK.
Parameters:
Set Time:
Daily: Executes the command at the specified time every day.
Every Week: Executes the command at the specified time on a specific day of the week.
Every Month: Executes the command at the specified time on a specific day of the month.
Fixed Interval: Executes the command at the specified interval. You can set the interval in minutes, hours, or days. This is suitable for tasks that need to run at regular intervals.
Expression: Executes the command based on a cron expression. You can specify the frequency by minute, hour, day, month, and day of the week. The system calculates the running time and executes the auto triggered task based on the cron expression. This flexible configuration is suitable for complex scheduled task scenarios.
For example, if you set the expression to
0 12 ? * WED, the system executes the command at 12:00 PM every Wednesday.
Crontab Expression: The system automatically generates a cronTab expression based on the time you set.
Command: Enter the command to be executed.
After you add the task, the system automatically writes it to the user's crontab file. You can view it using the
crontab -ecommand. The task runs automatically at the specified time.
Workbench 1.0
On the top menu bar, choose to go to the Scheduled Task management page.
Click Create Task. After you finish configuring the task, click OK.
Parameters:
Execution Time:
Daily: Executes the command at the specified time every day.
Every Week: Executes the command at the specified time on a specific day of the week.
Every Month: Executes the command at the specified time on a specific day of the month.
Fixed Interval: Executes the command at the specified interval. You can set the interval in minutes, hours, or days. This is suitable for tasks that need to run at regular intervals.
Expression: Executes the command based on a cron expression. You can specify the frequency by minute, hour, day, month, and day of the week. The system calculates the running time and executes the auto triggered task based on the cron expression. This flexible configuration is suitable for complex scheduled task scenarios.
For example, if you set the expression to
0 12 ? * WED, the system executes the command at 12:00 PM every Wednesday.
Crontab Expression: The system automatically generates a cronTab expression based on the time you set.
Command: Enter the command to be executed.
After you add the task, the system automatically writes it to the user's crontab file. You can view it using the
crontab -ecommand. The task runs automatically at the specified time.
Monitor real-time instance performance metrics
This feature is supported only in Workbench 2.0. How can I determine if the current Workbench version is 1.0 or 2.0 and how can I switch to 2.0?
You can view real-time metrics for key resources, such as CPU, memory, disk I/O, and network traffic, to quickly assess system health.
In the navigation pane on the left, click
 . The System Monitoring panel appears on the right.
In the System Monitoring panel, click Start Monitoring.
When you click Start Monitoring, a startup item is added to the shell configuration file and monitoring begins. This process takes about 5 to 10 seconds.
On this page, you can view metrics such as CPU utilization, memory usage, disk I/O, and network traffic.
FAQ
How do I determine whether I am using Workbench 1.0 or 2.0? How do I switch to 2.0?
You can identify the Workbench version based on the UI. In the upper-left corner, Workbench 2.0 displays the Workbench icon  , whereas Workbench 1.0 displays the word WORKBENCH. The left-side navigation pane is also different.
Workbench 2.0 | Workbench 1.0 |
|
|


To switch the Workbench version, click New Version in the upper-right corner to switch to 2.0, or click Previous Version to switch back to 1.0.
Why can't I see or use the system management and O&M features in Workbench?
Cause: You might be connected using Session Manager. This mode does not support the System Management or O&M features.
Solution: Disconnect from the current session and reconnect to the instance using the Terminal Connection method on the Workbench logon interface.