You can use Workbench to automatically deploy software, such as Docker and MySQL, to your Elastic Compute Service (ECS) instances. This simplifies environment setup by eliminating the tedious process of manually entering commands. You can use either the AI Agent or preset Operation Orchestration Service (OOS) packages for deployment.
Scope
To use this feature, Resource Access Management (RAM) users must have the required permissions to connect to an ECS instance using Workbench.
This feature is available only in Workbench 2.0. How do I know if I am using Workbench 2.0?
Method 1: Use AI Agent mode for assisted installation
AI Agent mode uses large language models to convert your natural language requests into executable commands.
The instance must have public network access to use AI Agent mode because this access is required to download installation packages from software sources.
At the top of the terminal, click the
 icon. The Install Software dialog box appears.
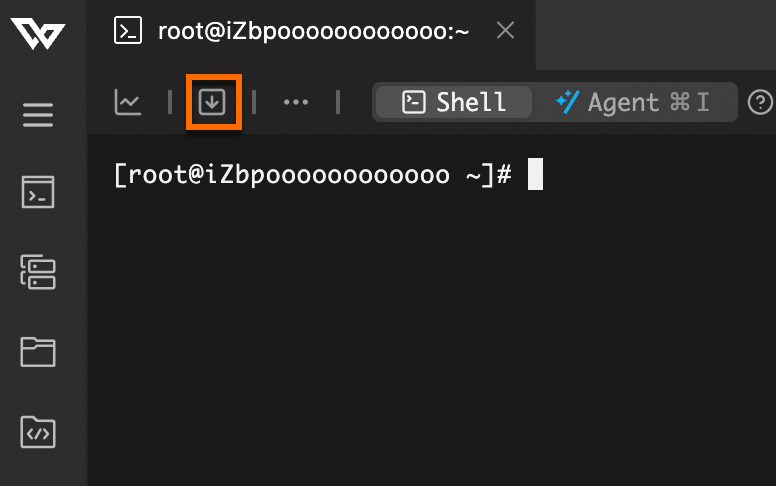
In the Install Software dialog box, click the Agent mode installation tab. In the input box, clearly describe your requirements. For best results, use the
Software Name + Version + Additional Actionformat. For example:Install the latest stable version of Nginx. After installation, start the service and enable it to start on boot.After you describe your requirements, click Run or press
Enter. A new terminal opens in AI Agent mode. Follow the AI guidance to complete the installation. For more information, see How to use AI Agent mode.ImportantThe content generated by the AI provides suggestions and is for reference only. You must confirm the final operations and assume all associated risks.
After the installation is complete, verify the software status.
For example, verify that Nginx from the example in Step 3 is installed.
# Check the service status. The expected output is "active (running)".
systemctl status nginx
Method 2: Use one-click installation for software packages
This method uses Alibaba Cloud OOS to provide verified extensions, which makes the installation process more controllable and standardized. For more information, see Supported extensions and limits.
At the top of the terminal, click the
icon. The Install Software dialog box appears.In the Install Software dialog box, click the Package Installation tab. Configure the following parameters:
Extensions to install: From the drop-down list, select the software that you want to install, such as Docker Community Edition.
Extension version: Use the default version.
Parameters in the command: The required parameters vary based on the selected extension. Configure the parameters as prompted on the page.
Click Install and follow the on-screen instructions to complete the installation.
After you click Install, the installation progress is displayed in the lower-right corner.
FAQ
How do I determine whether I am using Workbench 1.0 or 2.0? How do I switch to 2.0?
You can identify the Workbench version based on the UI. In the upper-left corner, Workbench 2.0 displays the Workbench icon  , whereas Workbench 1.0 displays the word WORKBENCH. The left-side navigation pane is also different.
Workbench 2.0 | Workbench 1.0 |
|
|


To switch the Workbench version, click New Version in the upper-right corner to switch to 2.0, or click Previous Version to switch back to 1.0.