Use CloudOps Orchestration Service (OOS) to apply the latest software and configurations to a custom image.
Background
OOS provides the ACS-ECS-UpdateImage public template to update custom images. Specify a source image, an instance type, and a Cloud Assistant script. OOS then automatically creates an execution that updates the image and generates a new one.
The update process automatically creates a temporary pay-as-you-go ECS instance. Ensure that your account balance can cover the temporary resources.
The ACS-ECS-UpdateImage template performs the following tasks in sequence:
-
Check the image name. Verify that the new image name is unique and meets naming conventions.
-
Prepare resources. Create a temporary ECS instance from the source image with the specified instance type and security groups, and install Cloud Assistant Agent.
-
Update the environment. Run a custom shell, batch, or PowerShell script on the temporary instance through Cloud Assistant.
-
Create a custom image. Stop the temporary instance and create a custom image from it.
-
Release resources. Release the temporary instance to avoid unnecessary costs.
Procedure
Go to ECS console - Images.
In the upper-left corner of the page, select a region and resource group.

-
On the Image page, click Custom Images.
-
Find the image to update. In the Actions column, choose
 > Update Image.
 -
On the OOS console Create or Update Images page, configure the following settings:
-
In the General Settings section, configure the following parameters.
Parameter
Description
Example
New Image Name
The new image name. Must be unique.
image-20230713133609
Permissions
-
Use Existing Permissions of Current Account: Default. Ensure your account has permissions to call ECS API operations for creating custom images.
-
Specify RAM Role and Use Permissions Granted to This Role: OOS assumes the specified RAM role to perform O&M tasks.
Use Existing Permissions of Current Account
-
-
In the Select Image section, verify that the source image is the custom image you want to update.
The source image is selected by default.
-
In the Configure Immediate Instance section, configure the temporary ECS instance.
Set the following parameters for the temporary instance.
Parameter
Description
Example
VPC
The VPC in which to deploy the temporary instance.
vpc-bp1pfyqnwdnvj7b******
vSwitch
The vSwitch for the temporary instance. Must be in the same VPC as the security group.
vsw-bp1s5fnvk4gn2tw******
Security Group
The security group for the temporary instance.
sg-bp1azkttqpldxg******
Instance Type
The instance type of the temporary instance. See Instance family.
ecs.g6.xlarge
System Disk Category
The system disk category of the temporary instance.
cloud_essd
Public Bandwidth
The public bandwidth of the temporary instance.
0
-
(Optional) In the Send Remote Commands section, select a command type and enter the command content to run on the temporary instance.
-
(Optional) In the Image Distribution section, specify destination regions to copy the image or Alibaba Cloud account IDs to share the image.
-
(Optional) Configure parameters in the Scaling Group Configuration section.
-
(Optional) In the Execution Settings section, configure Description, Tags for Execution, or Save as Template as needed.
-
-
Click Creation, confirm the parameters, and click OK.
When the execution enters the Running state, the image update is in progress. The image is updated when the status changes to Successful.
NoteTo view update progress, click Actions in the Actions column and click Log.
-
(Optional) View the new image.
-
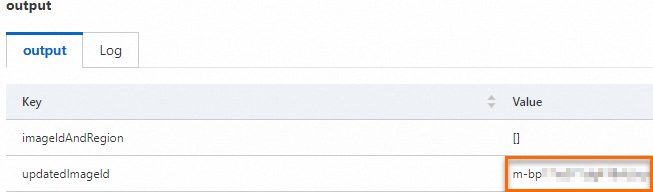
On the execution details page, find the new image ID in the output section.
-
On the Custom Images tab in the ECS console, find the new image by ID.
-