Grant other Alibaba Cloud accounts access to your reserved capacity so they can launch ECS instances from the shared pool.
Prerequisites
You have created one of the following resource shares:
-
A resource share of type capacity reservation
-
A resource share of type elasticity assurance
Billing
Sharing a private pool is free. The owner pays for unused capacity and their own ECS instances; each sharee pays only for their own instances. Exact fees depend on how the pool was created.
Private pool from an immediate capacity reservation
-
The owner and each sharee are billed for the ECS instances they create.
-
The owner is also billed for the pool's unused capacity.
Example: Account A (owner) shares the pool with Account B.
| Total pool capacity | ECS instances created by Account A | ECS instances created by Account B | Unused capacity |
|---|---|---|---|
| 10 | 3 | 2 | 5 |
Account A is billed for 3 instances and unused capacity equivalent to 5 instances.
Account B is billed for 2 created instances.
Private pool from an elasticity assurance
-
The owner and each sharee are billed for the ECS instances they create.
-
The owner is also billed the assurance fee for the full capacity of the associated elasticity assurance.
Example: Account A (owner) shares the pool with Account B.
| Total pool capacity | ECS instances created by Account A | ECS instances created by Account B | Unused capacity |
|---|---|---|---|
| 10 | 3 | 2 | 5 |
Account A is billed the assurance fee for the total capacity of 10 instances, plus the cost of 3 instances.
Account B is billed for 2 created instances.
Permissions
The following table lists actions available to the owner and sharees.
| Permission | Owner | Sharee |
|---|---|---|
| View private pool information | Supported | Supported |
| Modify private pool information | Supported | Not supported |
| Create resource shares | Supported | Not supported |
| View sharing records | Supported | Not supported |
| View associated ECS instances | All instances (owner and sharees) | Sharee's own instances only |
| View total capacity | Full pool capacity | Sharee's instances + unused capacity |
| View capacity used by each account | All accounts | Sharee account only |
| Unshare the pool | Supported | Not supported |
Capacity metrics differ by role. Owner: used capacity = all instances created by owner and sharees; total capacity = full pool. Sharee: used capacity = sharee's own instances; total capacity = sharee's instances + unused capacity. Example: a pool has 5 slots. The owner creates 2 instances, one sharee creates 1 instance, 2 slots remain unused. Owner sees used = 3, total = 5. Sharee sees used = 1, total = 3.
Share a private pool
The following steps show how Account A (owner) shares a private pool with Account B.
-
Log on to the ECS console - Resource Advisor with Account A.
-
In the top navigation bar, select a region and resource group.

-
In the left-side navigation pane, choose Guaranteed Provision > Resource Reservations.
-
On the Resource Reservations page, click the Private Pools tab.
-
Find an Active private pool, then in the Actions column, choose
 > Initiate Share.
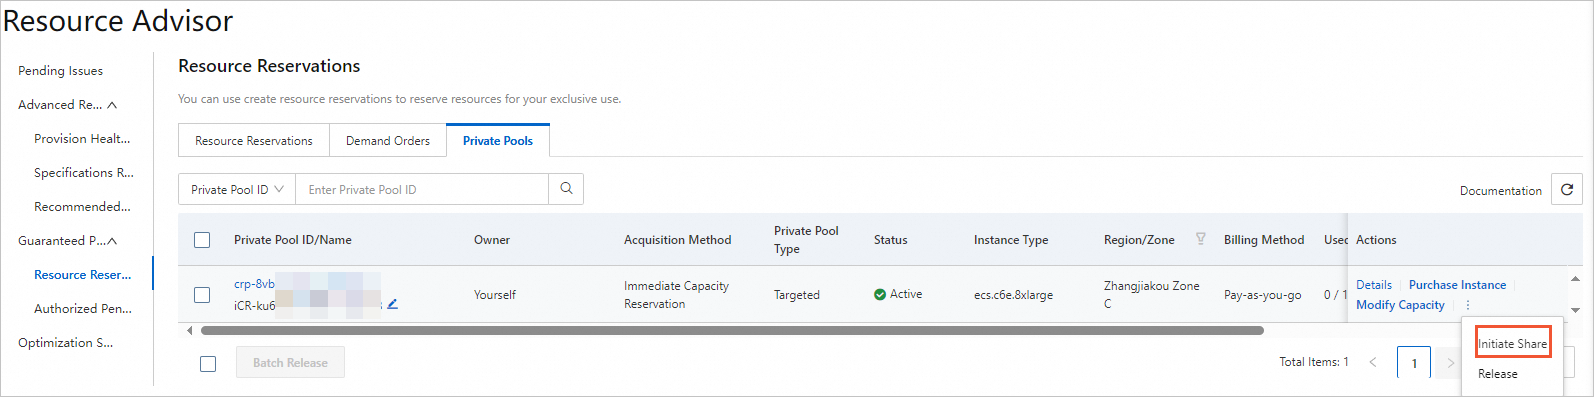
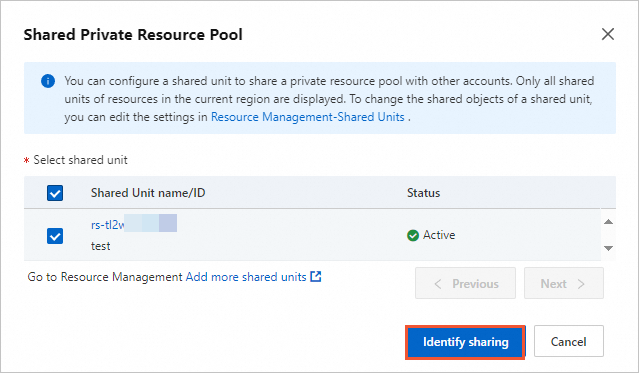
-
In the Share Private Pool dialog box, select a resource share and click OK.
-
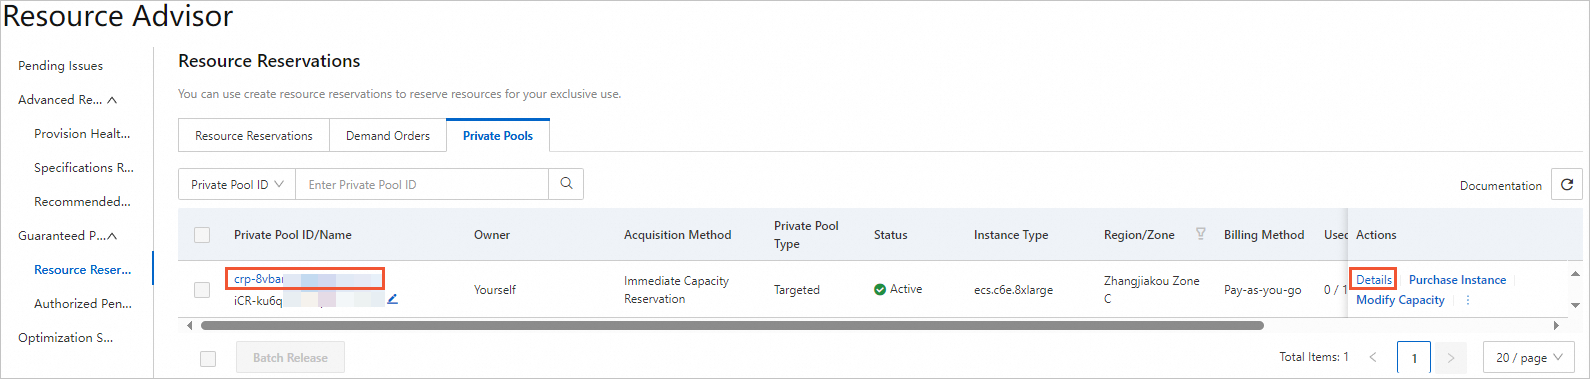
Verify the sharing status.
-
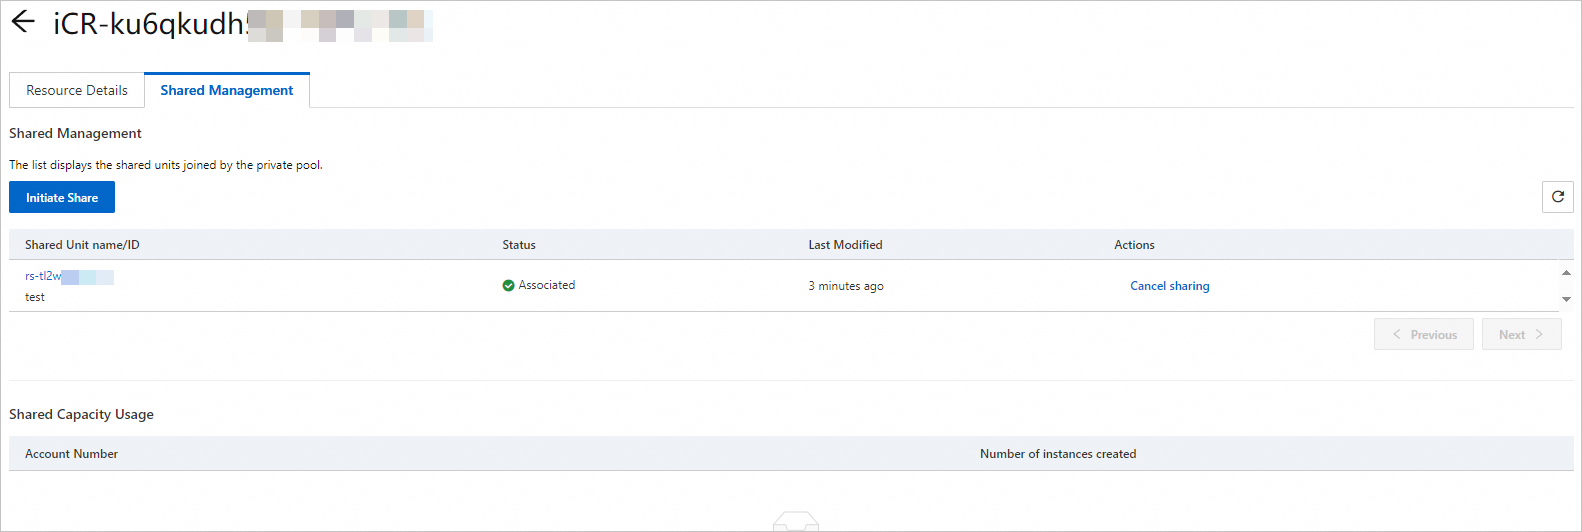
On the Private Pools tab, click the pool ID or click Details in the Actions column.
-
Check the details and sharing status.
-
On the Resource Details tab, view the resource reservation, pool information, and linked ECS instances.
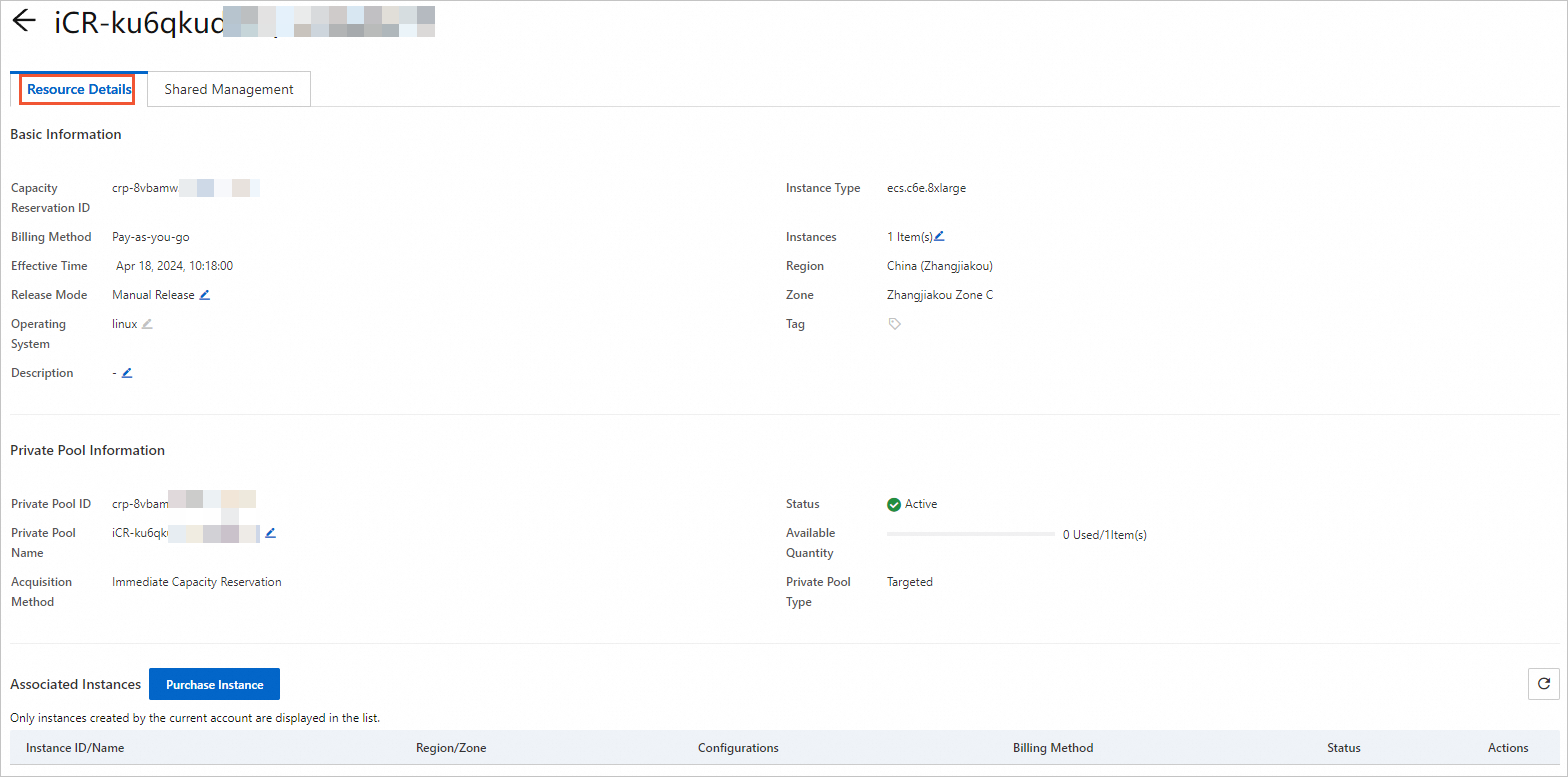
-
On the Share Management tab, view the resource shares and shared capacity usage.
-
-
Use a shared private pool
How Account B gains access depends on the account relationship:
-
Same resource directory: Account B can use the shared pool immediately.
-
Different resource directories: Account B must accept the sharing invitation first. See Resource Directory overview.
Accept the sharing invitation
Perform these steps if Account A and Account B are in different resource directories.
-
Log on to the Resource Management console with Account B.
-
In the left-side navigation pane, choose Resource Sharing > Resources Shared To Me.
-
In the top navigation bar, select the region of the shared private pool.
-
On the Shared To Me page, find the resource share containing the private pool and click Accept in the Status column.
-
In the Accept Resource Sharing Invitation message, click Accept.
After accepting, Account B can use the shared pool. Future resources added to the same resource share are accepted automatically.
Launch instances from the shared pool
-
Log on to the ECS console - Resource Advisor with Account B.
-
In the top navigation bar, select a region and resource group.
-
In the left-side navigation pane, choose Guaranteed Provision > Resource Reservations.
-
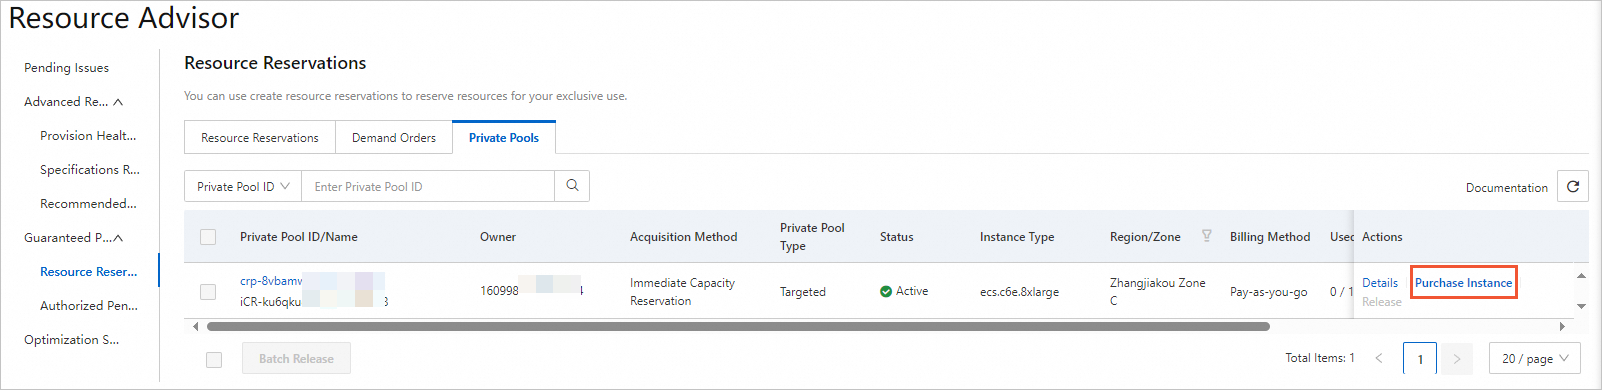
On the Resource Reservations page, click the Private Pools tab to view the shared pool.
-
Click Details in the Actions column to view pool details.

-
Click Purchase Instance in the Actions column to create ECS instances from the shared pool.
-
Unshare a private pool
After unsharing, Account B can no longer create ECS instances from the private pool. Existing instances created by Account B lose access to the pool capacity, and the system attempts to replenish the released capacity. If inventory is insufficient, the pool's total capacity is reduced.
-
Log on to the ECS console - Resource Advisor with Account A.
-
In the top navigation bar, select a region and resource group.
-
In the left-side navigation pane, choose Guaranteed Provision > Resource Reservations.
-
On the Private Pools tab, click the pool ID or click Details in the Actions column.
-
Click the Share Management tab.
-
Find the resource share containing the private pool and click Unshare in the Actions column.

-
In the confirmation dialog box, click OK.
