Spot Instances are low-cost Elastic Compute Service (ECS) resources provided by Alibaba Cloud. Spot Instances are suitable for cost-sensitive tasks that can tolerate interruptions, such as data analysis, testing, and development. The price of a spot instance is lower than the price of a pay-as-you-go instance. A spot instance may be automatically released due to market price fluctuations or changes in resource supply and demand. This topic describes how to create spot instances in the ECS console, by using an SDK, and by using Terraform.
Suggestions
When you create spot instances, take note of the following suggestions:
Make a reasonable bid. When you make a bid, take into account fluctuations of the market price. A reasonable bid price increases your chances of creating a spot instance and reduces the chances of releasing the instance whose bid price becomes lower than the market price. You must submit the bid price based on the requirements of your workloads.
NoteIf you are unable to determine a bidding price for your spot instances, we recommend that you use the market price at the time of purchase as the bidding price.
Ensure data persistence. To prevent data loss, we recommend that you store important data in storage media that are not affected by the release of spot instances. Storage media include separately created cloud disks that are not released together with spot instances, Object Storage Service (OSS) buckets, and File Storage NAS (NAS).
Monitor the instance status. You can monitor the status of spot instances by using CloudMonitor and viewing instance metadata to determine whether the instances are interrupted and reclaimed. For more information, see Perceive and respond to spot instance interruption events.
Handle interruptions. Spot Instances may be released because the market price exceeds your bid price or the inventory is insufficient. Test your application tolerance on unexpected releases of spot instances.
Procedure
In the ECS console
Log on to the ECS console, go to the instance buy page, and then click the Custom Launch tab.
Follow on-screen instructions to configure ECS resource settings based on your business requirements.
Take note of the following parameters. For information about other parameters, see Create an instance on the Custom Launch tab.
Billing Method: Select Spot Instance.
Instance Usage Duration:
1 Hour: Specify a 1-hour protection period for the spot instance. The instance is not automatically released within 1 hour after instance creation. When the protection period ends, the system checks the inventory and market price of the instance type in real time and determines whether to release the instance.
None: No protection period is specified for the spot instance. Spot Instances that do not have a protection period are more cost-effective than spot instances that have a protection period.
Highest Price per Instance:
Use Automatic Bid: The market price at the time of purchase is used as the bid price.
Set Maximum Price: Specify the maximum price that you are willing to pay for the instance type.
Instance Interruption Mode: Specify how to handle the spot instance and related resources if interruption and reclamation are triggered.
Release: The spot instance and the following resources are released: computing resources (vCPUs, GPUs, and memory), static public IP address (public IP address that is automatically assigned to the instance), public bandwidth, and cloud disks (system disk and data disks).
WarningThe spot instances are not suitable to store critical data. Setting Instance Interruption Mode to Release may cause data losses. We recommend that you disable the Release Disk with Instance attribute or create snapshots for disks on a regular basis to ensure data security.
Stop in Economical Mode: The spot instance is stopped in economical mode. The system reclaims and no longer bills the computing resources (vCPUs, GPUs, and memory), static public IP address, and public bandwidth associated with the static public IP address of the instance. The system continues billing other resources of the spot instance, such as the cloud disks (system disk and data disks), elastic IP addresses (if any), and snapshots.
NoteA spot instance that is stopped in economical mode may fail to restart due to insufficient resources or market price fluctuations.
On the right side of the page, review the instance configuration and set options such as the usage duration. Click Create Order to create the instance.
Use ECS SDK for Java
Preparations
Create an AccessKey pair.
Create an AccessKey pair for a Resource Access Management (RAM) user. An Alibaba Cloud account has all permissions on resources. If the AccessKey pair of your Alibaba Cloud account is leaked, your resources are exposed to risks. To minimize the risks, we recommend that you use the AccessKey pair of a RAM user. For information about how to create an AccessKey pair, see Create an AccessKey pair.
Grant permissions on ECS to the RAM user.
Grant the required permissions on ECS resources to the RAM user that you want to use. The sample code provided in this topic creates instances and related resources. To grant the required permissions to run the sample code, we recommend that you attach the policy in the following table to the RAM user.
Cloud service
Policy
ECS
AliyunECSFullAccess
Configure access credentials.
Configure the AccessKey pair of the RAM user that you want to use in environment variables. The sample code provided in this topic reads the AccessKey pair from the environment variables and uses the AccessKey pair as credentials to access Alibaba Cloud services. For information about how to specify environment variables to configure an AccessKey pair, see Configure environment variables in Linux, macOS, and Windows.
Install an ECS SDK.
Obtain ECS SDK 2.0 for Java. In this example, ECS SDK 2.0 for Java is installed by adding Maven dependencies. For information about other installation methods, see Install ECS SDK for Java.
Initialize the client
Alibaba Cloud SDKs support multiple access credentials, such as AccessKey pairs and Security Token Service (STS) tokens, to initialize clients. For more information, see Manage access credentials. In this example, an AccessKey pair is used to initialize a client.
import com.aliyun.ecs20140526.Client;
import com.aliyun.teaopenapi.models.Config;

public class Sample {
    private static Client createClient() throws Exception {
        Config config = new Config()
                // Required. Make sure that the ALIBABA_CLOUD_ACCESS_KEY_ID environment variable is configured.
                .setAccessKeyId(System.getenv("ALIBABA_CLOUD_ACCESS_KEY_ID"))
                // Required. Make sure that the ALIBABA_CLOUD_ACCESS_KEY_SECRET environment variable is configured.
                .setAccessKeySecret(System.getenv("ALIBABA_CLOUD_ACCESS_KEY_SECRET"))
                // Specify an endpoint. For information about endpoints, go to https://api.alibabacloud.com/product/Ecs.
                .setEndpoint("ecs.cn-hangzhou.aliyuncs.com");
        return new Client(config);
    }
}
Create a request object for the API operation
Before you create a request object, view the parameters of the API operation that you want to call in the corresponding API documentation.
// Create a request object.
RunInstancesRequest request = new RunInstancesRequest()
    // Specify the region ID.
    .setRegionId("cn-hangzhou")
    // Set the billing method to pay-as-you-go.
    .setInstanceChargeType("PostPaid")
    // Set the bidding mode to automatic bidding.
    .setSpotStrategy("SpotAsPriceGo")
    // Set the instance usage duration to 1 hour, which ensures that the instance is not released within 1 hour after the instance is created.
    .setSpotDuration(1)
    // Specify the instance type.
    .setInstanceType("instanceType")
    // Specify the image ID.
    .setImageId("imageId")
    // Specify the ID of the security group.
    .setSecurityGroupId("securityGroupId")
    // Specify the vSwitch ID.
    .setVSwitchId("vSwitchId");
Initiate a call
When you call an API operation from a client, you can specify runtime parameters, such as timeout and proxy parameters. For more information, see Advanced settings.
// Specify the runtime parameters.
RuntimeOptions runtime = new RuntimeOptions();
// Call the RunInstances operation.
RunInstancesResponse response = client.runInstancesWithOptions(request, runtime);
System.out.println(response.body.toMap());
Handle exceptions
ECS SDK for Java classifies exceptions into the following types:
TeaUnretryableException: In most cases, this type of exception is caused by network issues and is reported when the maximum number of retries is reached.
TeaException: In most cases, this type of exception is caused by business errors.
We recommend that you properly handle exceptions by performing operations, such as reporting exceptions, logging exceptions, and performing retries, to ensure the robustness and stability of your system.
Example
import com.aliyun.ecs20140526.Client;
import com.aliyun.ecs20140526.models.RunInstancesRequest;
import com.aliyun.ecs20140526.models.RunInstancesResponse;
import com.aliyun.ecs20140526.models.RunInstancesResponseBody;
import com.aliyun.tea.TeaException;
import com.aliyun.tea.TeaUnretryableException;
import com.aliyun.teaopenapi.models.Config;
import com.aliyun.teautil.models.RuntimeOptions;
import com.alibaba.fastjson.JSONArray;

import java.util.Arrays;

public class Sample {
    private static Client createClient() throws Exception {
        Config config = new Config()
                // Required. Make sure that the ALIBABA_CLOUD_ACCESS_KEY_ID environment variable is configured.
                .setAccessKeyId(System.getenv("ALIBABA_CLOUD_ACCESS_KEY_ID"))
                // Required. Make sure that the ALIBABA_CLOUD_ACCESS_KEY_SECRET environment variable is configured.
                .setAccessKeySecret(System.getenv("ALIBABA_CLOUD_ACCESS_KEY_SECRET"))
                // Specify an endpoint. For information about endpoints, go to https://api.alibaba.com/product/Ecs.
                .setEndpoint("ecs.cn-hangzhou.aliyuncs.com");
        return new Client(config);
    }

    public static void main(String[] args) {
        try {
            Client client = Sample.createClient();
            // Create a request object.
            RunInstancesRequest request = new RunInstancesRequest()
                    // Specify the region ID.
                    .setRegionId("cn-hangzhou")
                    // Set the billing method to pay-as-you-go.
                    .setInstanceChargeType("PostPaid")
                    // Set the bidding mode to automatic bidding.
                    .setSpotStrategy("SpotAsPriceGo")
                    // Set the instance usage duration to 1 hour, which ensures that the instance is not released within 1 hour after the instance is created.
                    .setSpotDuration(1)
                    // Specify the instance type.
                    .setInstanceType("instanceType")
                    // Specify the image ID.
                    .setImageId("imageId")
                    // Specify the ID of the security group.
                    .setSecurityGroupId("securityGroupId")
                    // Specify the vSwitch ID.
                    .setVSwitchId("vSwitchId");
            // Specify the runtime parameters.
            RuntimeOptions runtime = new RuntimeOptions();
            // Call the RunInstances operation.
            RunInstancesResponse response = client.runInstancesWithOptions(request, runtime);
            System.out.println(response.body.toMap());
        } catch (TeaUnretryableException ue) {
            // Handle exceptions with caution in actual business scenarios and do not ignore exceptions in your project. In this example, exceptions are provided only for reference.
            ue.printStackTrace();
            // Obtain the error message.
            System.out.println(ue.getMessage());
            // Obtain the request message and query the request information when an error occurs.
            System.out.println(ue.getLastRequest());
        } catch (TeaException e) {
            // Handle exceptions with caution in actual business scenarios and do not ignore exceptions in your project. In this example, exceptions are provided only for reference.
            e.printStackTrace();
            // Obtain the error code.
            System.out.println(e.getCode());
            // Obtain the error message that contains the request ID.
            System.out.println(e.getMessage());
            // Obtain the detailed error information that is returned by the server.
            System.out.println(e.getData());
        } catch (Exception e) {
            // Handle exceptions with caution in actual business scenarios and do not ignore exceptions in your project. In this example, exceptions are provided only for reference.
            e.printStackTrace();
        }
    }
}
Use Terraform
You can run the sample code with one click. Go to Terraform Explorer to run the sample code.
Preparations
Create an AccessKey pair.
An Alibaba Cloud account has all permissions on resources. To prevent AccessKey pair abuse, we recommend that you grant a RAM user the required minimal permissions and use the AccessKey pair. For more information, see Create a RAM user and Create an AccessKey pair.
Create a custom policy.
The following sample code provides an example of a custom policy. You can attach the policy to a RAM user to allow the RAM user to start ECS instances, view instance details, and view the history prices of ECS instance types in stock. For more information, see Create custom policies.
{
  "Version": "1",
  "Statement": [
    {
      "Effect": "Allow",
      "Action": [
        "ecs:RunInstances",
        "ecs:DescribeInstances",
        "ecs:DescribeSpotPriceHistory"
      ],
      "Resource": "*"
    }
  ]
}
Required resources
alicloud_vpc: creates a virtual private cloud (VPC).
alicloud_vswitch: creates a vSwitch in the VPC. The vSwitch is used to subnet instances in the VPC.
alicloud_security_group: creates a security group named default and associates the security group with the VPC that you created.
alicloud_instance: creates an ECS instance.
alicloud_security_group_rule: creates a security group rule.
Procedure
Open your browser and enter https://shell.alibabacloud.com in the address bar to access Cloud Shell.
For information about how to use Cloud Shell, see Use Cloud Shell.
Create and access a project directory named terraform in which Terraform resources are stored.
mkdir terraform
cd terraform
Create a configuration file named main.tf in the preceding directory and add the following content to the file:
Run the
terraform initcommand to initialize the configurations.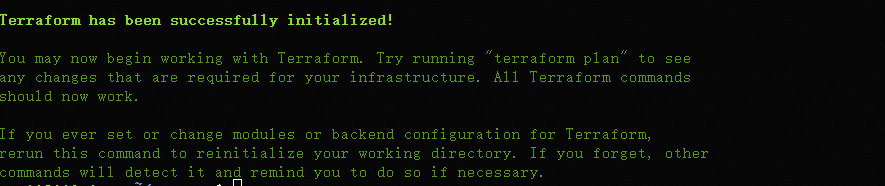
Run the
terraform applycommand. During the execution, follow on-screen instructions to enteryesand press the Enter key. Wait until the command is complete. If the following command output is returned, the spot instance is created.
Run the
terraform showcommand to query the details of resources created by Terraform.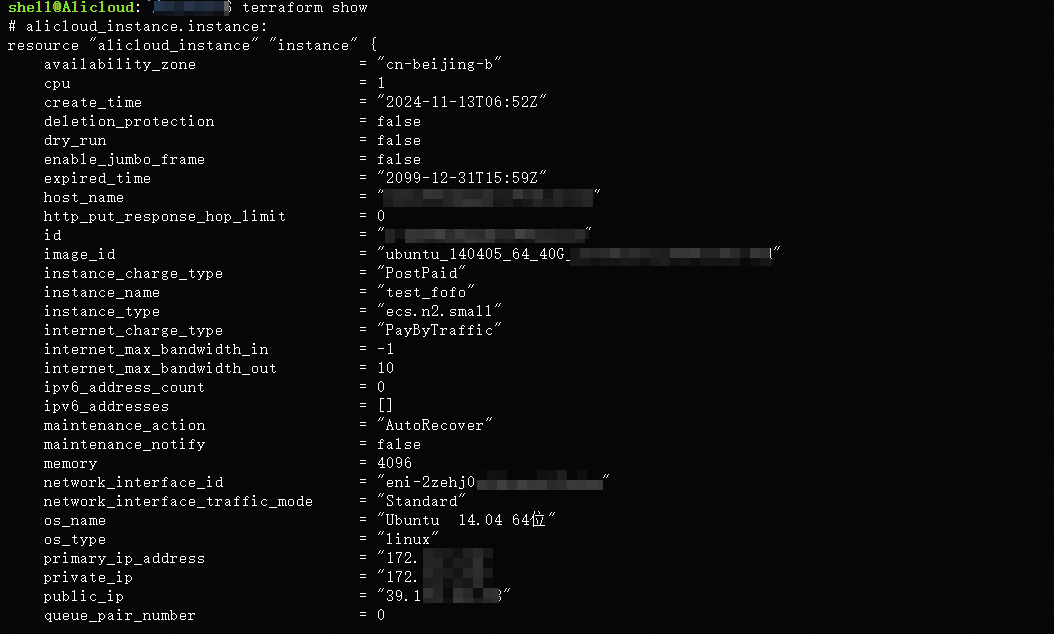
Delete resources
If you no longer require the preceding resources created or managed by Terraform, run the following command to delete the resources. For more information, see Common commands.
terraform destroyReferences
For information about Terraform, see What is Terraform?
Create a spot instance by using other methods
Alibaba Cloud provides services, such as Auto Scaling, Alibaba Cloud Container Service for Kubernetes (ACK), and auto provisioning groups, to help you efficiently create resources and perform automatic resource O&M.
Auto Scaling
Auto Scaling is suitable for scenarios that require dynamic responses to business load fluctuations. Auto Scaling automatically combines pay-as-you-go and spot instance resources at an adjustable ratio and automatically replenishes instance resources if instances are released. For more information, see Use spot instances to reduce costs.
ACK
ACK is suitable for stateless and fault-tolerant applications. Kubernetes clusters require low-cost node pools. You can create spot instance-based node pools. For more information, see Best practices for spot instance-based node pools.
Auto provisioning group
Auto Provisioning allows you to quickly deliver ECS instance clusters. You need to only make simple configurations to automate the delivery of instances that use different billing methods (pay-as-you-go and spot instances) across instance types and zones. This improves the efficiency of delivering a large number of instances at the same time. For more information, see Configure an auto provisioning group.