Define reusable instance configurations in a launch template to create ECS instances, scaling groups, and auto provisioning groups.
Usage notes
-
Each account can have up to 30 launch templates per region.
-
Parameters such as instance type and image are required. If a template omits required parameters, you must specify them when you create instances from the template.
-
Launch templates cannot be modified after creation, but you can create new versions.
Procedure
Use the ECS console
In the upper-left corner of the page, select a region and resource group.

-
On the Launch Templates page, click Create Template.
-
On the Template Name page, configure the Basic Configurations (Optional) and Advanced Configurations (Optional) steps.
You can define parameters or select an existing template as a basis. For parameter descriptions, see Create an instance with Custom Launch.
NoteWhen you create your first launch template, the Clone Template section is unavailable. After you create templates, you can select an existing template and version and modify configurations.
When you configure the Instance Type, use Scenario-based Selection to quickly filter instance types that meet your requirements.
-
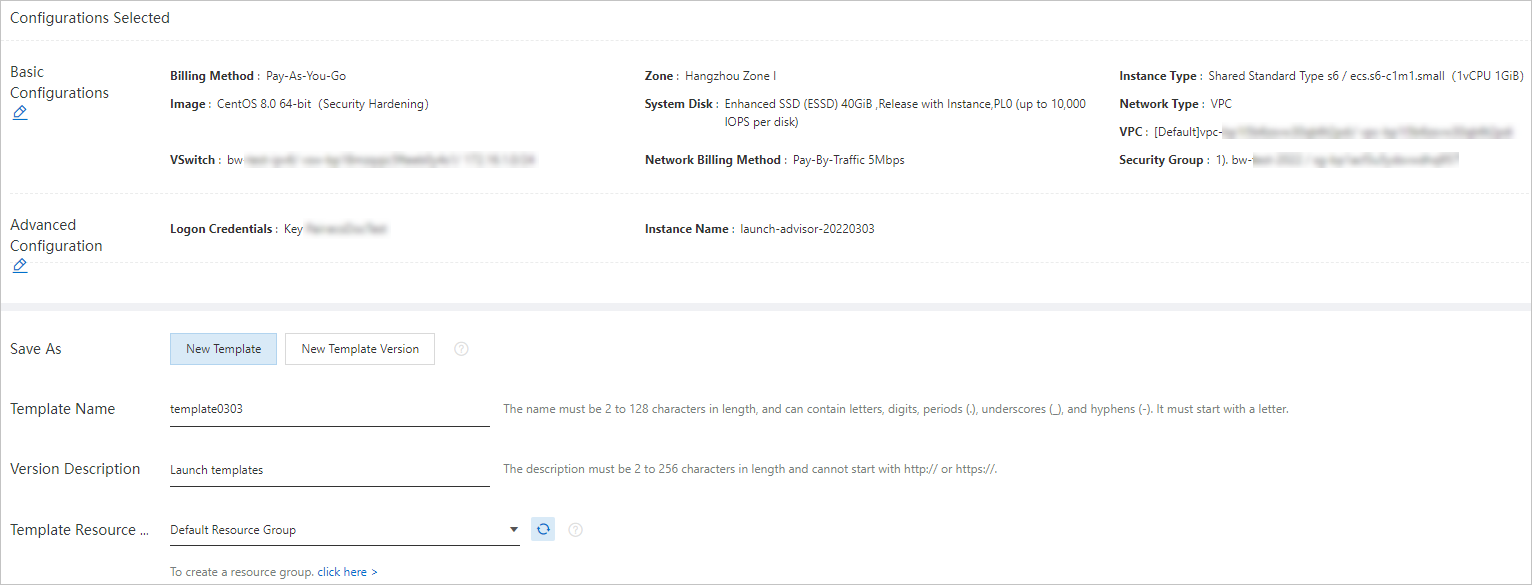
In the Confirm Configurations step, enter a template name and version description, then click Create Launch Template.
-
Configurations: Click the
 icon in the Basic Configurations and Advanced Configurations sections to modify parameters.Note
The Basic Configurations and Advanced Configurations parameters are optional. Configure them as needed to simplify subsequent instance creation.
-
Save As: Specify how to save the current configurations.
-
Create Template: Saves the current configurations as the default version of a new launch template.
-
Create Version: Saves the current configurations as the latest version of an existing launch template.
-
-
Template Name and Version Description: Enter a template name and version description for management.
-
Template Resource Group: Select a resource group to assign the template to.
To create a new resource group, click here to go to the Resource groups page.
-
-
In the Success message, click View Template to view the created template.
Call an API operation
-
Call the CreateLaunchTemplate operation to create a launch template.
-
Call the DescribeLaunchTemplates operation to query launch templates.
References
After you create a launch template, you can use it for the following operations.
|
Operation |
Description |
References |
|
Create an ECS instance |
Use a launch template to quickly create an ECS instance without repeatedly configuring parameters. |
|
|
Create multiple ECS instances at a time |
Use a launch template with the RunInstances operation to create multiple ECS instances at a time. Specify the LaunchTemplateId and LaunchTemplateVersion parameters when you call the RunInstances operation. |
|
|
Create a scaling group |
Use a launch template to create a scaling group based on ECS instances. The system uses configurations from the template. You can modify specific configurations during creation, such as the VPC and vSwitch. |
|
|
Create an auto provisioning group |
Auto provisioning groups use specific versions of launch templates as instance configuration sources. Attributes such as images, security groups, and logon credentials from the templates are used to create ECS instances. After an auto provisioning group is created, an instance cluster is provisioned at the specified time. |