Windows includes a timeout setting that prevents the system from hanging if storage I/O stops responding. Under a heavy load, a high-performance NVMe cloud drive may take longer to respond than the default timeout period allows, which can cause system errors. You can extend the I/O timeout for the NVMe driver to make the system more stable and fault-tolerant under high I/O pressure.
Procedure
Perform the following steps only on NVMe drives.
In thePowerShellinterface of the instance, you can runGet-Disk |select BusType. If NVMe is returned, the disk is an NVMe disk.
Before you begin, create a snapshot to back up your data. This prevents data loss that may be caused by incorrect operations.
Method 1 (recommended): Automatically modify the setting using a PowerShell script
Log on to the ECS instance.
Go to ECS console - Instances. In the top navigation bar, select the target region and resource group.
Go to the details page of the target instance, click Connect, and select Workbench. Set the connection method to Terminal, enter the username and password, and then log on to the graphical terminal page.
Right-click the
 icon and click Run. Enter
 PowerShell ISE. In thePowerShell ISEinterface, copy and run the following code.This script automatically detects the NVMe controller driver that is used by the system. The script then adds or modifies the
IoTimeoutValueregistry key and sets its value to65535.function Set_Nvme_Reg { $os = (Get-WmiObject -Class win32_operatingsystem).Caption $nvmeDevs = Get-WmiObject Win32_PnPEntity | Where-Object {$_.Name -match "nvm" -and $_.PNPClass -eq 'SCSIAdapter' -and $_.Status -eq "OK"} if($os -match 2012){ $nvmeDevs = Get-WmiObject Win32_PnPEntity | Where-Object { $_.Name -match "nvm" -and $_.Status -eq "OK"} } if ($nvmeDevs) { $drvFiles = @() foreach ($dev in $nvmeDevs) { $regpath = "HKLM:\SYSTEM\CurrentControlSet\Enum\" + ($dev.DeviceID -replace '\\','\\') $drvinfo = Get-ItemProperty -Path $regpath $driverkey = $drvinfo.Driver $driverparts = $driverkey.Split('\') $classguid = $driverparts[0] $classnum = $driverparts[1] $classregpath = "HKLM:\SYSTEM\CurrentControlSet\Control\Class\$classguid\$classnum" $drvInf = (Get-ItemProperty -Path $classregpath).Infpath $dir = "$env:SystemRoot\INF" $infPath = Join-Path $dir $drvInf $sysList = Select-String -Path $infPath -Pattern "\.sys" | Select-Object -ExpandProperty Line $serviceBinValue = $sysList -split "`n" | Where-Object { $_ -match "^ServiceBinary\s*=" } if ($serviceBinValue) { $match = $serviceBinValue -match "=\s*(.+)$" $rawPath = $Matches[1] $fileName = [System.IO.Path]::GetFileName($rawPath) if ($fileName) { $drvFiles += $fileName }else{ Write-Host "Driver .sys file name NOT found in inf file ($infPath)! " } }else { Write-Host "ServiceBinary value NOT found in inf file ($infPath)!" } } $uniqDrvFiles = $drvFiles | Select-Object -Unique foreach ($fileName in $uniqDrvFiles) { try { $drvName = [System.IO.Path]::GetFileNameWithoutExtension($fileName) Write-Host "The nvme driver used is: $drvName" $regpath = "HKLM:\SYSTEM\CurrentControlSet\Services\$drvName\Parameters" New-ItemProperty -Path $regpath -Name "IoTimeoutValue" -Value 65535 -PropertyType DWORD -Force | Out-Null Write-Host "IoTimeoutValue Modified successfully for $drvName" } catch { Write-Host "Failed to set registry for ${drvName}: $($_.Exception.Message)" } } } else { Write-Host 'No NVMe driver found, no need to do anything' } } Set_Nvme_RegIf the output is
IoTimeoutValue Modified successfully for AliNVMeorIoTimeoutValue Modified successfully for stornvme, the modification is successful.Restart the instance for the configuration to take effect.
ImportantRestarting the instance interrupts your services. Plan the restart time carefully.
In the upper-right corner of the instance details page, click Restart.
In the pop-up window, click Confirm to immediately restart the instance.
Method 2: Manually modify the registry
Identify the NVMe driver name.
Right-click the
icon and then click Device Manager.Expand Storage controllers, right-click Standard NVM Express Controller or Alibaba NVMe Elastic Block Storage Adapter, and then click Properties.
On the Properties page, go to the Driver tab and then click Driver Details.
In Driver files, note the driver name (AliNVMe or stornvme).
Adjust the I/O timeout for the NVMe drive.
Perform the steps based on the driver name.
AliNVMe
Right-click the
icon and then click Run. Enter regeditto open the Registry Editor.Locate the driver service path.
In the navigation pane of Registry Editor, expand the following path:
Click Parameters. In the right pane, right-click a blank area, select , and name the new value IoTimeoutValue.
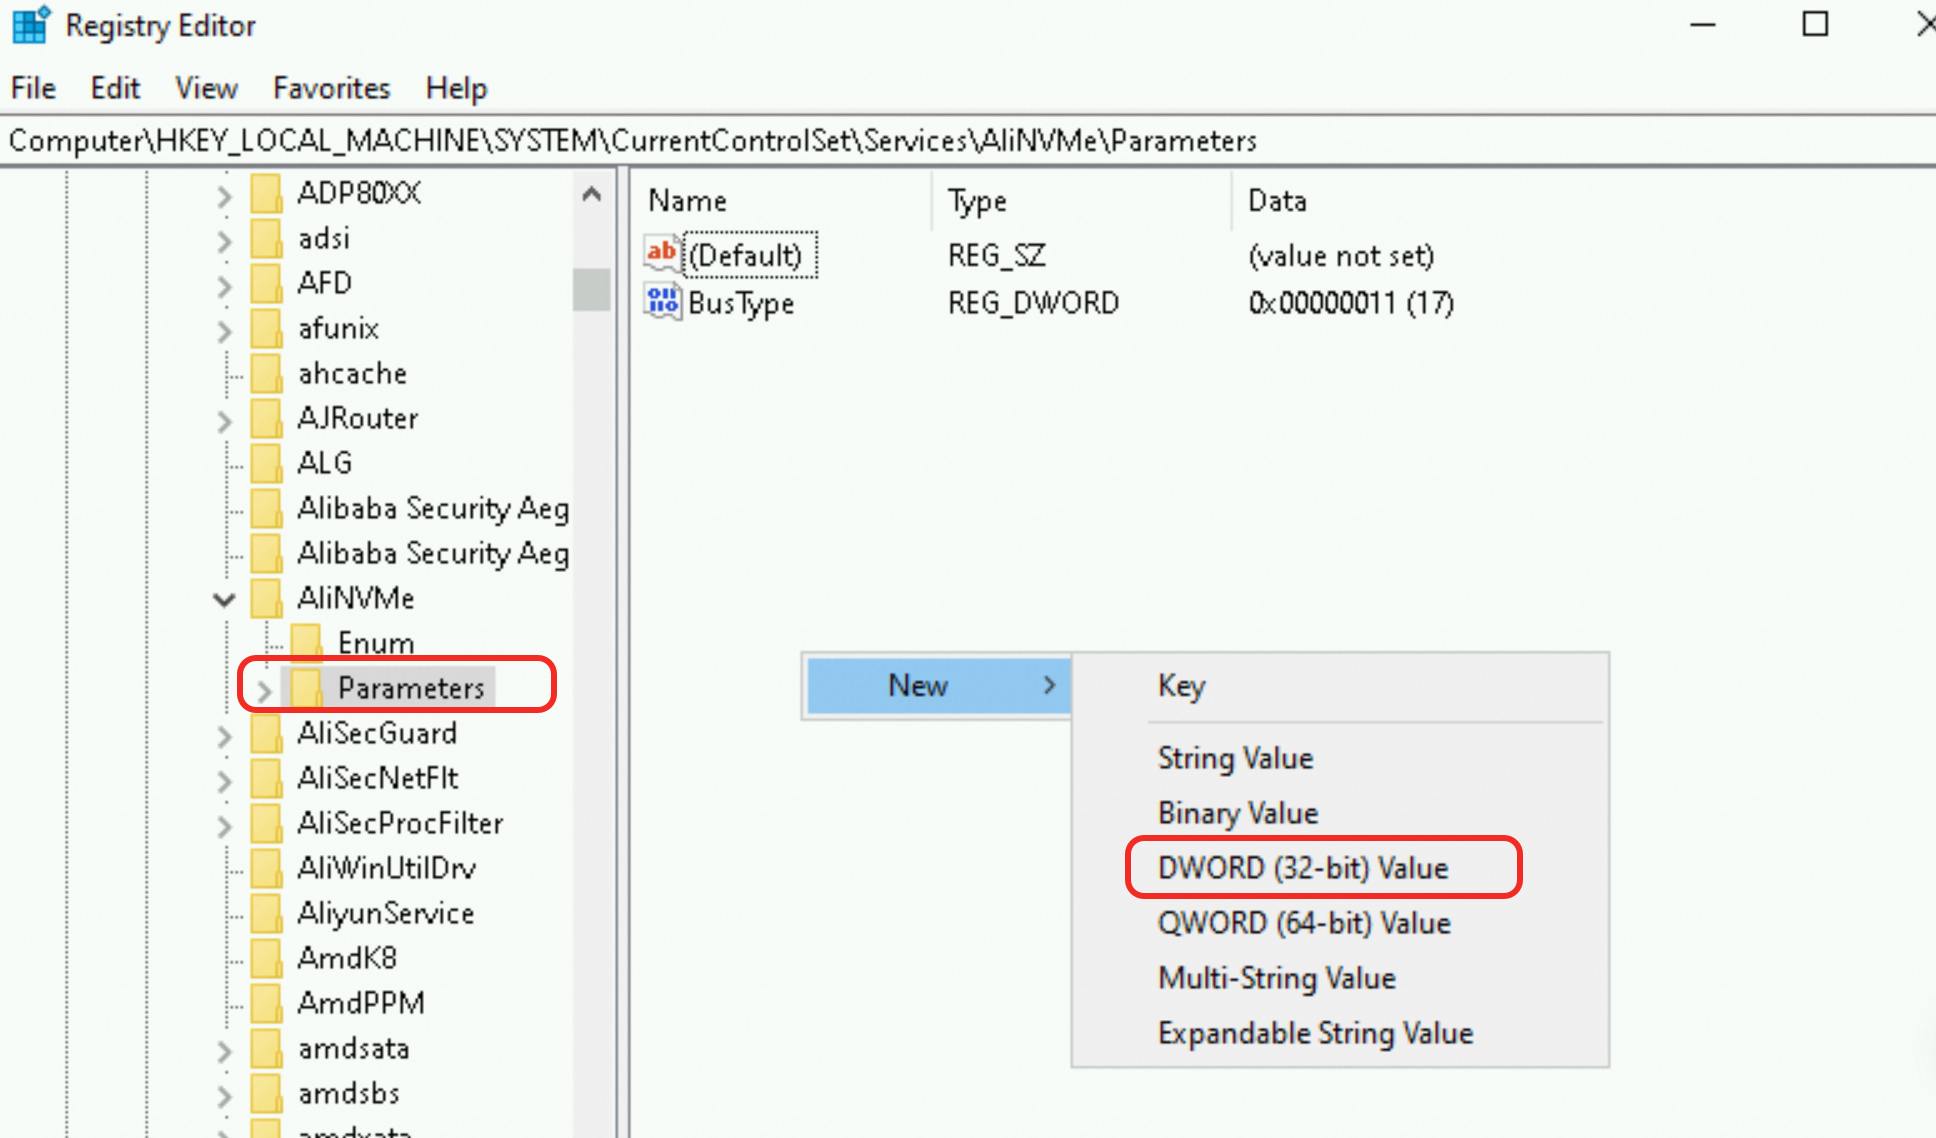
Double-click the new value. In the dialog box that appears, change the base to Decimal, set Value data to
65535, and then click OK.
stornvme
Right-click the
icon and then click Run. Enter regeditto open the Registry Editor.Locate the driver service path.
In the navigation pane of Registry Editor, expand the following path:
Click Parameters and check if the IoTimeoutValue file exists. If it does not exist, right-click a blank area in the right pane, select , and name the new file IoTimeoutValue.
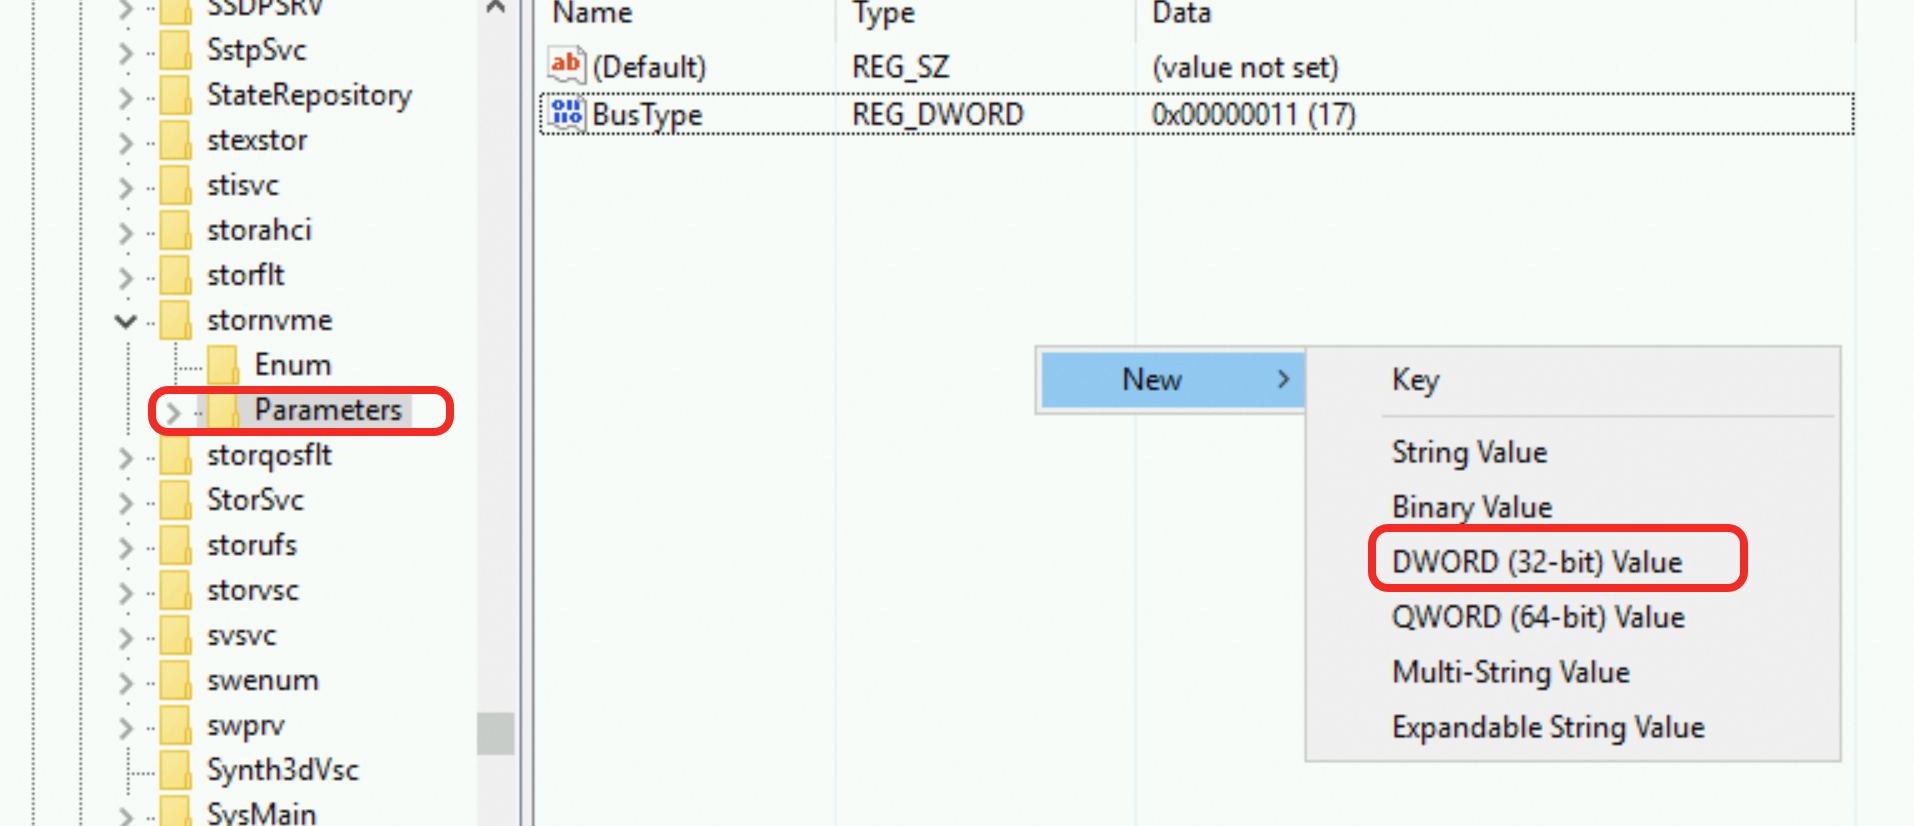
Double-click the IoTimeoutValue value. In the dialog box that appears, set the base to Decimal, set Value data to
65535, and then click OK.
Restart the instance for the configuration to take effect.
ImportantRestarting the instance interrupts your services. Plan the restart time carefully.
In the upper-right corner of the instance details page, click Restart.
In the pop-up window, click Confirm to immediately restart the instance.