Diagnose and fix a Windows ECS instance stuck in "Preparing Automatic Repair" mode on startup.
Symptom
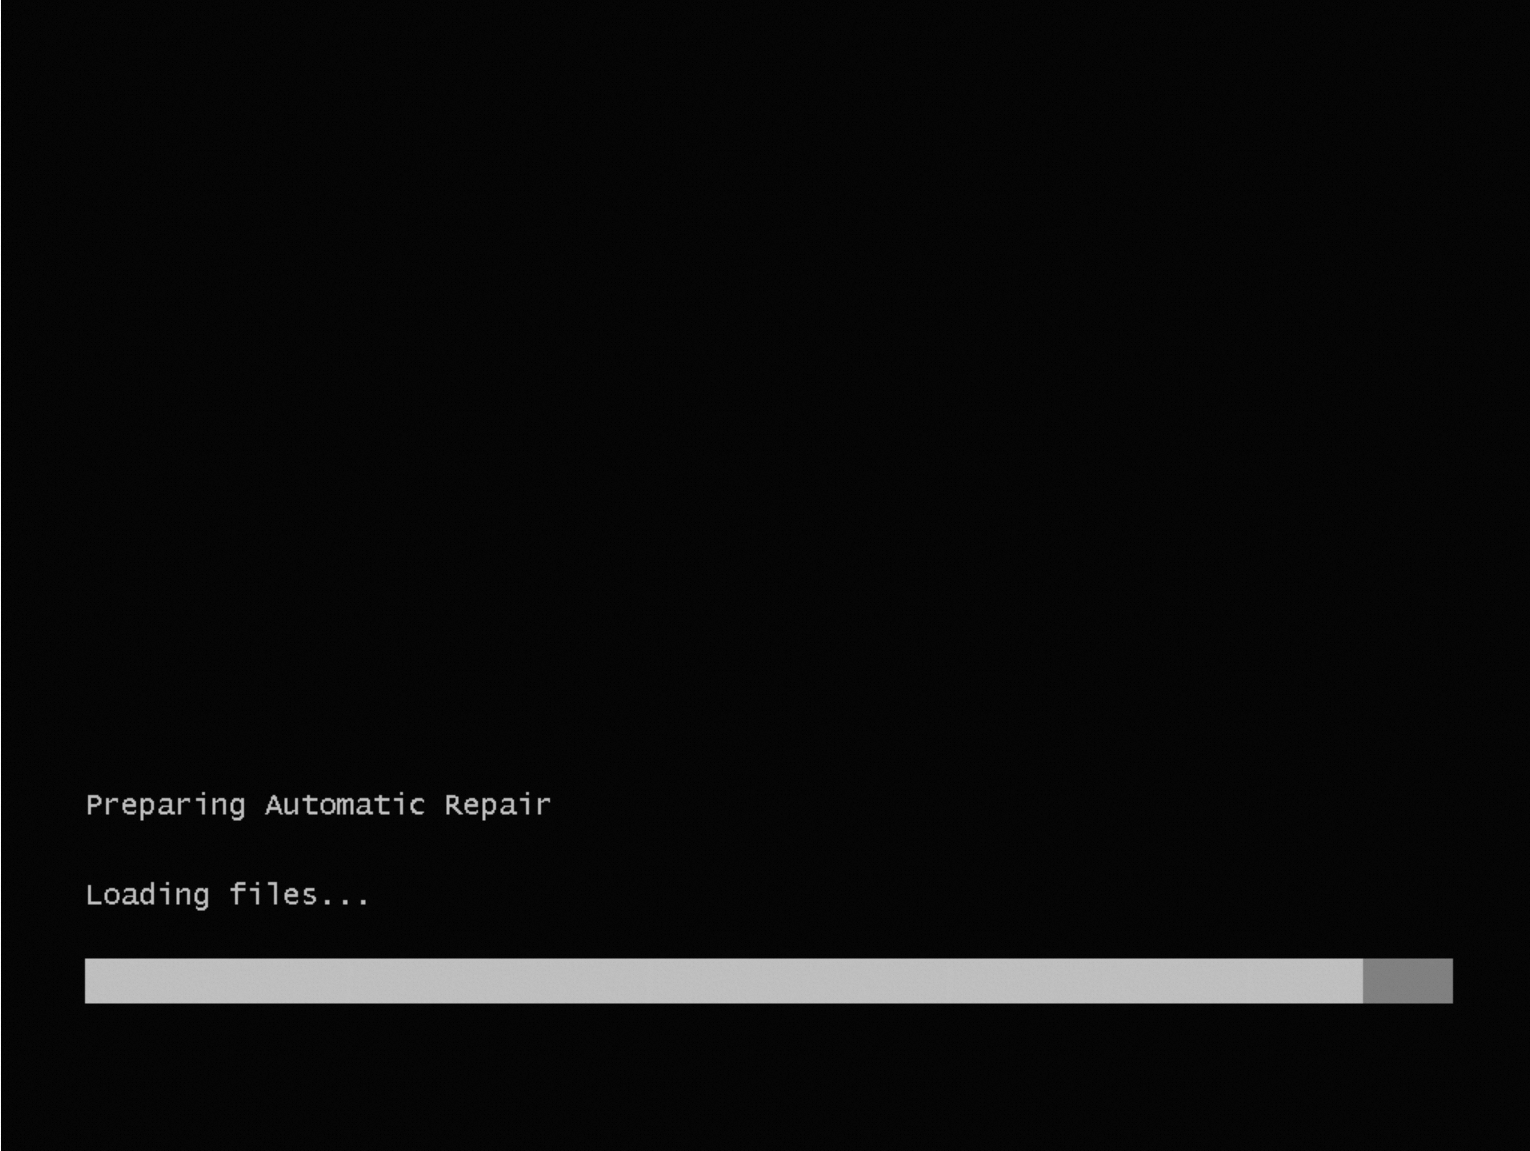
When a Windows ECS instance starts, the OS fails to load and displays the "Preparing Automatic Repair" message.
Causes
Use the instance health diagnostics feature to identify the cause and apply the corresponding solution.
|
Cause |
Solution |
|
The Windows partition does not exist or has missing files. |
This issue typically occurs when the instance is created from a faulty custom image. Create a valid image and use it to Replace system disk (OS). See Create Windows image files. |
|
The Windows partition file system type is not NTFS. |
|
|
The Windows partition is smaller than 20 GB. |
Extend the disk. See Extend the partitions and file systems of disks on a Windows instance. |
|
The Windows partition is read-only. |
|
|
The Windows partition is hidden. |
|
|
A critical registry file is missing. |
|
|
A critical registry file is corrupted. |
|
|
The Boot Configuration Data (BCD) file is missing. |
|
|
The BCD file is corrupted. |
|
|
The BootMgr file is missing. |
|
|
The BootMgr file is corrupted. |
|
|
The boot device or disk specified in the BootMgr configuration does not exist. |
|
|
The OS bootloader is missing. |
Clear the read-only attribute for the Windows partition
Clear the read-only attribute on the Windows partition of the faulty instance with a repair disk attached.
-
Connect to the faulty instance.
On the Diagnostic Result page, click VNC Connection. Enter the Administrator username and password from the diagnostic report to log on to the ECS instance with the repair disk attached. See Connect to an instance by using VNC.
-
Clear the read-only attribute for the Windows partition.
Use one of the following methods:
Use the DiskPart utility
In this example, the Windows partition drive letter is D.
-
Open
DiskPart.Search for
diskpartin the taskbar search box and press Enter, or openWindows PowerShelland rundiskpart. -
Select the target volume.
select volume D -
Clear the read-only attribute.
attribute volume clear readonly
Run a PowerShell command
In this example, the faulty OS disk number is 1 and the system partition number is 1.
Set-Partition -DiskNumber 1 -PartitionNumber 1 -IsReadOnly $false -
-
On the Instance page, move the pointer over the Fixing state that corresponds to the instance and click Detach Repair Disk.
-
Restart the instance for the changes to take effect.
See Restart an instance.
-
Connect to the ECS instance. If the connection succeeds, the issue is resolved.
Clear the hidden attribute for the Windows partition
Clear the hidden attribute on the Windows partition of the faulty instance with a repair disk attached.
-
Connect to the faulty instance.
On the Diagnostic Result page, click VNC Connection. Enter the Administrator username and password from the diagnostic report to log on to the ECS instance with the repair disk attached. See Connect to an instance by using VNC.
-
Clear the hidden attribute for the Windows partition. In this example, the faulty system disk drive letter is D and the hidden partition number is 1.
Use one of the following methods:
Use the DiskPart utility
-
Open
DiskPart.Search for
diskpartin the taskbar search box and press Enter, or openWindows PowerShelland rundiskpart. -
Select the target disk.
select disk D -
Select the hidden partition.
select partition 1 -
Clear the hidden attribute.
attribute volume clear hidden
Run a PowerShell command
In PowerShell, run:
Set-Partition -DiskNumber D -PartitionNumber 1 -IsHidden $false -
-
On the Instance page, move the pointer over the Fixing state that corresponds to the instance and click Detach Repair Disk.
-
Restart the instance for the changes to take effect.
See Restart an instance.
-
Connect to the ECS instance. If the connection succeeds, the issue is resolved.
Repair a corrupted registry file
Solution 1: Repair a corrupted registry file in Repair mode
-
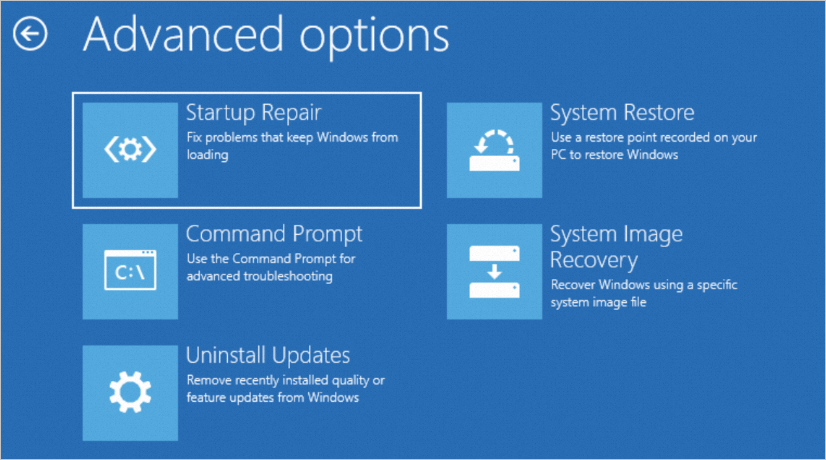
In Repair mode, click Startup Repair to repair the startup failure.
-
Choose a repair method based on whether a backup of the corrupted registry file exists:
-
If a backup exists, replace the corrupted file with the backup.
NoteRegistry backups are typically in
C:\Windows\System32\config\regback. -
If no backup is available, run one of the following commands:
-
dism /Image:D: /Cleanup-image /Restorehealth -
sfc /scannow /offbootdir=D:\ /offwindir=D:\Windows /offlogfile=C:\sfclog.txt
-
-
-
Connect to the ECS instance. If the connection succeeds, the issue is resolved.
Solution 2: Repair a corrupted registry file when you repair the instance
Repair a corrupted registry file on the faulty instance with a repair disk attached. In this example, the repair disk drive letter is D.
-
Connect to the faulty instance.
On the Diagnostic Result page, click VNC Connection. Enter the Administrator username and password from the diagnostic report to log on to the ECS instance with the repair disk attached. See Connect to an instance by using VNC.
-
Repair the corrupted registry file.
-
Choose a repair method based on whether a backup exists:
-
If a backup exists, replace the corrupted file with the backup.
NoteRegistry backups are typically in
D:\Windows\System32\config\regback. -
If no backup is available, run one of the following commands:
-
dism /Image:D: /Cleanup-image /Restorehealth -
sfc /scannow /offbootdir=D:\ /offwindir=D:\Windows /offlogfile=C:\sfclog.txt
-
-
-
-
Connect to the ECS instance. If the connection succeeds, the issue is resolved.
Configure Windows boot entries
If the startup failure is caused by incorrect boot settings, reconfigure the boot mode on the faulty instance with a repair disk attached.
-
Connect to the faulty instance.
On the Diagnostic Result page, click VNC Connection. Enter the Administrator username and password from the diagnostic report to log on to the ECS instance with the repair disk attached. See Connect to an instance by using VNC.
-
Run Command Prompt as an administrator.
-
Reconfigure the boot mode with BCDboot.
The command varies by boot mode. In this example, S is the system partition drive letter and C is the Windows partition drive letter.
-
UEFI boot mode:
bcdboot C:\Windows /s S: -
BIOS boot mode:
bcdboot C:\Windows /s S: /f UEFINoteIf a second Windows installation exists on the D disk, run one of the following commands to add it to the boot menu:
-
UEFI boot mode:
bcdboot D:\Windows /s S: /d /p /addlast -
BIOS boot mode:
bcdboot D:\Windows /s S: /d /p /addlast /f UEFI
-
-
-
Verify the boot configuration:
-
UEFI boot mode:
bcdedit /store S:\Boot\BCD -
BIOS boot mode:
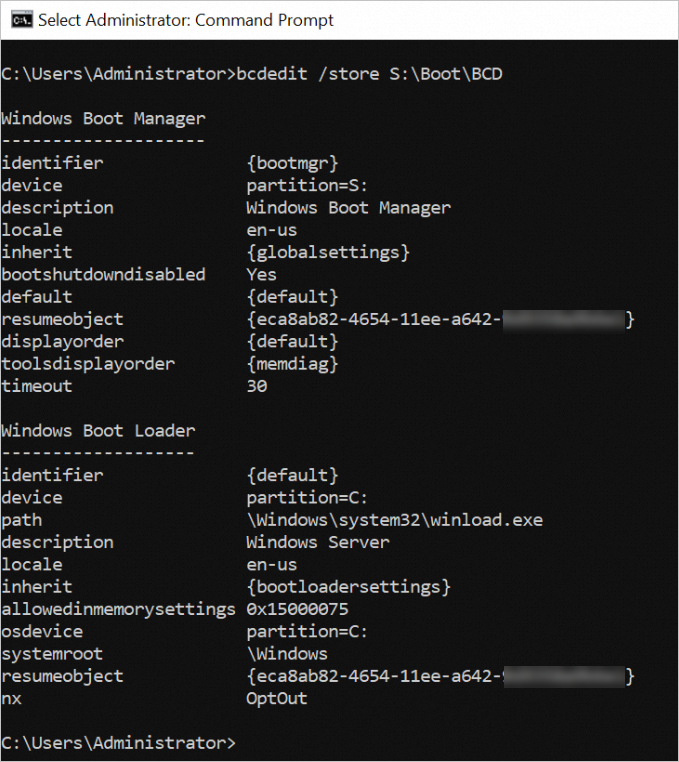
bcdedit /store S:\EFI\Microsoft\Boot\BCDIf the output matches the following sample, the boot configuration is correct.
-
-
On the Instance page, move the pointer over the Fixing state that corresponds to the instance and click Detach Repair Disk.
-
Start the ECS instance.
See Start an instance.