After you perform a cross-generation instance type change on a Windows instance in the ECS console, the instance may fail to start and show a blue screen with the "INACCESSIBLE_BOOT_DEVICE" error, which prevents the operating system from loading. This topic describes how to resolve this issue.
Problem description
Trigger conditions
This issue occurs when you perform a cross-generation instance type change on an ECS instance that runs Windows, such as changing the instance family from ecs.g7 (VirtIO-SCSI) to ecs.g8i (NVMe).
Symptoms
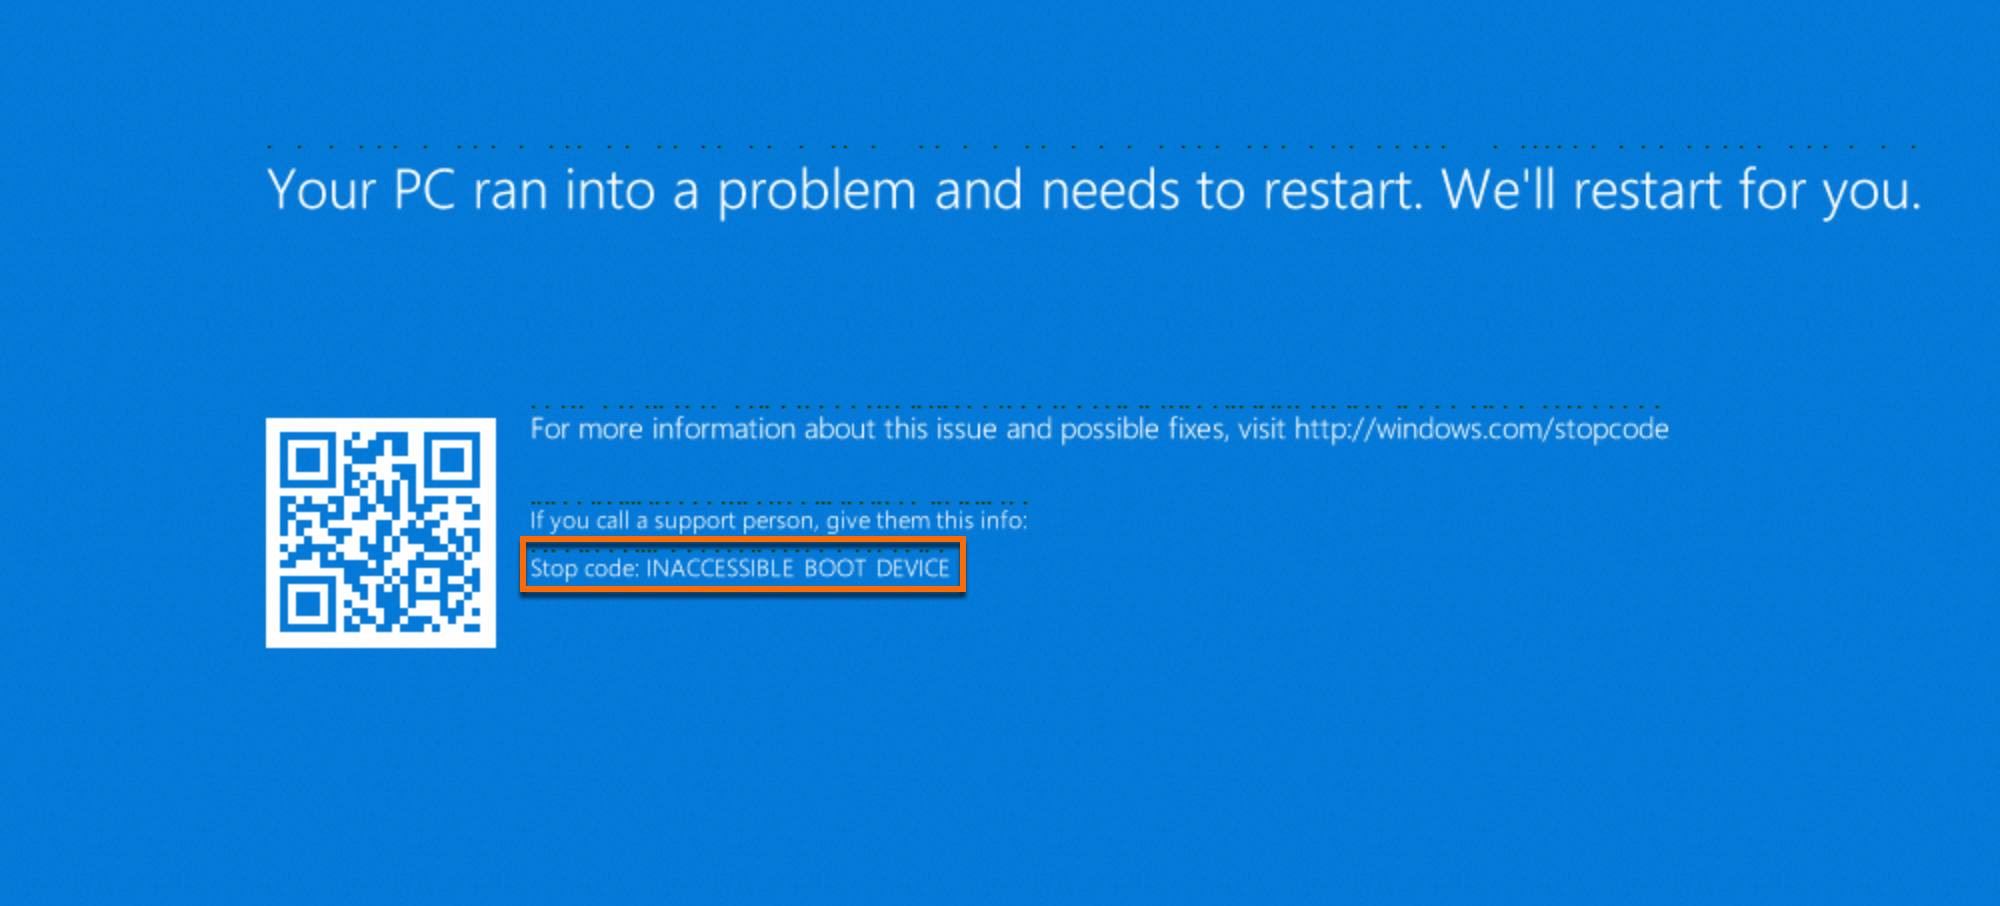
After the instance is started in the ECS console, you cannot connect to it by using Remote Desktop Connection (RDP). When you log on to the instance by using a VNC connection, you find that the operating system shows a blue screen with the error message Stop Code: (INACCESSIBLE_BOOT_DEVICE) during the boot process.
Error screenshot
Root cause
To optimize boot speed, the Windows operating system loads only the critical drivers required by the current hardware environment during a normal startup.
When you perform a cross-generation instance type change for an ECS instance, the interface protocol of the underlying storage hardware may change.
For example, if you upgrade an instance fromecs.g7toecs.g8i, the underlying storage driver switches fromVirtIO-SCSItoNVMe. After the instance type change, the operating system still attempts to load the old storage driver (viostor.sys) during the boot phase. However, the hardware now uses theNVMeinterface. As a result, the system disk cannot be recognized or accessed, which triggers theINACCESSIBLE_BOOT_DEVICEblue screen error because no bootable device can be found.
Workaround
This workaround is intended to quickly restore service access, not to provide a permanent solution.
To quickly restore your services, you can first change the instance type back to the original one.
After your services are restored, if you still need to upgrade to the new instance type, first follow the steps in the Preventive measures section to prepare the instance. Then, schedule a new maintenance window to change the instance type again.
Solutions
Solution 1: Automatic repair in safe mode (Recommended)
This solution uses Windows safe mode to automatically load generic drivers and resolve the issue.
Before you perform the repair, you must create a manual snapshot for the instance to prevent data loss due to operational errors.
Procedure
-
Log on to the failed instance by using a VNC connection. After two consecutive boot failures, the instance automatically enters the recovery screen. On this screen, select Troubleshoot to go to the Advanced options screen.
-
On the Advanced options screen, select Startup Settings.
-
On the Startup Settings screen, click Restart.
-
After the instance restarts, the Advanced Boot Options menu appears. Select Safe Mode With Networking and press
Enter. Wait for the system to load in safe mode. -
Follow the on-screen instructions to log on to the system and enter the safe mode desktop. The new storage driver is automatically loaded and registered.
-
In the ECS console, restart the instance and then log on to the instance by using a VNC connection. If the instance starts normally and enters the Windows desktop, the issue is resolved.
Solution 2: Edit the registry offline
This solution uses the command-line tools in the Windows Recovery Environment to modify the registry offline and force the storage driver to load.
Before you perform the repair, you must create a manual snapshot for the instance to prevent data loss due to operational errors.
Procedure
-
Log on to the failed instance by using a VNC connection. After two consecutive boot failures, the instance automatically enters the recovery screen. Select Troubleshoot to go to the Advanced options screen.
-
Select Command Prompt.
-
Select an account with administrative privileges (the default is administrator), enter the password, and open Command Prompt.
-
In the Command Prompt window, enter
regeditand press Enter to open Registry Editor. -
Select
HKEY_LOCAL_MACHINE. Then, from the menu bar, choose . -
In the file selection dialog box that appears, navigate to the path of the registry file on the system disk, which is typically
C:\Windows\System32\config\SYSTEM, and click Open. -
In the Load Hive dialog box, specify a temporary key name for the loaded hive, such as
OfflineSYSTEM, and then click OK. -
Expand
HKEY_LOCAL_MACHINE\OfflineSYSTEM\Selectand check the value of theDefaultkey. For example, if the value is1, the current control set isControlSet001. -
Find the following registry paths. Right-click each path and select Delete. If a path does not exist, ignore it.
HKEY_LOCAL_MACHINE\OfflineSYSTEM\ControlSet001\Services\AliNVMe\StartOverride HKEY_LOCAL_MACHINE\OfflineSYSTEM\ControlSet001\Services\stornvme\StartOverride HKEY_LOCAL_MACHINE\OfflineSYSTEM\ControlSet001\Services\viostor\StartOverride -
Select the
OfflineSYSTEMkey that you loaded. From the menu bar, choose and confirm the action. -
Close Registry Editor and the Command Prompt window. Return to the options screen, select Continue, and wait for the system to restart.
Expected result: The instance restarts normally and displays the Windows logon screen.
Solution 3: Edit registry with a helper instance
This solution involves attaching the system disk of the failed instance to a working helper instance to perform a registry repair.
Before you perform the repair, you must create a snapshot for the instance to prevent data loss due to operational errors.
Procedure
-
Prepare a working Windows instance (helper instance) that meets the following requirements:
-
Different image: The image of the helper instance must be different from the image of the failed instance.
-
Same zone: The helper instance must be in the same zone as the failed instance.
-
-
In the ECS console, stop the failed instance, detach its system disk, and then attach the system disk as a data disk to the helper instance.
-
Log on to the helper instance by using Workbench. Press
Win+R, enterdiskmgmt.msc, and then pressEnterto open Disk Management. Right-click the newly attached disk and click Online. -
Press
Win+R, enterregedit, and then pressEnterto open Registry Editor. -
Select
HKEY_LOCAL_MACHINE. Then, from the menu bar, choose . -
In the dialog box that appears, navigate to the path of the registry file on the newly attached system disk and click Open.
For example, if the drive letter of the newly attached system disk is D, the path of the registry file is
D:\Windows\System32\config\SYSTEM. -
In the Load Hive dialog box, specify a temporary key name for the loaded hive, such as
OfflineSYSTEM, and then click OK.After the hive is loaded, the new OfflineSYSTEM key appears under the HKEY_LOCAL_MACHINE node.
-
Expand
HKEY_LOCAL_MACHINE\OfflineSYSTEM\Selectand check the value of theDefaultkey. For example, if the value is1, the current control set isControlSet001. -
Find the following registry paths. Right-click each path and select Delete. If a path does not exist, ignore it.
HKEY_LOCAL_MACHINE\OfflineSYSTEM\ControlSet001\Services\AliNVMe\StartOverride HKEY_LOCAL_MACHINE\OfflineSYSTEM\ControlSet001\Services\stornvme\StartOverride HKEY_LOCAL_MACHINE\OfflineSYSTEM\ControlSet001\Services\viostor\StartOverride -
Select the
OfflineSYSTEMkey that you loaded. From the menu bar, choose . Confirm the action and then exit Registry Editor. -
Press
Win+R, enterdiskmgmt.msc, and then pressEnterto open Disk Management. Right-click the newly attached disk and click Offline. -
In the ECS console, detach the repaired cloud disk from the helper instance and then attach it back to the original instance as a system disk.
-
Restart the failed instance and then log on to it by using a VNC connection.
Expected result: The instance restarts normally and displays the Windows logon screen.
Preventive measures
To prevent this issue, you must perform the following steps before you perform a cross-generation instance type change on a Windows instance. These tasks force the system to load all available storage drivers on the next startup.
Before you perform the repair, you must create a manual snapshot for the instance to prevent data loss due to operational errors.
Console (Cloud Assistant)
-
On the Cloud Assistant page in the ECS console, create a PowerShell command.
-
Paste the following commands into the Command Content box.
reg delete HKLM\SYSTEM\CurrentControlSet\Services\stornvme\StartOverride /f reg delete HKLM\SYSTEM\CurrentControlSet\Services\AliNVMe\StartOverride /f reg delete HKLM\SYSTEM\CurrentControlSet\Services\viostor\StartOverride /f -
Select the instances that you want to change and click Run. Ignore any "not found" error messages.
-
After the commands run successfully, you can change the instance type in the ECS console.
In-instance (manual)
-
Log on to the Windows instance for which you want to change the instance type.
-
Press
Win+R, enterpowershell, and then pressEnterto openPowerShell. -
Run the following commands to delete the related registry information. Ignore any "not found" error messages.
reg delete HKLM\SYSTEM\CurrentControlSet\Services\stornvme\StartOverride /f reg delete HKLM\SYSTEM\CurrentControlSet\Services\AliNVMe\StartOverride /f reg delete HKLM\SYSTEM\CurrentControlSet\Services\viostor\StartOverride /f -
After the commands are successfully run, you can change the instance type in the ECS console.
In-instance (plugin)
-
Log on to the Windows instance for which you want to change the instance type.
-
Press
Win+R, enterpowershell, and then pressEnterto openPowerShell. -
Run the following commands to switch to the Cloud Assistant directory and delete the related registry information. Ignore any "not found" error messages.
cd (Get-ChildItem "C:\ProgramData\aliyun\assist\" -Directory | Where-Object { $_.Name -match '^\d+(\.\d+){2,3}$' } | Sort-Object { [version]$_.Name } -Descending | Select-Object -First 1).FullName ./acs-plugin-manager.exe -e -P ACS-ECS-ScsiNvmeBootfix -
After the commands run successfully, you can change the instance type in the ECS console.