You can attach tags to Elastic Container Instance (ECI) resources, such as ECI instances, image caches, and virtual nodes. This lets you implement enterprise cost allocation based on tag categorization. This topic describes how to query split bill information based on tags.
Bind tags to Elastic Container Instance resources
Tags are similar to Kubernetes labels. You can use tags to mark ECI resources that share the same management or business requirements for easier resource categorization and filtering. You can attach tags to various ECI resources. For more information, see the following table.
Scenario | Resource | References |
You can perform operations in the ECI console or through OpenAPI. | Elastic container instances | |
Image caches | ||
VNodes | Manually deploy a VNode in a self-managed Kubernetes cluster | |
Add tags by adding annotations to Kubernetes clusters | Elastic container instances |
By default, the following tags are added to the elastic container instances that are created using Container Service for Kubernetes:
ManagedBy: the type of the cluster.
ClusterId: the cluster ID.
NameSpace: the namespace of the cluster.
OwnerReferenceKind: the type of the workload that is created in the cluster, such as Deployment and Job.
OwnerReferenceName: the name of the workload that is created in the cluster, such as Deployment name and Job name.
PodName: the name of the pod.
Query split bills based on tags
Log on to the Elastic Container Instance console.
In the top navigation bar, click Expenses to go to the Expenses and Costs.
In the navigation pane on the left, choose .
Enable cost allocation tags.
Enabling for the first time
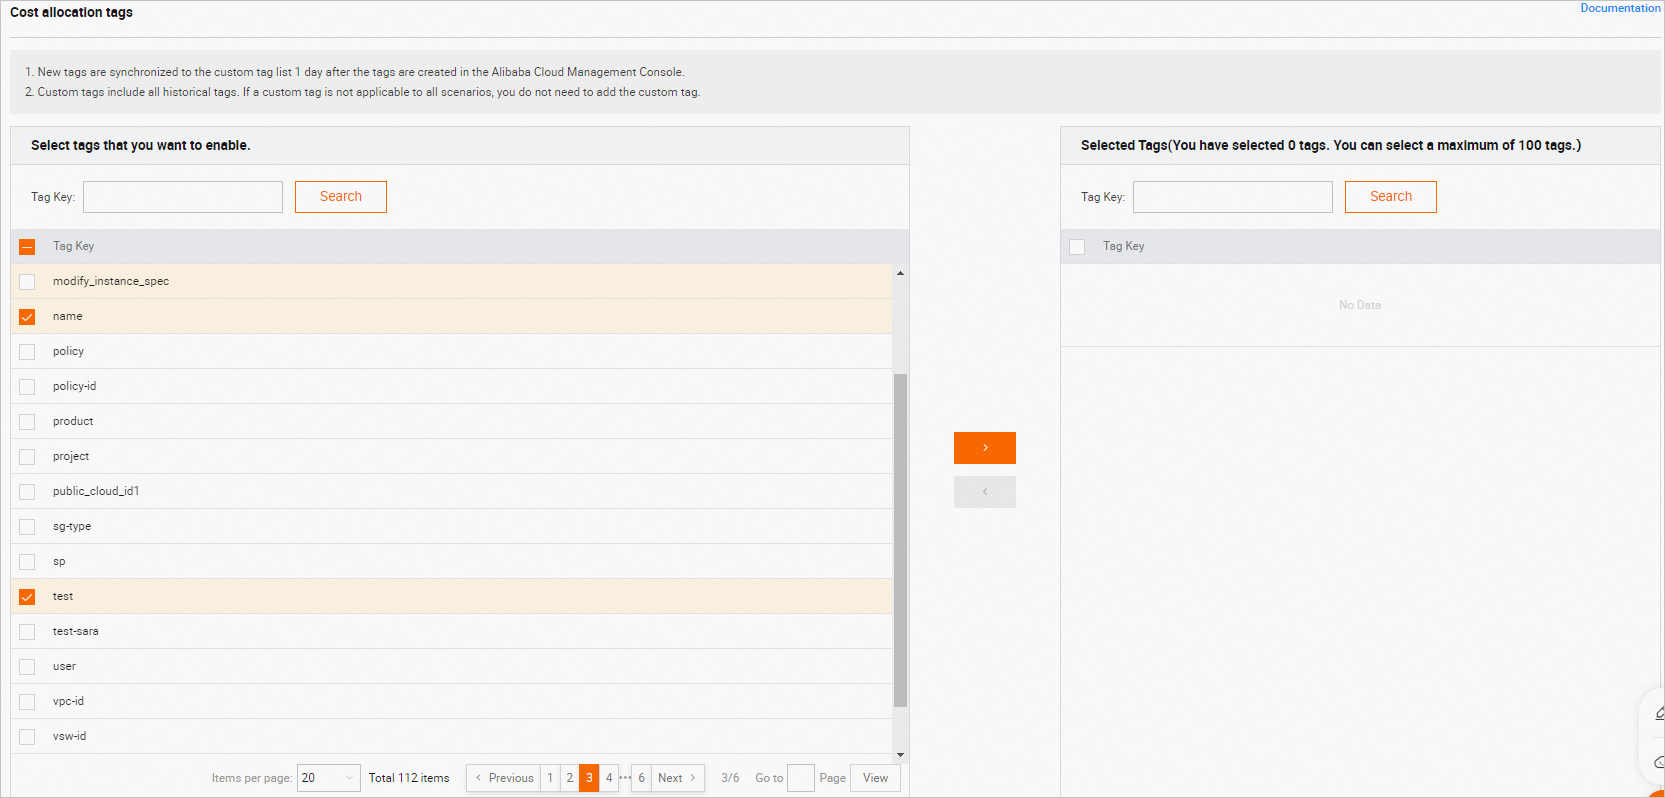
On the Cost allocation tags page, read the description of tags and click Next.
Select a tag that you want to enable, click ">" to move the tag to the Selected Tags list, and then click Next.
Click Enable.
Previously enabled
To enable a single tag, find the tag and click Enable in the Operations column.
To enable multiple tags at a time, select the tags and click Batch Enable in the lower part of the page.
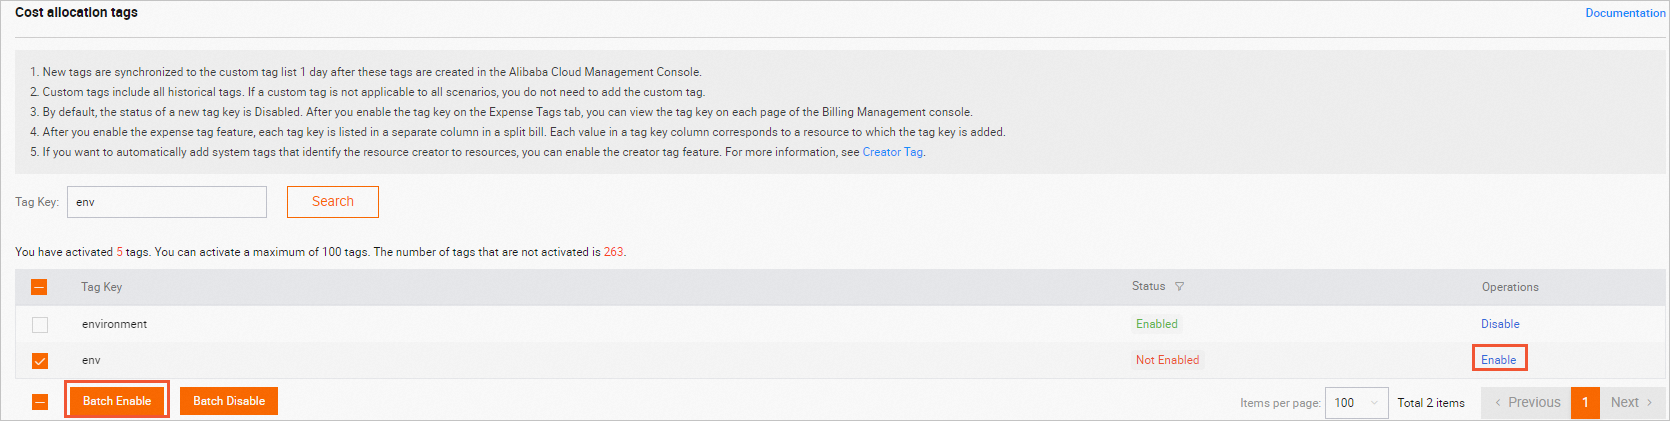
NoteTags are case-sensitive. If many tags are displayed in the list, you can search for tags by key.
In the navigation pane on the left, choose . You can allocate resources to cost centers by tag.
Add a cost center.
In the navigation pane on the left of the Cost Centers page, click the "+" icon next to Cost Center.
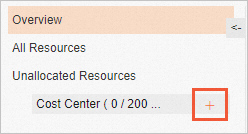
In the Add Cost Center dialog box, enter a name for the cost center and click OK.
Allocate resources to the cost center.
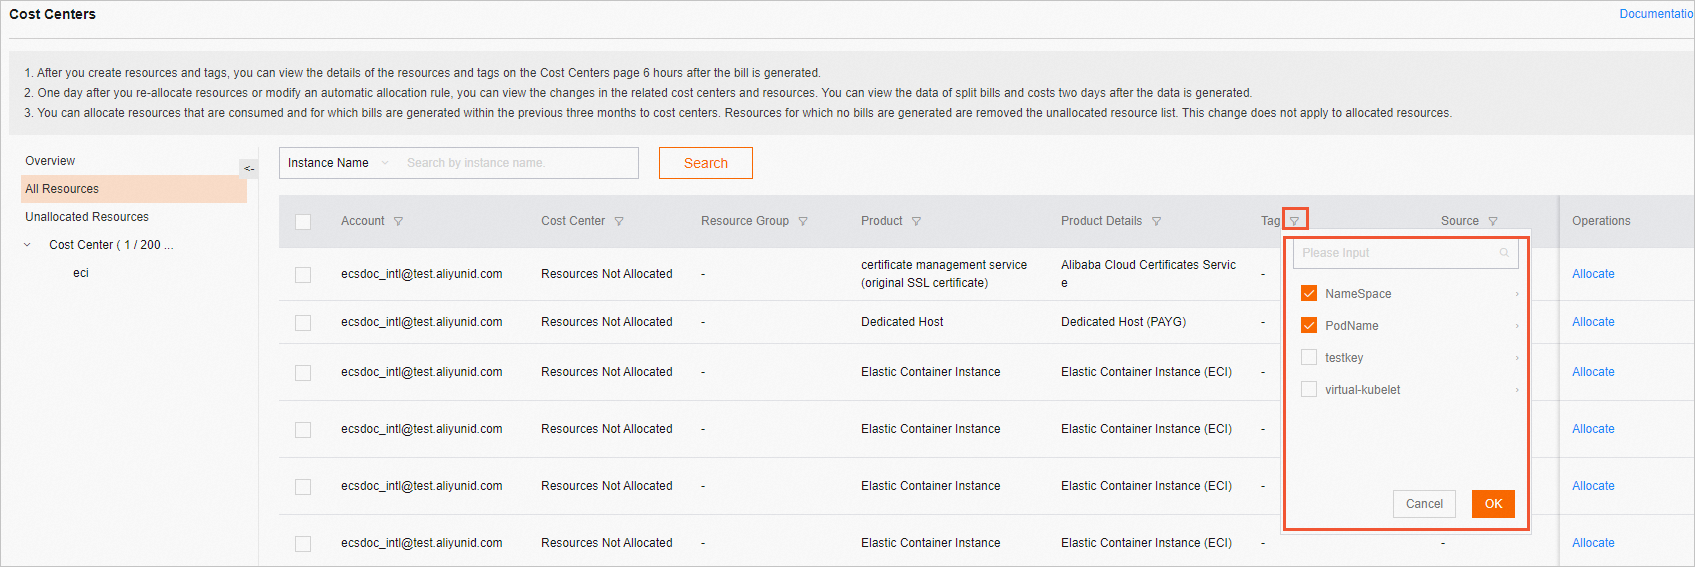
In the navigation pane on the left of the Cost Centers page, click All Resources.
In the Tag column of the resource list on the right, click the filter icon. In the dialog box that appears, select the tags that you enabled and click OK.
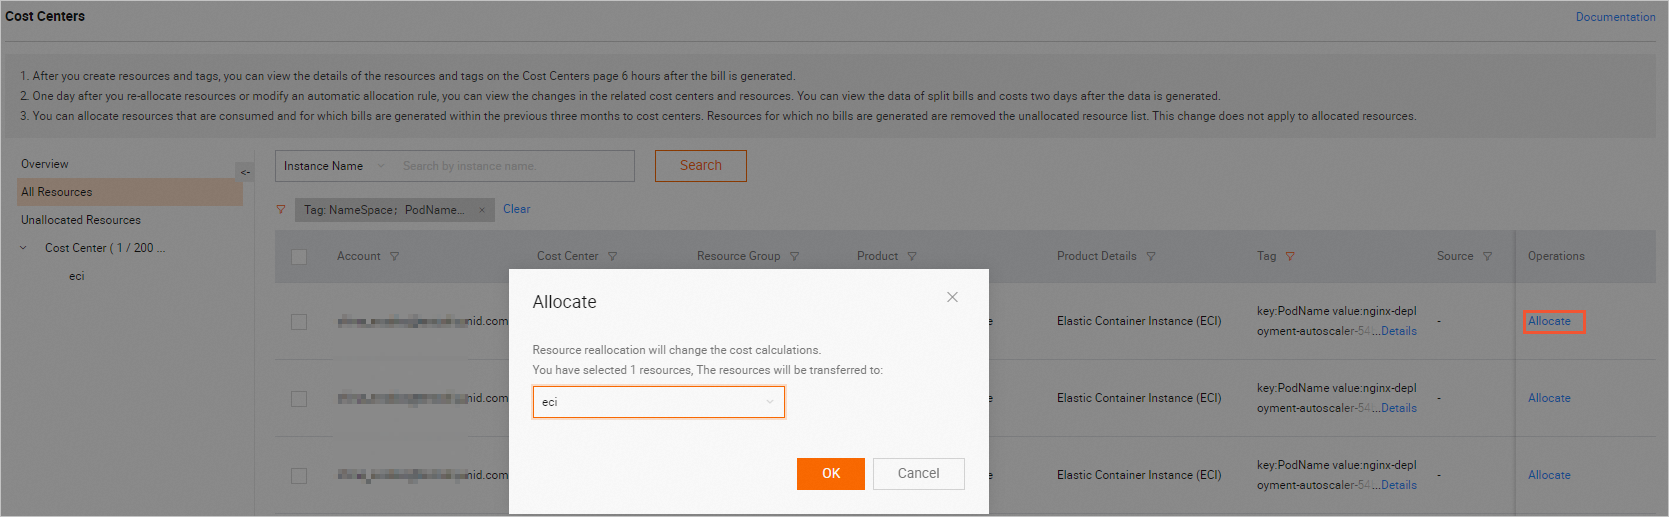
Select Elastic Container Instance resources from the filter results and click Allocate. In the Allocate dialog box, select the cost center that you added and click OK.
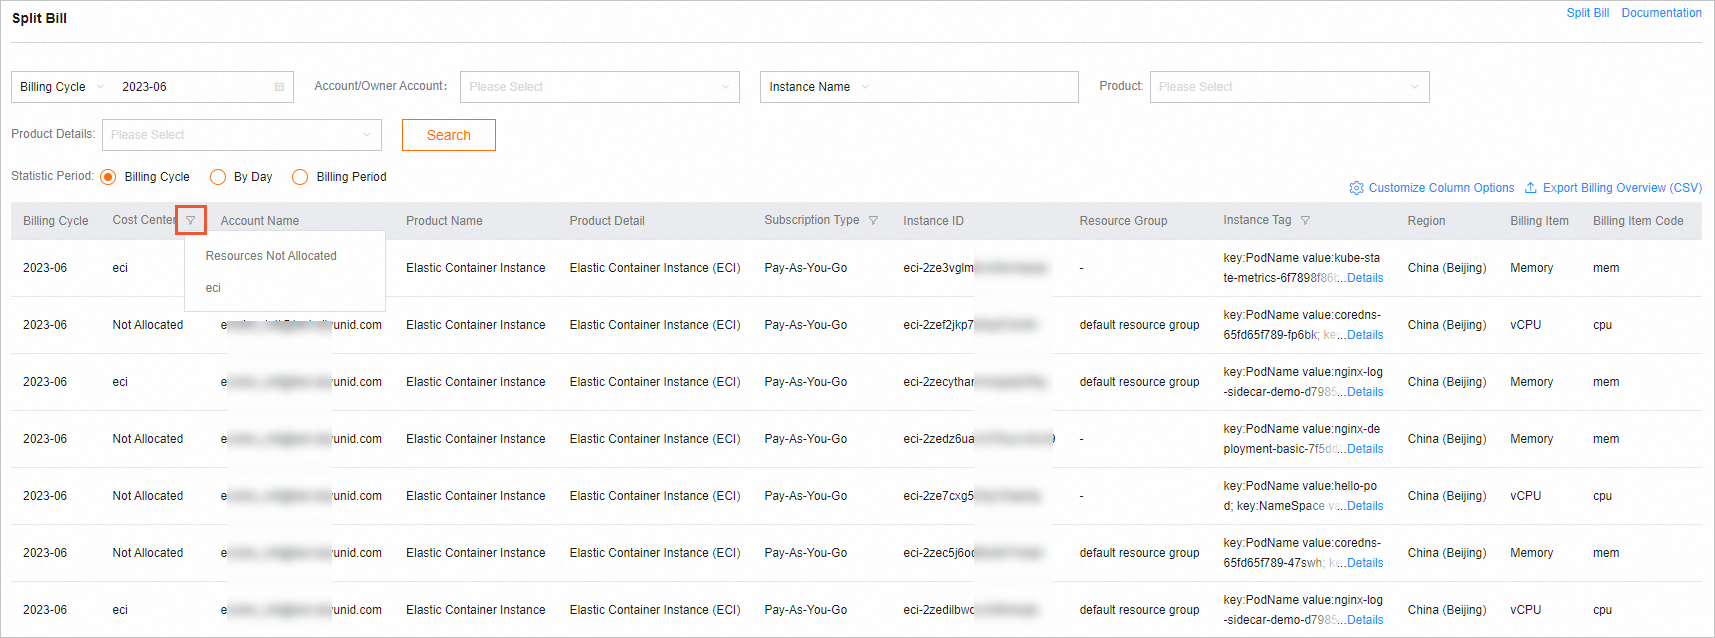
In the navigation pane on the left, choose . On the Split Bill page, filter and view split bills by cost center.
NoteThe first time you use the split bill feature, follow the on-screen instructions to enable the feature.
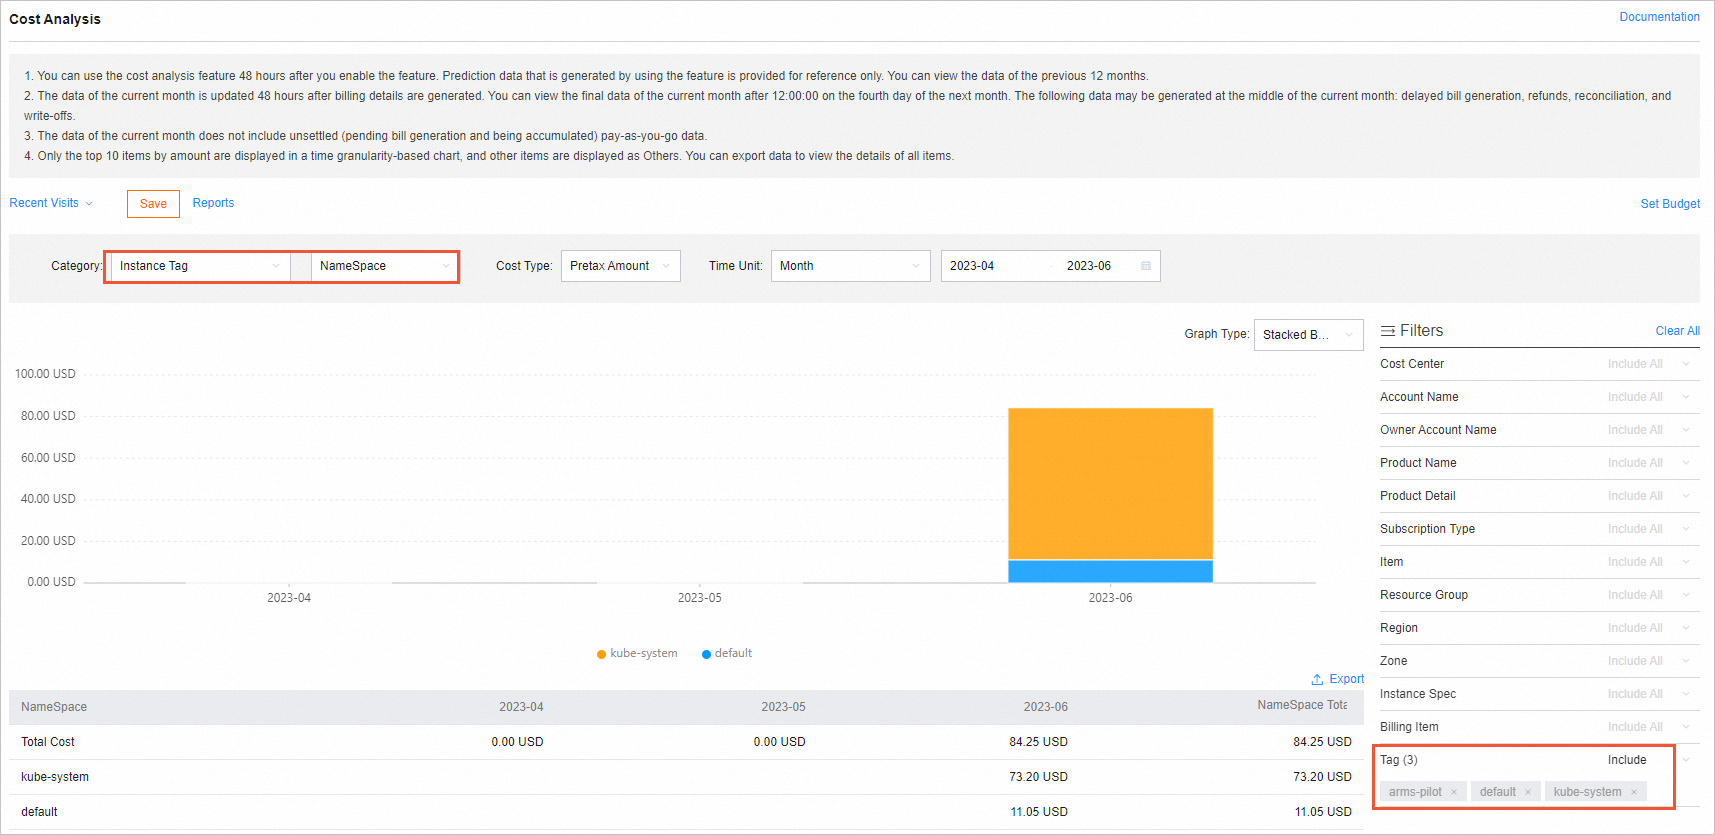
In the navigation pane on the left, choose . Filter costs by cost center and tag to view the cost analysis.
NoteThe first time you use the cost analysis feature, follow the on-screen instructions to enable the feature.
On the Cost Analysis page, the display mode of charts varies based on the value of Category. The filters that you select from the Filters section on the right filter the data that you want to view. For example, you can select Instance Tag from the Category drop-down list, and then select the tags that you want to view in the Filters section. This way, you can view the cost details of the resources to which the tags are added.