This topic describes how to use an Elastic High Performance Computing (E-HPC) cluster to perform virtual drug screening with AutoDock Vina.
Background information
Molecular docking is a key step in virtual drug screening. AutoDock Vina is an open-source molecular docking software, famous for its high speed and accurate algorithms. It is suitable for virtual screening based on molecular docking and uses the MGLTools toolkit. MGLTools includes AutoDock Tools (ADT) and Python Molecular Viewer (PMV). ADT is used to generate input files for Vina, and PMV is used to view the results. For more information, see AutoDock Vina and MGLTools.
This topic describes how to simulate the interaction between small-molecule ligands and macromolecular receptors to predict their binding patterns and affinity, and screen for potential drugs. Widely used commercial compound libraries, such as Specs, Enamine, and ChemDiv, provide many ligands that can be used to simulate the interaction between ligands and a given receptor. Because the ligands are independent of each other, they can be processed in a massively parallel processing mode. The process described in this topic is also applicable to other scenarios that require batch processing and high concurrency.
Preparations
Create an E-HPC cluster. For more information, see Create a cluster using the wizard.
The following describes the parameters:
Parameter | Description |
Hardware parameters | The deployment mode is Standard. The cluster contains two management nodes, one compute node, and one logon node. All nodes are of the ecs.c7.large instance type, which provides 2 vCPUs, 4 GiB of memory, and a 2.7 GHz Ice Lake processor. |
Software configuration | Select the CentOS 7.6 public image, select pbs as the scheduler, and enable VNC. |
Create a cluster user. For more information, see Create a user.
A cluster user is required to log on to the cluster. This is to perform operations such as compiling software and submitting jobs. In this topic, the following sample is created:
Username: vinatest
User group: sudo permission group
Install software. For more information, see Install software.
Install the following software:
vina, version 1.1.2.
AutoDockTools, version 1.5.7.
Step 1: Connect to the cluster
Connect to the cluster using one of the following methods. This topic uses the username vinatest. After you connect to the cluster, you are automatically logged on to the /home/vinatest.
Using a client
The scheduler of the cluster must be PBS. Make sure that you have downloaded and installed an E-HPC client and deployed the environment required for the client. For more information, see Deploy an environment for an E-HPC client.
Start and log on to your E-HPC client.
In the left-side navigation pane, click Session Management.
In the upper-right corner of the Session Management page, click terminal to open the Terminal window.
Using the console
Log on to the E-HPC console.
In the upper-left corner of the top navigation bar, select a region.
In the left-side navigation pane, click Cluster.
On the Cluster page, find the cluster and click Connect.
In the Connect panel, enter a username and a password, and click Connect via SSH.
Step 2: Submit the job
Download and decompress the job file.
Download the job file.
NoteIf Git is not installed in the cluster,
sudo yum install -y gitto install it.git clone https://best-practice:Abcd123456@codeup.aliyun.com/best-practice/bp/022.gitDecompress the job file.
cd 022
tar xzvf vina-ehpcarrayjob.tar.gz
Modify the configuration file.
cd vina-ehpcarrayjob
vim conf.txt
In the conf.txt file, delete the following two lines:
receptor = 1fkn_rgd.pdbqt
ligand = $file
Create a job script and name it vina.sh.
cd /home/vinatest
vim vina.sh
The script is as follows:
#!/bin/bash

#PBS -N vina_job
#PBS -l nodes=1:ppn=2
#PBS -l walltime=00:10:00
#PBS -j oe
#PBS -v receptor="022/vina-ehpcarrayjob/1fkn_rgd.pdbqt",ligand="022/vina-ehpcarrayjob/test/ligand_1.pdbqt",config="022/vina-ehpcarrayjob/conf.txt"


cd $PBS_O_WORKDIR

ppn="$NCPUS"
cd $PBS_O_WORKDIR


vina --receptor $receptor --config $config  --ligand $ligand --out out.pdbqt --cpu $ppn
Submit the job.
qsub vina.shThe following output is returned. The job ID is 0.scheduler.
0.scheduler
Step 3: View the results
View the job status.
qstat -x 0.schedulerThe following output is returned. When the value of
SisR, the job is running. When the value ofSisF, the job is complete.Job id Name User Time Use S Queue ---------------- ---------------- ---------------- -------- - ----- 0.scheduler vina_job vinatest 00:01:56 F workqNoteAfter the job is complete, the result file out.pdbqt is generated and saved to the path from submission. In this example, the path is
/home/vinatest/out.pdbqt.Use VNC to view the job result in visualization mode.
Enable VNC.
NoteMake sure that the ports required by VNC are enabled for the security group to which the cluster belongs. When you use the console, the system automatically enables the port 12016. When you use the client, you need to enable the ports manually. Port 12017 allows only one user to open the VNC Viewer window. If multiple users need to open the VNC Viewer window, you need to enable the corresponding number of ports, starting from port 12017.
Use the client
In the left-side navigation pane, click Session Management.
In the upper-right corner of the Session Management page, click VNC to open VNC Viewer.
Use the console
In the left-side navigation pane of the E-HPC console, click Cluster.
On the Cluster page, select a cluster. Choose More > VNC.
Use VNC to remotely connect to a visualization service. For more information, see Use VNC to manage a visualization service.
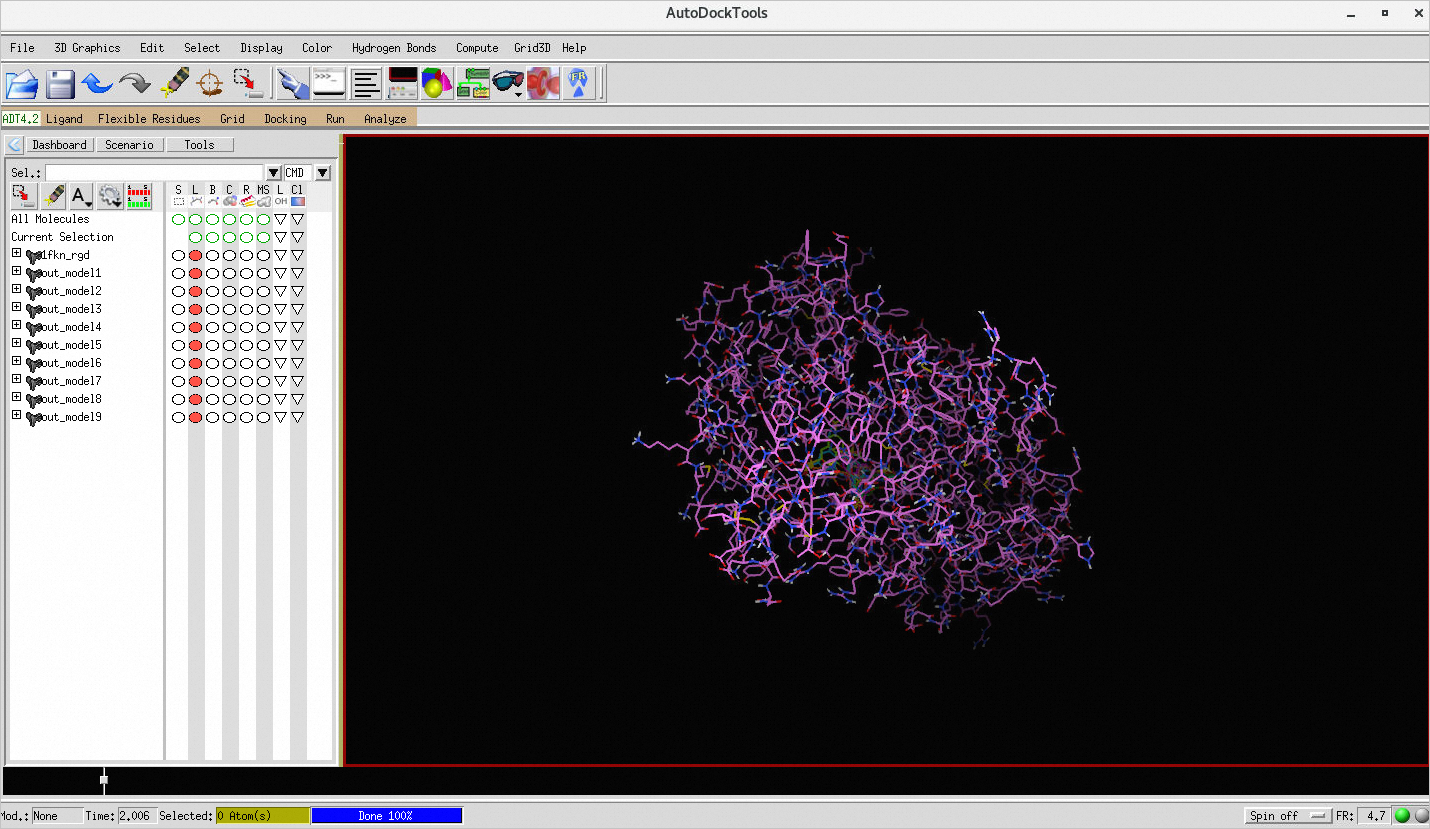
In the Virtualization Service dialog box of the cloud desktop, choose Application > System Tools > Terminal.
In the terminal, run the following command to open AutoDock Tools and load the job result.
/usr/local/bin/adt /home/vinatest/022/vina-ehpcarrayjob/1fkn_rgd.pdbqt /home/vinatest/out.pdbqtAfter the model is loaded, the result is displayed in the AutoDock Tools window as follows: