With the service mesh feature of ACK One, you can implement unified application distribution and traffic management across multiple clusters. This topic describes how to use an ACK One Fleet instance to manage application distribution and traffic between associated clusters.
Prerequisites
-
The service mesh feature is enabled for the ACK One Fleet instance.
-
Associated clusters have been added.
Background information
This topic provides an example of how to use an ACK One Fleet instance to deploy a Rollouts application to multiple associated clusters and apply traffic management rules to switch traffic between different application versions. For more information about multi-cluster application distribution, see application distribution.

-
You can deploy native Kubernetes resources, such as Deployments, Services, and ConfigMaps, to the associated clusters.
-
You can use an ACK One Fleet instance to apply traffic management rules to associated clusters without using the kubeconfig of the Service Mesh instance. The following resource types are supported:
-
DestinationRule
-
EnvoyFilter
-
Gateway
-
ServiceEntry
-
Sidecar
-
VirtualService
-
WorkloadEntry
-
WorkloadGroup
-
-
You access the application through the gateway address. The application routes requests based on the deployed traffic rules.
Procedure
Step 1: Create the application
-
Run the following command to enable automatic sidecar injection for the default namespace.
kubectl label namespace default istio-injection=enabled -
Create a file named podinfo-meta.yaml with the following content. This file defines the native Kubernetes resources for the application.
-
Run the following command to add the resources to the Fleet instance.
kubectl apply -f podinfo-meta.yaml -
Run the following command to get information about the associated clusters added to the Fleet instance.
For more information about the AMC CLI, see AMC CLI reference.
kubectl amc get managedclustersExpected output:
Name Alias HubAccepted c5f4110f2ad88499583fc76cc568a**** ack-hy-01 true c7f78dd3b09a146b8b750b4c1c51d**** ack-hy-02 true -
Create a file named podinfo-app.yaml with the following content to define an open-source KubeVela application named podinfo for multi-cluster distribution.
Replace
<clusterid1>and<clusterid2>with the IDs of the associated clusters that you obtained in the previous step.apiVersion: core.oam.dev/v1beta1 kind: Application metadata: name: podinfo namespace: default annotations: app.oam.dev/publishVersion: version1 spec: components: - name: podinfo type: ref-objects properties: objects: - apiVersion: apps/v1 kind: Deployment name: podinfo-blue - apiVersion: apps/v1 kind: Deployment name: podinfo-green - apiVersion: v1 kind: Service name: podinfo policies: - type: topology name: podinfo-clusters properties: clusters: ["<clusterid1>","<clusterid2>"] # Defines the target clusters for deployment. To update the target clusters, add or modify clusters in this field. -
Run the following command to deploy the
podinfoapplication on the Fleet instance.kubectl apply -f podinfo-app.yaml
Step 2: Configure a gateway and virtual service
-
Log on to the ASM console and create an Service Mesh ingress gateway. For more information, see Create an ingress gateway.
-
Create a file named podinfo-gateway.yaml with the following content.
apiVersion: networking.istio.io/v1alpha3 kind: Gateway metadata: name: podinfo-gateway spec: selector: istio: ingressgateway servers: - port: number: 80 name: http protocol: HTTP hosts: - "*" -
Run the following command to deploy the Istio gateway on the Fleet instance.
kubectl apply -f podinfo-gateway.yaml -
Create a file named virtual-service-all-blue.yaml with the following content.
apiVersion: networking.istio.io/v1alpha3 kind: VirtualService metadata: name: podinfo spec: hosts: - "*" gateways: - podinfo-gateway http: - match: - uri: prefix: / route: - destination: host: podinfo subset: blue port: number: 80 -
Run the following command to deploy the virtual service on the Fleet instance.
kubectl apply -f virtual-service-all-blue.yaml -
Create a file named destination-rule-all.yaml with the following content.
apiVersion: networking.istio.io/v1alpha3 kind: DestinationRule metadata: name: podinfo spec: host: podinfo trafficPolicy: outlierDetection: baseEjectionTime: 30s consecutiveErrors: 7 interval: 30s subsets: - name: blue labels: version: blue - name: green labels: version: green -
Run the following command to deploy the destination rule on the Fleet instance.
kubectl apply -f destination-rule-all.yaml
Step 3: Verify the result
-
Run the following command to get the IP address of the ASM gateway.
For more information about the AMC CLI, see AMC CLI reference.
kubectl amc get svc -n istio-system -m <associated_cluster_ID>Expected output:
Run on ManagedCluster c5f4110f2ad88499583fc76cc568a**** (ack-hy-01) NAME TYPE CLUSTER-IP EXTERNAL-IP PORT(S) AGE istio-ingressgateway LoadBalancer 10.12.1**.*** 47.113.***.*** 80:30315/TCP,443:32***/TCP 47h Run on ManagedCluster c7f78dd3b09a146b8b750b4c1c51d**** (ack-hy-02) NAME TYPE CLUSTER-IP EXTERNAL-IP PORT(S) AGE istio-ingressgateway LoadBalancer 10.75.9**.*** 47.113.***.*** 80:32101/TCP,443:30***/TCP 47h -
In your browser, go to http://<gateway_IP>/.
Replace
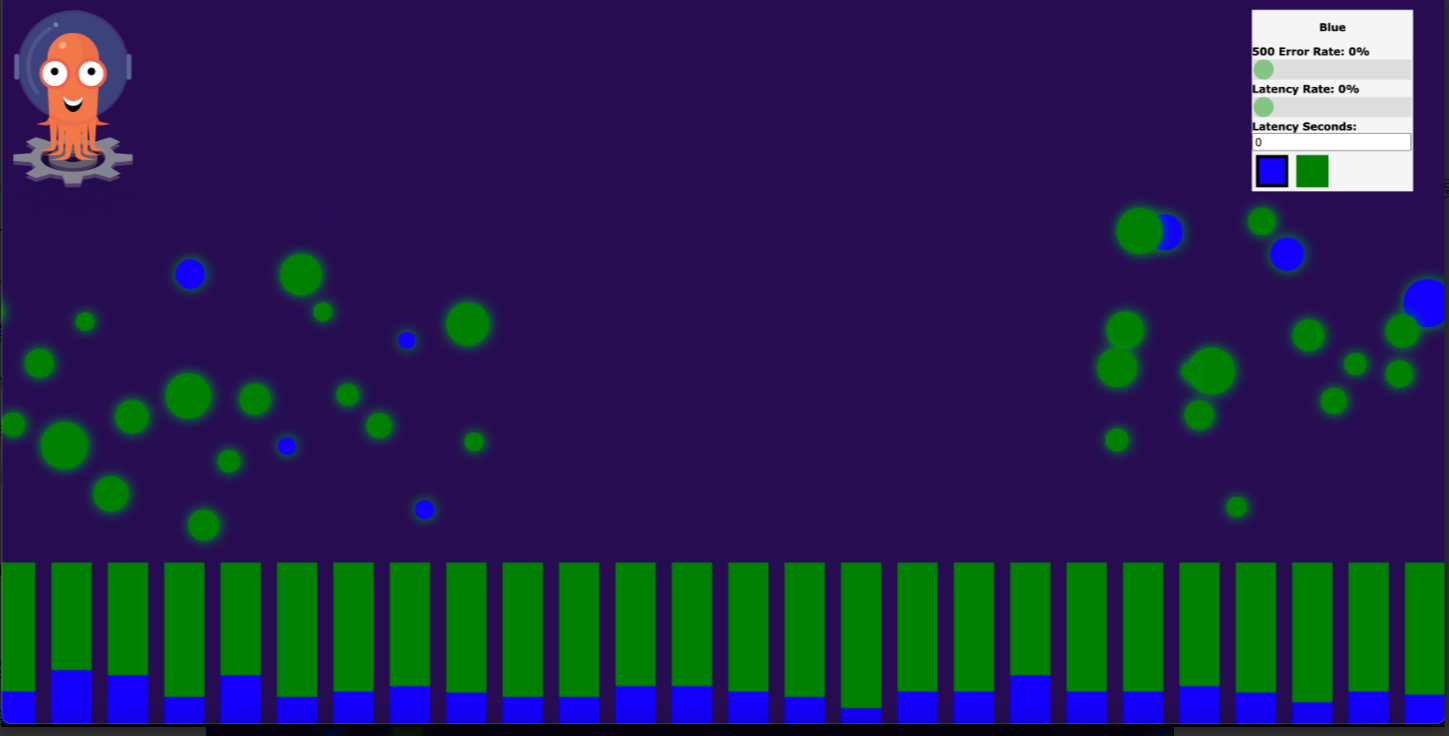
<gateway_IP>with theEXTERNAL-IPfrom the previous step. The page for theblueversion of the demo application appears. On the control panel in the upper-right corner, the title is Blue. The values for 500 Error Rate, Latency Seconds, and Latency Rate are 0%, 0, and 0%, respectively. This indicates that no faults are being injected and the service is running as expected. -
Create a virtual service to split traffic by weight.
-
Create a file named virtual-service-green-blue-80-20.yaml with the following content.
In this example, the weight for the
greenversion is 80 and the weight for theblueversion is 20.apiVersion: networking.istio.io/v1alpha3 kind: VirtualService metadata: name: podinfo spec: hosts: - "*" gateways: - podinfo-gateway http: - match: - uri: prefix: / route: - destination: host: podinfo subset: green port: number: 80 weight: 80 - destination: host: podinfo subset: blue port: number: 80 weight: 20 -
Run the following command to deploy the virtual service on the Fleet instance.
kubectl apply -f virtual-service-green-blue-80-20.yaml
-
-
Refresh http://<gateway_IP>/ in your browser.
The gateway routes 80% of traffic to the
greenversion and 20% to theblueversion.