To access data in File Storage NAS (NAS), you must first create a NAS file system and then mount it on an Elastic Compute Service (ECS) instance. This topic describes how to create a Server Message Block (SMB) file system in the NAS console and mount the SMB file system on an ECS instance. In this example, the ECS instance is deployed on Windows Server 2019 in a virtual private cloud (VPC). After you mount the file system on the ECS instance, you can upload data to or download data from the file system.
Prerequisites
NAS is activated.
The first time you visit the product page of NAS, follow the instructions to activate the NAS service.
An ECS instance is created in the China (Hangzhou) region. The operating system of the instance is Windows Server 2019. For more information, see Create and manage an ECS instance in the console (express version).
Step 1: Create an SMB file system and obtain the mount command
Log on to the NAS console.
In the Overview page, click Create under General-purpose NAS.
On the General-purpose NAS (Pay-as-you-go) page, configure the parameters. The following table describes the parameters. For parameters not listed in the table, use the default values or configure them as needed.
For more information, see Create a file system.
Parameter
Description
Region
Select China (Hangzhou).
Zone
Select Hangzhou Zone F. Select the zone where the ECS instance resides.
Protocol Type
Select SMB.
Network Type
Select VPC.
VPC
Select the VPC where the ECS instance resides.
vSwitch
Select a vSwitch that resides in the VPC.
Click Buy Now and follow the instructions to complete the payment.
After you purchase the file system, a mount target is automatically generated for the file system and a permission group named "VPC default permission group (all allowed)" is attached to the mount target. You can also create permission groups and add mount targets as needed. For more information, see Manage permission groups and Create a mount target.
Go to the NAS console. In the left-side navigation pane, choose . Then, click the file system that you created.
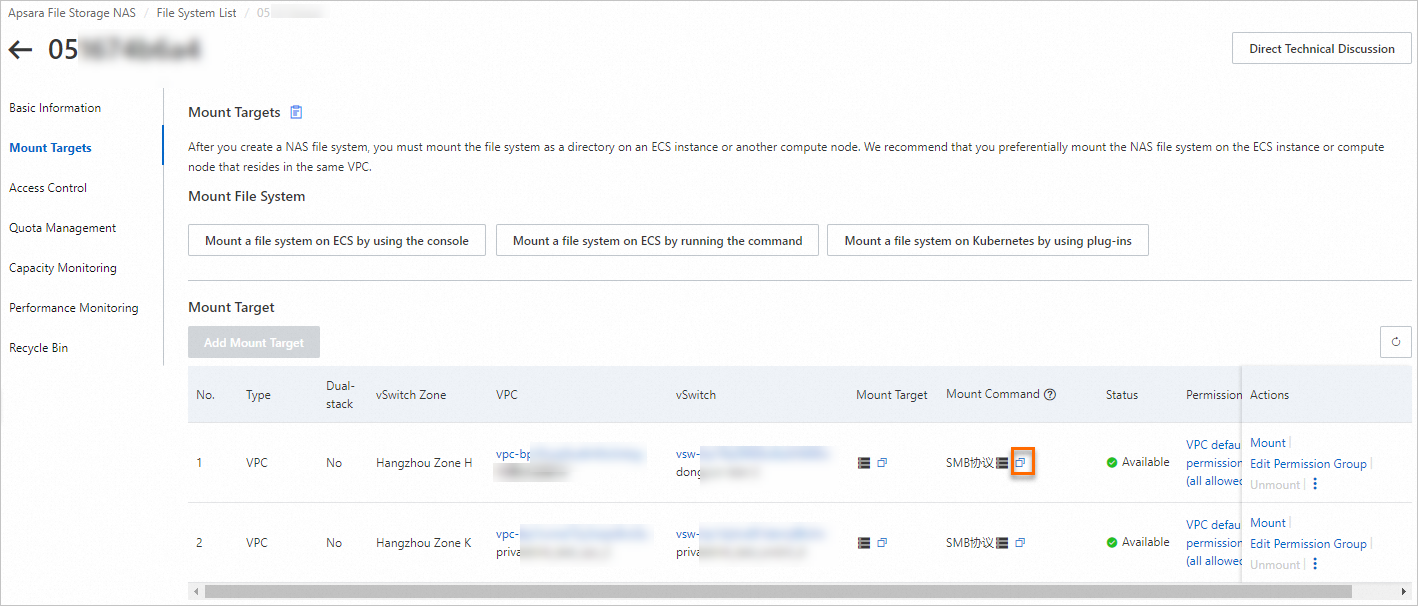
On the details page of the file system, click Mount Targets.
In the Mount Command column of the Mount Target section, copy the mount command for later use.
Step 2: Mount the file system
Connect to the ECS instance. For more information, see Connection methods.
To allow guest/anonymous access, open Command Prompt and run the following command to modify the registry:
REG ADD HKEY_LOCAL_MACHINE\SYSTEM\CurrentControlSet\services\LanmanWorkstation\Parameters /f /v AllowInsecureGuestAuth /t REG_DWORD /d 1Enable the Workstation service.
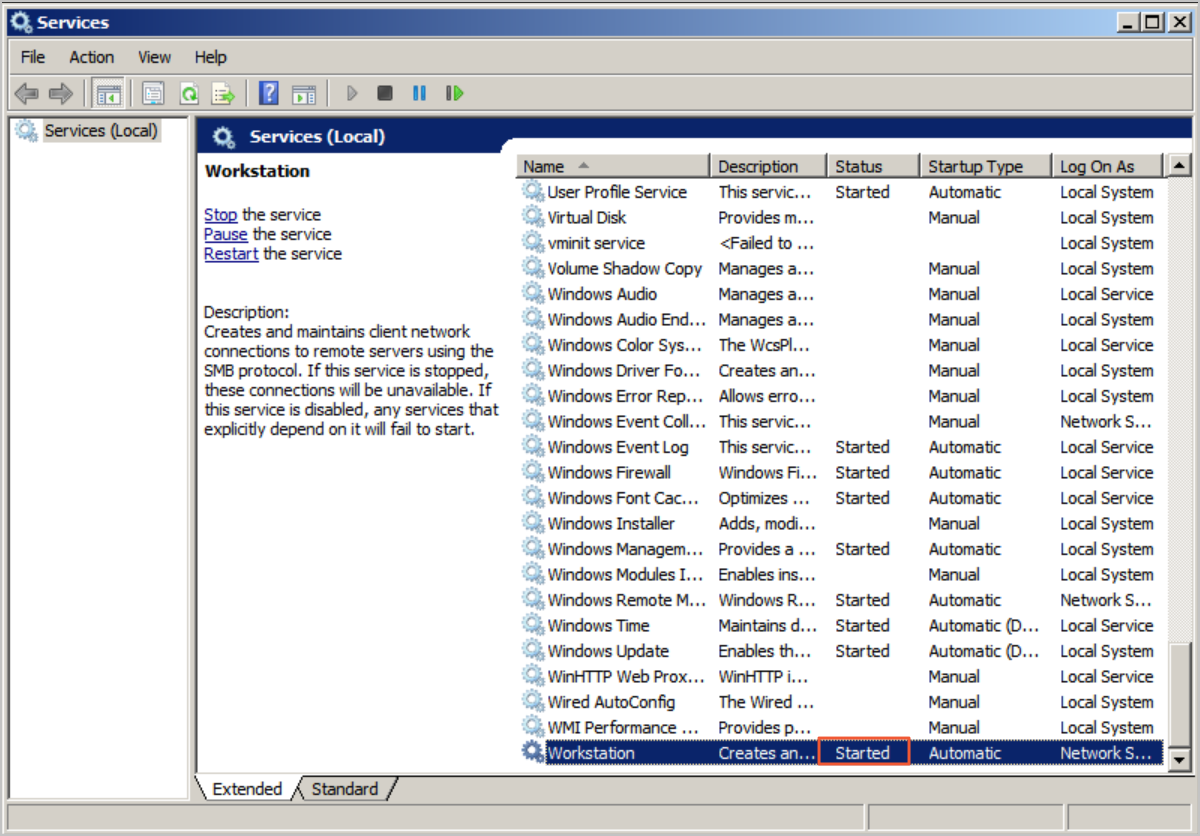
Press
Win+R. In the Run dialog box, enterservices.mscand click OK.Make sure that the Workstation service is in the Started state and the startup type is Automatic.
Enable NetBIOS over TCP/IP.
Open Control Panel, choose , and then click the network that is connected to your host.
In the Status dialog box, click Properties. In the Properties dialog box, double-click Internet Protocol Version 4 (TCP/IPv4).
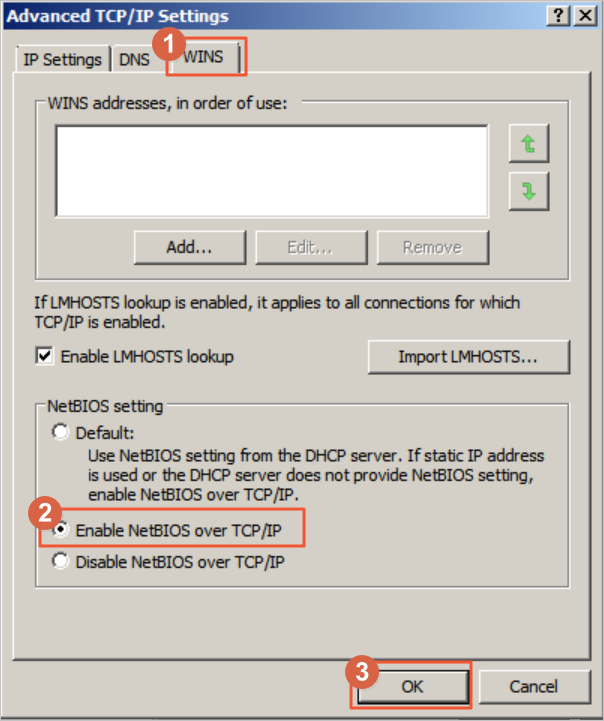
In the Internet Protocol Version 4 (TCP/IPv4) Properties dialog box, click Advanced.
In the Advanced TCP/IP Settings dialog box, click the WINS tab, select Enable NetBIOS over TCP/IP, and then click OK.
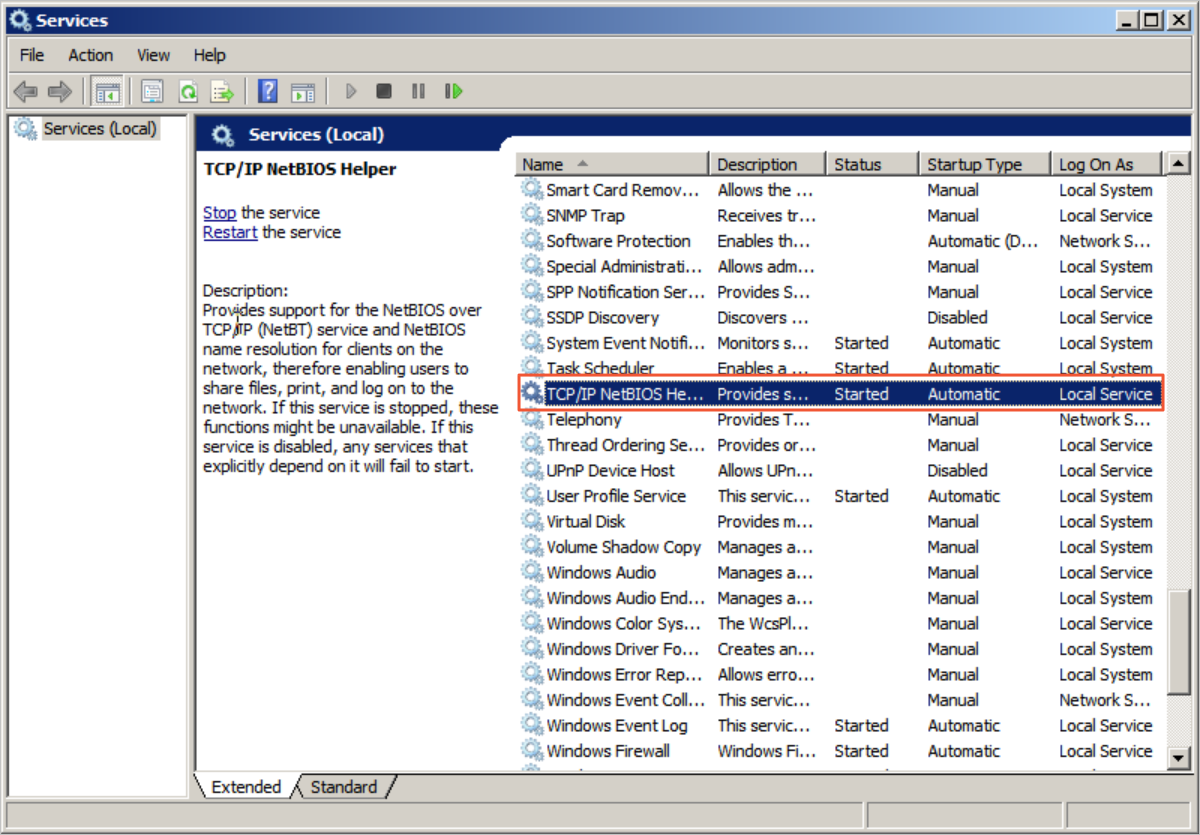
Press
Win+R. In the Run dialog box, enterservices.mscand click OK.Ensure the TCP/IP NetBIOS Helper service is running and its Startup Type is set to Automatic.
Open the Command Prompt and run the mount command that you copied in Step 1.
NoteThe default drive letter in the mount command is Z. Replace the drive letter as needed.
After the mount command is executed, run the
net usecommand to view the mount result.If an output similar to the following example appears, the mount is successful.
 If the file system failed to be mounted, troubleshoot the issue. For more information, see FAQ about troubleshooting of mount failures.
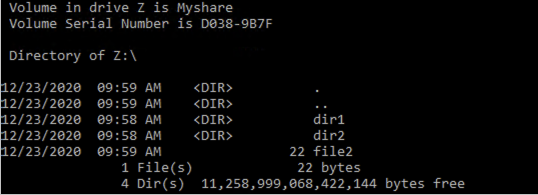
Step 3: Verify access and use the file system
After you mount the file system on the ECS instance, you can access the file system the same way you access a local directory. The following figure shows an example.
Remotely connect to the ECS instance by referring to Connection methods, and run the following commands to access the file system.
Run the following commands to access the file system. The following example assumes you mounted the file system to the
Z:drive. Replace the drive letter if you used a different one.Z: mkdir dir1 mkdir dir2 echo 'some file content' > file2 dirIf the commands execute successfully and output similar to the following appears, you have successfully accessed and used the SMB file system.