Service Mesh (ASM) allows you to create, delete, modify, and query Istio resources by using the Kubernetes API of clusters on the data plane. You can also use Helm to manage applications in clusters. This topic describes how to access Istio resources by using the Kubernetes API of clusters on the data plane.
Prerequisites
An ASM instance of Enterprise Edition or Ultimate Edition is created, and the Istio version of the ASM instance is later than 1.12.4.50. For more information, see Create an ASM instance and Update an ASM instance.
The cluster is added to the ASM instance. For more information, see Add a cluster to an ASM instance.
Background information
The Kubernetes API is a resource-based programmatic interface provided by means of HTTP. It supports the standard HTTP methods, including POST, PUT, PATCH, DELETE, and GET. You can use these methods to query, create, update, and delete primary cluster resources such as Deployments and Services. For more information, see Kubernetes API Concepts.
Usage notes
We recommend that you use the Kubernetes API to access the Istio resources of an ASM instance whose data plane contains only one cluster. If you enable the feature for an ASM instance whose data plane contains multiple clusters, you can use the Kubernetes API of all clusters to create, delete, modify, and query the Istio resources of the ASM instance.
After you enable the feature that allows Istio resources to be accessed by using the Kubernetes API of clusters on the data plane, you cannot delete the istio-system namespace from the clusters. To delete the istio-system namespace, you must first remove the clusters from the ASM instance.
After you enable the feature that allows Istio resources to be accessed by using the Kubernetes API of clusters on the data plane, wait 1 to 2 minutes for the settings to take effect.
If you delete a namespace from the data plane, the corresponding namespace on the control plane and Istio resources in the control plane namespace are not deleted.
If the control plane contains a namespace but the data plane does not contain the same namespace, you must create the namespace for the data plane. Otherwise, you cannot create, delete, modify, or query Istio resources in the namespace, and the following error message is displayed:
Error from server (NotFound): error when creating "xx.yaml": namespaces "daily-01" not foundIf a namespace created on the data plane for Istio resources does not exist on the control plane, the namespace is automatically created for the control plane.
The Istio resources that you create for the control plane by using the Kubernetes API of clusters on the data plane are stored on the control plane. Therefore, when you create or update these Istio resources by using the Kubernetes API of clusters on the data plane, do not add the owner reference field to specify resources on the data plane as the resource owners. Otherwise, the Istio resources on the control plane are garbage collected because the owners of the resources are considered absent.
Enable the feature that allows Istio resources to be accessed by using the Kubernetes API of clusters
Enable this feature when you create an ASM instance
By default, this feature is enabled for ASM instances that are created on or after November 2024 (UTC+8). No additional operation is required. For the instance created before this date, you can enable this feature by referencing to Enable this feature for an existing ASM instance.
Enable this feature for an existing ASM instance
Log on to the ASM console.
In the left-side navigation pane, choose .
On the Mesh Management page, find the ASM instance that you want to configure. Click the name of the ASM instance or click Manage in the Actions column.
In the Basic Information page, click Enable for the Enable Data-plane KubeAPI access parameter.
In the Confirm to enable data-plane cluster KubeAPI access message, click OK.
Scenario 1: Manage Istio resources by using kubectl
After you enable the feature that allows Istio resources to be accessed by using the Kubernetes API of clusters, you can connect to a cluster by using kubectl and create, query, modify, and delete Istio resources by using the kubeconfig file of the cluster. In this example, a virtual service is used.
Run the following command to create a virtual service:
kubectl apply -f <YAML file name of the virtual service>Run the following command to query the virtual service:
kubectl get VirtualserviceRun the following command to modify the virtual service:
kubectl edit Virtualservice <Virtual service name>Run the following command to delete the virtual service:
kubectl delete Virtualservice <Virtual service name>
Scenario 2: Install applications by using Helm
After you enable the feature that allows Istio resources to be accessed by using the Kubernetes API of clusters, Helm can install applications in a cluster and add Istio resources to your ASM instance by using the kubeconfig file of the cluster.
Connect to the ACK cluster by using kubectl. For more information, see Obtain the kubeconfig file of a cluster and use kubectl to connect to the cluster.
Install Helm on your on-premises device. For more information, see Helm.
NoteAfter you use kubectl to connect to a cluster, the Helm client automatically uses the kubeconfig file to connect to the cluster.
Download and decompress the istio-bookinfo sample Helm chart package to your on-premises device.
Run the following command in the istio-bookinfo directory to install istio-bookinfo:
helm install -f values.yaml istio-bookinfo ./Expected output:
NAME:istio-bookinfo
LAST DEPLOYED:THU May 26 16:44:19 2022
NAMESPACE:default
STATUE:deployed
REVISION:1
TEST SUITE:None
Check whether applications are installed by using Helm.
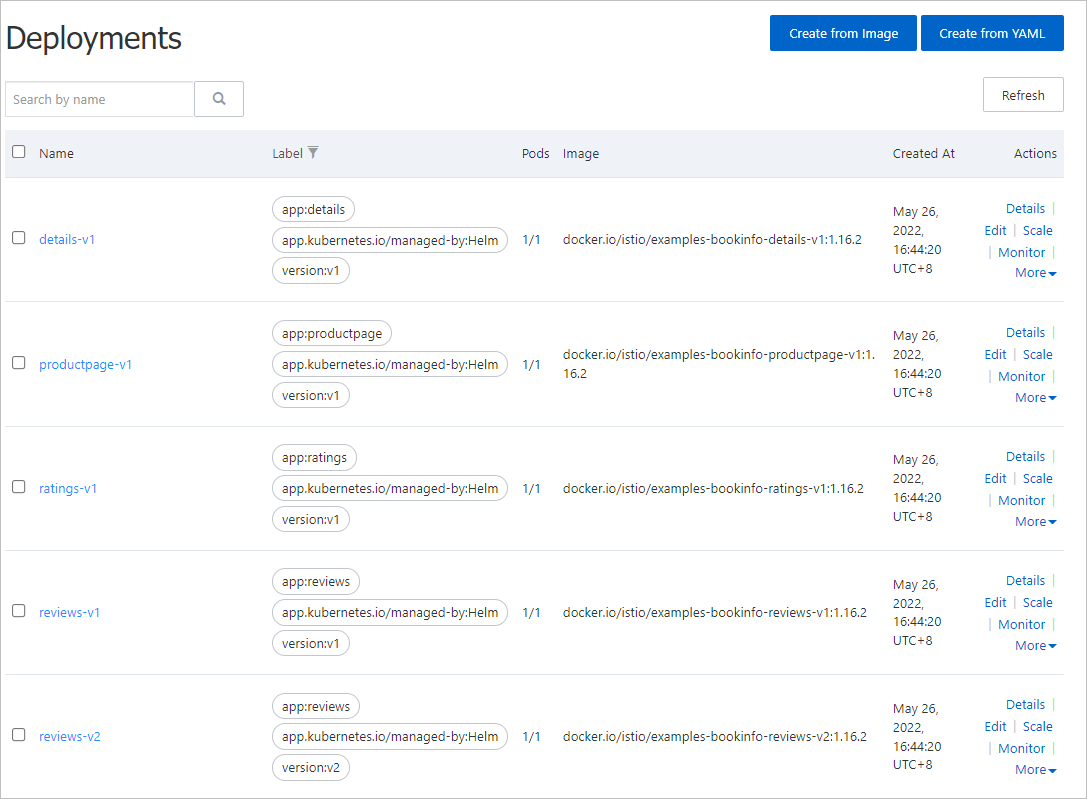
Query the Bookinfo application in the Container Service for Kubernetes (ACK) console.
Log on to the ACK console. In the left-side navigation pane, click Clusters.
On the Clusters page, find the cluster you want to manage and click its name. In the left-side pane, choose .
In the upper part of the page that appears, select default from the Namespace drop-down list.
You can view applications such as details, productpage, and ratings installed by using Helm.
NoteYou can view the installation package of Helm on the Helm page by choosing in the left-side navigation pane.
View virtual services and Istio gateways in the ASM console.
Log on to the ASM console.
In the left-side navigation pane, choose .
On the Mesh Management page, find the ASM instance that you want to configure. Click the name of the ASM instance or click Manage in the Actions column.
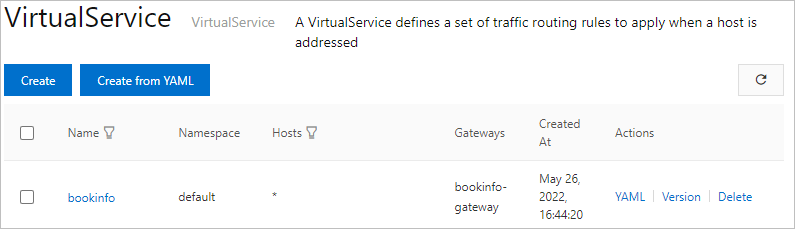
On the details page of the ASM instance, choose in the left-side navigation pane.
On the VirtualService page, you can view the bookinfo virtual service installed by using Helm.
On the details page of the ASM instance, choose in the left-side navigation pane.
On the Gateway page, you can view the bookinfo-gateway gateway installed by using Helm.

Related operations
Run the following command to view the applications installed by using Helm:
helm listRun the following command to update Helm charts:
helm upgrade -f values.yaml istio-bookinfo ./