Row-level permission control of Quick BI allows you to perform authorization based on users/user groups or tags. Authorization based on users or user groups is suitable for scenarios that involve a small number of users. This topic describes how to grant permissions to users or user groups.
Prerequisites
Background information
Currently, only Quick BI Pro and Quick BI Enterprise Standard allow you to configure row-level permissions on a dataset in a group workspace.
Procedure
- Click the
 icon and select the target group workspace from the drop-down list.
- On the Datasets page, find the target dataset, click the
 icon in the Actions column, and select Grant Row-level Permissions.You can also right-click the target dataset and select Grant Row-level Permissions.
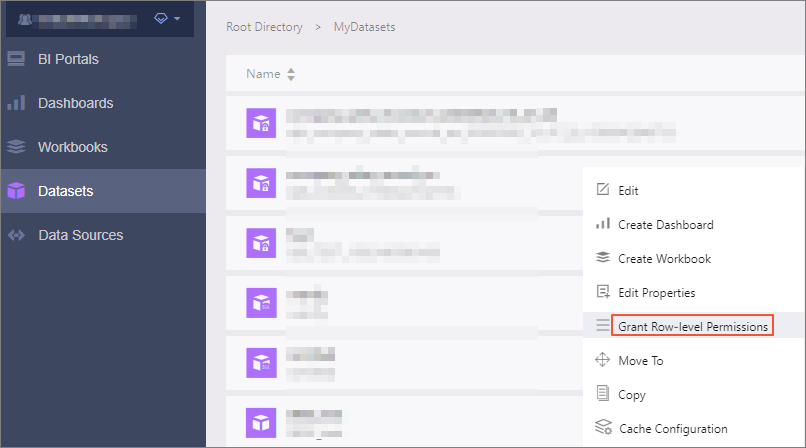
- Click the drop-down icon next to Fields. Select the fields based on which authorization
is performed, such as province and Measure Value.
 Note The values of Measure Value are the measures in the dataset. You can grant row-level permissions based on Measure Value to allow different users to view different measures.
 - Select a user or user group and configure permissions in the Select section.The following figure shows that the user is authorized to view data of Beijing and Anhui.
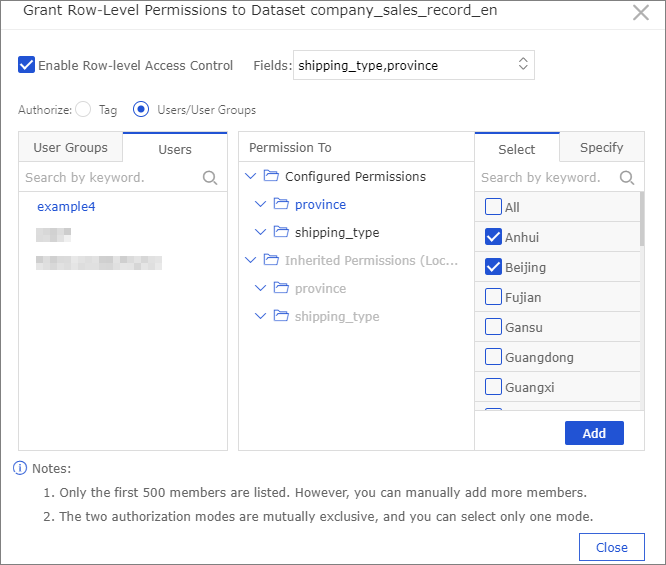 Note If row-level permission control is enabled for a field in a dataset, users must be granted permissions on this field to access the charts generated based on this dataset.
For information about how to create a user group, see Create a user group.