Use the SQL Console in DMS to view or modify a table's schema — either by running an SQL statement or through the graphical user interface (GUI).
Prerequisites
Before you begin, ensure that you have:
-
Permissions to query, modify, and export data in the target database. For more information, see Manage RAM permissions.
Query a schema
DMS provides two ways to view a table's schema: run an auto-generated SQL statement, or inspect the table's object information directly.
Run an SQL statement
-
On the SQL Console tab, double-click the table name. DMS auto-generates an SQL statement to query the table's schema. Click Execute.
View object information
-
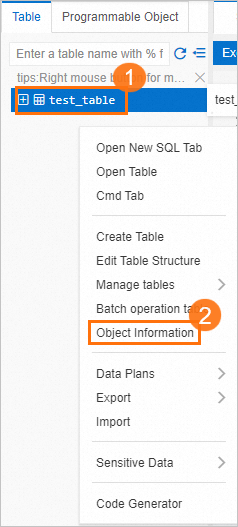
In the navigation tree on the left, right-click the target table and select Object Information.
-
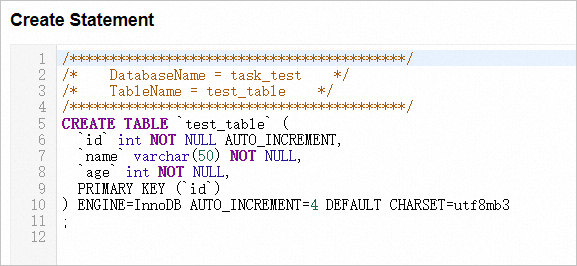
In the Create Statement section, view the statement used to create the table.
Change a schema
DMS supports two approaches for schema changes: SQL statements for precise control, and the GUI for visual editing of columns, indexes, foreign keys, and the storage engine.
Schema changes can affect relevant databases and business. Proceed with caution when you change a schema.
Run an SQL statement
-
Enter an
ALTER TABLEstatement and click Execute. The following example adds aphone_numbercolumn totest_table:ALTER TABLE `test_table` ADD COLUMN `phone_number` varchar(32) NOT NULL COMMENT 'phone_number' AFTER `age`;
Use the GUI
The GUI lets you add columns and set column properties without writing SQL. You can also add foreign key indexes and modify the storage engine. The following example adds a column to test_table.
-
In the navigation tree on the left, right-click the target table and select Edit Table Structure.
-
In the navigation pane on the left, click Column Information.
-
On the Column Information tab, click New. A new row appears.
-
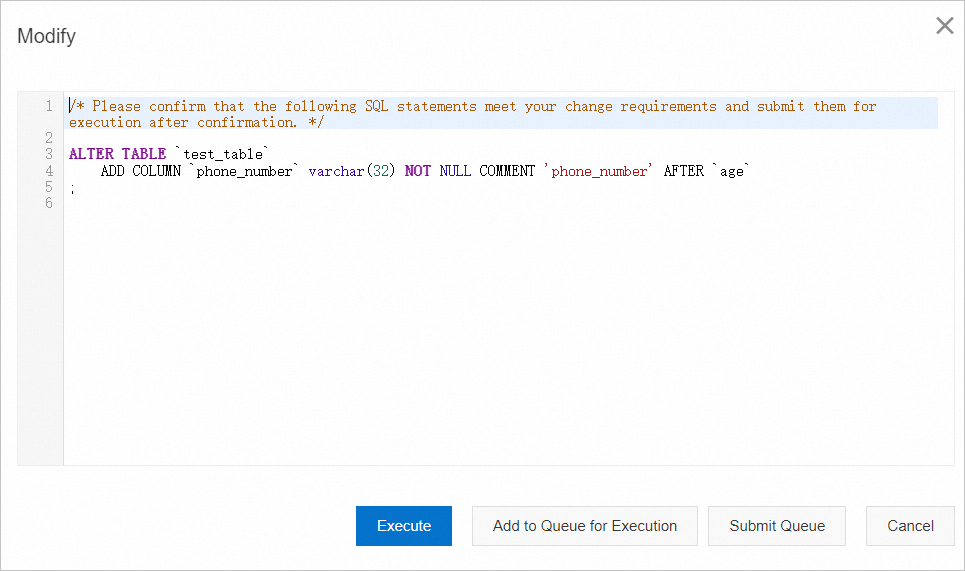
Enter the column details in the new row, then click Modify at the bottom of the tab.
-
In the Modify dialog box, click Execute.
What's next
To apply multiple schema changes in a single operation, see Data change.