When you run UPDATE or DELETE on a large table, a standard transaction locks the table until the operation finishes — blocking reads and writes and risking timeouts that disrupt production traffic. Lock-free data change avoids this by splitting the affected rows into small batches and processing each batch as a separate, short-lived transaction. Each batch commits and releases its lock immediately, so the table stays responsive throughout.
How it works
DMS divides the affected rows into chunks based on the table's primary key or unique key. For each chunk, DMS applies the change, commits, and moves to the next chunk. No single transaction holds a lock long enough to block concurrent reads or writes.
Requirements
The table must have:
-
A primary key, or
-
A unique key that does not accept null values
Limitations
-
Operates on a single table only
-
Supports simple SQL statements: SELECT, UPDATE, and DELETE
-
Does not support multi-table statements, such as DELETE with JOIN
Submit a lock-free change
This example updates all rows in big_table<\/code> where id < 1,000,000<\/code>, setting long_text_b<\/code> to 'random long text'<\/code>.<\/code>
The process involves two roles:
-
A regular user submits the change ticket
-
A DMS administrator approves and executes it
Submit the ticket (regular user)
-
Log in to the DMS console V5.0 as a regular user.
-
In the top navigation bar, choose Database Development > Data Change > Lockless change.
In simple mode, hover over the
 icon in the upper-left corner and choose All Features > Database Development > Data Change > Lockless Change.
 -
Configure the following parameters and click Submit. For this example, enter the following statement in SQL Statements for Change:
Parameter Required Description Database Yes Select poc_dev<\/code>.<\/code>Business Background No Describe your business requirements to reduce back-and-forth with approvers. Affected Rows Yes Estimate the number of rows this change will affect. Run a COUNT<\/code> query in the SQL Console to get this number.<\/code>SQL Statements for Change Yes Enter the UPDATE or DELETE statement to execute. UPDATE `big_table` SET `long_text_b` = 'random long text' WHERE id < 1000000;<\/code><\/code> -
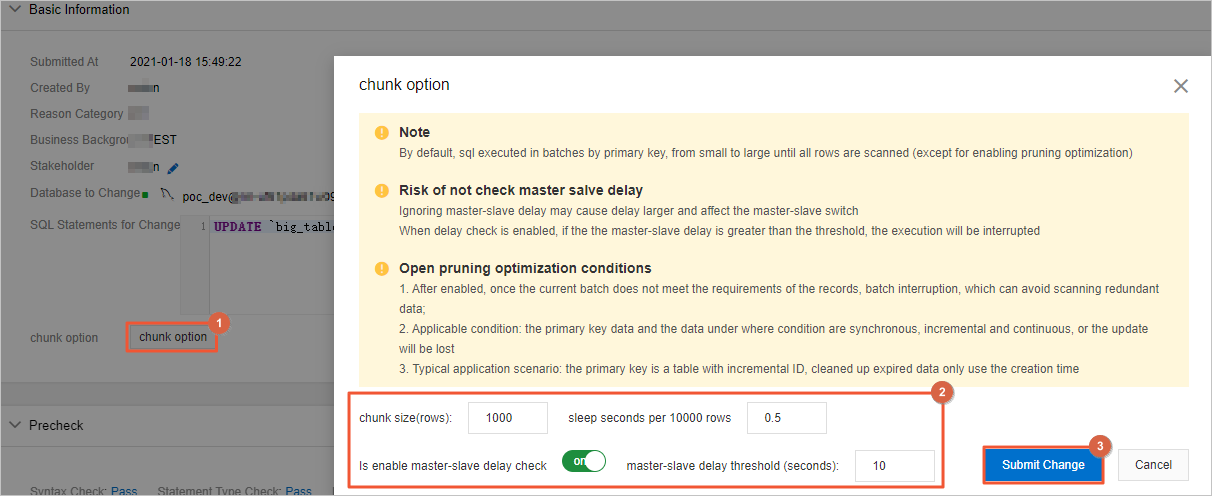
On the ticket details page, click chunk option. In the dialog that appears, configure the batch execution settings and click Submit Change.
-
Review the ticket details. Before execution, DMS runs a precheck on your SQL statement that covers:
Precheck item What it validates Syntax validation Catches SQL errors before the change runs Statement type Confirms the statement type matches your security rule configuration Permissions Verifies the submitting user has the required permissions Row scan estimate Estimates the number of rows to be scanned -
After the precheck passes, click Submit for Approval, then click OK in the confirmation dialog.
ImportantYou can only edit the ticket before submitting it for approval.
Approve and execute the ticket (DMS administrator)
-
Log in to the DMS console V5.0 as a DMS administrator.
-
On the DMS console homepage, click Pending Tickets in the My Tickets section.
-
On the My Tickets page, click the ticket number in the Ticket Number column to open the ticket.
-
In the Ticket Details panel, review the change details and click Approve.
-
In the approval dialog, enter your comments and click Submit.
-
In the Execute step, click Execute Change. Set Execution Strategy to Running immediately and click Confirm Execution.
- Execution Strategy defaults to Running immediately. Select Schedule to set a specific execution time. - Enable Specify End Time to automatically stop execution at a set time, preventing the change from running during peak hours.
-
To monitor progress, click Details in the Execute step, then select Execution Progress.
Verify the change
After the change completes, run a SELECT query to confirm the data was updated correctly.
-
Log in to the DMS console V5.0 as a DMS administrator.
-
In the instance list, expand the
POC_dev<\/code> instance and double-click thepoc_dev<\/code> database to open the SQL Console.<\/code> -
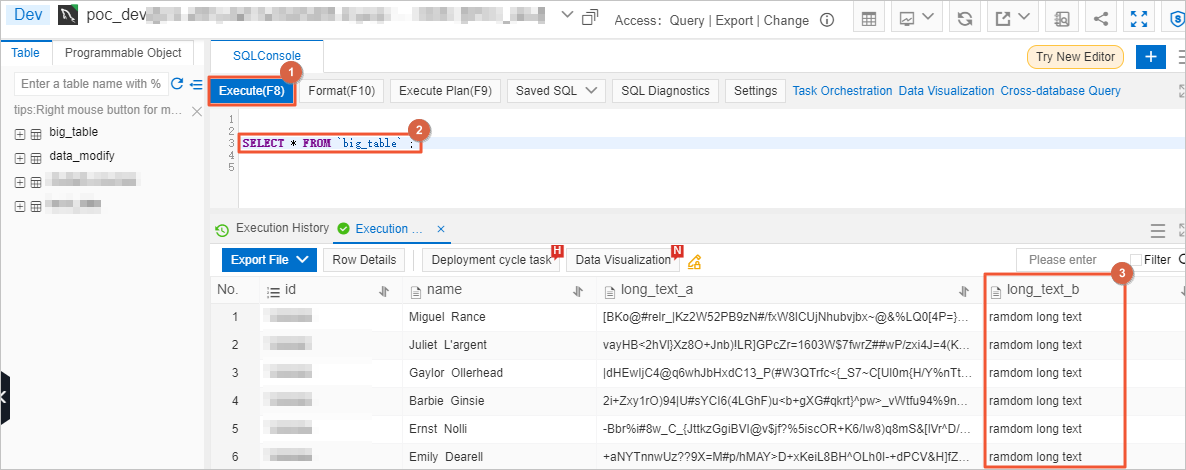
Run the following query and confirm that the
long_text_b<\/code> field shows the updated values:<\/code>SELECT * FROM `big_table`;<\/code>
<\/code>