Configure the network for a Dify instance
This topic describes how to enable private and public endpoints for a Dify instance.
Prerequisites
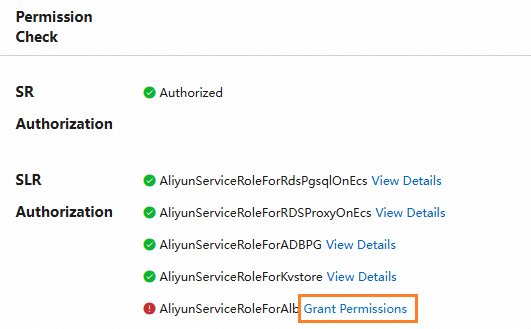
The Alibaba Cloud account that you use to log on to Data Management (DMS) must have the AliyunServiceRoleForAlb service-linked role. To create this role, go to the One-click Deployment page and turn on the Private and Public Network Access Address switch. Then, in the Permission Check section, click Grant Permissions next to AliyunServiceRoleForAlb.
Usage notes
You can enable private and public endpoints only during a one-click deployment or for an existing instance.
Before you enable private and public endpoints, you must activate the PrivateZone, EIP, and ALB services. When you enable the endpoints, the system automatically purchases and configures instances for these services, which incurs pay-as-you-go fees. For more information, see PrivateZone billing rules, EIP billing rules, and ALB billing rules.
You can enable private and public endpoints only at the same time.
Once enabled, private and public endpoints cannot be manually disabled.
NoteWhen you release the Dify instance resources, the system automatically shuts down the private and public endpoints and releases the related network resources.
Enable during one-click deployment
During a one-click deployment, turn on the Private and Public Network Access Address switch and then complete the deployment.

Enable for an existing instance
Prerequisites
A Dify instance is deployed. For more information, see One-click deployment and Manual deployment.
Procedure
- Log on to the DMS console V5.0.
Go to the Workspace Management page.
You can choose one of the following methods to go to the workspace based on your requirements:
Method 1
Move the pointer over the
 icon in the upper-left corner and choose .Note
If you use the DMS console in normal mode, choose in the top navigation bar.
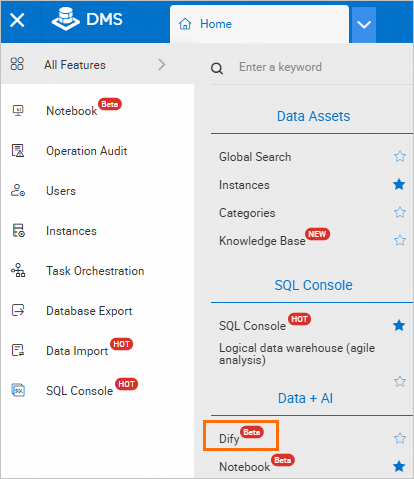
Method 2
In the left-side navigation pane, click the
 icon and then click Workspace.Note
If you use the DMS console in normal mode, choose in the top navigation bar.
Click the target workspace name.
In the navigation pane on the left, choose
 > Dify Resources.
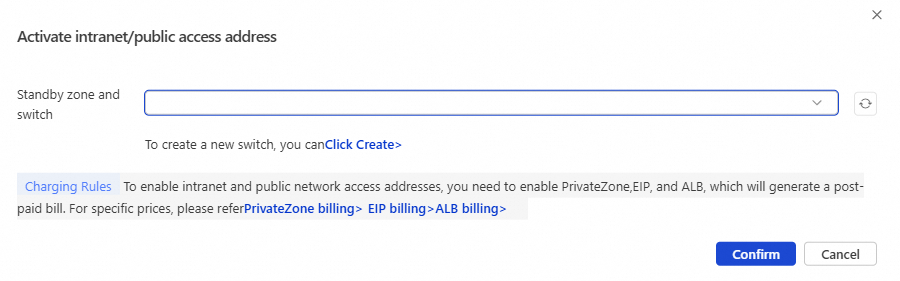
In the Basic Configuration section, click Activate the intranet/public address of the instance next to Instance intranet address.
In the dialog box that appears, select a Standby zone and switch and click Confirm.
NoteFor Standby zone and switch, you can only select a vSwitch that is in a different zone from the Dify instance.
Wait for the endpoints to be enabled.
After the endpoints are enabled, the private and public endpoints of the instance are displayed in the Basic Configuration section.
NoteTo access the Dify instance, you must also configure a whitelist.
 > Dify Resources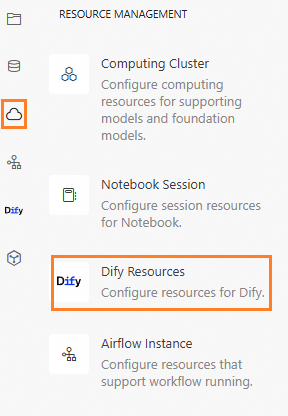
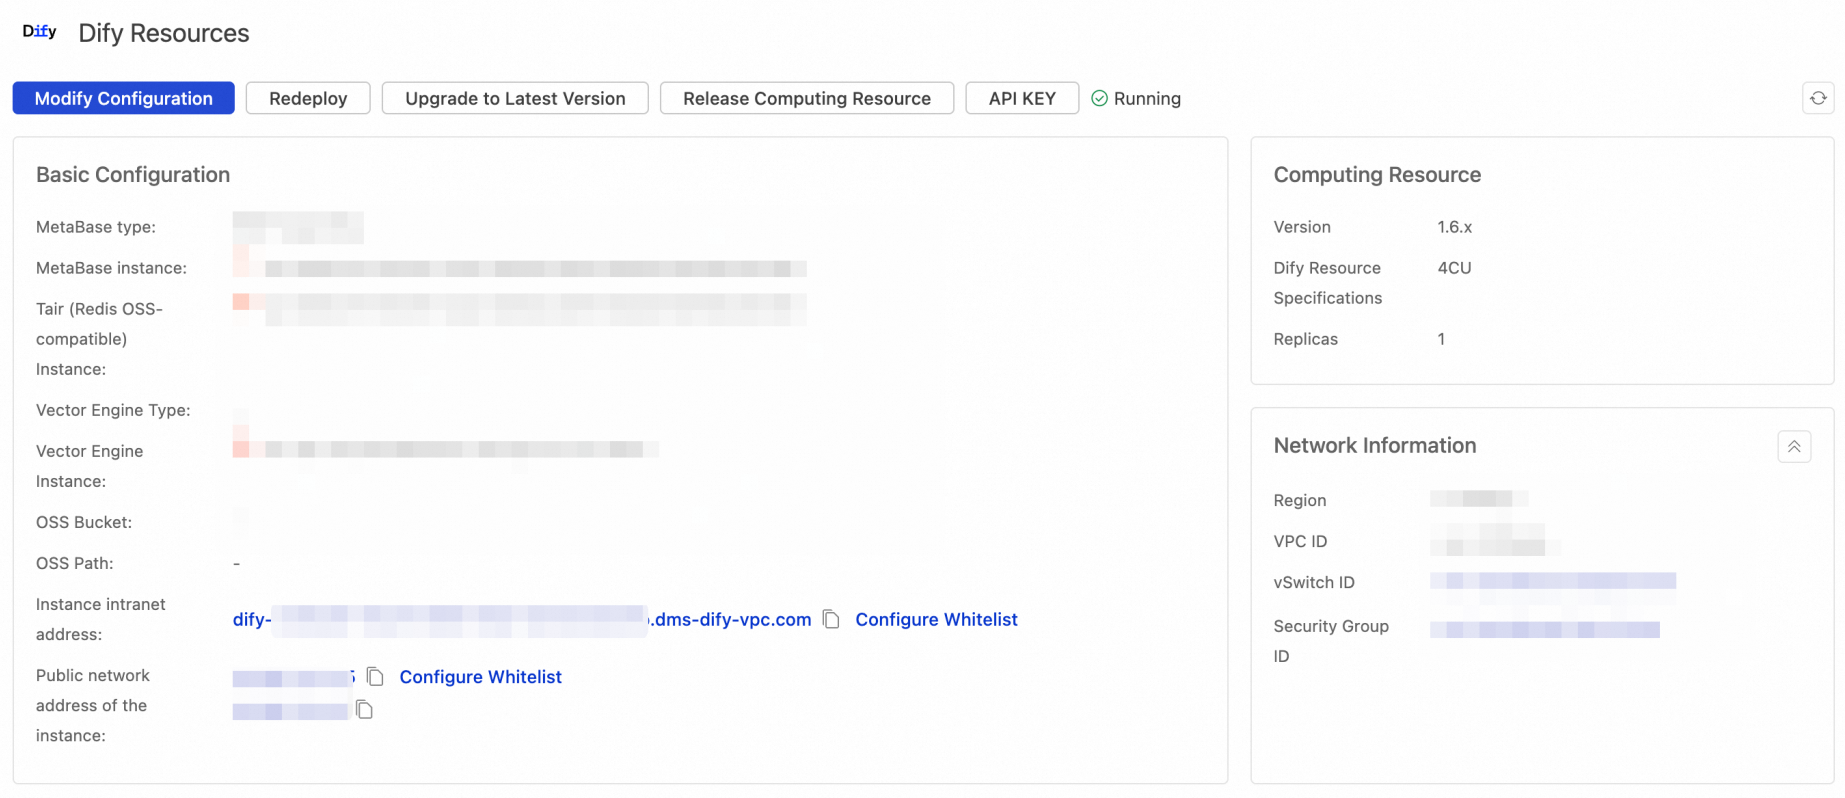
Configure a whitelist
In the Basic Configuration section, click Configure Whitelist next to Instance intranet address or Public network address of the instance.
On the page that appears, add entries to the whitelist.
Method 1: Click Add Entry. In the Add ACL Entry panel, set IP Address/CIDR Block and Remarks, and click Add.
Method 2: Click Add ACL Entries. In the Add ACL Entries panel, add multiple IP addresses or CIDR blocks and descriptions, and click Add.
Enter one entry per line. Press the Enter key to start a new line.
Use a vertical bar (|) to separate an IP address or CIDR block and a description within an entry. Example: 192.168.1.0/24|Description
You can now access the Dify instance.
