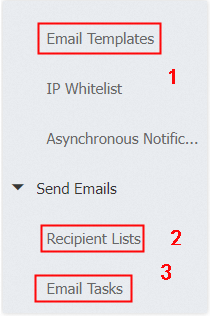
This guide shows you how to quickly configure and send emails using DirectMail.
For detailed configuration instructions, see the Overview.
Configuration steps
Step 1: Configure sender domain
If you purchased your domain from Alibaba Cloud, try the Automatic Configuration process. If your domain is from another provider, follow the Manual Configuration steps.
Option 1: Automatic Configuration. Authorize DirectMail to handle DNS resolution for your domain. If the process is successful, skip to Step 4. If it fails, your domain does not meet the prerequisites.
Option 2: Manual Configuration. Follow the steps below.
In the DirectMail console, create a subdomain. If you do not have a primary domain, you must purchase one. For example, if your primary domain is example.net, you can use a subdomain like t1.example.net. The 't1' part is customizable. Note: The screenshots in this guide use t1.example.net as an example. Replace it with your actual domain.
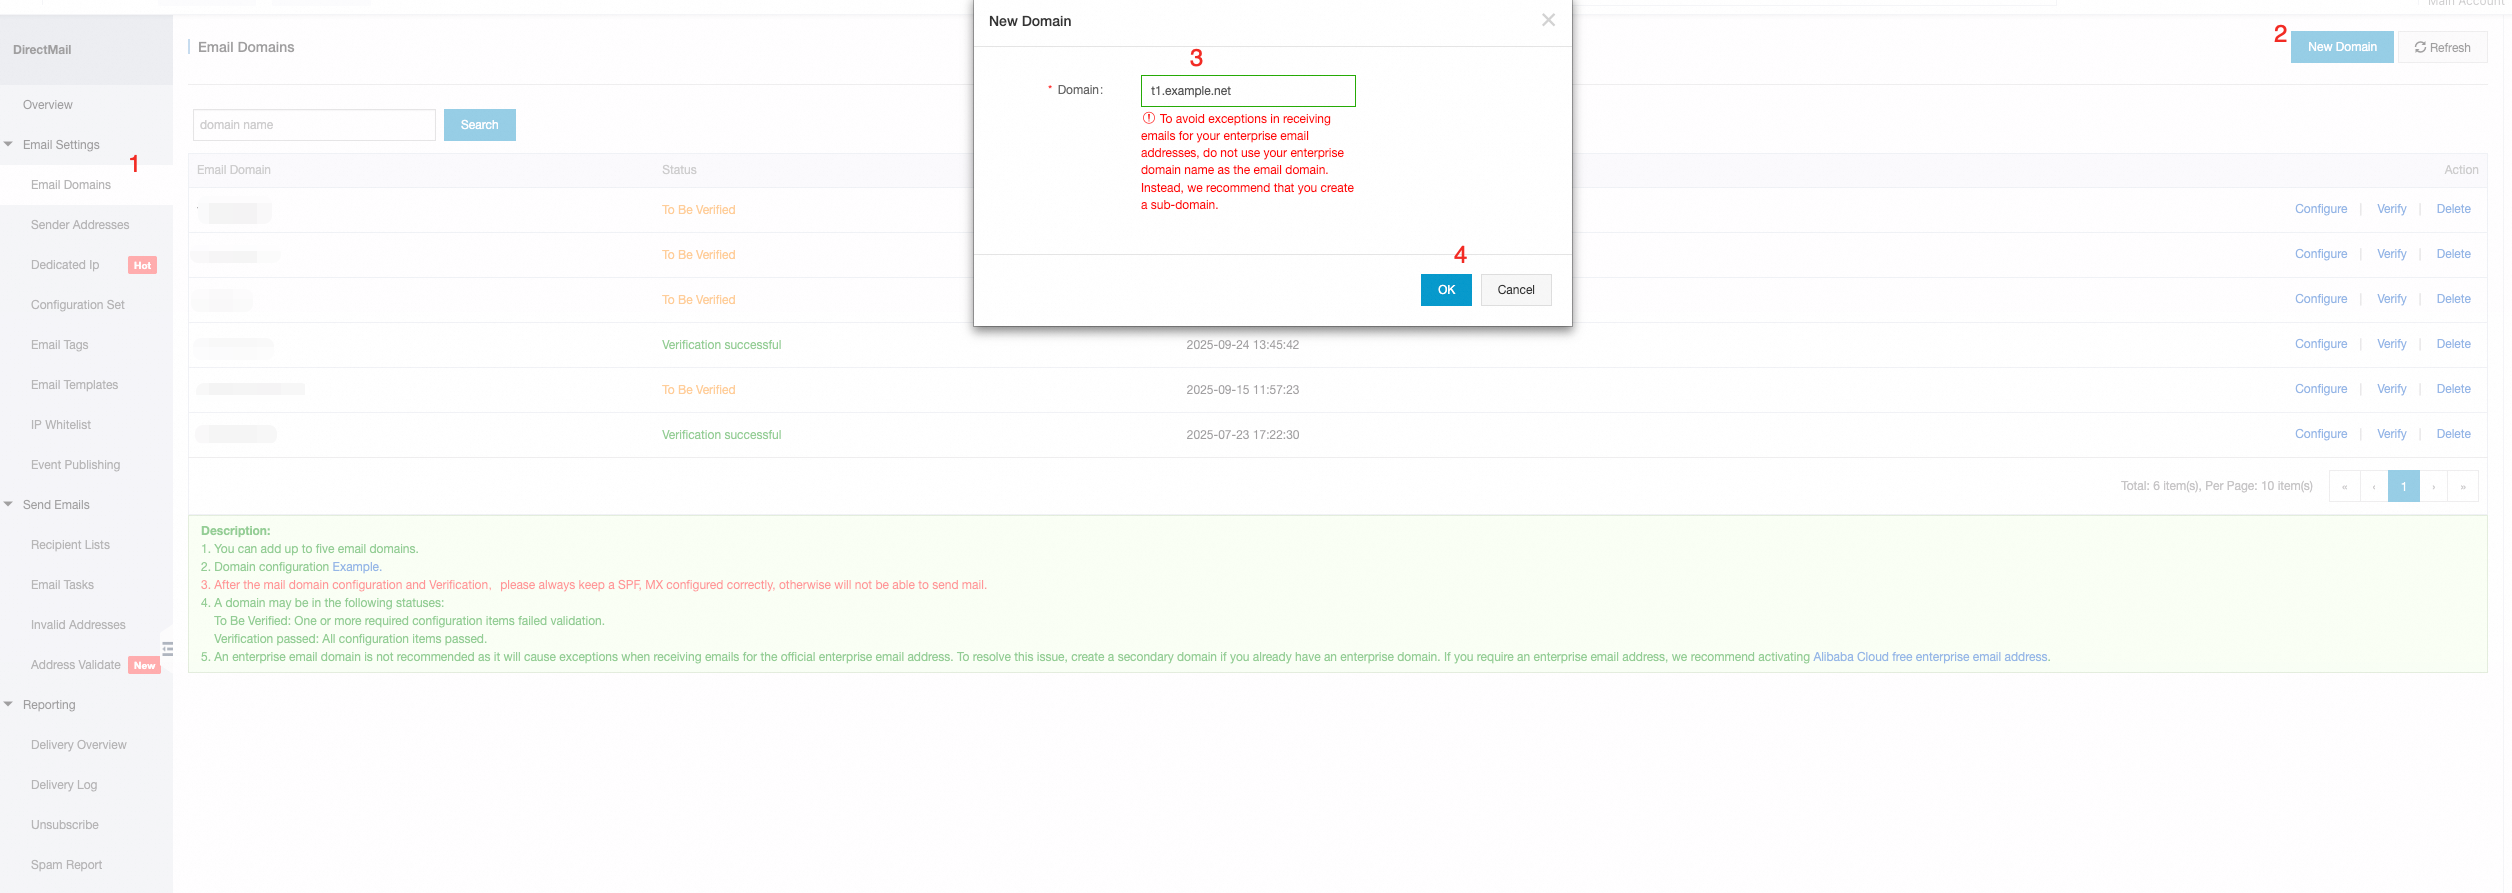
Step 2: Get record values
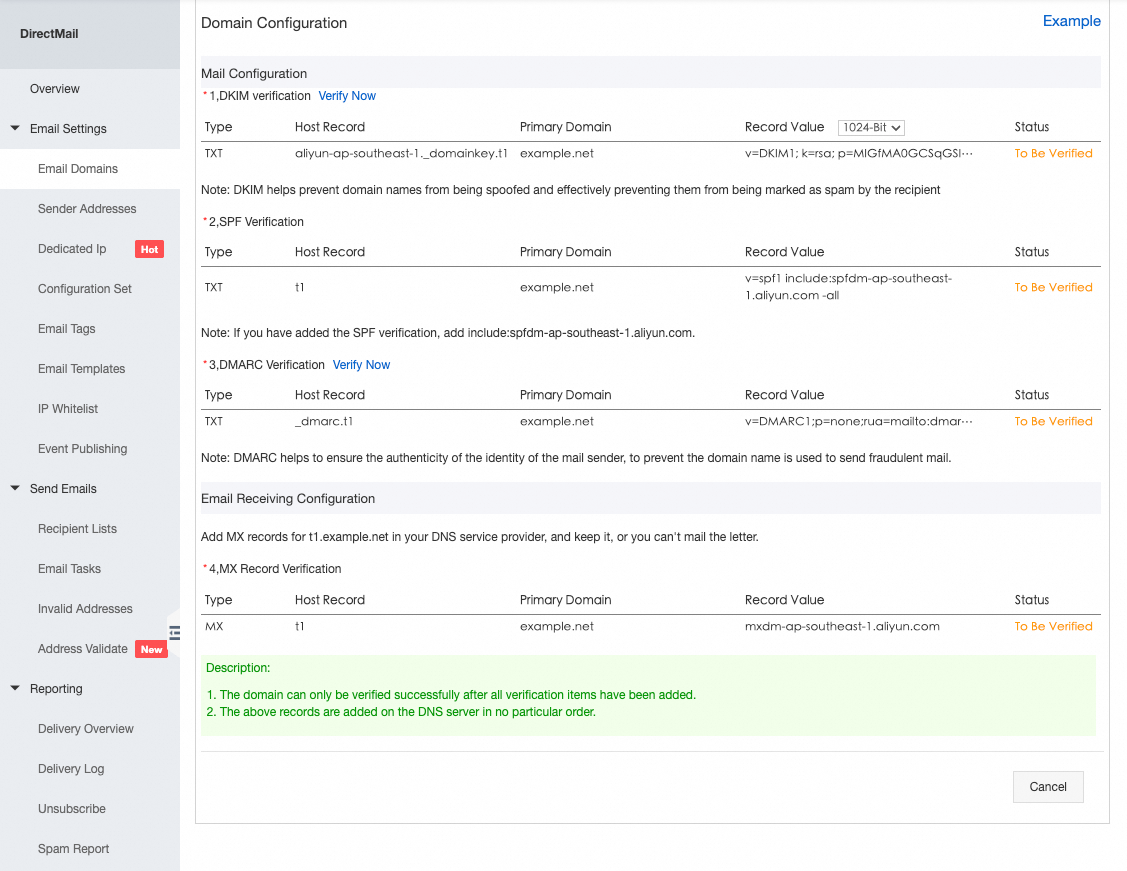
Path: DirectMail console > Sender Domains > Domain Configuration.
You will use the values on this page when you add DNS records.
The required host record and record value vary by console region and domain. Go to the correct page in the console to get these values.
Step 3: Configure DNS records
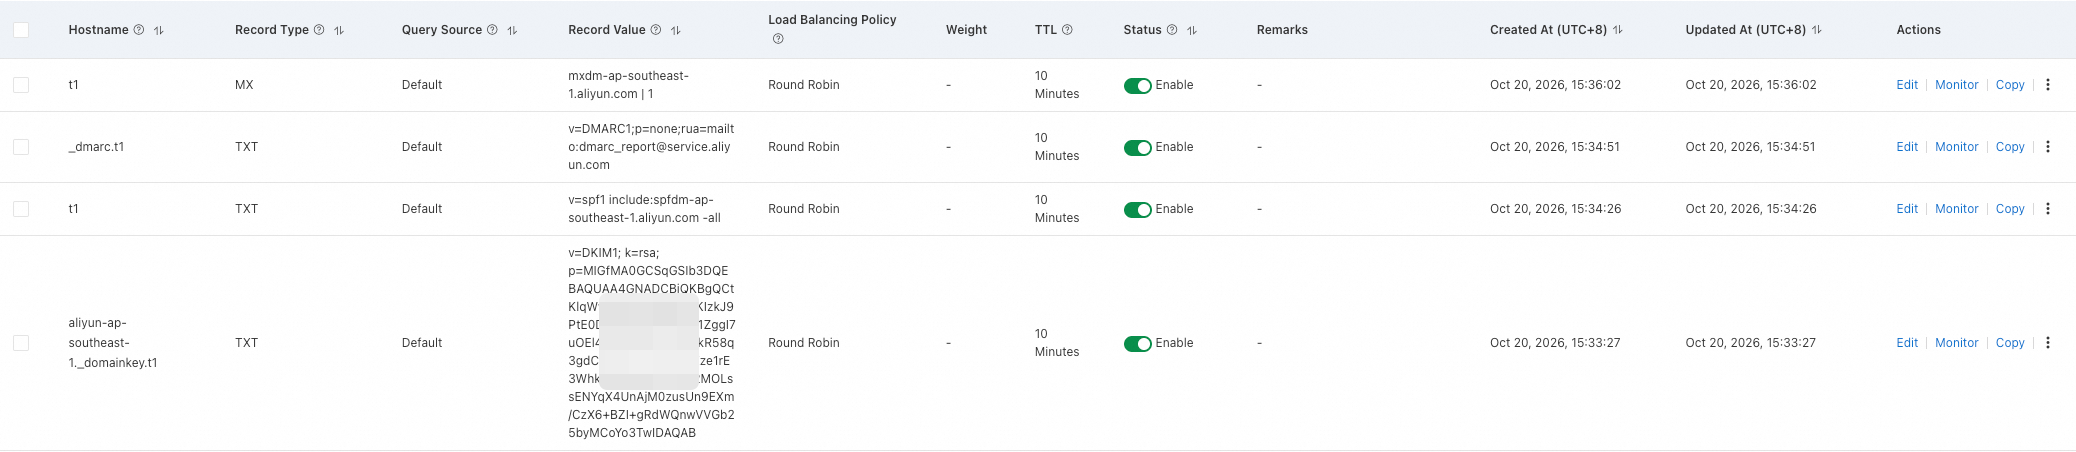
If you purchased your domain from Alibaba Cloud or have transferred it in, add the six records from Step 2 in the DNS console.
Note: For domains hosted by other providers, the process is similar. Contact your provider for specific instructions.
Step a: In the DNS console, find the domain you want to configure, and then navigate to DNS Settings.

Step b: Enter the corresponding values from Step 2.
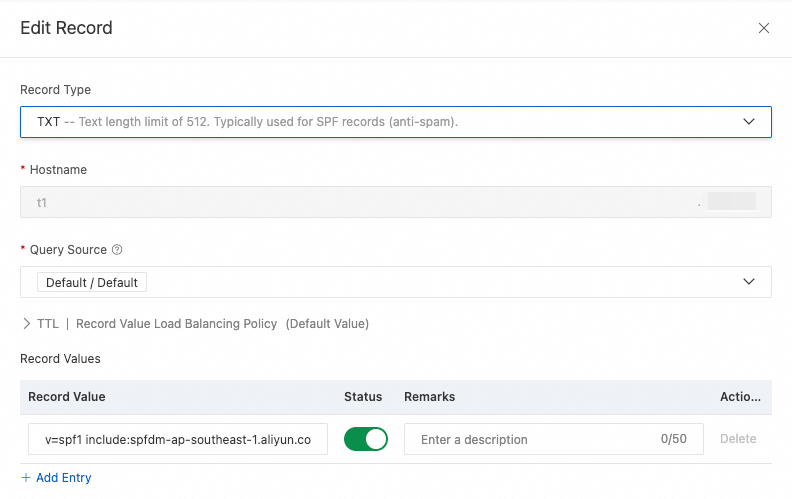
Final configuration
Step 4: Verify domain
About 20 minutes after you finish the configuration, go to the DirectMail console and open the Sender Domains page. Find your domain and click Verify.
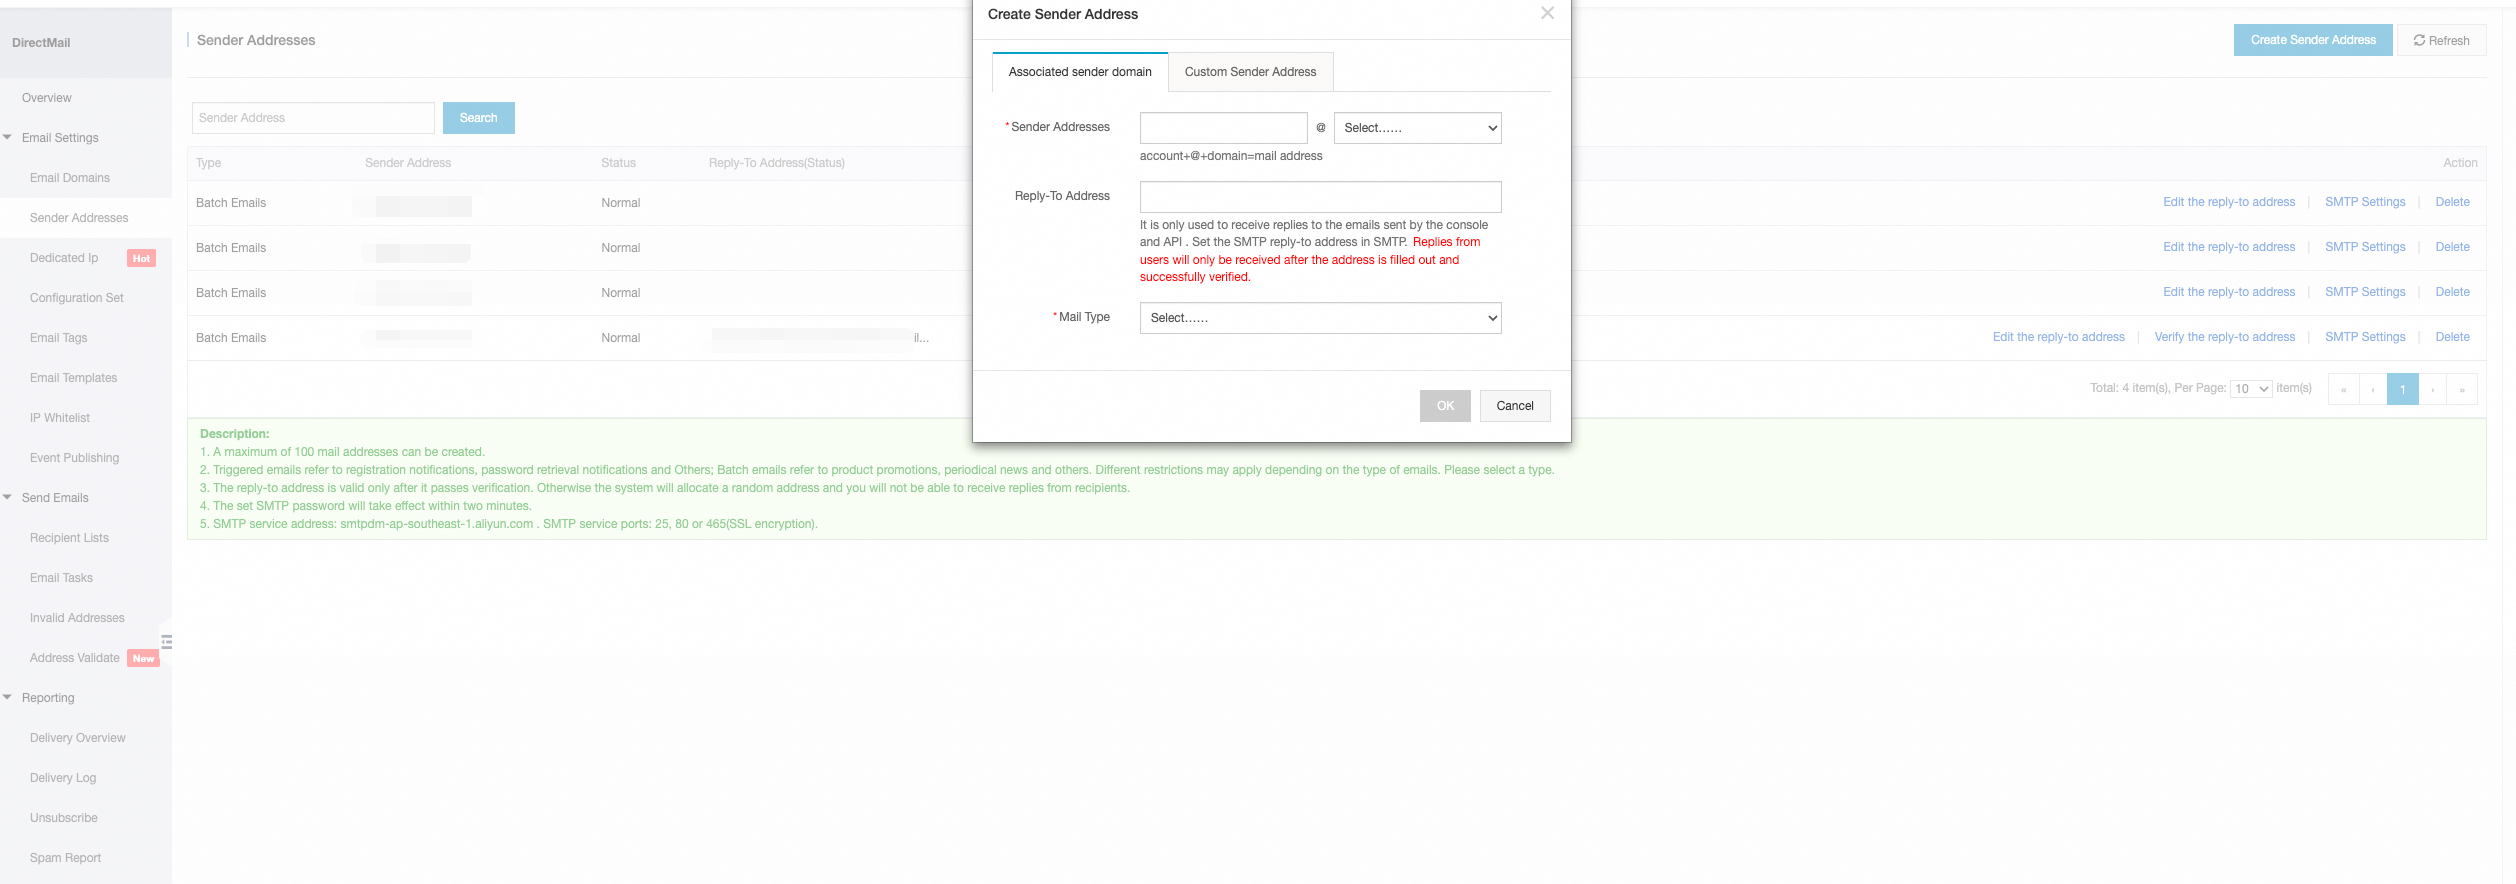
Step 5: Create sender address
When creating a sender address, select the correct channel type for your use case:
Transactional email: For emails triggered by specific events, such as registration notifications, transaction alerts, or password reset messages.
Bulk email: For emails sent to a subscriber base, such as product promotions, customer newsletters, or marketing updates.
Step 6: Send emails
To send a small number of emails, you can use the console. Submit a template for review and upload a recipient list. After the template is approved, you can start sending. Alternatively, the three methods for sending emails require a developer.