This topic describes how to create Elastic Compute Service (ECS) instances on a dedicated host.
Background information
Only VPC-connected ECS instances can be created on a dedicated host. The ECS instances on a dedicated host have different features from those on a shared host. For more information, see Differences between ECS instances on a dedicated host and those on a shared host.
We recommend that you create pay-as-you-go ECS instances on a dedicated host and select a combination of billing methods to optimize your costs without compromising flexibility. For more information, see Resource billing for ECS instances on a dedicated host.
Procedure
Log on to the ECS console.
In the left-side navigation pane, choose Instances & Images >
 > Dedicated Hosts.
 In the top navigation bar, select the region and resource group to which the resource belongs.

Find the dedicated host on which you want to create ECS instances, and click Create Instance in the Actions column.
On the Custom Launch page, create one or more ECS instances according to the following table.
Parameter
Description
Example
Dedicated Host
Select the dedicated host on which you want to create ECS instances and specify whether to associate the dedicated host.
If you select Associate with DDH, the ECS instances are deployed on the current dedicated host. If the resources of the dedicated host are insufficient, the ECS instances fail to be restarted.
If you do not select Associate with DDH, the ECS instances may be deployed on another dedicated host that belongs to your Alibaba Cloud account when the instances are restarted. For more information, see Functions and features.
DDH-test/dh-bp116lrux5x1qxh9****
Billing Method
Select a billing method for the ECS instances based on the billing method of the dedicated host. You can select Subscription or Pay-as-you-go as the billing method of ECS instances that run on a subscription dedicated host.
For more information, see Resource billing for ECS instances on a dedicated host.
ImportantICP filings are unavailable for pay-as-you-go ECS instances.
Pay-as-you-go
Instance Type
The region and zone of the ECS instances must be the same as those of the dedicated host. The available instance types depend on the type and available computing resources of the dedicated host. For more information about dedicated host types, see Dedicated host types.
If the dedicated host supports only predefined instance types, click Predefined Instance Type. Then, select the instance type in the Instance Type section.
If the dedicated host supports custom instance types, click Custom Instance Type. Then, you can adjust the sliders to specify the number of vCPUs and the size of the memory. The minimum scaling step size of vCPUs is 1. If more than 1 vCPU is required, you must set this parameter to an even number, such as 2 or 4. The minimum scaling step size of the memory is 1 GiB.
ecs.i2.xlarge
Host Resource
The total and remaining amount of vCPUs and memory.
Retain the default setting.
Instance Type
The selected instance type.
ecs.c7.large (2 vCPU 4 GiB, Compute Optimized Type c7)
Quantity
The number of instances to purchase.
1
Image
You can select an image on the Public Image, Custom Image, Shared Image, Marketplace Image, or Community Image tab.
For more information, see Select an image.
NoteTo associate an SSH key pair with each ECS instance, you must select a Linux operating system from the drop-down list for the image.
To configure user data of the ECS instances, you must select an image that supports user data. For more information, see Manage the user data of Linux instances.
Alibaba Cloud Linux 2.1903 LTS 64-bit
Storage
System Disk: Required. The system disk is used to install the operating system. You must specify the category and capacity of the system disk.
Category: All available categories of disks in the current region are listed in this section.
Capacity: The default capacity of the system disk is 40 GiB. The maximum capacity is 500 GiB. If the size of the selected image is larger than 40 GiB, the image size is the default value. The minimum size of the system disk is related to the image. The actual size is displayed on the buy page. The system disks for different images have different capacities:
Linux (excluding CoreOS and Red Hat): 20 to 500 GiB
FreeBSD: 30–500 GiB
CoreOS: 30–500 GiB
Red Hat: 40–500 GiB
Windows: 40–500 GiB
Data Disk: To add data disks, you must specify the disk category, capacity, and quantity, as well as whether to enable Disk Encryption. You can create an empty data disk or create a data disk from a snapshot.
NoteData disks created together with instances have the following features:
The billing method of the data disks is the same as that of the ECS instances.
When you enable or disable the Release with Instance feature for a system disk or a data disk, take note of the following information:
If the Release with Instance feature is enabled for the disk, the disk is automatically released when its associated instance is released.
If the Release with Instance feature is disabled for the disk, the disk is retained as a pay-as-you-go data disk 15 days after its associated instance expires, 15 days after a payment becomes overdue for the instance, or when the instance is manually released. If you create a disk in the Chinese mainland, you must complete real-name verification for your account to ensure that the disk can be retained.
NoteThe retained disk is billed on a pay-as-you-go basis. You can log on to the Billing Management console and view consumption details by disk ID.
A maximum of 16 data disks can be attached to a single instance. For more information, see EBS limits.
If you create an instance from an instance family with local SSDs, such as the i2 instance family, the information about the local SSDs is displayed and cannot be modified. For more information about the local disks that are supported by different instance types, see Overview of instance families.
Retain the default setting.
Snapshot
You can use automatic snapshot policies to periodically back up disks to prevent data loss risks arising from various situations such as virus attacks and accidental data deletion. You can specify the backup cycle and a system disk or data disk for backup.
Retain the default setting.
Click Next:Networking and configure the parameters in the Networking step. The following table describes the parameters.
Parameter
Description
Example
Network Type
Alibaba Cloud provides a default virtual private cloud (VPC). If you do not want to use the default VPC, you can create a VPC and a vSwitch in the region where you want to create ECS instances. For more information, see Create a VPC with an IPv4 CIDR block.
VPC: ddh-vpc/vpc-bp1j4z1sr8****
vSwitch: test/vsw-bp155oak33****
Public IP Address
If you want to assign public IP addresses to the ECS instances, you must select Assign Public IPv4 Address. Then, select Pay-by-traffic or Pay-by-bandwidth as the metering method of the public bandwidth, and specify the bandwidth. The public IP addresses cannot be detached from the ECS instances. For more information on public bandwidth billing, see Public bandwidth.
If your instances do not need to access the Internet or your VPC-type instances use elastic IP addresses (EIPs) to access the Internet, you do not need to assign public IP addresses. You can associate an EIP with or disassociate an EIP from an instance at any time.
Retain the default setting.
Security Group
Alibaba Cloud provides a default security group. If you do not want to use the default security group, you can create a security group in the region where you want to create ECS instances. For more information, see Create a security group.
sg-20200622/sg-bp1542zl60b5q6hx****
Elastic Network Interface
If the selected instance type supports elastic network interfaces (ENIs), you can add ENIs and select vSwitches for the ENIs.
NoteBy default, the ENIs are released together with the ECS instances. You can also detach the ENIs from the instances by calling the DetachNetworkInterface operation or using the ECS console.
test
IPv6
Specify whether to use an IPv6 address based on your business requirements. For information about the instance families that support IPv6, see Overview of instance families.
Retain the default setting.
Optional. Click Next:System Configurations and complete system configurations according to the following table.
Parameter
Description
Example
Logon Credentials
You can specify a key pair and password, or select Set Later to configure the logon credential after the instance is created. Select a logon credential based on the operating system of the image.
Key Pair: Select an existing key pair or click Create Key Pair to create one. For more information, see Create an SSH key pair.
Password: Enter a password and confirm it.
Set Later: After the instances are created, bind the key pairs or reset the instance passwords. For more information, see Reset the logon password of an instance.
Set Later
Instance Name
Enter a name for the ECS instance. The name must be 2 to 128 characters in length, and can contain letters, digits, periods (.), underscores (_), colons (:), and hyphens (-). It must start with a letter.
DDH-ecs
Description
Enter a description. The description must be 2 to 256 characters in length and cannot start with
http://orhttps://.test
Hostname
Enter a hostname.
ddh-test
Advanced Options
Instance RAM Role: A Resource Access Management (RAM) role must be created for an ECS instance and authorized to access the ECS instance if you want the instance to assume a RAM role. For more information, see Attach an instance RAM role to an ECS instance.
User Data: You can configure user data based on your business requirements. For more information, see Overview of ECS instance user data.
Retain the default setting.
Optional. Click Next:Grouping to group the instance you have created.
Tag: A tag consists of a case-sensitive key-value pair. If you have multiple instances, we recommend that you tag the instances for easy identification.
Resource Group: If you are an enterprise user, and you have activated Resource Management and created resource groups, you can manage instances by using the resource groups. Resource groups allow you to manage cross-region and cross-service resources based on your business requirements and manage the permissions of resource groups. For more information, see What is Resource Management?
Click Preview to confirm the order.
Before the instances are created, make sure that all configurations, such as the use duration, meet your business requirements.
In the Configurations section, confirm the configurations of the ECS instances.
You can click
 to modify the configurations.
 Configure the use duration of the ECS instances.
If the billing method of the ECS instances is Subscription, you must specify the duration and whether to enable auto-renewal.
NoteThe expiration date of the subscription ECS instances cannot be later than that of the subscription dedicated host.
If the billing method of the ECS instances is Pay-as-you-go, you can select Automatic Release and specify the time scheduled for the ECS instances to be automatically released.
Read ECS Terms of Service and select the check box.
In the lower part of the page, view the total fees of the ECS instances, confirm the order, and then complete the payment.
View the result
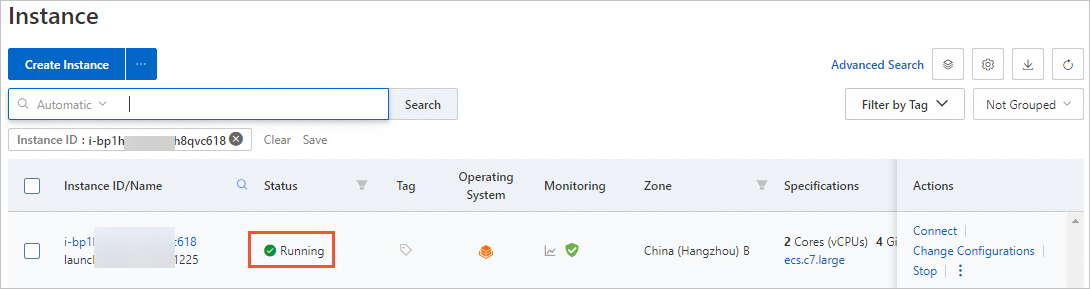
After the ECS instances are created, click Console to switch back to the ECS console. On the instances page, select the region where the created ECS instances reside. Then, you can view the instance IDs, public IP addresses, and private IP addresses of the created instances.
What to do next
If you did not set a logon password when you created an ECS instance, you can set a password for the instance later. For more information, see Reset the logon password of an instance.
You can build an FTP site on an ECS instance to upload files to the instance. For more information about how to deploy the FTP service, see Build an FTP site on an ECS instance.
If you have created data disks along with the ECS instances, you can use the data disks only after they are partitioned and formatted. For more information, see Initialize a data disk whose size does not exceed 2 TiB on a Linux instance or Initialize a data disk up to 2 TiB in size on a Windows instance.