Managing separate legacy resource groups for Data Integration, scheduling, and DataService Studio creates operational overhead. A single serverless resource group handles all three — simplifying management and unifying billing. This topic walks you through estimating the compute units (CUs) you need, then completing the switch.
After switching, data compute tasks (such as PyODPS2 and EMR Hive) incur additional computing fees. Review Billing for serverless resource groups before proceeding.
What changes after the switch
The following table summarizes how each task type is affected:
| Task type | Impact after switching |
|---|---|
| Data Integration | DataWorks automatically recommends compute unit (CU) counts based on your original task configuration. You can override this using the estimates in Step 2. |
| Scheduling | The resource group used for task computing changes along with the scheduling resource group. A portion of the scheduling quota is allocated for compute-optimized task CU configuration. |
| DataService Studio | You must configure a CU quota for DataService Studio before switching. Without a quota, the serverless resource group cannot be selected during the switch. |
Billing
| Link | |
|---|---|
| Before switching | Billing for legacy resource groups |
| After switching | Billing for serverless resource groups |
Step 1: Query tasks in the resource groups to be switched
Identify which tasks are currently running on the legacy resource groups you plan to switch. Do this for each task type.
Data Integration
On the Data Integration page:
-
Log on to the DataWorks console. In the top navigation bar, select your region. In the left-side navigation pane, choose Data Integration > Data Integration, select your workspace, and click Go to Data Integration.
-
In the left-side navigation pane, click Synchronization Task. In the Tasks section, click Expand. Filter tasks by setting Resource Group to the data integration resource group you want to switch.

On the new Data Studio page:
-
Go to the Workspaces page. In the top navigation bar, select your region. Find your workspace and choose Shortcuts > Data Studio in the Actions column.
-
Click the
 icon next to Project Directory to access batch operations.
 -
Filter nodes by the resource group you want to switch, and select the Real-time Sync and Batch Sync node types.

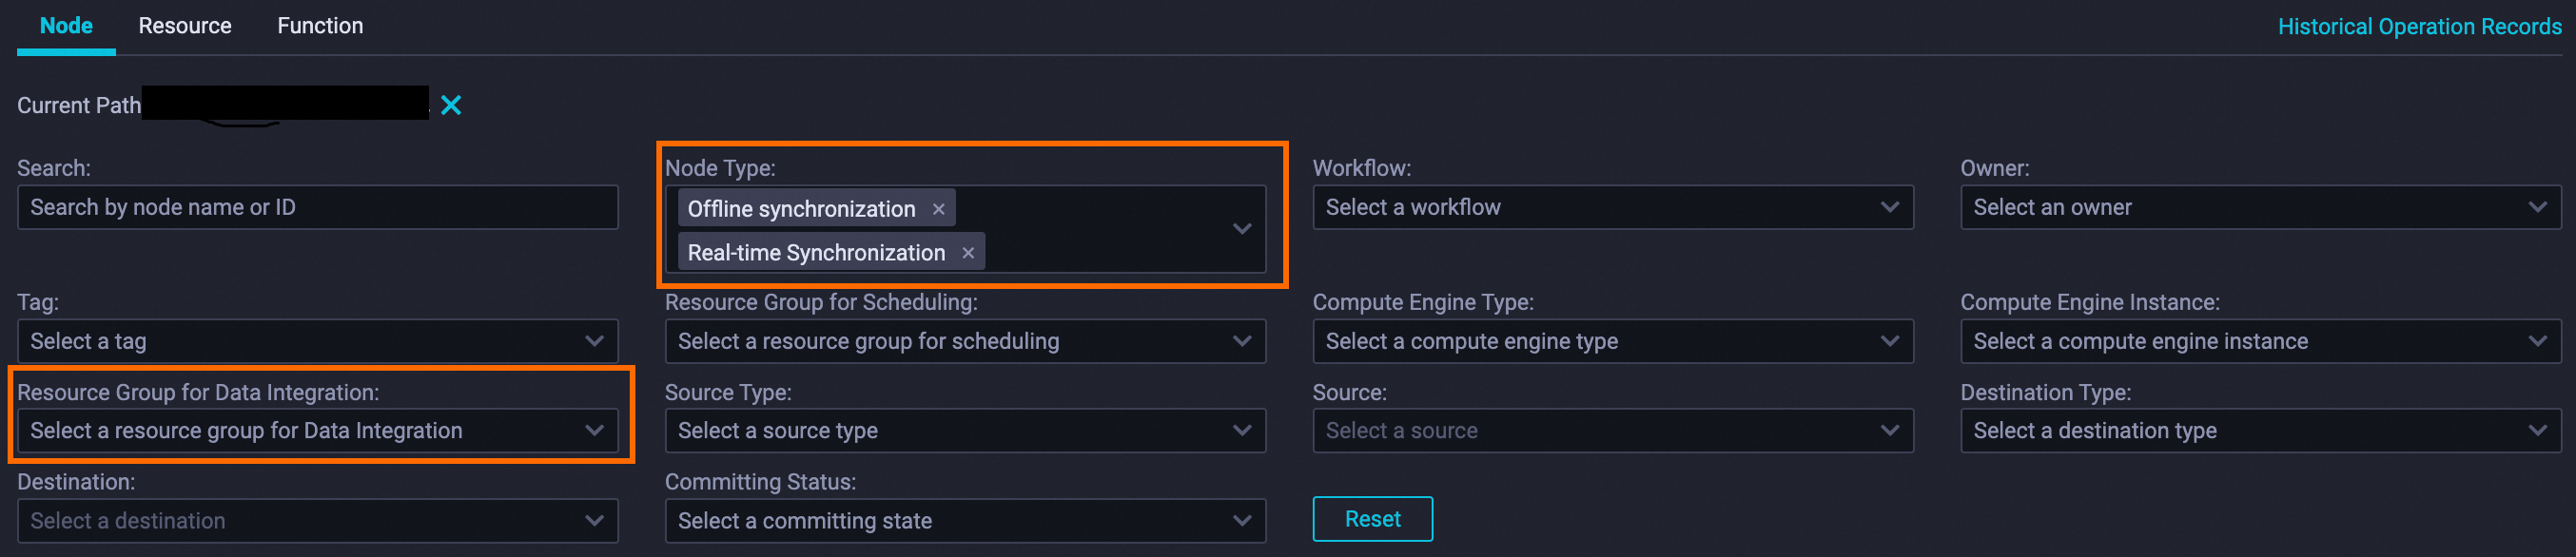
On the legacy DataStudio page:
-
Log on to the DataWorks console. In the top navigation bar, select your region. In the left-side navigation pane, choose Data Development and O&M > Data Development, select your workspace, and click Go to Data Development.
-
In the left-side navigation pane, click DataStudio. Right-click the target business flow and choose Batch Operation.
-
Set Node Type to Offline Synchronization and Real-time Synchronization. Set Resource Group for Data Integration to the resource group you want to switch.
Scheduling tasks
-
Log on to the DataWorks console. In the top navigation bar, select your region. In the left-side navigation pane, choose Data Development and O&M > Operation Center, select your workspace, and click Go to Operation Center.
-
In the left-side navigation pane, choose Auto Triggered Task O&M > Auto Triggered Tasks. Filter tasks by setting Scheduling Resource Group to the scheduling resource group you want to switch.

DataService Studio
-
Log on to the DataWorks console. In the top navigation bar, select your region. In the left-side navigation pane, choose Data Analysis and Service > DataService Studio, select your workspace, and click Go to DataService Studio.
-
In the left-side navigation pane, click Service Development. Click the
 icon to open the Batch Operations page. Filter services by setting Resource Group to the DataService Studio resource group you want to switch.
Step 2: Assess the required serverless resource group size
Use the tables below to estimate the CU count needed for each task type, then total them to size your serverless resource group.
Data Integration — offline synchronization
| Concurrency configuration | Recommended specs | Minimum specs |
|---|---|---|
| Less than 4 | 0.5 CU | 0.5 CU |
| 4 or more | (Concurrency - 4) × 0.07 + 0.5 CU |
— |
Data Integration — real-time synchronization
| Task type | Recommended specs | Minimum specs |
|---|---|---|
| Real-time synchronization for MySQL — 1 database | 2 CU | 1 CU |
| Real-time synchronization for MySQL — 2 to 5 databases | 2 CU | — |
| Real-time synchronization for MySQL — 6 or more databases | 2 CU | — |
| Real-time synchronization for Kafka | 1 CU | — |
| Other single-table real-time tasks | 1 CU | — |
| Real-time synchronization for an entire database | — | 2 CU |
Scheduling
CU specification has no effect on scheduling tasks. The serverless resource group supports up to 200 concurrently running instances regardless of CU count. The default concurrent instance limit is 50. To raise it to 200, update the limit on the resource group details page.

DataService Studio
| Maximum QPS | Minimum specs | Service-level agreement (SLA) |
|---|---|---|
| 500 | 4 CU | 99.95% |
| 1,000 | 8 CU | — |
| 2,000 | 16 CU | — |
Data compute
Each data compute task type has a default CU consumption. For details, see Task types and CU consumption.
Step 3: Purchase a serverless resource group
Based on your estimates from Step 2, purchase a serverless resource group with sufficient capacity. For instructions, see Use a serverless resource group.
Step 4: Switch to the serverless resource group
Switch each task type to the serverless resource group you purchased:
-
Switch the resource group for Data Integration
DataWorks automatically recommends CU counts based on the original task configuration. To set CUs manually, use the estimates from Step 2.
-
Switch the resource group for scheduling tasks
Changing the scheduling resource group also changes the resource group used for task computing. A portion of the scheduling quota is allocated for compute-optimized task CU configuration.
-
Switch the resource group for DataService Studio
Before switching DataService Studio, allocate a CU quota for it. Without a quota, the serverless resource group will not appear as an option. For details, see Allocate a CU quota to a task.
What's next
After the switch, unsubscribe from your legacy resource groups if they are no longer needed. For instructions, see Unsubscribe from a subscription product.