The cross-workspace cloning feature will stop providing services on June 30, 2025. For details, see Notice on the discontinuation of DataWorks cross-workspace cloning.
Cross-workspace cloning lets you copy nodes—along with their folders and workflows—from one DataWorks workspace to another, preserving directory structure and node dependencies.
Use cases
Use cross-workspace cloning when you want to reuse existing development work without rebuilding nodes from scratch:
Reuse nodes across teams or projects: Clone nodes from one basic-mode workspace to another to share a common set of tasks.
Promote nodes to a standard-mode workspace: Clone nodes from a basic-mode workspace to a standard-mode workspace to move them into a workspace with dev/prod separation.
Only basic-mode workspaces can be the source. Cloning from a standard-mode workspace is not supported.
Prerequisites
Before you begin, make sure that:
The destination workspace exists and is accessible to you.
All ancestor nodes of the nodes you want to clone have already been cloned to the destination workspace.
If the source or destination workspace has more than two compute engine instances of the same type, you know which instance each node should map to.
Usage notes
Cloning a node also clones the folder and workflow it belongs to.
Cloning overwrites any existing nodes, folders, or workflows in the destination workspace that share the same path and name.
If you clone a node together with its ancestor and descendant nodes in the same operation, the dependencies among those nodes are preserved after cloning.
Clone nodes across workspaces
Log on to the DataWorks console. In the left-side navigation pane, click Workspaces. In the top navigation bar, select the region where the source workspace resides. Find the workspace and click DataStudio in the Actions column.
In DataStudio, find the workflow you want to clone in the Business Flow section and double-click its name to open it.
In the toolbar, click Cross-project cloning. The Create Clone Task page appears.

Set the Target Workspace parameter, then select the nodes you want to clone.

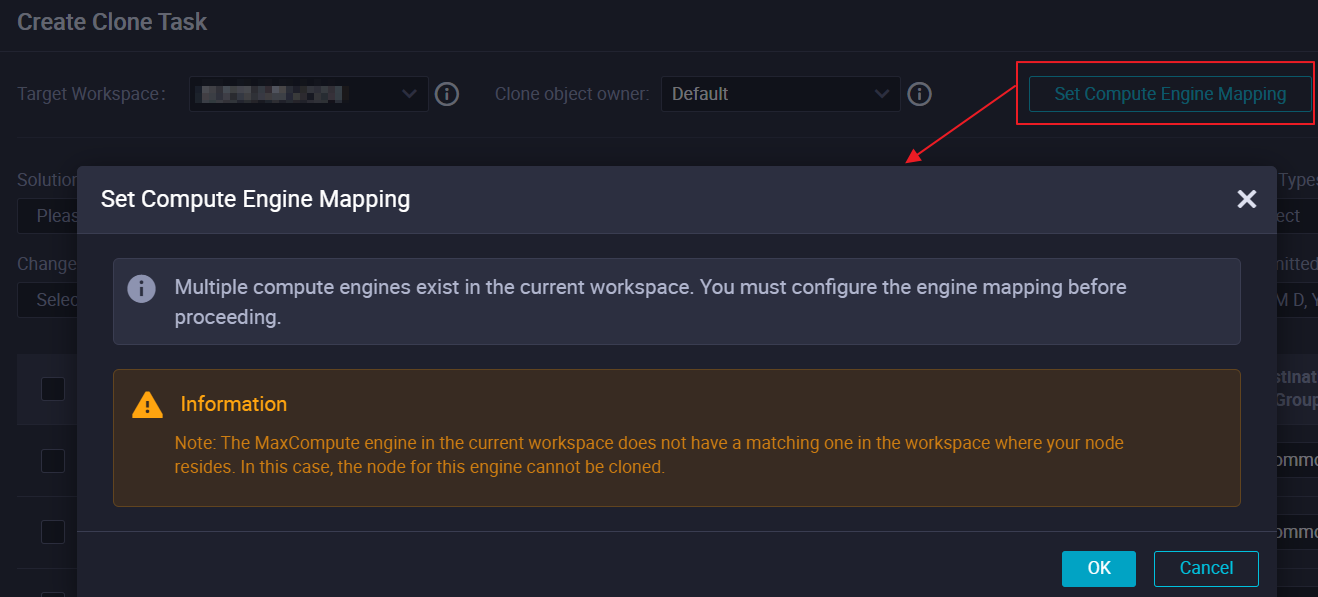
Configure compute engine mapping. The Set Compute Engine Mapping button appears only when the source or destination workspace has more than two compute engine instances of the same type.
If the button is visible: Click Set Compute Engine Mapping. In the Compute Engine Mapping dialog box, map each compute engine instance from the source workspace to the corresponding instance in the destination workspace, then click OK. If the destination workspace does not have a compute engine type that some of the selected nodes require, a message appears in the dialog box. Select Skip Nodes Without Target Engine Instance to exclude those nodes from the clone operation. If you do not select this option, the clone operation reports an error.
If the button is not visible: The selected nodes will be cloned to the default compute engine instance of the destination workspace. No action is needed.
In the lower-left corner, click Add to List. The selected nodes are added to the To-Be-Cloned Node List.
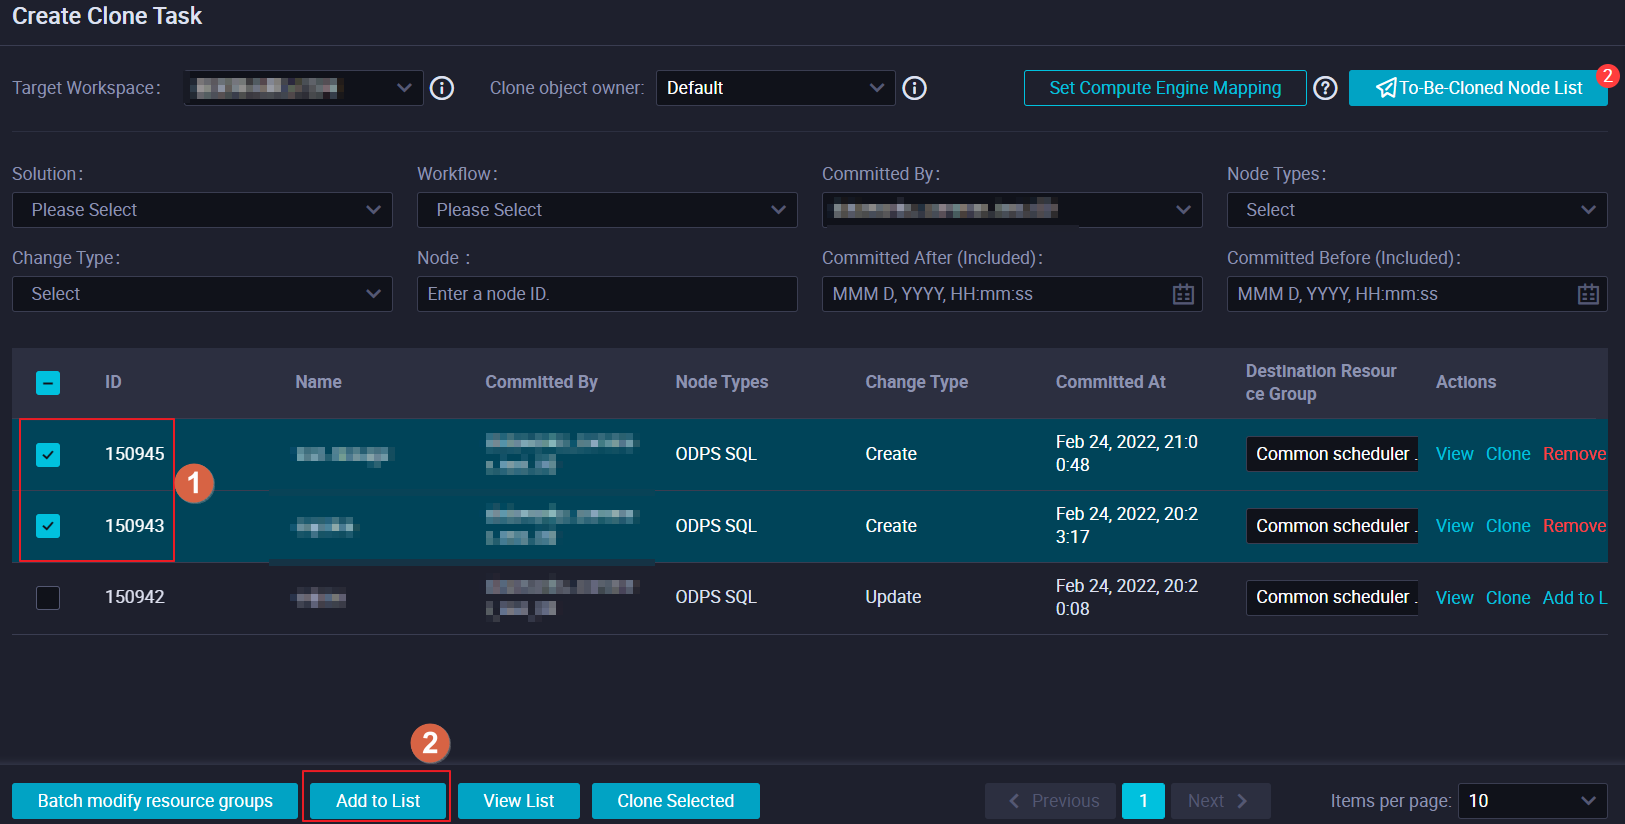
In the upper-right corner, click To-Be-Cloned Node List. In the Nodes to Clone panel, click Clone All.
In the Compute Engine Mapping dialog box, confirm the mapping and click OK.
After the operation completes, go to the destination workspace and verify that the nodes appear under the expected workflow. In most cases, the directory structure of the workflow is cloned along with the nodes.