When you use DataWorks to synchronize data, you can use only exclusive resource groups
for Data Integration to run Data Integration nodes. In addition, you can select a
shared or exclusive resource group for scheduling based on your business requirements.
This topic describes the resources that are used for data synchronization and how
to configure the resources.
Background information
- Resource planning and preparation
When you synchronize data, Data Integration nodes are run based on resource groups
for Data Integration and resource groups for scheduling. You can use only exclusive
resource groups for Data Integration. Before you synchronize data, you must purchase
an exclusive resource group for Data Integration and add this exclusive resource group
to your DataWorks workspace.
For more information about exclusive resource groups for Data Integration, see Overview.
- Network connections
An exclusive resource group for Data Integration is essentially a group of ECS instances.
After you purchase such an exclusive resource group, it is isolated from other services.
You must associate the resource group with a virtual private cloud (VPC) to ensure
network connectivity between the resource group and data sources during subsequent
data synchronization.
Purchase a resource group (create an order)
- Log on to the DataWorks console by using your Alibaba Cloud account and go to the
buy page for an exclusive resource group for scheduling.
- On the buy page, configure the parameters based on your business requirements. Take
note of the following items when you configure the parameters:
- Region: Select the region in which you want to use an exclusive resource group for Data
Integration.
Note An exclusive resource group for Data Integration cannot be used across regions. For
example, exclusive resource groups for Data Integration in the China (Shanghai) region
can be used only by the workspaces in the China (Shanghai) region.
- Type: Select Exclusive Resource Groups for Data Integration Instances.
Configure other parameters such as
Duration based on your business requirements.
Note You can purchase a maximum of 20 Elastic Compute Service (ECS) instances for an exclusive
resource group of each type of specifications. If you want to purchase more ECS instances
for your exclusive resource group,
submit a ticket to upgrade the resource group.
- Click Buy Now and follow the on-screen instructions to complete the payment.
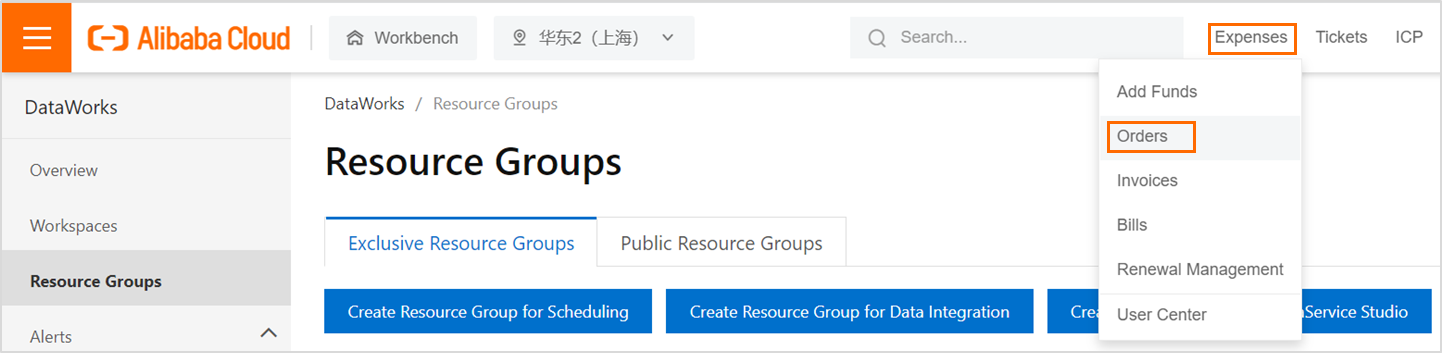
After you purchase the resource group, you can view the details about the purchase
order, such as the order number, on the
Orders page.
You can add the purchased exclusive resource group for Data Integration to the DataWorks
console by using the order number.
Associate the exclusive resource group with a VPC
Exclusive resource groups are deployed in the virtual private cloud (VPC) in which
DataWorks is hosted. Exclusive resource groups are disconnected from other network
environments. To use an exclusive resource group, you must configure network settings
for the exclusive resource group to associate it with a VPC that can connect to data
sources. This way, the exclusive resource group can access the data sources over the
VPC. To associate the exclusive resource group for Data Integration with a VPC, perform
the following steps:
Notice You can associate an exclusive resource group for Data Integration that uses the specifications
of 4 vCPUs and 8 GiB of memory with a maximum of two VPCs. You can associate an exclusive
resource group for Data Integration that uses the other specifications with a maximum
of three VPCs.
- Log on to the DataWorks console.
- On the Exclusive Resource Groups tab of the Resource Groups page, find the created resource group and click Network Settings in the Actions column. The page on which you can associate the resource group with
a VPC appears.
Before you associate the exclusive resource group with a VPC, you must configure permissions
in the RAM console by using your Alibaba Cloud account to authorize DataWorks to access
your cloud resources. You can go to the
Cloud Resource Access Authorization page to authorize DataWorks to access your cloud resources. You can also authorize
DataWorks to access your cloud resources by clicking Log on to the RAM console for
authorization in the dialog box that prompts to you when you log on to the DataWorks
console for the first time by using your Alibaba Cloud account.
- Associate the exclusive resource group with a VPC.
- On the VPC Binding tab, click Add Binding in the upper-left corner. In the Add VPC Binding panel, configure the parameters based on the network environment.
The following table describes the parameters.
| Parameter |
Description (The data source and exclusive resource group belong to the same Alibaba
Cloud account and same region.)
|
Description (The data source and exclusive resource group belong to different Alibaba
Cloud accounts or different regions.)
|
| VPC |
If your data source and the exclusive resource group belong to the same Alibaba Cloud
account, we recommend that you set this parameter to the VPC in which your data source
is deployed.
If your data source and the exclusive resource group belong to different Alibaba Cloud
accounts, set this parameter based on the description for the scenario where your
data source and the exclusive resource group belong to different regions.
|
If your data source and the exclusive resource group belong to different regions,
you can click Create VPC to create a VPC for the exclusive resource group. For example, if your data source
is not deployed in a VPC, you can create a VPC for the exclusive resource group. After
you create the VPC, you can select it from the VPC drop-down list. You can also select
a VPC that connects to your data source.
Note If you click Create VPC to create a VPC for the exclusive resource group, you must
connect the created VPC to the VPC in which your data source resides by using Express
Connect circuits or VPN gateways, and manually add a route that points to the IP address
of your data source to ensure network connectivity between the exclusive resource
group and your data source.
|
| Zone |
Set this parameter to the zone in which your data source resides. |
Set this parameter to a zone from which a network connection to your data source is
established.
|
| VSwitch |
If you set the VPC parameter to the VPC in which your data source resides, we recommend
that you select the vSwitch to which the data source is connected.
Note After you associate the exclusive resource group with the VPC in which the data source
resides and a vSwitch that resides in the VPC, a route is automatically added. The
destination of this route is the CIDR block of the VPC. This ensures that the exclusive
resource group can access all data sources in this VPC.
|
Set this parameter to the vSwitch that can connect to your data source. If no vSwitch
is available, you can click Create VSwitch to create a vSwitch for the exclusive resource group. After a vSwitch is created,
set this parameter to the vSwitch.
|
| Security Groups |
Security groups allow or deny access to the resources in your exclusive resource group
over the Internet or an internal network. You can select an existing security group
based on your business requirements, or click Create Security Group on the right side of this parameter to create a security group for the resources
in the exclusive resource group. For more information about how to create a security
group, see Add a security group rule.
|
- Click OK.
Note If your data source and the exclusive resource group belong to different regions or
Alibaba Cloud accounts, after you associate the exclusive resource group with a VPC,
you must add a route that points to the IP address of your data source.
- Optional:Add host configurations.
You may fail to access your data source by using IP addresses. For example, you can
access your data source only by using hostnames. In this case, you must perform the
following steps to add host configurations. Otherwise, the connectivity test fails
when you add the data source by using its hostnames.
- Click the Hostname-to-IP Mapping tab. Then, click Add in the upper-left corner of the tab. In the Create Hostname-to-IP Mapping dialog box, configure the parameters. The following table describes the parameters.
| Parameter |
Description |
| IP Address |
The actual IP address of the data source. |
| The hostname |
The hostname that is used to access the data source. If you want to specify multiple
hostnames, place each hostname on a separate line.
Note The domain name can contain digits, letters, hyphens (-), and periods (.). It must
start with a letter and end with a letter or digit.
|
- If the data source has multiple IP addresses, click Add to add more host configurations.
Note
- The IP address or hostnames that are added in a host configuration must be different
from the IP addresses or hostnames in existing host configurations.
- You can map one IP address to multiple hostnames in a host configuration. However,
one hostname can point to only one IP address.
- Optional:Add Domain Name System (DNS) configurations.
You may fail to access your data source by using IP addresses. For example, you can
access your data source only by using the domain name of a Server Load Balancer (SLB)
instance, and an internal DNS server resolves the domain name to IP addresses of your
data source. In this case, you must perform the following steps to add DNS configurations.
Otherwise, the connectivity test fails when you add the data source by using its DNS
configuration.
Note If a domain name that is added in a host configuration is also configured in a DNS
configuration, the system preferentially uses the host configuration to access the
data source.
- Click the DNS Configuration tab. Then, click Add in the lower-left corner of the tab. After you configure the parameters for a DNS
configuration, click Save. The following table describes the parameters.
| Parameter |
Description |
| Domain |
Optional. If you can use the same second-level domain to access your data sources,
set this parameter to the second-level domain.
For example, the domain name that is used to access data source 1 is domain1.example.com,
and the domain name that is used to access data source 2 is domain2.example.com. In
this example, we recommend that you set this parameter to example.com.
Note The domain name can contain digits, letters, hyphens (-), and periods (.). It must
start with a letter and end with a letter or digit.
|
| NameServer |
Enter the IP address of the DNS server that resolves the domain name of the data source.
If you want to specify multiple DNS servers, place the IP address of each DNS server
on a separate line.
|
- To modify an existing DNS configuration, click Modify in the lower-left corner.
What to do next
After you plan and configure resources, you can configure data sources. You must connect
the exclusive resource group for Data Integration to the source and destination data
sources. You must also create an account and grant the required permissions to the
account. This account is used to access the source and destination data sources. The
preceding operations help you create a sync node. For more information about how to
configure source data sources, see Configure a source MySQL data source, Configure a source Oracle data source, and Configure a source PolarDB data source.