This topic describes how to use an exclusive resource group for Data Integration to migrate data from a self-managed MySQL database on an Elastic Compute Service (ECS) instance to MaxCompute.
Prerequisites
You have at least one Elastic Compute Service (ECS) instance that is associated with a virtual private cloud (VPC). Do not use an instance on the classic network. A MySQL database is installed on the ECS instance, and a user and test data have been created in the database. This topic uses the following statements to create the test data in the self-managed MySQL database.
CREATE TABLE IF NOT EXISTS good_sale(
   create_time timestamp,
   category varchar(20),
   brand varchar(20),
   buyer_id varchar(20),
   trans_num varchar(20),
   trans_amount DOUBLE,
   click_cnt varchar(20)
   );
insert into good_sale values('2018-08-21','coat','brandA','lilei',3,500.6,7),
('2018-08-22','food','brandB','lilei',1,303,8),
('2018-08-22','coat','brandC','hanmeimei',2,510,2),
('2018-08-22','bath','brandA','hanmeimei',1,442.5,1),
('2018-08-22','food','brandD','hanmeimei',2,234,3),
('2018-08-23','coat','brandB','jimmy',9,2000,7),
('2018-08-23','food','brandA','jimmy',5,45.1,5),
('2018-08-23','coat','brandE','jimmy',5,100.2,4),
('2018-08-24','food','brandG','peiqi',10,5560,7),
('2018-08-24','bath','brandF','peiqi',1,445.6,2),
('2018-08-24','coat','brandA','ray',3,777,3),
('2018-08-24','bath','brandG','ray',3,122,3),
('2018-08-24','coat','brandC','ray',1,62,7) ;
Note the Primary Private IP Address , VPC, and vSwitch information of your ECS instance.
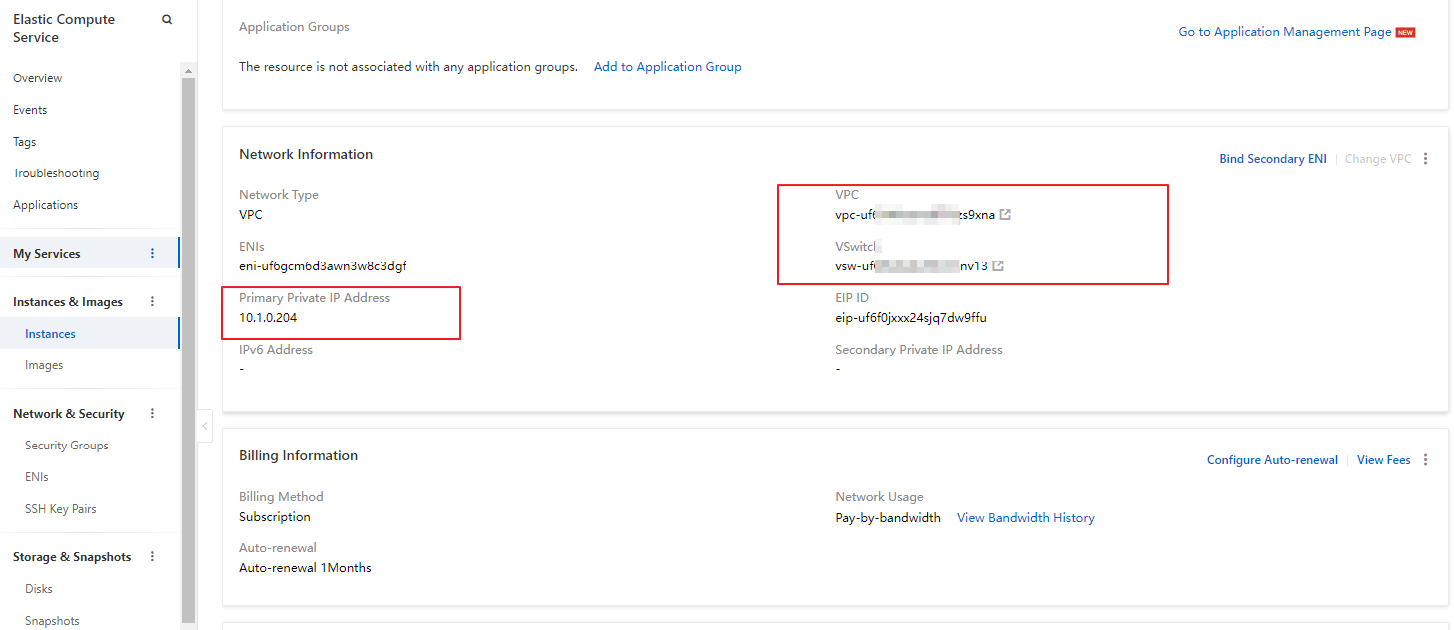
A security group rule is added for the ECS instance to allow access on the port that the MySQL database uses. The default port is 3306. For more information, see Add a security group rule. Note the name of your security group.
A DataWorks workspace is created. This topic uses a DataWorks workspace in basic mode that uses the MaxCompute compute engine. Ensure that your ECS instance and DataWorks workspace are in the same region. For more information about how to create a workspace, see Create a workspace.
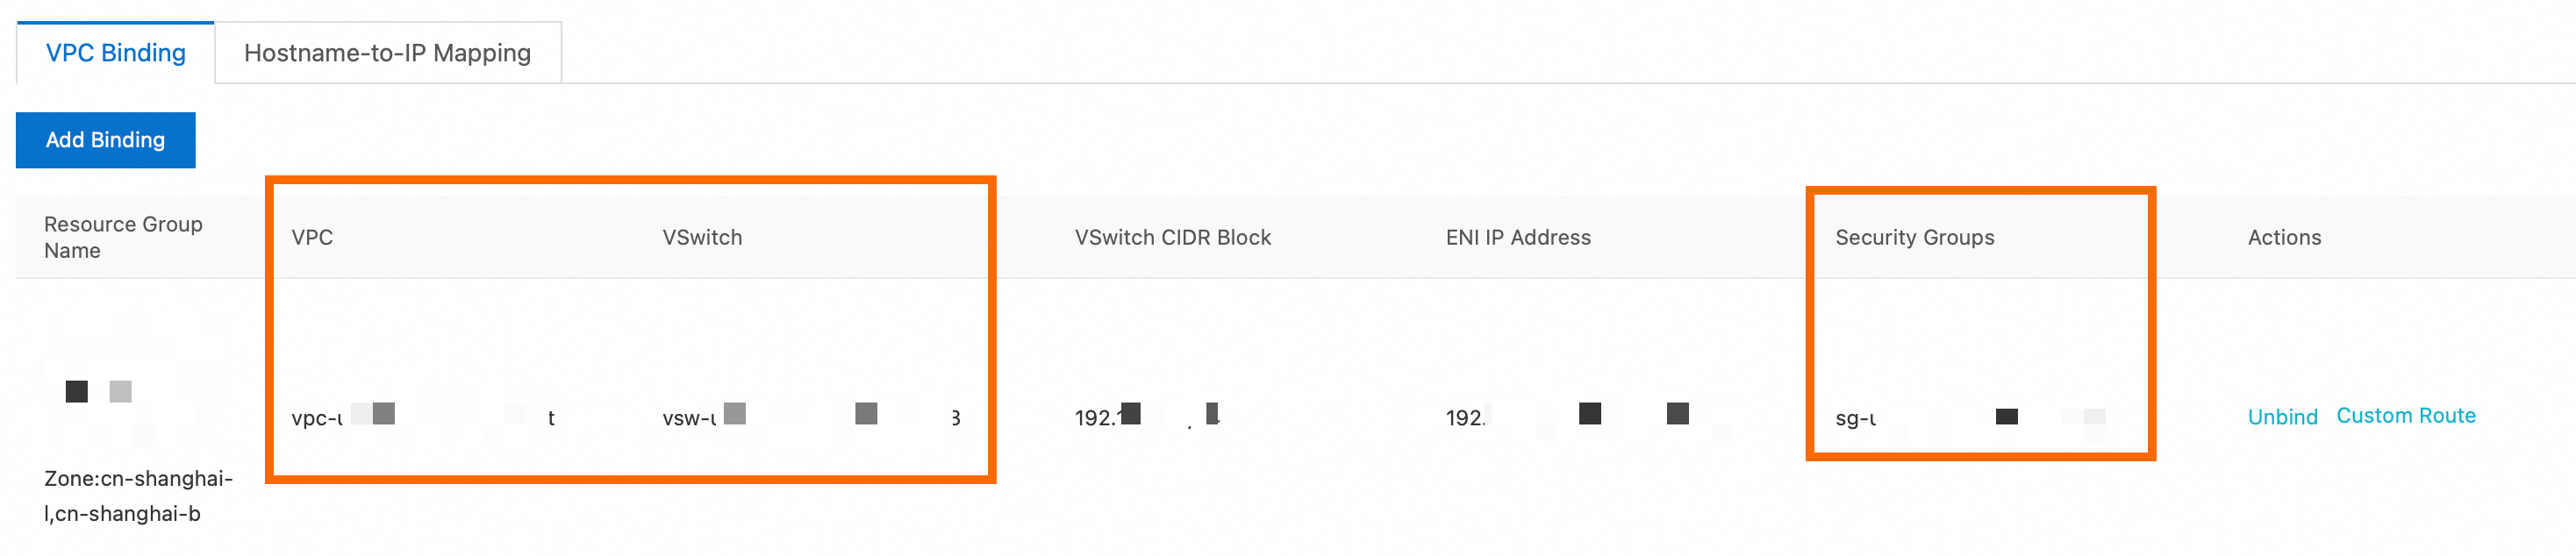
An exclusive resource group for Data Integration is purchased and associated with the VPC where the ECS instance resides. The exclusive resource group must be in the same zone as the ECS instance. For more information, see Use exclusive resource groups for Data Integration. After the association is complete, you can view your exclusive resource group in the Resource Groups.
On the tab, verify that the VPC, VSwitch, and Security Groups information is the same as that of the ECS instance.
A MaxCompute data source is added. For more information, see Associate a MaxCompute compute resource.
Background
Exclusive resource groups for Data Integration ensure fast and stable data transmission. The exclusive resource group that you purchase and the data source that you want to access must be in the same zone of the same region. In this topic, the data source is a self-managed MySQL database on an ECS instance. The resource group must also be in the same region as your DataWorks workspace.
Procedure
Create a MySQL data source in DataWorks.
Go to the Data Sources page.
Log on to the DataWorks console. In the top navigation bar, select the desired region. In the left-side navigation pane, choose . On the page that appears, select the desired workspace from the drop-down list and click Go to Management Center.
In the left-side navigation pane of the SettingCenter page, click Data Sources.
Click Add Data Source.
In the Add Data Source dialog box, click MySQL.
In the Create MySQL Data Source dialog box, configure the parameters. For more information, see Configure a MySQL data source.
This topic uses the Connection String Mode as an example. For Connection Address, enter the private IP address of the ECS instance that you noted and the default MySQL port number, 3306.
 Note
NoteThe Test Connectivity feature is not supported for self-managed MySQL data sources in a VPC. Therefore, it is normal for the connectivity test to fail.
Click Test Connectivity for the resource group.
You can use an exclusive resource group for Data Integration to run data sync tasks. A task can use only one resource group for each run. If multiple resource groups are available, you must test the connectivity of each resource group that you want to use. This ensures that the resource group used by the sync task can connect to the data source. Otherwise, the data sync task cannot run as expected. For more information, see Network connectivity solutions.
After the connectivity test passes, click Complete.
Create a MaxCompute table.
Create a table in DataWorks to receive the test data from the MySQL database.
Click the
 icon in the upper-left corner and choose .
Create a Workflow. For more information, see Create a scheduled workflow.
Right-click the new workflow and choose .
Enter a name for your MaxCompute table. This example uses good_sale, which is the same name as the table in the MySQL database. Click DDL, enter the table creation statement, and then click Generate Table Schema.
The following table creation statement is used in this example. Note the data type conversions.
CREATE TABLE IF NOT EXISTS good_sale(
   create_time string,
   category STRING,
   brand STRING,
   buyer_id STRING,
   trans_num BIGINT,
   trans_amount DOUBLE,
   click_cnt BIGINT
   );
Enter a Display Name for the table and click Commit To Production Environment to create the good_sale table in MaxCompute.
Configure a data integration task.
Right-click the workflow and choose to create a data integration task.
For the source, select the MySQL data source that you added. For the destination, select the added MaxCompute data source. Click Switch To Code Editor to switch the data integration task to the code editor.
It is normal if an error occurs or if you cannot select a source Table. Switch to the code editor directly.
In the right-side pane, click the Data Integration Resource Group Configuration tab and select the exclusive resource group that you purchased.
If you do not switch the task to the exclusive resource group for Data Integration, the task cannot run.
Enter the following content for the data integration task script.
{
    "type": "job",
    "steps": [
        {
            "stepType": "mysql",
            "parameter": {
                "column": [// The names of the source columns.
                    "create_time",
                    "category",
                    "brand",
                    "buyer_id",
                    "trans_num",
                    "trans_amount",
                    "click_cnt"
                ],
                "connection": [
                    {
                        "datasource": "shuai",// The source data source.
                        "table": [
                            "good_sale"// The name of the source database table. The name must be in an array format enclosed in square brackets [].
                        ]
                    }
                ],
                "where": "",
                "splitPk": "",
                "encoding": "UTF-8"
            },
            "name": "Reader",
            "category": "reader"
        },
        {
            "stepType": "odps",
            "parameter": {
                "partition": "",
                "truncate": true,
                "datasource": "odps_source",// The name of the destination MaxCompute data source.
                "column": [// The names of the destination columns.
                    "create_time",
                    "category",
                    "brand",
                    "buyer_id",
                    "trans_num",
                    "trans_amount",
                    "click_cnt"
                ],
                "emptyAsNull": false,
                "table": "good_sale"// The name of the destination table.
            },
            "name": "Writer",
            "category": "writer"
        }
    ],
    "version": "2.0",
    "order": {
        "hops": [
            {
                "from": "Reader",
                "to": "Writer"
            }
        ]
    },
    "setting": {
        "errorLimit": {
            "record": "0"
        },
        "speed": {
            "throttle": false,
            "concurrent": 2
        }
    }
}
Click Run. You can view the Runtime Log at the bottom to check whether the data was transferred to MaxCompute.
Results
Create an ODPS SQL node to query the data in the MaxCompute table.
Enter the query statement select * from good_sale; and click Run. You can see the data that was transferred to the MaxCompute table.