This topic describes how to create a synchronization task to export data from MaxCompute to a MySQL data source.
Prerequisites
-
You have created an ApsaraDB RDS for MySQL instance and obtained its instance ID. You have also added the required IP addresses to a whitelist in the ApsaraDB RDS console. For more information, see Create an ApsaraDB RDS for MySQL instance.
NoteWhen you use a Serverless Resource Group to run a synchronization task for ApsaraDB RDS, note the following:
-
If you access the data source over an internal network (VPC), you must add the CIDR block of the vSwitch that is bound to the resource group to the whitelist of the data source.
-
If you access the data source over the Internet, add the Elastic IP Address (EIP) of the Virtual Private Cloud (VPC) to which the Serverless Resource Group is bound to the data source's whitelist.
For more information, see Configure a whitelist.
-
-
If you use an ApsaraDB RDS for MySQL database, create a table named ODPS_RESULT in the database by executing the following statement:
CREATE TABLE `ODPS_RESULT` (
`education`  varchar(255) NULL ,
`num`  int(10) NULL
);
After you create the table, you can run the
DESC ODPS_RESULT;statement to view the table details. -
A result table named result_table has been prepared. For more information, see Create a table and upload data.
-
A virtual node (start) and an ODPS SQL node (insert_data) have been created. For more information, see Create a workflow.
Background
In DataWorks, you typically use Data Integration to periodically import business data generated in your system into a workspace. After SQL tasks compute the data, you can periodically export the results to a specified data source for display or further use.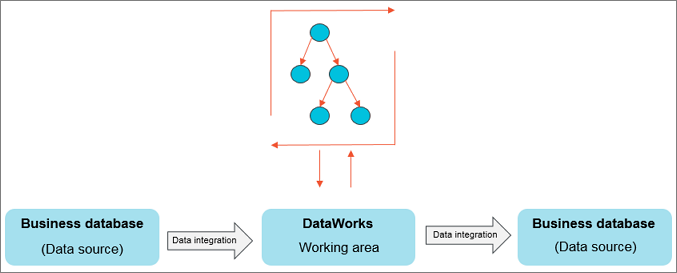
Data Integration supports importing data from or exporting data to various data sources, such as ApsaraDB RDS, MySQL, SQL Server, PostgreSQL, MaxCompute, ApsaraDB for Memcache (OCS), PolarDB-X, Object Storage Service (OSS), Oracle, FTP, DM, HDFS, and MongoDB. For the complete list of supported data source types, see Supported data sources and plug-ins.
Step 1: Add a data source
Only workspace administrators can add data sources. Members with other roles can only view data sources.
-
Log on to the DataWorks console. In the target region, click in the left-side navigation pane. Select a workspace from the drop-down list and click Go to Management Center.
-
Create a MySQL data source.
-
In the left-side navigation pane, choose to go to the Data Sources page.
-
Click Add. In the Add dialog box, select MySQL.
-
-
Configure the data source.
In the Add MySQL Data Source dialog box, configure the parameters. In this example, select Alibaba Cloud instance mode.
The following table describes the key parameters.
Parameter
Description
Applicable environment
Configure the data source for the Development Environment and the Production Environment separately.
Configuration Mode
Select Alibaba Cloud instance mode.
Alibaba Cloud Account
Select Current Alibaba Cloud Account.
Region
Select the region where the data source is located.
Instance
Select the ApsaraDB RDS for MySQL instance that you created. After you select an instance, you can click Obtain Latest Address to view instance details.
If no instance is available, you can go to the ApsaraDB RDS console to create one.
Database Name, Username, and Password
Specify the name of the default database for this data source, and enter the username and password for the database. Do not use the at sign (@) in the password.
Note the following when you configure a synchronization task:
-
For database-level synchronization (including real-time and batch), you can select any database in the ApsaraDB RDS instance that you have permission to access.
-
For a batch synchronization task, if you use multiple databases, you must add a separate data source for each database.
Authentication Method
Select No Authentication.
Configure Secondary Instance
If the data source has a read-only instance (secondary instance), you can enable Configure Secondary Instance when you configure the task and select the secondary instance ID. Using a secondary instance prevents interference with the primary instance and helps protect its performance. If multiple read-only instances exist, one available instance is randomly selected for read operations.
NoteThis feature supports only serverless resource groups.
-
-
Test the resource group's network connectivity.
On the Data integration and Data Scheduling tabs, click **Test Network Connectivity** for the corresponding resource group. A "Connected" status indicates a successful test.
Note-
A synchronization task can use only one type of resource group.
-
You must test the connectivity of each resource group to the data source. The synchronization task cannot run if its resource group fails to connect.
-
-
After the connectivity test passes, click Complete Creation to add the data source.
Step 2: Create and configure a synchronization task
Create a synchronization node named write_result to generate a synchronization task. This task writes data from the result_table table to your MySQL database. Follow these steps:
Log on to the DataWorks console. In the target region, click in the left-side navigation pane. Select a workspace from the drop-down list and click Go to Data Development.
-
Create a batch synchronization node.
Click the
 icon and choose to create a batch synchronization node.
 -
Configure the network connection for the synchronization task.
-
On the Configure Network Connections and Resource Groups tab of the node edit page, set Source to **MaxCompute(ODPS)** and MySQL to **MySQL**. Select the resource group and test its connectivity to the data source. For more information about network configuration, see Network connectivity solutions.
-
Click Next step to go to the Configure tasks page.
-
-
Configure the synchronization task.
-
Configure the source and destination.
In the Source section, select MaxCompute(ODPS) for the data source and enter
result_tablein the Table field. In the Destination section, select MySQL for the data source, enterODPS_RESULTin the Table field, and select insert into for the Primary Key Conflict Policy. This sets the source table to result_table and the destination table to ODPS_RESULT. You can configure other parameters based on your business requirements. For more information, see Codeless UI configuration. -
Configure field mapping.
Map the source fields to the destination fields. The task uses this field mapping to write data.
-
Configure channel control.
Parameter
Description
Expected Maximum Concurrency
The maximum number of threads for concurrently reading data from the source or writing data to the destination.
Note-
Due to factors such as resource specifications, the actual concurrency at runtime may be less than or equal to the value you specify. The resource group used for debugging is charged based on the actual concurrency. For more information, see Performance metrics.
-
Task scheduling fees depend on the number of single-table batch synchronization tasks, not the configured concurrency.
Sync Rate
This setting controls the data transfer speed.
-
Throttling: You can limit the synchronization rate to protect the source database from being overloaded by high extraction speeds. The minimum speed limit is 1 MB/s.
-
No throttling: The task runs at the maximum transfer rate supported by the hardware within the configured concurrency limit.
NoteThis traffic metric measures the throughput within Data Integration, not the actual network interface card (NIC) traffic. NIC traffic is typically one to two times the channel traffic, depending on the serialization overhead of the data storage system.
Policy for Dirty Data Records
Dirty data refers to records that the task fails to write to the destination due to an exception, such as a data type conflict or a constraint violation. You can define a dirty data policy that specifies a tolerance threshold and how dirty data affects the task.
-
By default, dirty data is allowed and does not affect task execution.
-
If you set the tolerance to 0, no dirty data is allowed. If any dirty data is generated during synchronization, the task fails.
-
If you allow dirty data and set a threshold:
-
If the number of dirty data records is within the threshold, the task ignores these records (they are not written to the destination) and continues to run.
-
If the number of dirty data records exceeds the threshold, the task fails.
-
ImportantAn excessive amount of dirty data can slow down the overall synchronization speed.
Distributed Execution
This setting controls whether to run the task in distributed mode.
-
Enabled: Splits the task into multiple concurrent processes. This mode helps overcome single-process bottlenecks and improve synchronization efficiency.
-
Disabled: The task runs as a single process.
Use distributed mode for high-performance requirements or to make efficient use of fragmented machine resources.
Important-
Distributed execution can be enabled only when the concurrency is set to 8 or greater.
-
Enabling distributed execution consumes more resources. If an out-of-memory (OOM) error occurs at runtime, try disabling this setting.
Time Zone
To synchronize data across time zones, specify the source time zone to enable conversion.
-
-
Configure task dependencies.
Set the insert_data node as the upstream node of the write_result node in the current Workflow. On the workflow canvas, connect the insert_data node to the write_result node to establish an upstream/downstream dependency. This means that write_result is executed after insert_data completes.
-
-
After you configure the task, click the
 icon in the toolbar to save the task.
Step 3: Commit and deploy the task
After you save the synchronization task, return to the workflow. Click the ![]() icon in the toolbar to commit the synchronization task to the scheduling system. The scheduling system automatically runs the task based on its configured schedule, starting from the next day.
icon in the toolbar to commit the synchronization task to the scheduling system. The scheduling system automatically runs the task based on its configured schedule, starting from the next day.
Next steps
This tutorial described how to create a synchronization task to export data to different types of data sources. The next tutorial explains how to configure scheduling properties and dependencies for a synchronization task. For more information, see Configure scheduling and dependencies.
Related documentation
-
For more information about how to configure a batch synchronization task, see Codeless UI configuration.