DataV Proxy allows you to connect to an on-premises database without exposing the public IP address of the database. Add a DataV Proxy data source to securely access your database from DataV.
Prerequisites
The DataV Proxy data source that you want to add is prepared.Procedure
Log on to the DataV console.
On the My Data tab, select Data Source Management and click Add Data.
- Select DataV Data Proxy Service from the Type drop-down list.
Important
- The SDK of DataV Proxy provides services only over HTTP. If you want the SDK of DataV Proxy to provide services over HTTPS, apply for an HTTPS certificate recognized by Google Chrome.
- Before you use the SDK of DataV Proxy to provide services over HTTPS, make sure that the DataV console is opened by using HTTP.
- Enter database information.
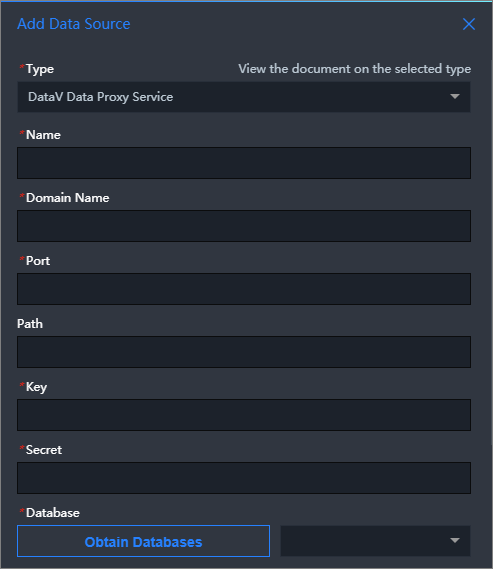
Parameter Description Name A custom name for the data source. Domain The IP address or domain name of the DataV Proxy server. If DataV Proxy is deployed on an ECS instance, enter the public IP address of the instance. For more information, see How to use DataV Proxy. Port Number The port used to connect to DataV Proxy. Default value: 8001. For more information, see How to use DataV Proxy. Key The key generated after DataV Proxy is installed. For more information, see How to use DataV Proxy. Secret The secret generated after DataV Proxy is installed. For more information, see How to use DataV Proxy. Database The ID of the database added to the DataV Proxy application as a data source. After you enter the database information, DataV automatically tests the connectivity to the database.
- After the database passes the connectivity test, click OK.