The filter transform widget filters and transforms input fields from upstream components before passing them to downstream components.
Procedure
-
On the Dataphin home page, select Development > Data Integration from the top menu bar.
-
At the top menu bar of the integration page, select Project (choose an Environment for the Dev-Prod pattern).
-
In the left-side navigation pane, click Batch Pipeline. Then, in the Batch Pipeline list, click the Offline Pipeline you want to develop to open its configuration page.
-
Click Component Library in the upper right corner of the page to open the Component Library panel.
-
In the Component Library panel's left-side navigation pane, select Transform. Locate the Filter component in the list of transform widgets on the right and drag it onto the canvas.
-
Click and drag the
 icon from the target upstream and downstream components to connect them to the current filter component.
 -
Click the
 icon on the filter component card to open the Transform-filter Configuration dialog box.
 -
In the Transform-filter Configuration dialog box, set the necessary parameters.
Parameter
Description
Step Name
The name of the filter transform widget. Dataphin automatically generates a default name, which you can modify as needed. The name must meet the following requirements:
-
Can only contain Chinese characters, letters, underscores (_), and numbers.
-
Cannot exceed 64 characters.
Input Fields
Displays input fields from the upstream output. If a field name contains a table name, the table name is also displayed.
Filter Conditions
Filter conditions in code editor mode or configuration mode.
-
Code Editor Mode: Define filter conditions using scripts. Do not include WHERE; enter only the expression that follows WHERE. For example,
user_id is not nullorand name != 'xxx'. -
Configuration Mode: Define filter conditions through the interface by configuring the field, operator, and content in sequence. If a field name contains a table name, the table name is also displayed.
Supported Filter Conditions include =, !=, >, >=, <, <=, LIKE, NOT LIKE, IS NULL, IS NOT NULL, START WITH, END WITH. Multiple conditions support AND and OR logical operators.
For example: If the input fields include
id,name, andds, and you need to filter data whereid<123andname is not equal to abc. If using code editor mode, enter the statementid < 123 AND name != 'abc'; if configuring directly through the interface, the filter conditions should be as shown in the following image.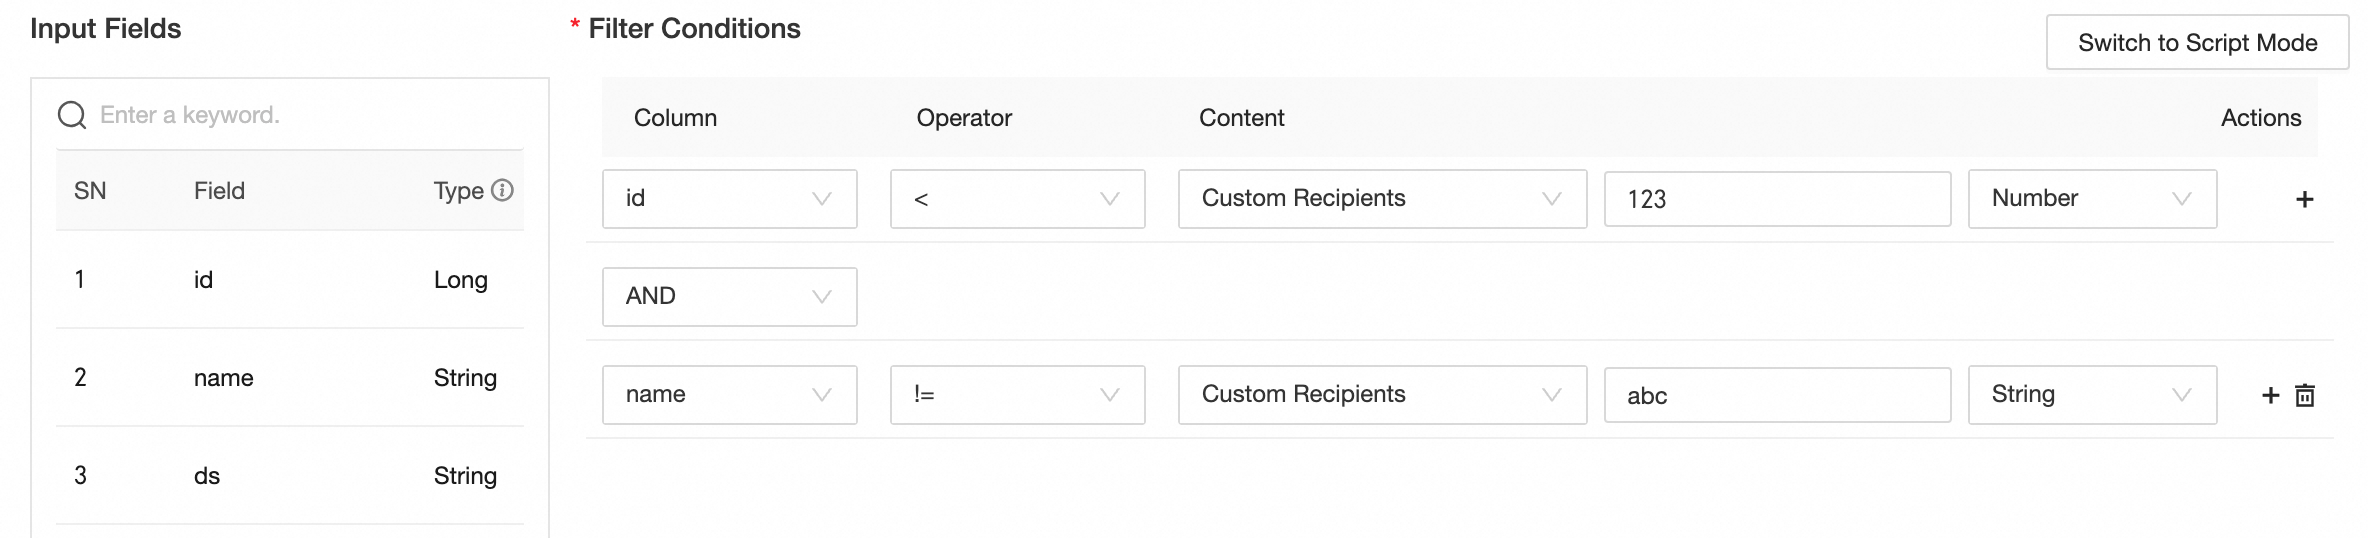 Important
The LIKE operator does not support the percent (%) wildcard for matching starting or ending characters. It only filters data that contains the specified characters. To match starting or ending characters, use the START WITH and END WITH statements. For example,
name START WITH 'Zhang' AND name END WITH 'San'filters data where thenamefield starts with Zhang and ends with San. -
-
Click Confirm to finalize the property settings for the Filter Transform Widget.