Connect Dataphin to Lark Base so that Dataphin can read from or write to your Lark Base tables.
Prerequisites
-
A custom Lark application is created and its authorization information is obtained. Obtain application authorization information.
-
The share link of the target Lark Base is obtained. Obtain a Base link.
Limits
-
Lark Base tables support various field types. For field-type mappings, see Lark Base parsing rules.
-
Starting October 31, 2024, the Lark Basic Free Edition limits cumulative API calls to 10,000 per month. To increase this quota, upgrade your Lark edition. Custom App API Call Limit Adjustment Description.
Permissions
Only super administrators, data source administrators, domain architects, project administrators, or custom global roles with the Create Data Source permission can create data sources.
Procedure
-
In the top menu bar, choose Management Hub > Datasource Management.
-
On the Datasource page, click +Create Data Source.
-
On the Create Data Source page, select Lark Base.
You can also find it in the Recently Used area or use the search box.
-
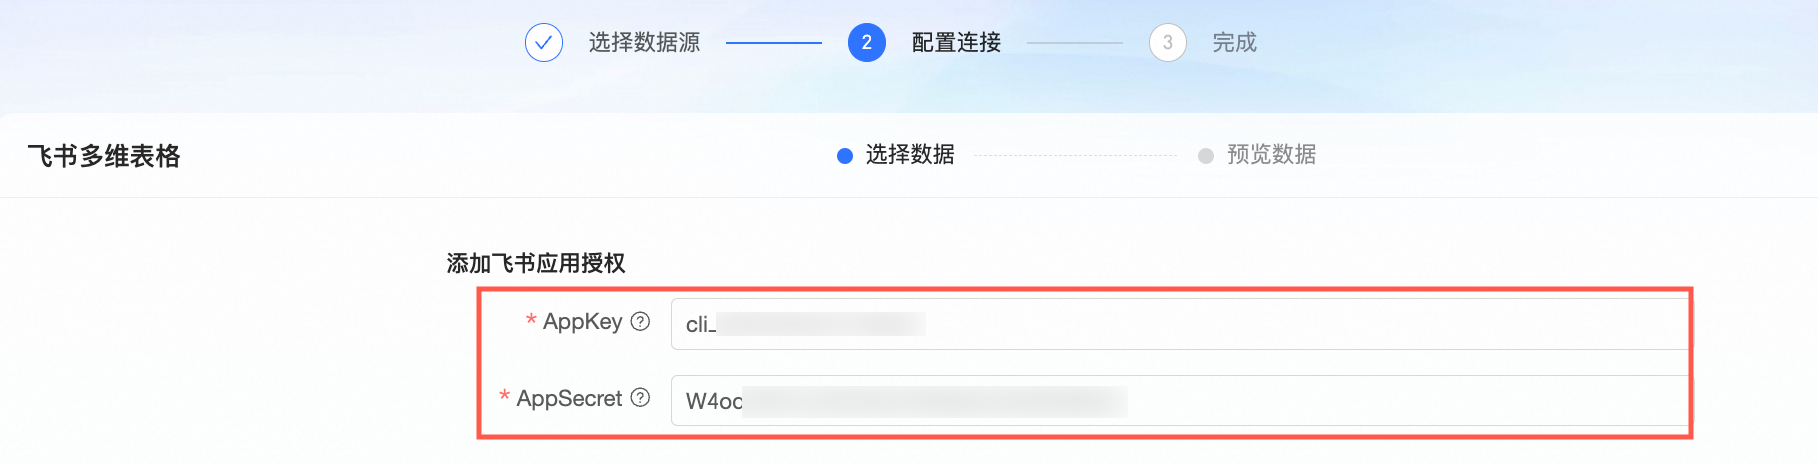
On the Create Lark Base Data Source page, configure the connection parameters.
-
Configure basic data source information.
Parameter
Description
Datasource Name
The data source name. Naming conventions:
-
Can contain Chinese characters, letters, digits, underscores (_), and hyphens (-).
-
Maximum length: 64 characters.
Datasource Code
Use the data source code to access tables in Flink SQL tasks or the Dataphin JDBC client with the format
data_source_code.table_nameordata_source_code.schema.table_name. To auto-switch data sources by environment, use the variable format${data_source_code}.tableor${data_source_code}.schema.table. Dataphin Data Source Table Development Methods.ImportantThe data source code cannot be modified after it is configured.
You can preview data on the object details page in the asset directory and asset checklist only after the data source code is configured.
In Flink SQL, only MySQL, Hologres, MaxCompute, Oracle, StarRocks, Hive, SelectDB, and GaussDB data warehouse service (DWS) data sources are currently supported.
Data Source Description
A brief description of the data source. Maximum: 128 characters.
Data Source Configuration
Select a configuration mode based on whether your data source separates production and development environments:
-
If production and development are separate, select Production + Development Data Source.
-
If they share the same environment, select Production Data Source.
Tag
Categorize data sources using tags. To create tags, see Manage Data Source Tags.
-
-
Configure connection parameters.
If you selected Production + Development Data Source, configure connection information for both environments. For Production Data Source, configure only the production connection.
NoteTo isolate development from production, use separate data sources for each environment. Dataphin also supports using the same data source for both.
Parameter
Description
Lark Base URL
The Lark Base URL, such as
https://base.feishu.cn/base/appxxxx. Obtain a Base link.APP ID and APP Secret
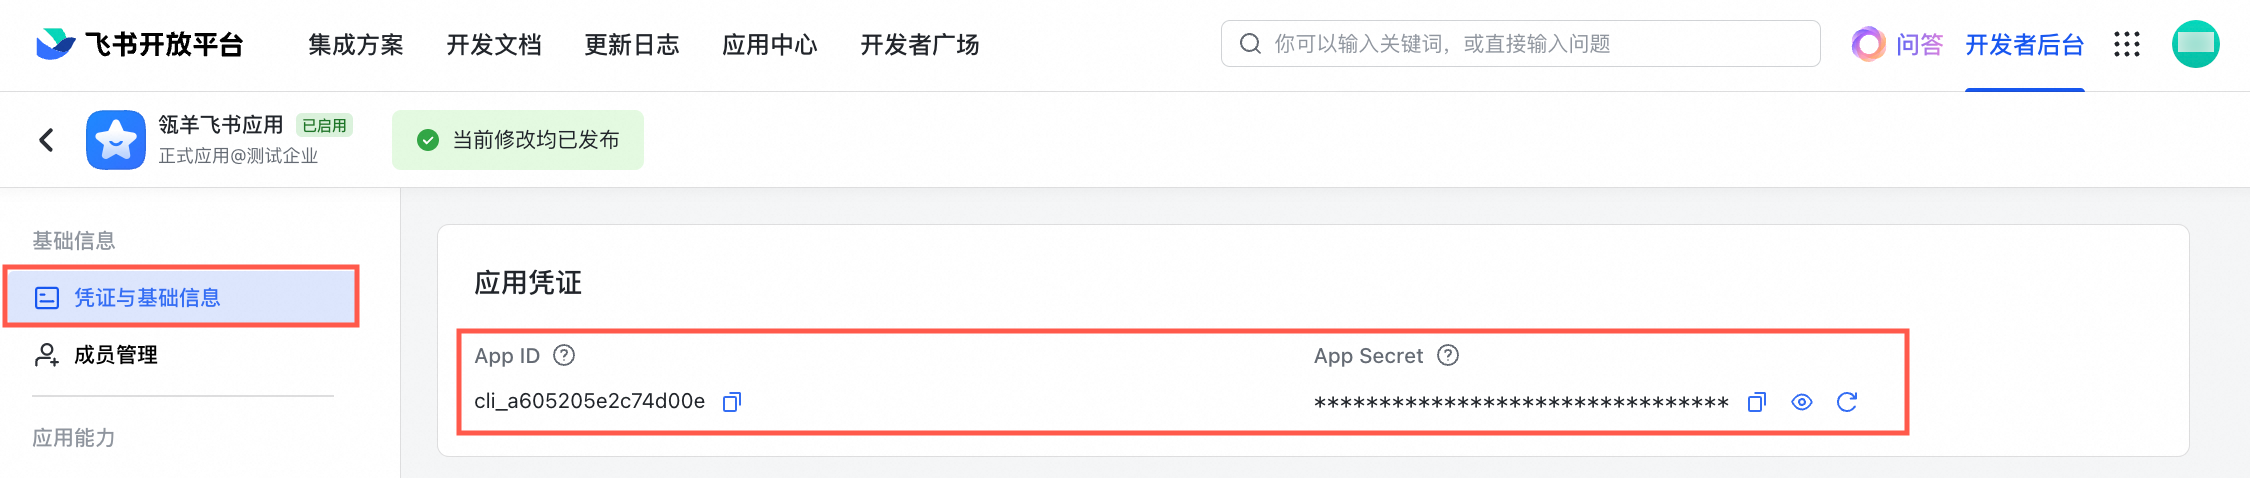
The App ID and App Secret of your Lark enterprise application. Obtain application authorization information.
-
-
Select the Default Resource Group. This resource group runs tasks for the current data source, including SQL execution, offline full-database migration, and data preview.
-
Click Test Connection to verify connectivity, or click OK to save the data source directly.
Click Test Connection to verify connectivity. If you click OK without testing, the system automatically tests all selected clusters. The data source is created even if all clusters fail the test.
Test Connection tests the connection for the Default Cluster or Registered Scheduling Clusters that have been registered in Dataphin and are in normal use. The Default Cluster is selected by default and cannot be deselected. If there are no resource groups under a Registered Scheduling Cluster, connection testing is not supported. You need to create a resource group first before testing the connection.
The selected clusters are only used to test network connectivity with the current data source and are not used for running related tasks later.
The test connection usually takes less than 2 minutes. If it times out, you can click the
 icon to view the specific reason and retry.
Regardless of whether the test result is Connection Failed, Connection Successful, or Succeeded With Warning, the system will record the generation time of the final result.
NoteOnly the test results for the Default Cluster include three connection statuses: Succeeded With Warning, Connection Successful, and Connection Failed. The test results for Registered Scheduling Clusters in Dataphin only include two connection statuses: Connection Successful and Connection Failed.
When the test result is Connection Failed, you can click the
icon to view the specific failure reason.When the test result is Succeeded With Warning, it means that the application cluster connection is successful but the scheduling cluster connection failed. The current data source cannot be used for data development and integration. You can click the
icon to view the log information.
Appendix
Obtain Application Authorization Information
Create a custom enterprise application in the Lark Open Platform and obtain its App ID and App Secret for authenticating the data source in Dataphin.
-
Log on to the Lark Open Platform. Click Create Custom Enterprise Application. In the Create Custom Enterprise Application dialog box, fill in the application information and click Create.
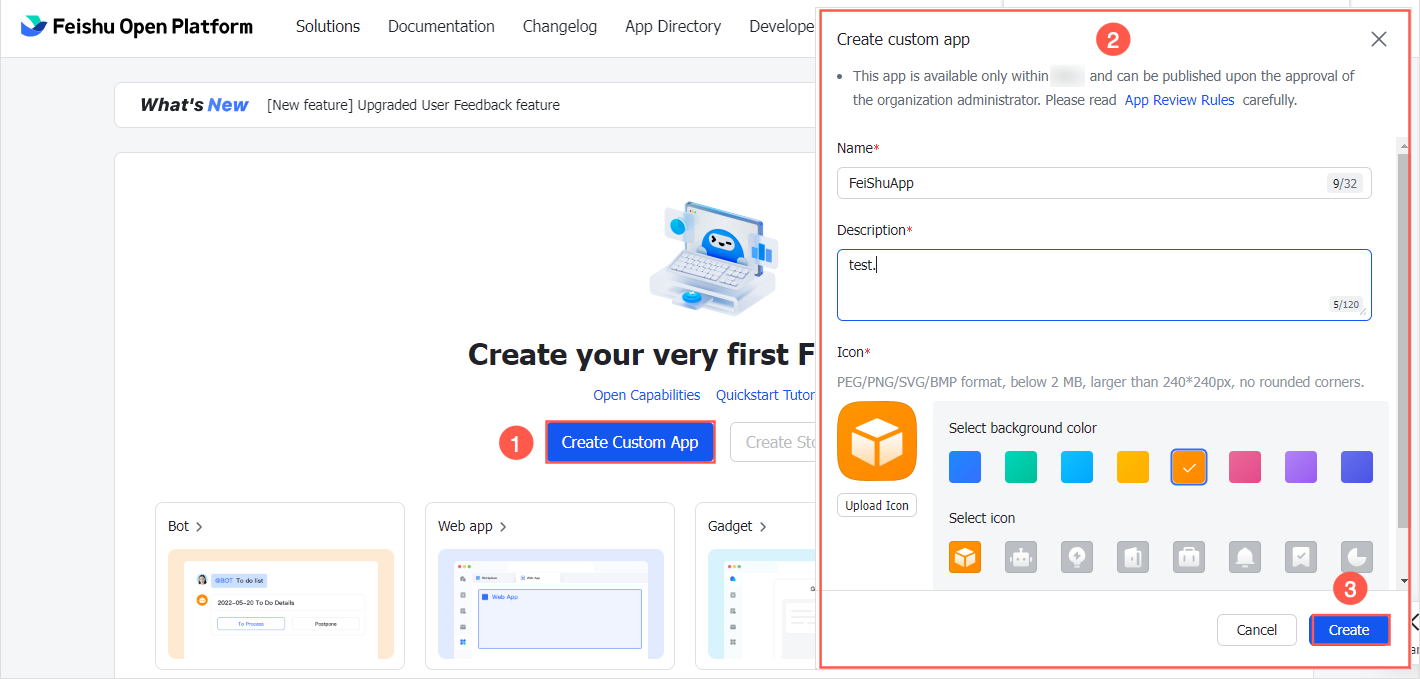
-
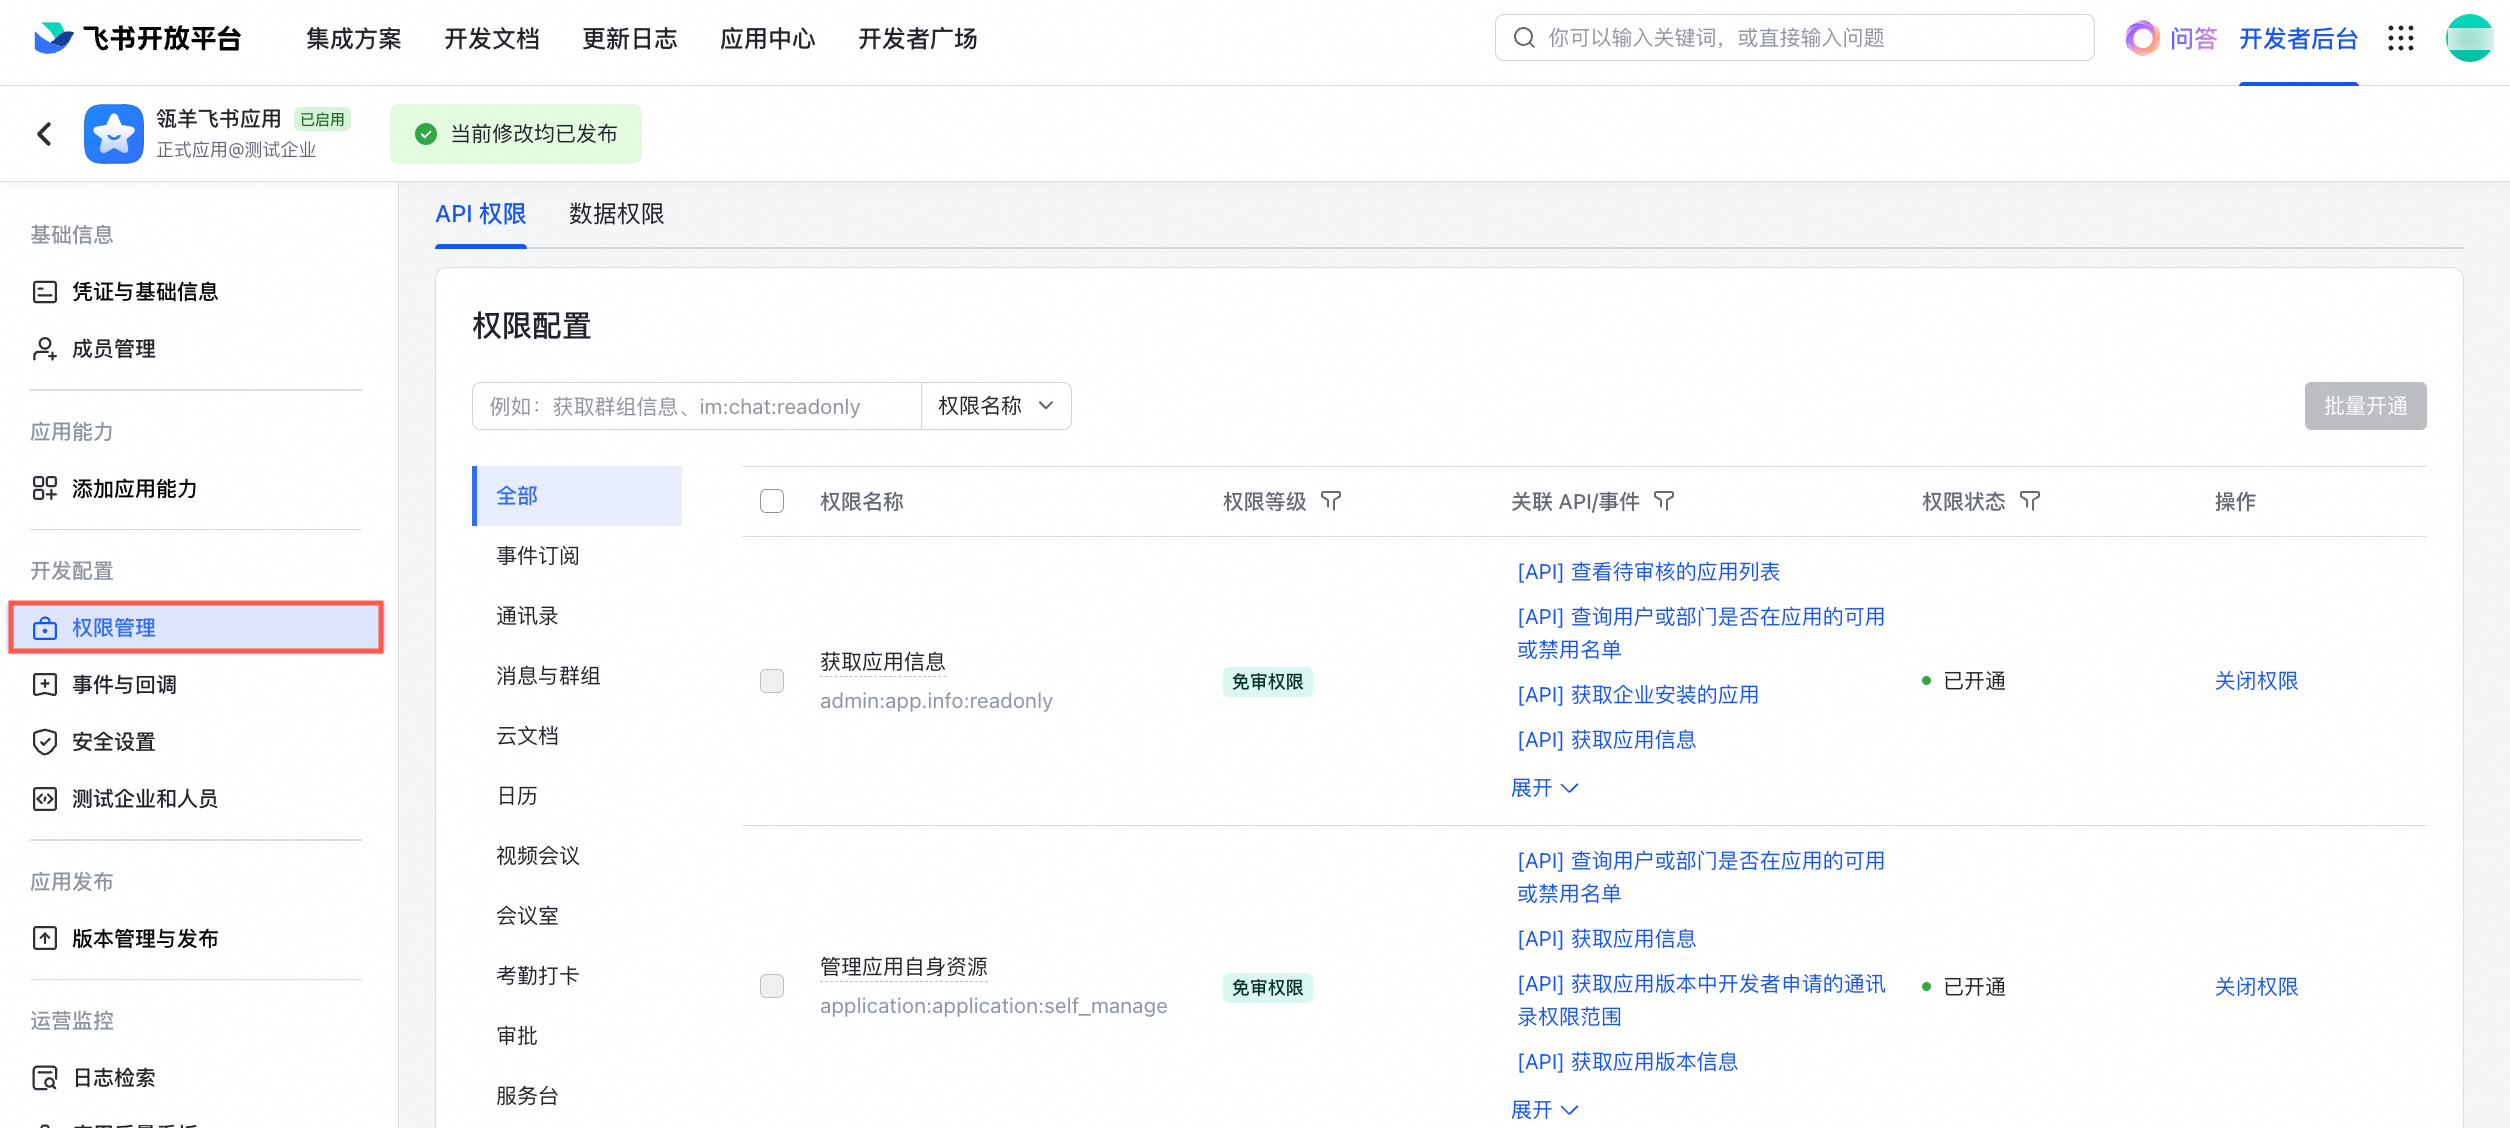
Dataphin accesses Lark Base data through APIs. Apply for the required API permissions for your application. In the developer backend, click Permission Management in the left navigation pane and configure permissions on the API Permissions tab.
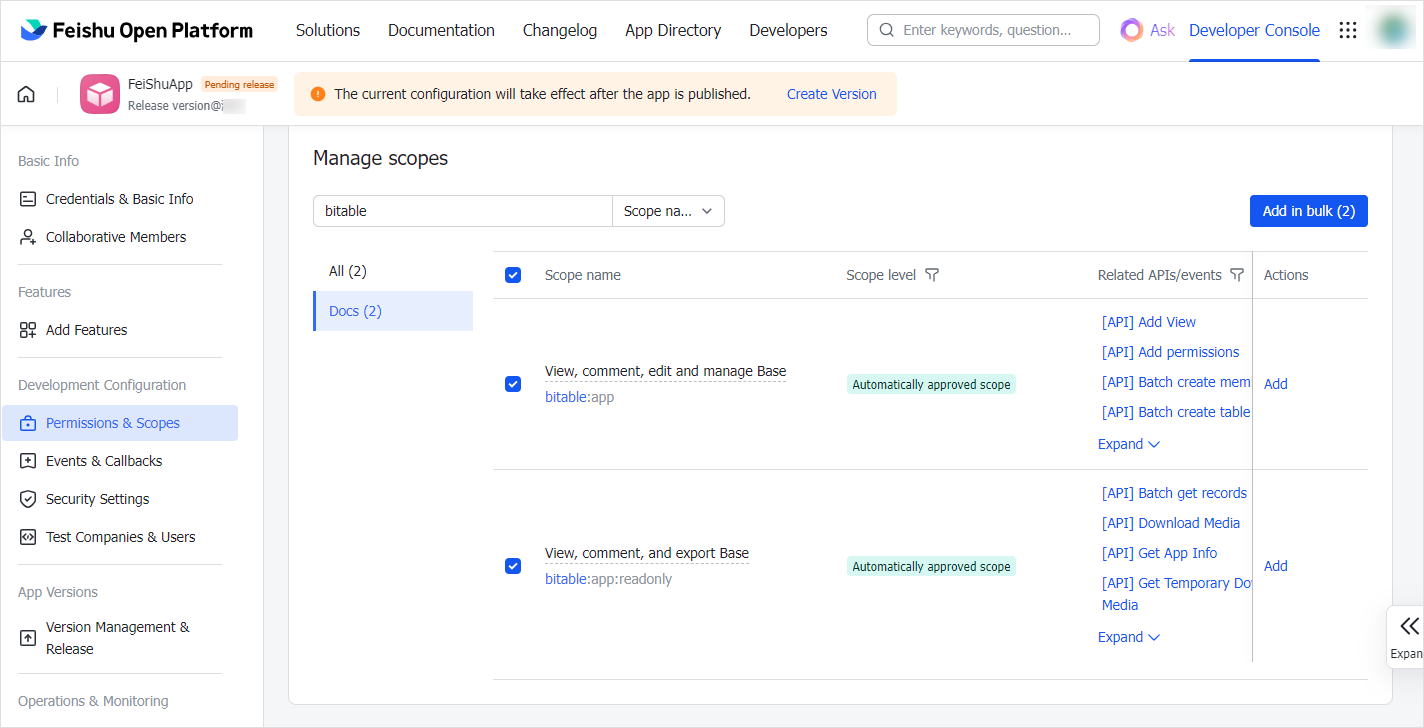
Select the following API permissions and click Batch Enable:
-
View, comment on, edit, and manage all files in the cloud space.
-
You can view, comment, edit, and manage multidimensional tables.
-
You can view, comment on, and export multidimensional tables.
-
Obtain application information.
-
-
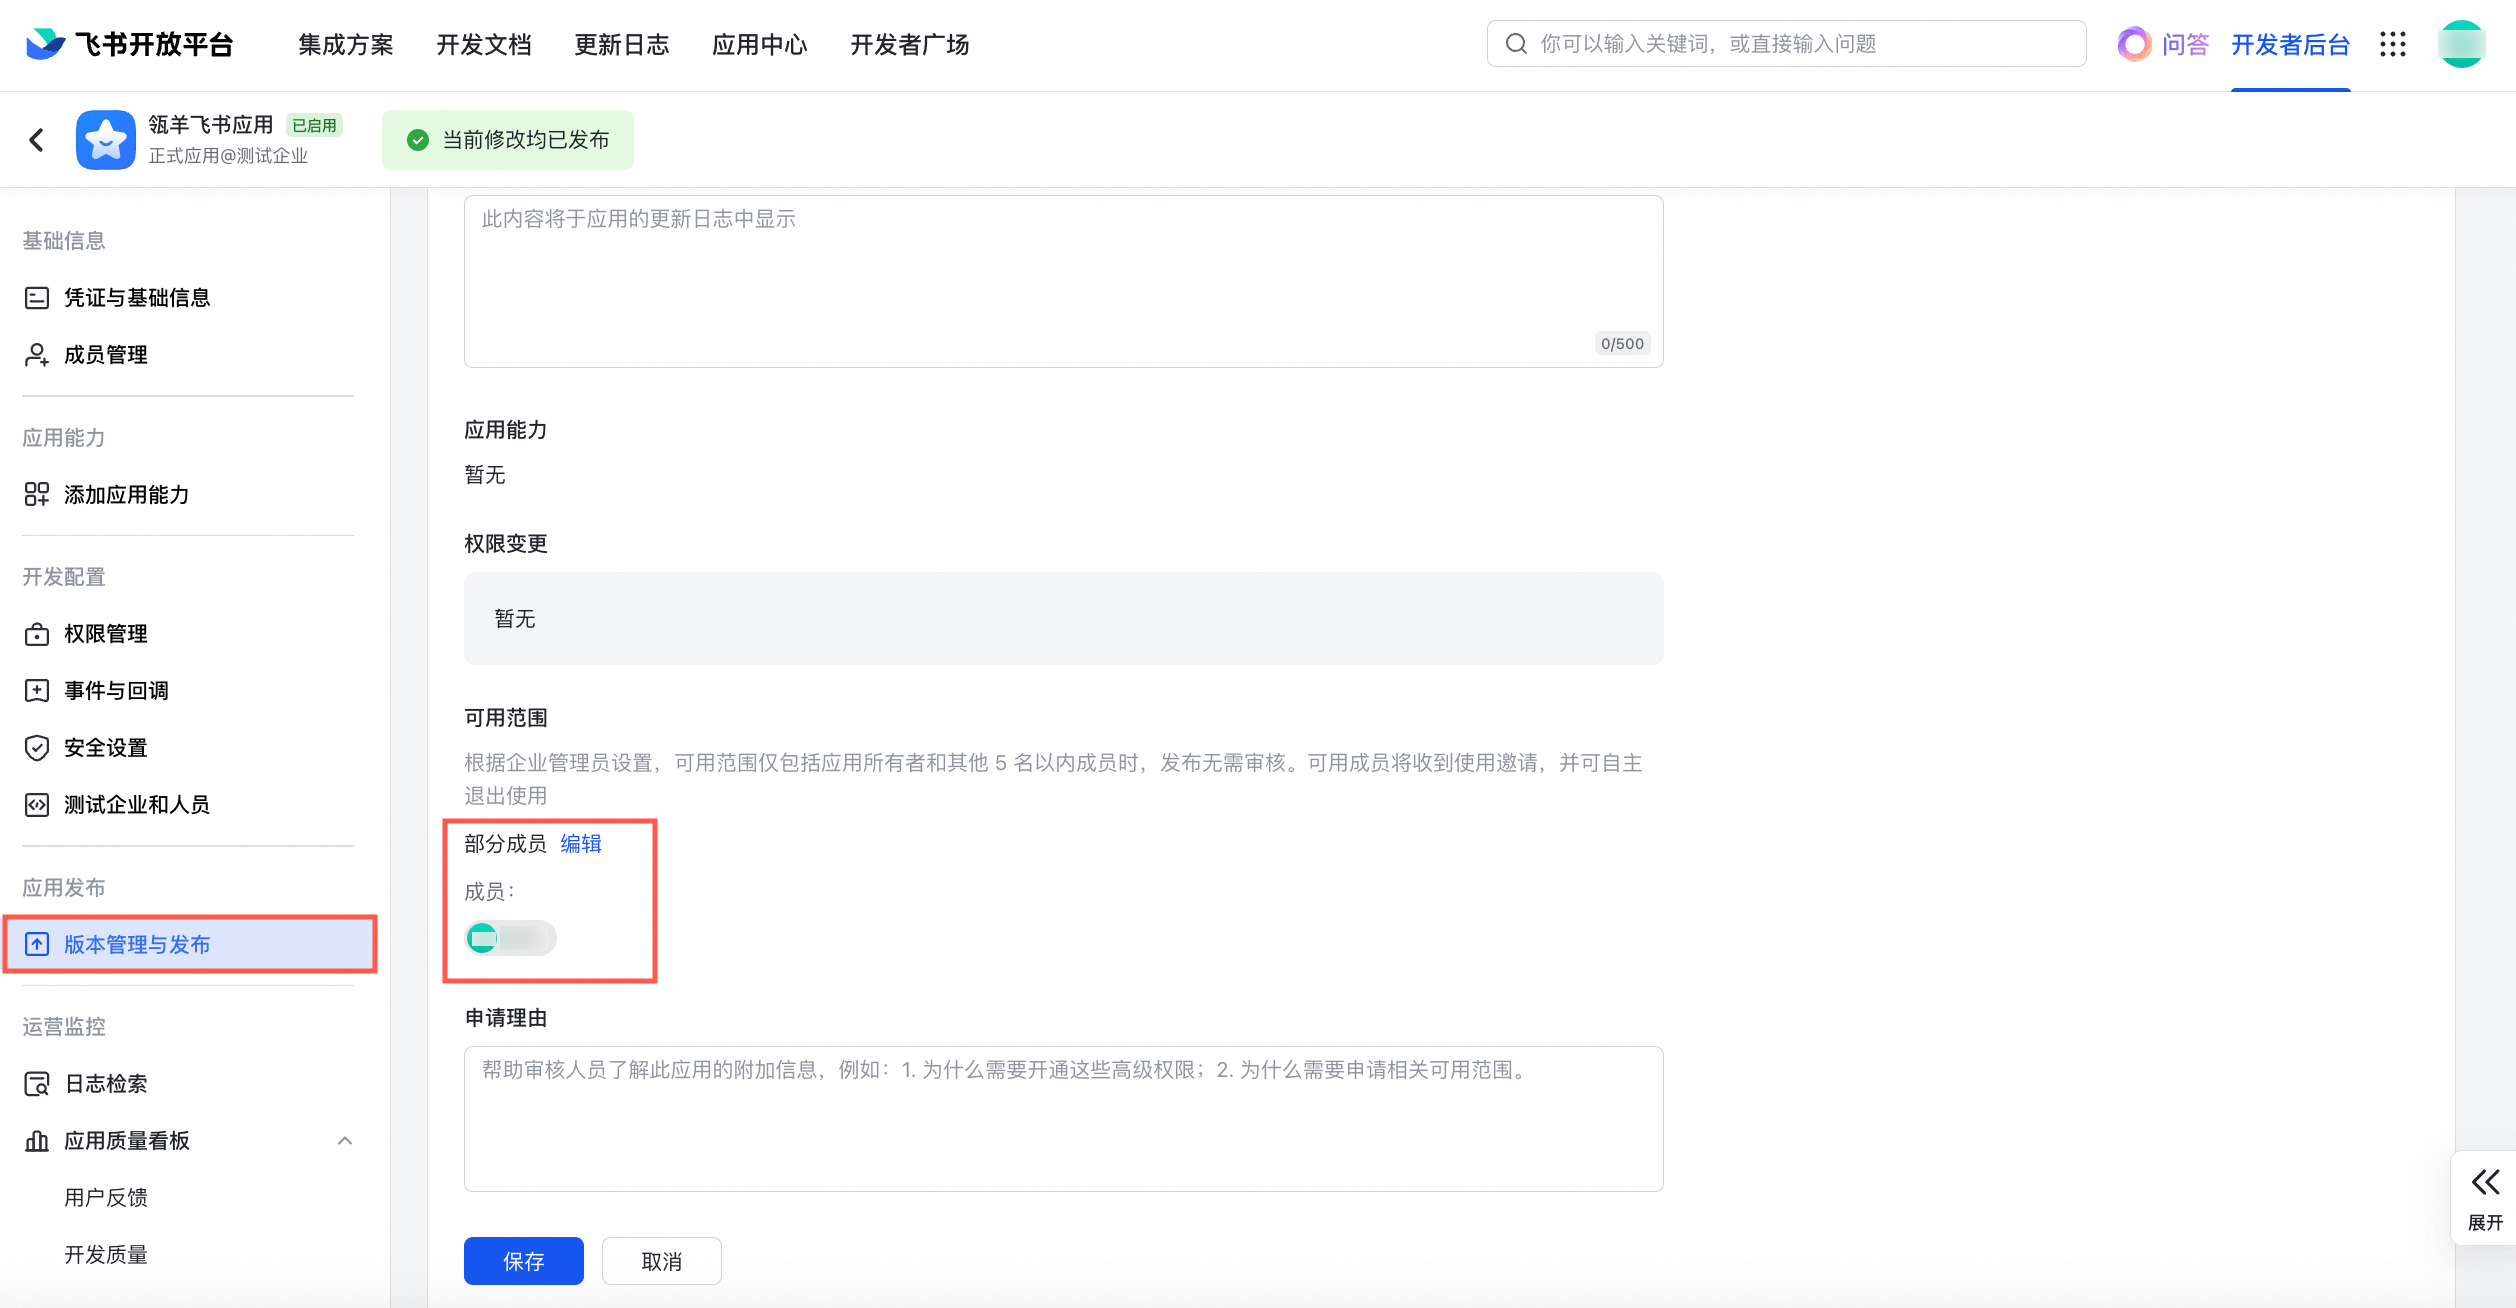
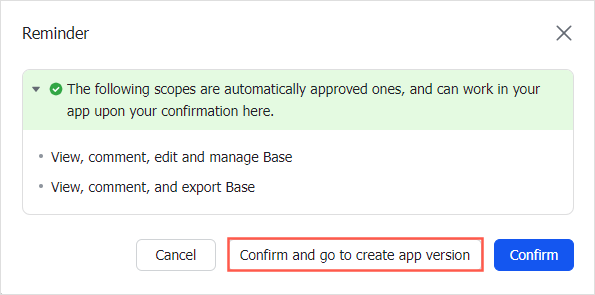
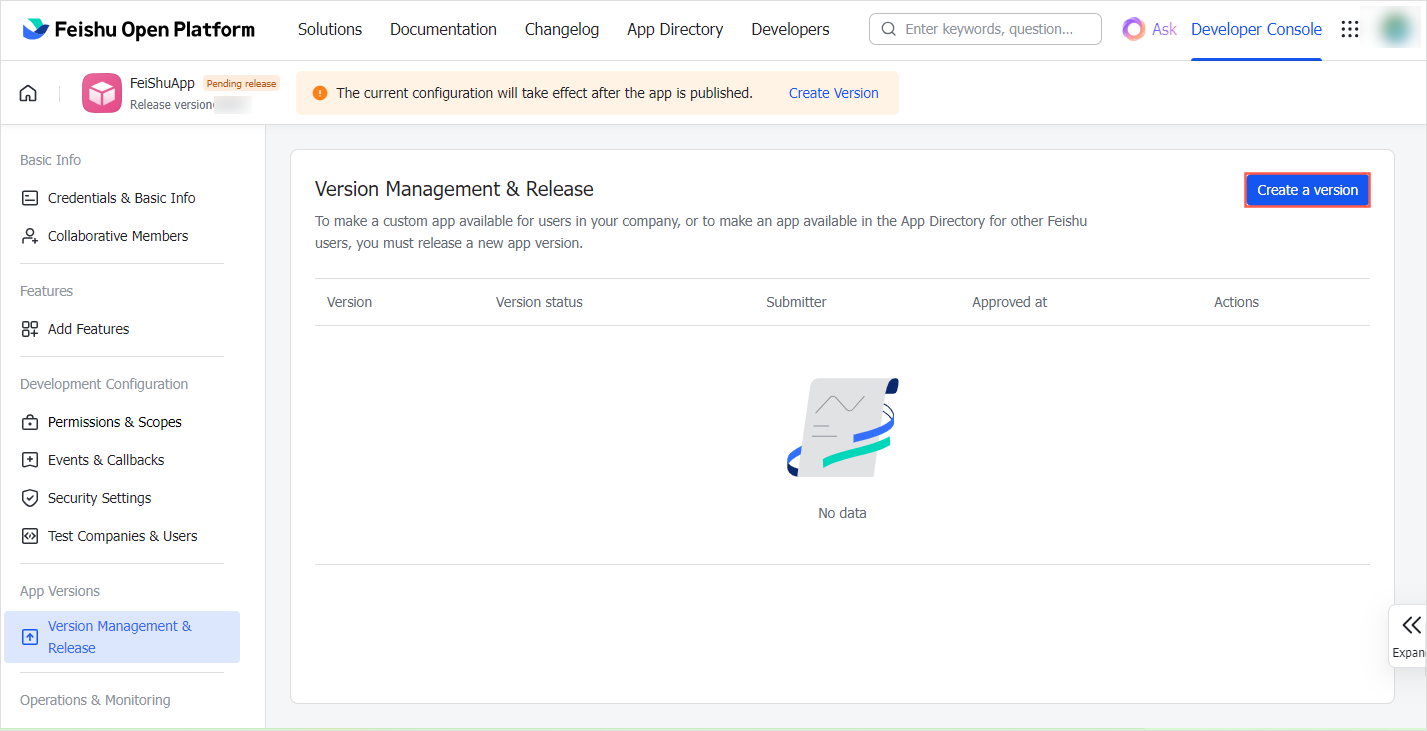
In the Prompt dialog box, click Confirm and Go to Create Application Version. On the Version Management and Release page, click Create Version.
-
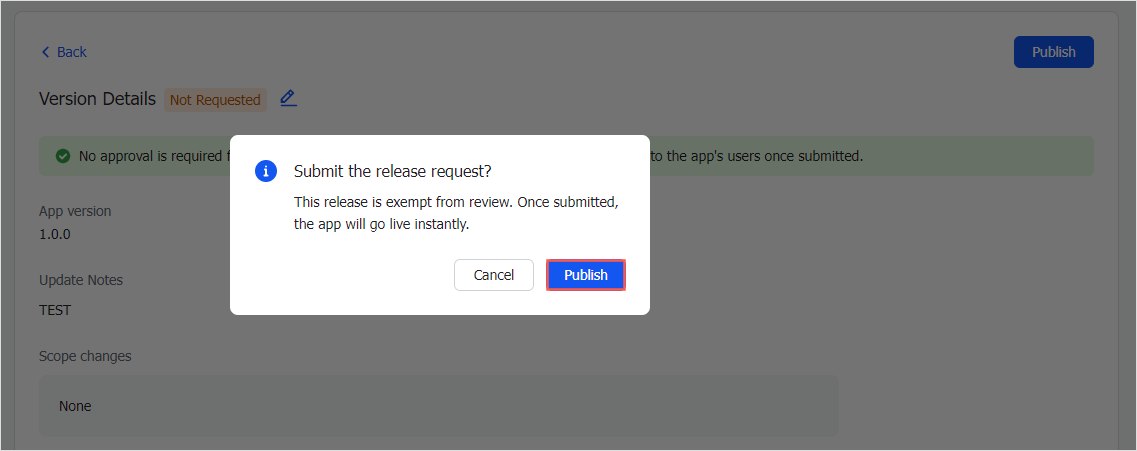
Fill in the version details, then click Save > Apply for Online Release.
-
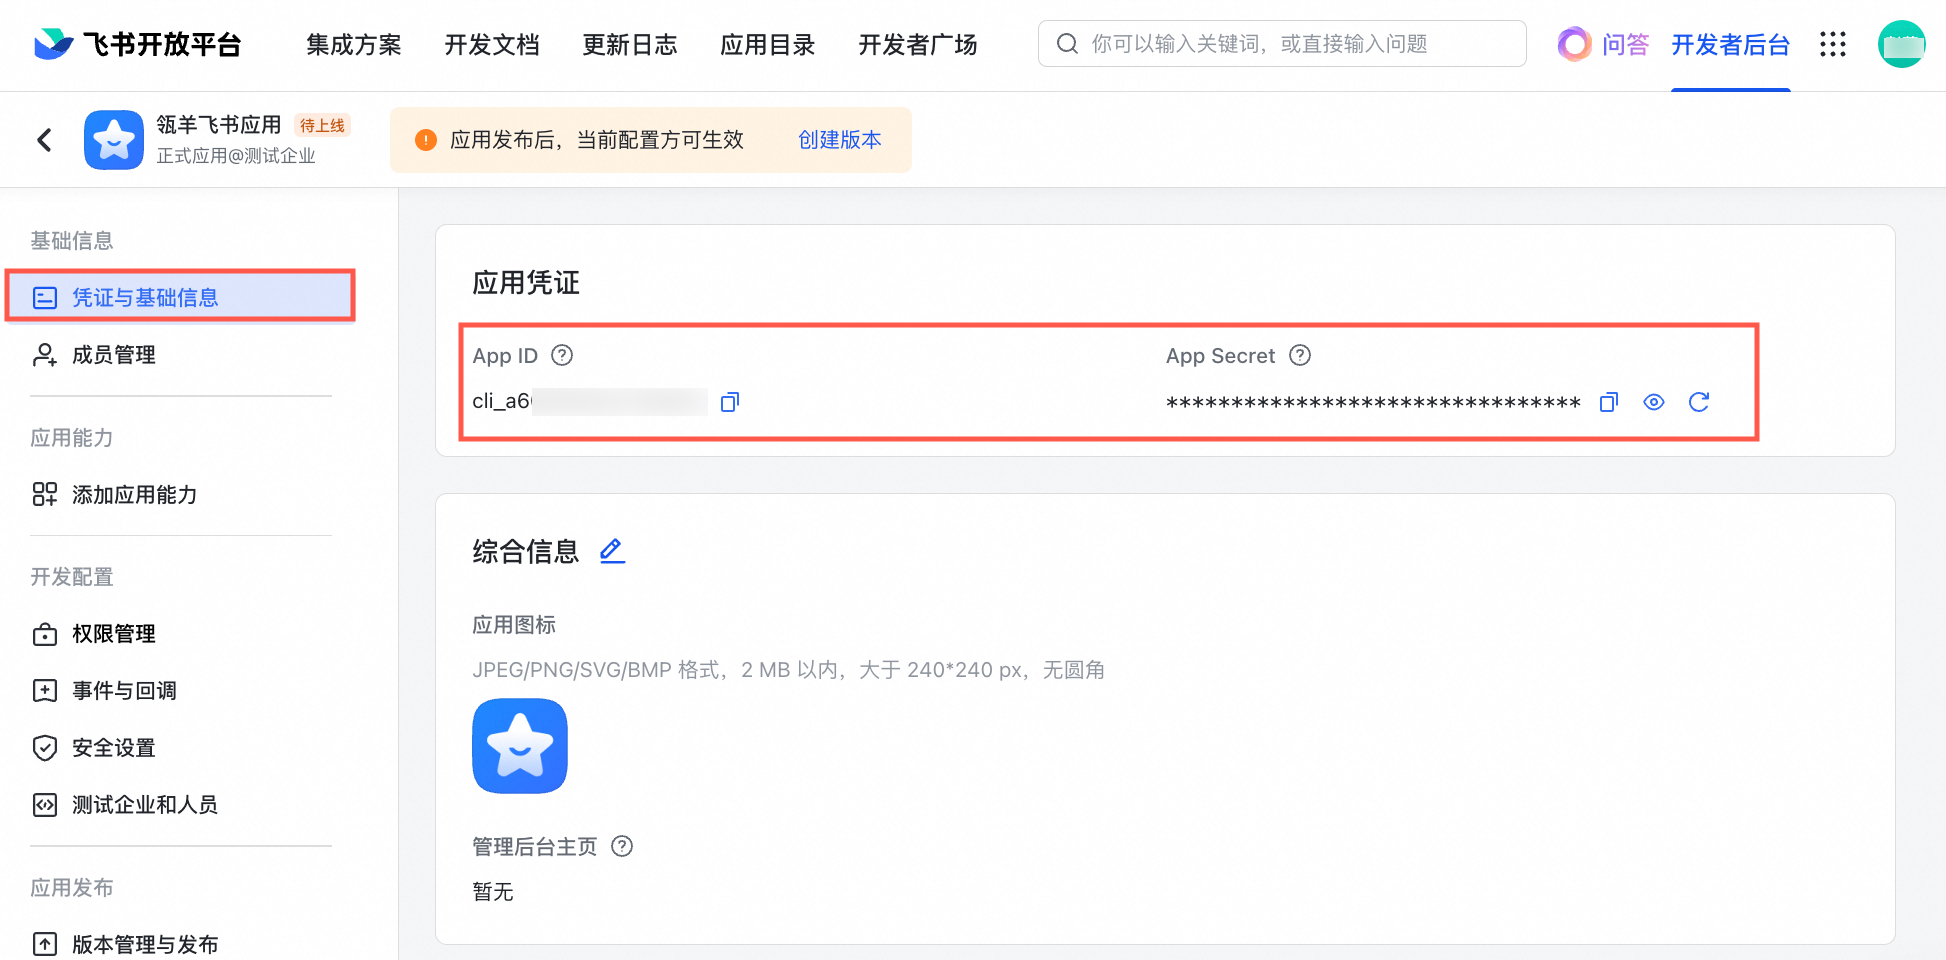
In the developer backend, click Credentials and Basic Information. On the Application Credentials page, copy the App ID and App Secret.
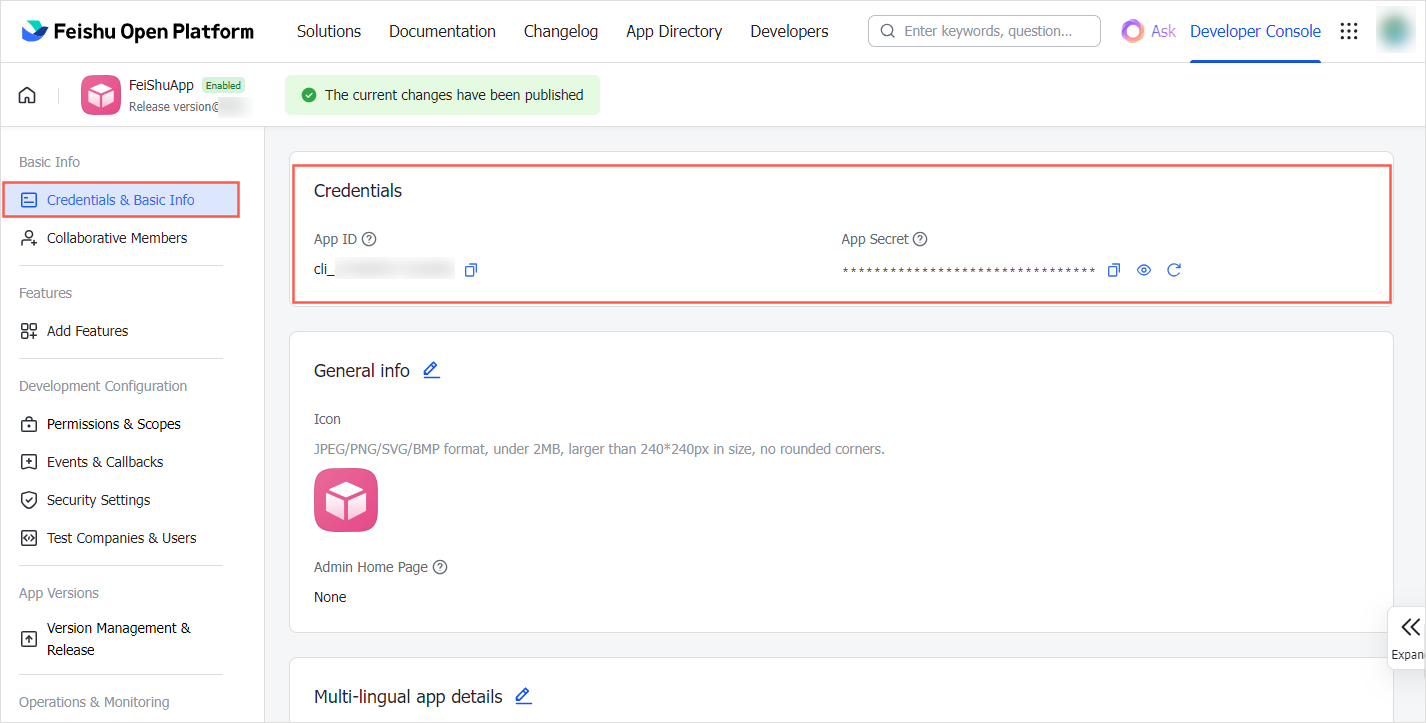
Obtain a Base Link
Obtain the share link of the target Lark Base you want to connect to Dataphin.
-
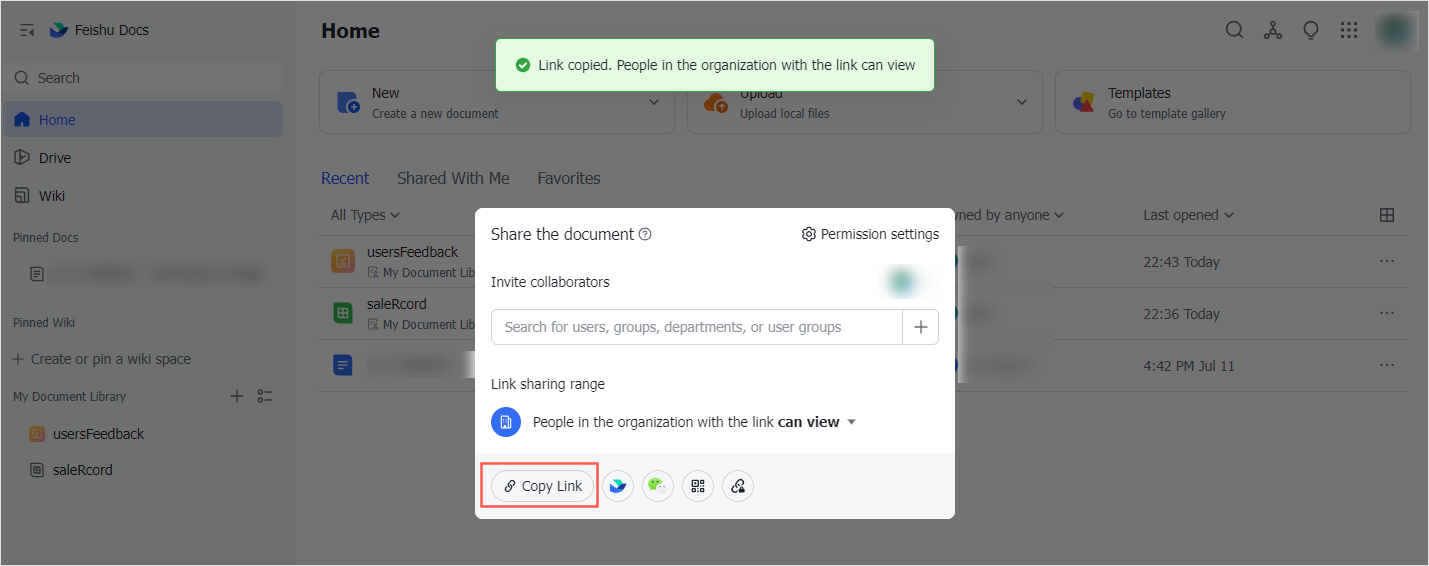
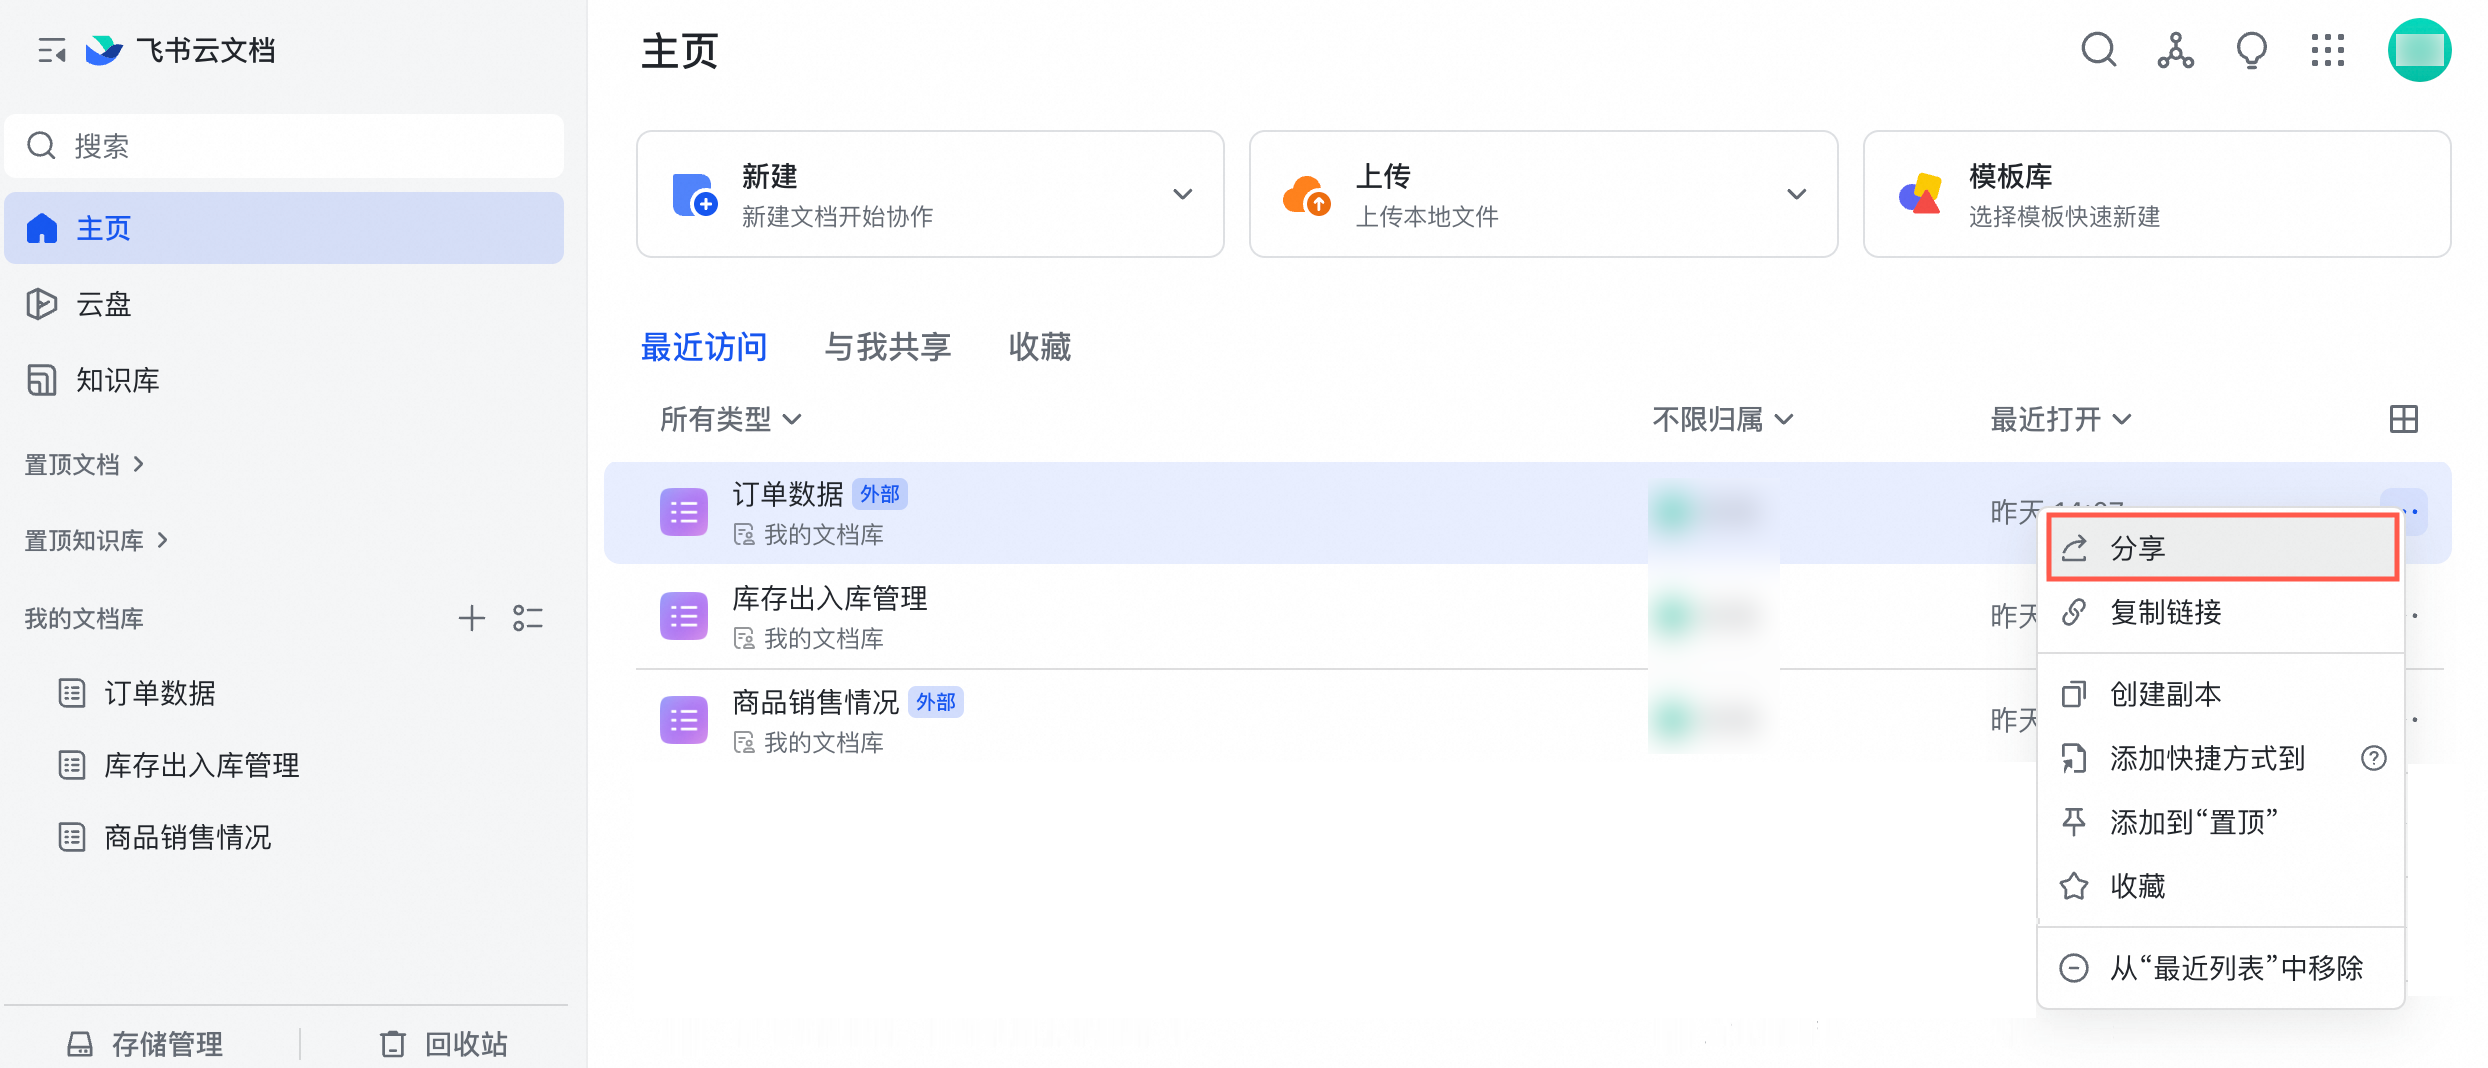
In the Lark Docs document list, find the target Base. In the Actions column, click Share.
 Note
NoteThe following limits apply to Lark Base tables connected to Dataphin:
-
A single table page cannot exceed 100 columns or 10,000 rows.
-
Attachment, association, and lookup reference fields are not supported. For supported field types, see Lark Base parsing rules.
-
Formulas inherited from tables are not supported. Only values are retained.
-
-
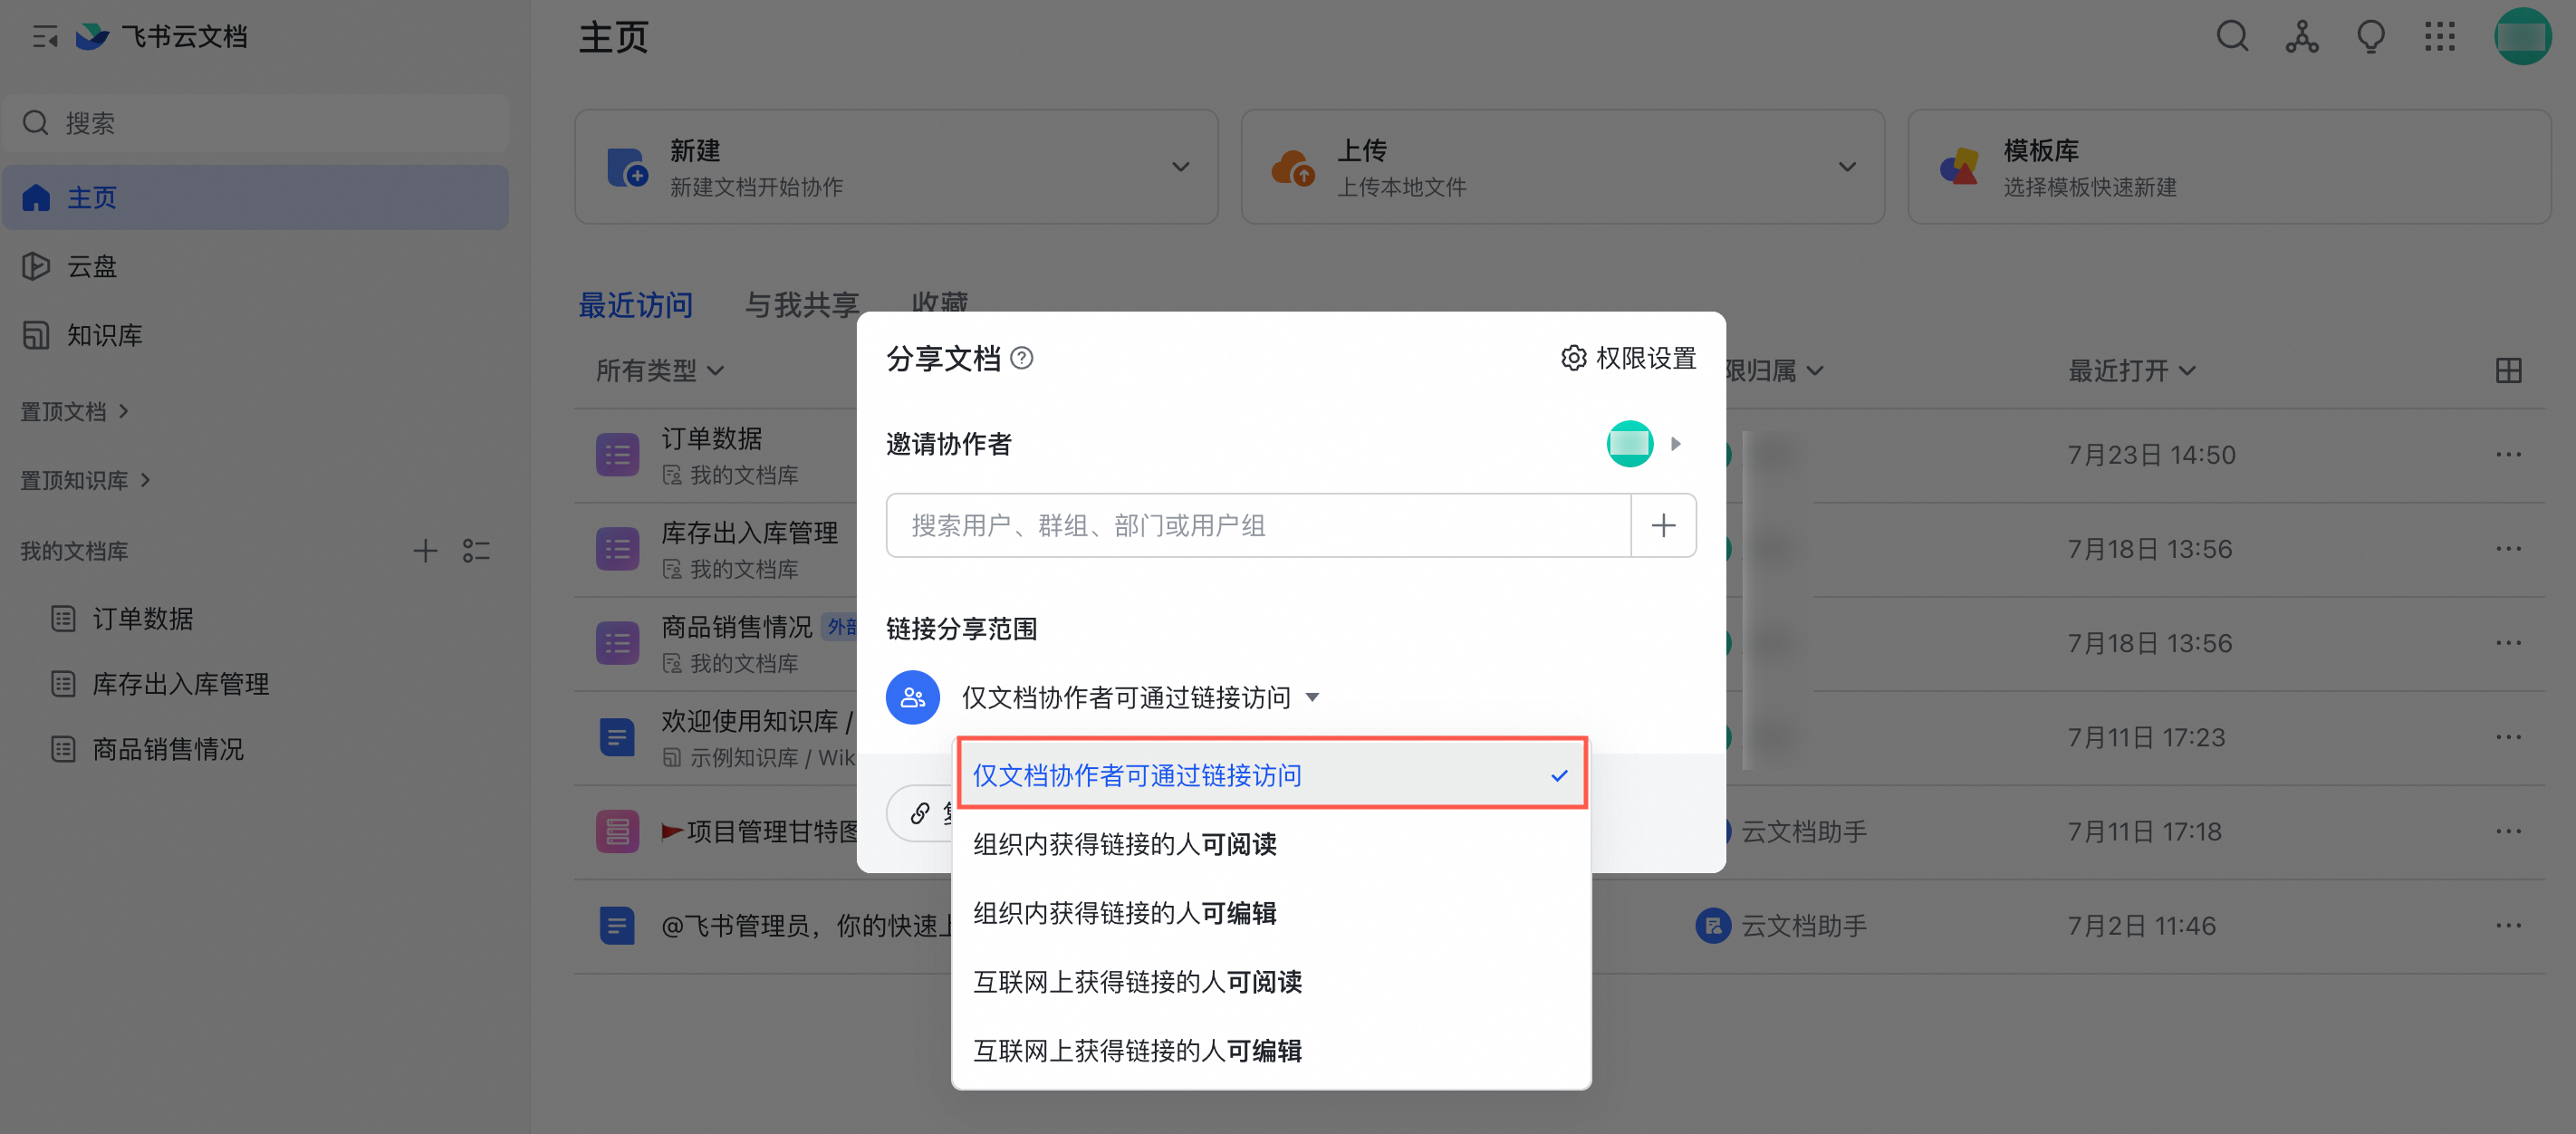
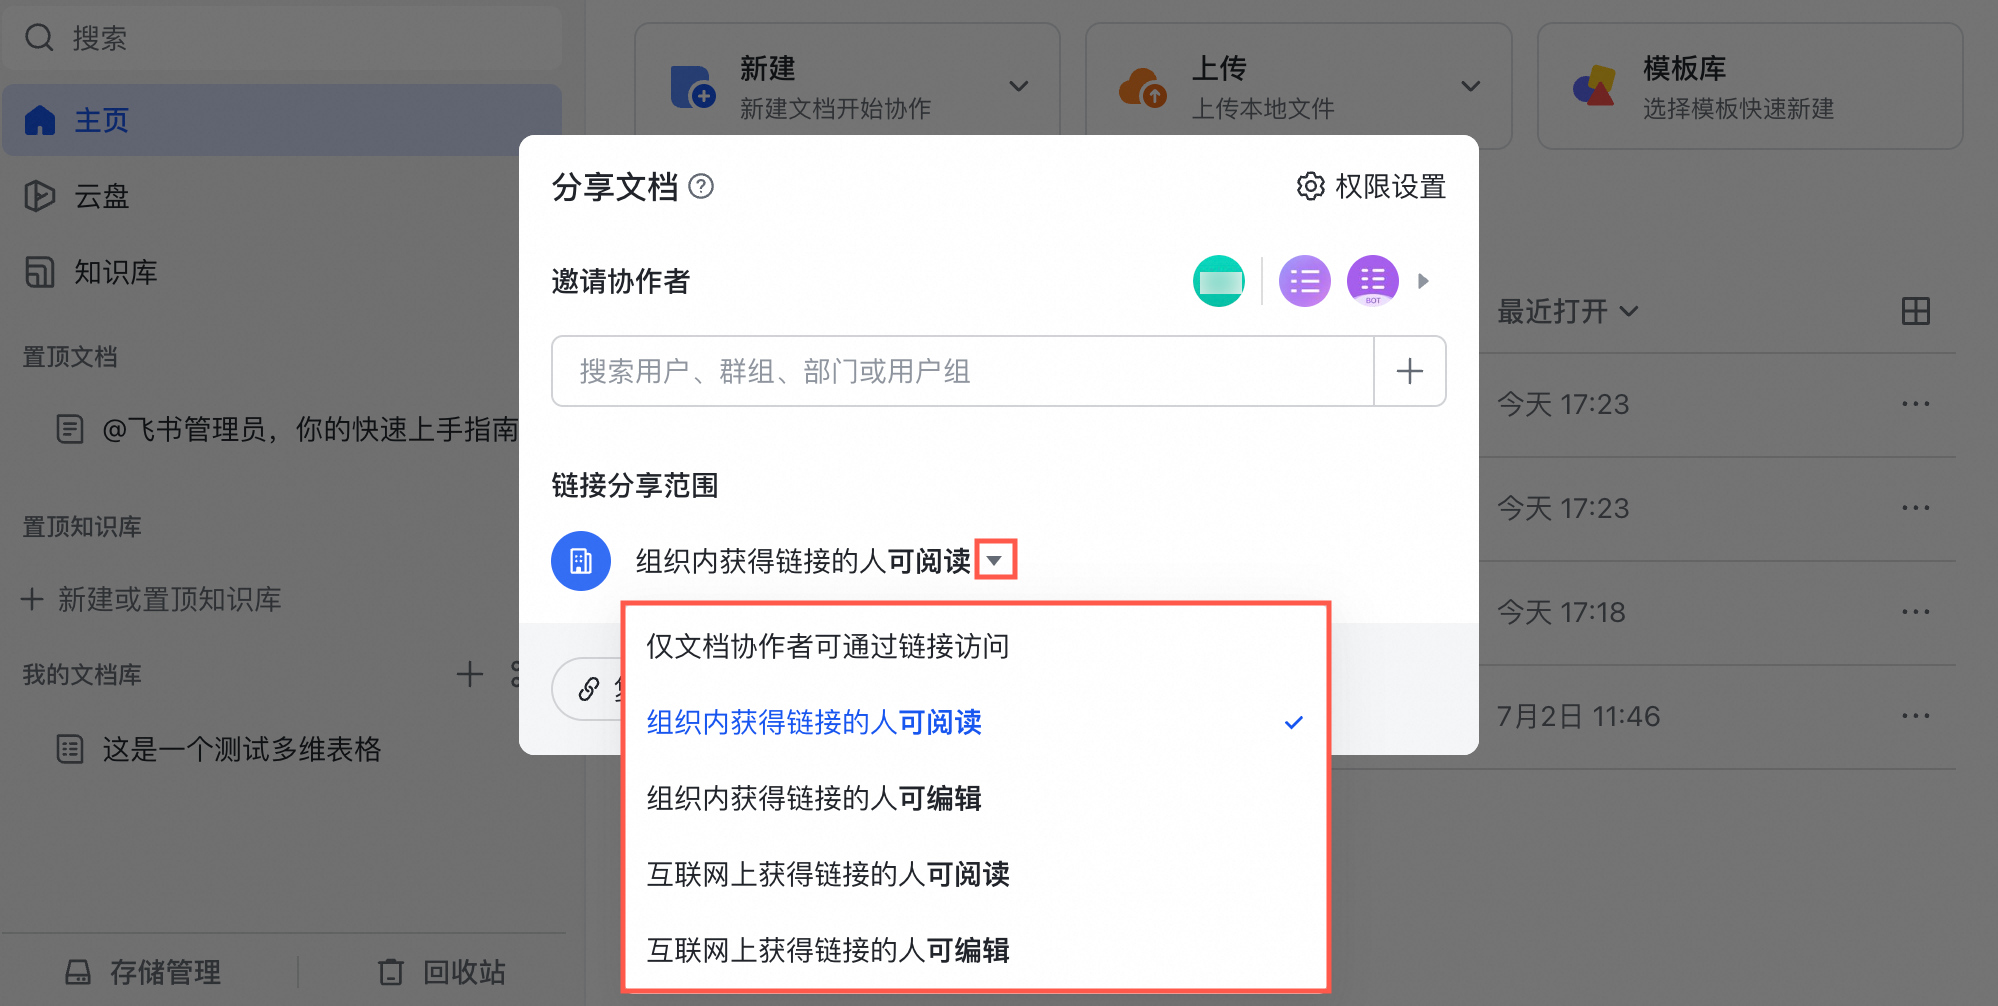
In the Share Document dialog box, configure the Link Sharing Scope.
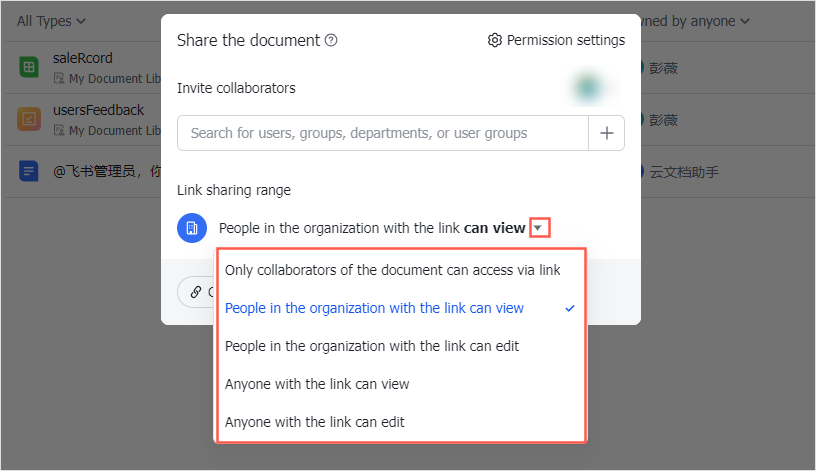
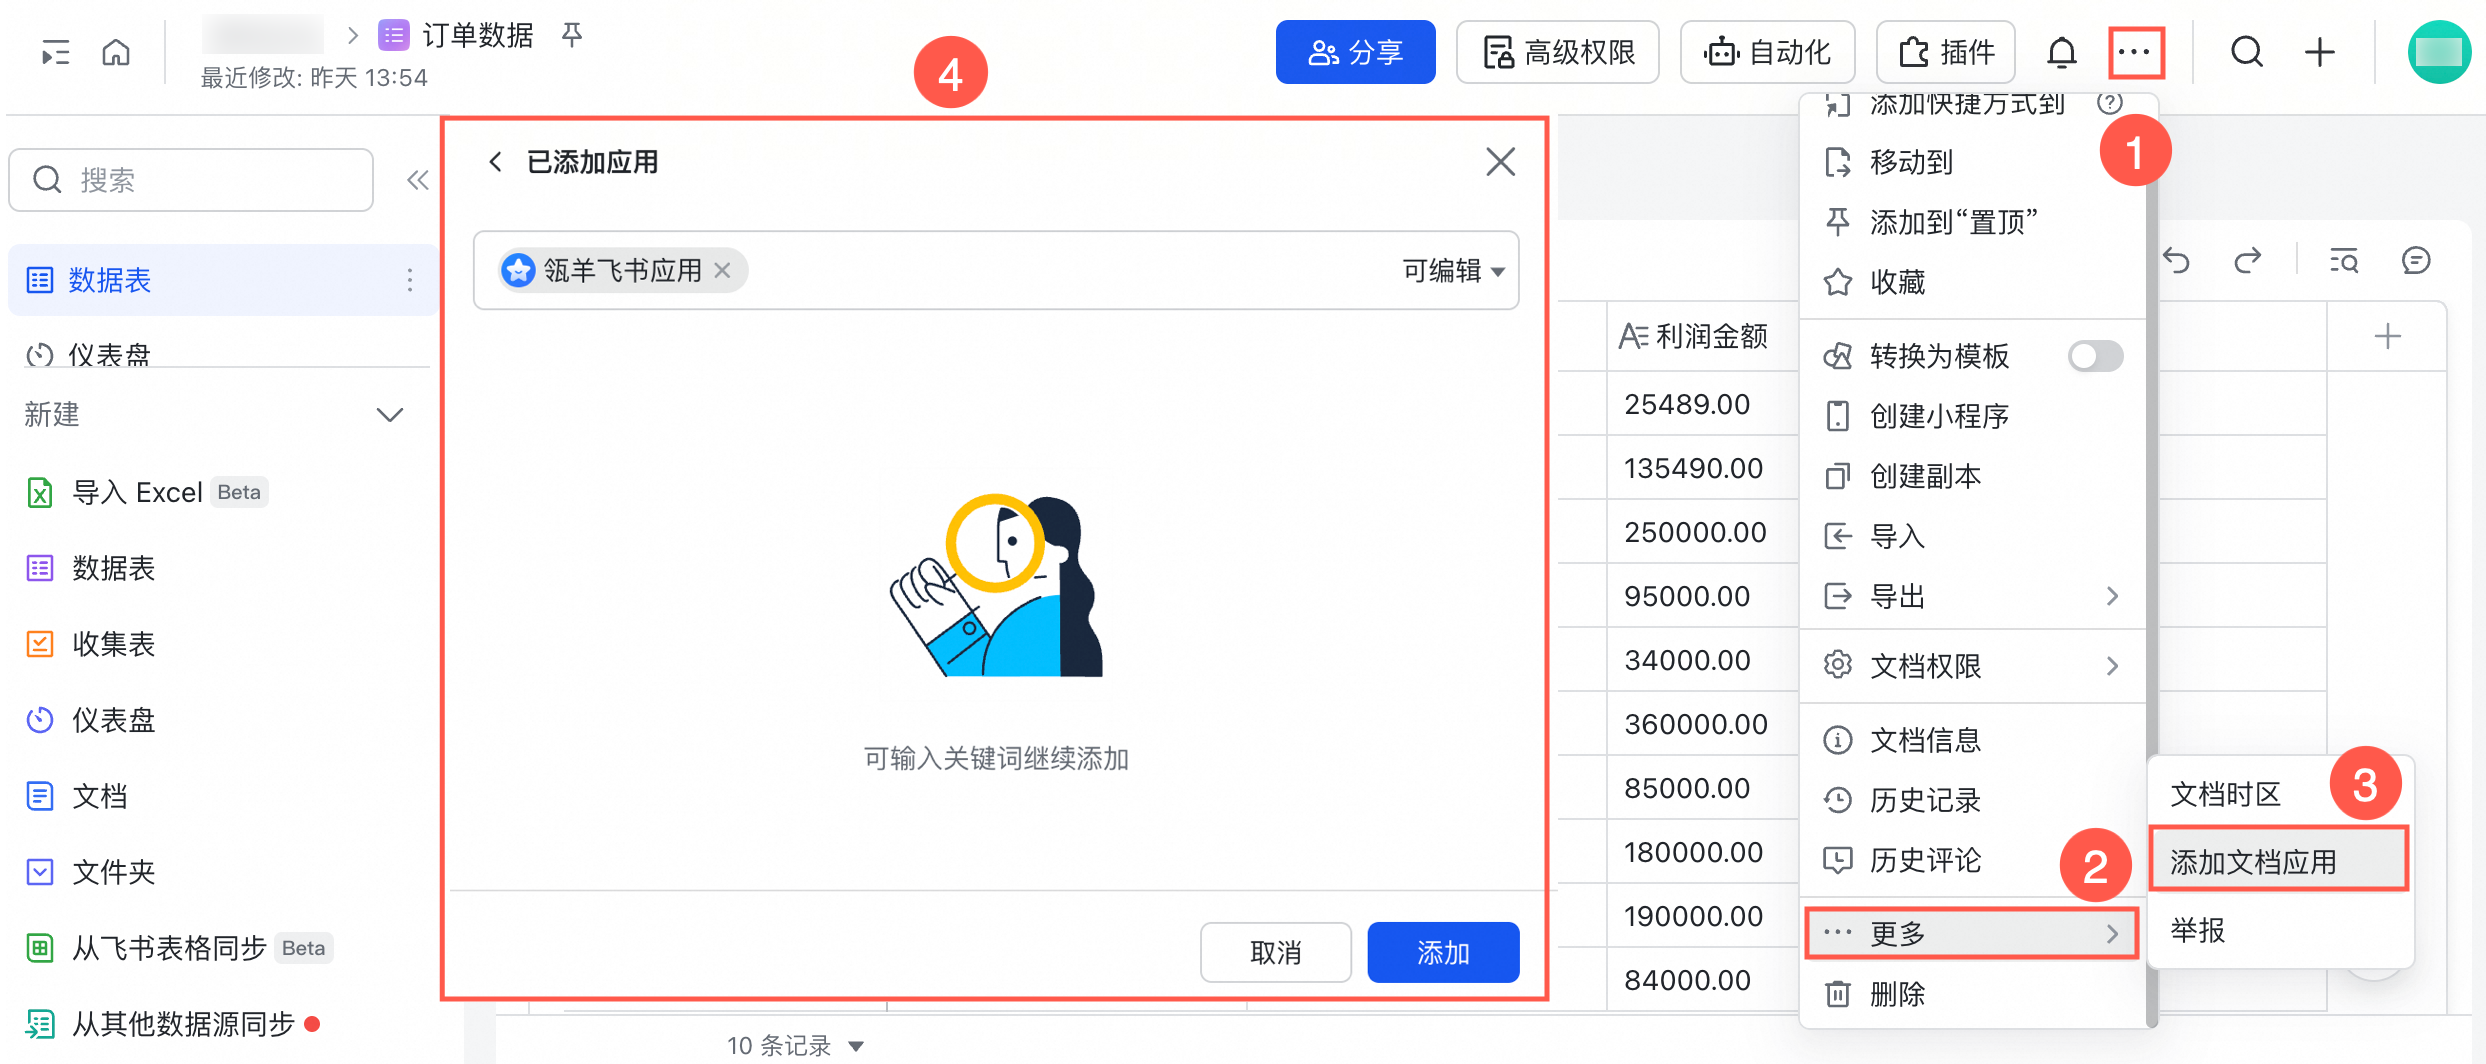
If the scope is Only document collaborators can access via link, add your custom application to the table’s document applications.
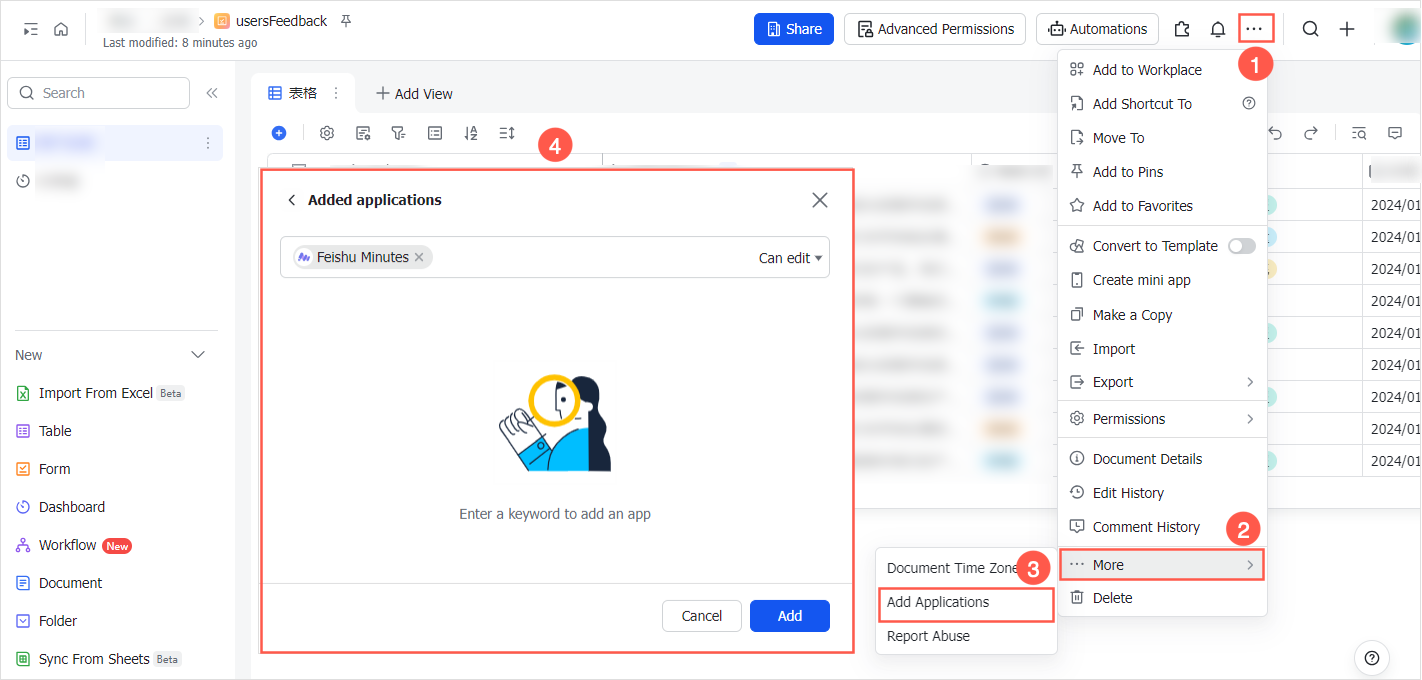
-
Click Copy Link to copy the share link.
Lark Base parsing rules
|
Lark Table Data Type Category |
Lark Table Data Type |
Mapping Type |
|
General |
Text |
String |
|
Single Select |
String |
|
|
Multi-Select |
String |
|
|
Personnel |
String |
|
|
Audience Group |
Not supported |
|
|
Date |
Date |
|
|
Attachment |
Not supported |
|
|
Number |
Long |
|
|
Check Box |
Boolean |
|
|
Hyperlink |
String |
|
|
Formula |
String |
|
|
Lookup Reference |
Not supported |
|
|
Business |
Flow |
Not supported |
|
Button |
Not supported |
|
|
Auto-Number |
Long |
|
|
Phone Number |
String |
|
|
|
String |
|
|
Geolocation |
String |
|
|
Bar Code |
String |
|
|
Progress |
Double |
|
|
Currency |
Double |
|
|
Rating |
Long |
|
|
Advanced |
Bidirectional Association |
Not supported |
|
Unidirectional Association |
Not supported |
|
|
Creator |
String |
|
|
Modifier |
String |
|
|
Creation Time |
Date |
|
|
Last Update Time |
Date |
|
|
Extendable Fields for Personnel |
Department |
String |
|
Direct Supervisor |
String |
|
|
Employee ID |
String |
|
|
Position |
String |
|
|
Personnel Type |
String |
|
|
Work Mailbox |
String |
FAQ
If the connection to Lark Base fails, check the following:
|
Error Cause |
Solution |
|
Incorrect AppKey or AppSecret during Add Lark Application Authorization. |
Re-obtain the correct AppKey and AppSecret from the Lark developer backend. |
|
Required API permissions are not enabled on the Permission Management page in the Lark developer backend. |
Enable the following API permissions:
|
|
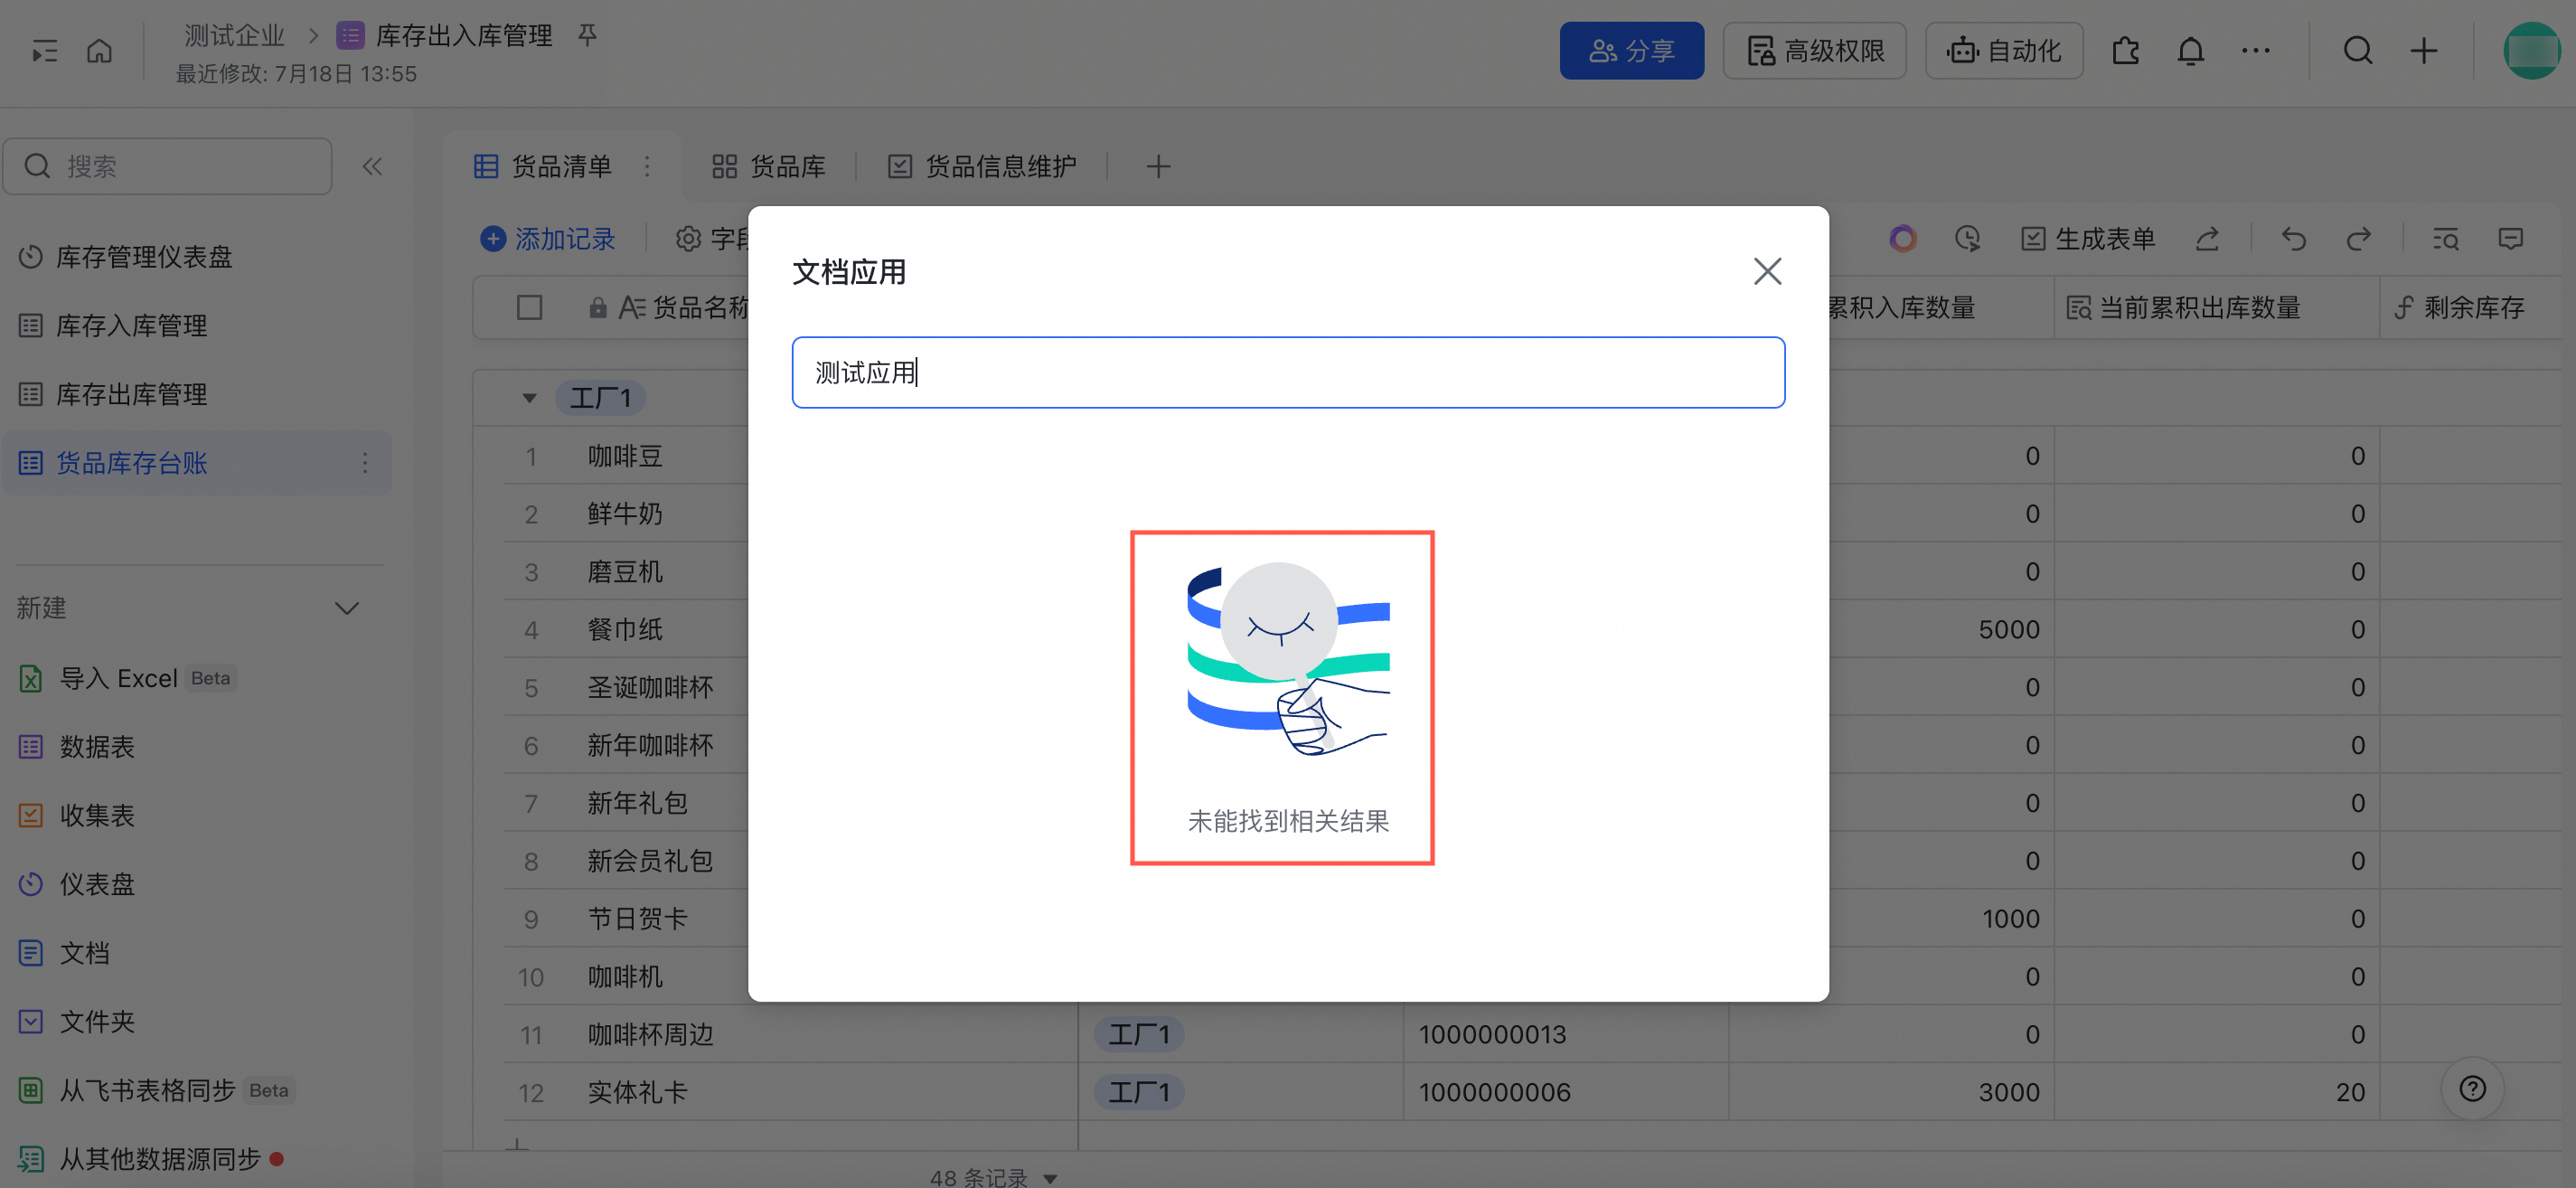
The link sharing scope is Only document collaborators can access via link, but the custom enterprise application is not added as a document application. |
Add the custom enterprise application as a document application on the Lark Base editing page. |
|
The link sharing scope is Only document collaborators can access via link, and the custom application cannot be selected as a document application. |
Ensure your account is in the Available Scope defined in the application version details. |
|
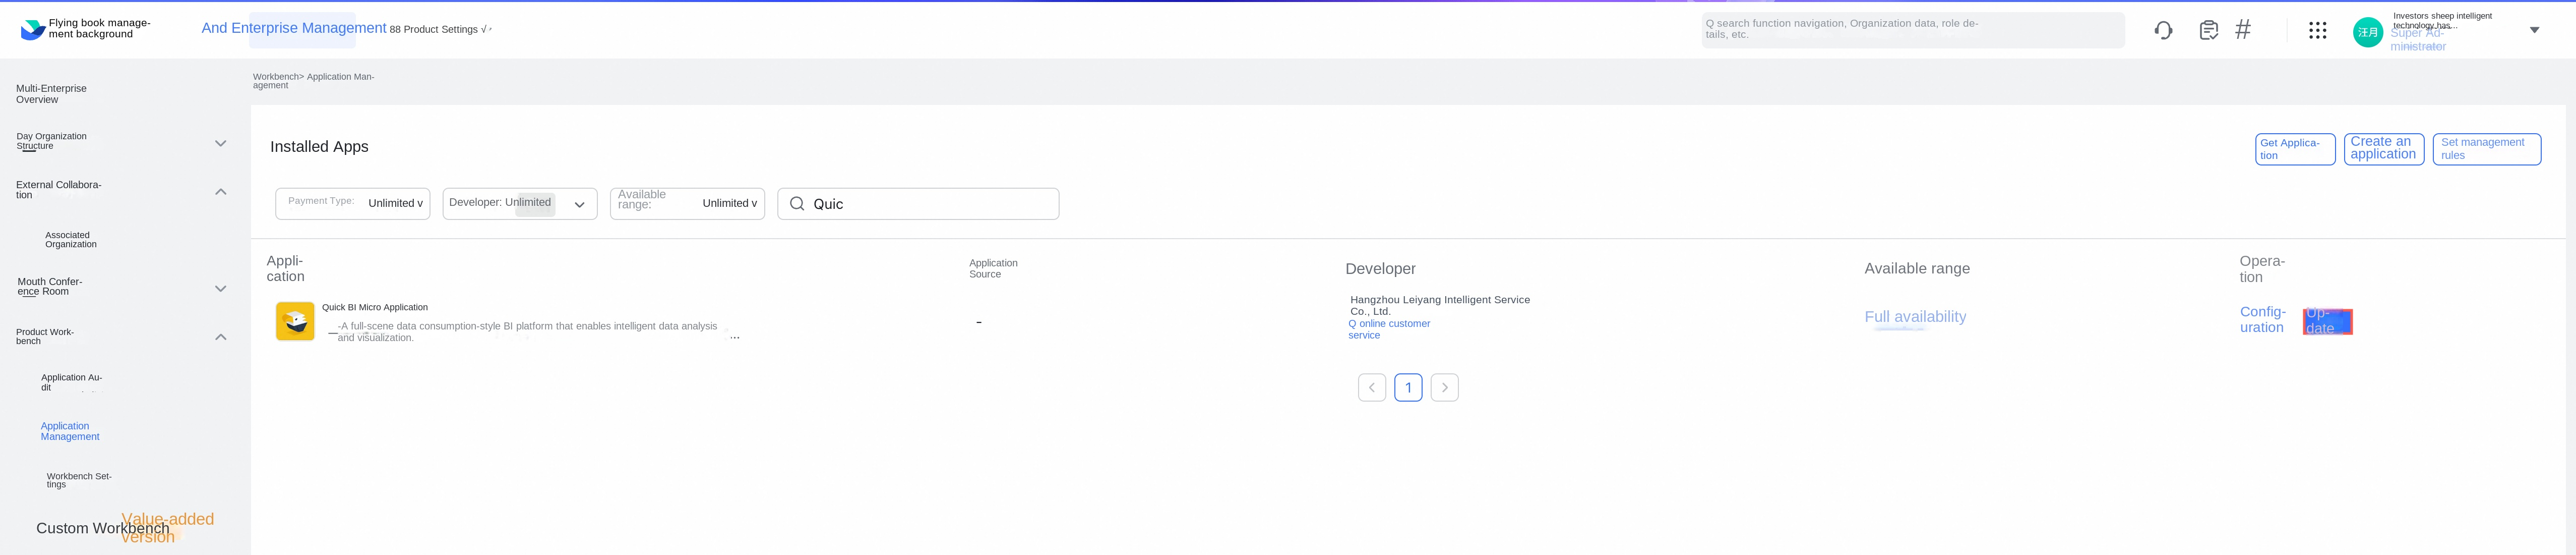
The system-default third-party application is not updated to the latest version. |
Update the application version in the Lark management backend. |