This topic answers common questions about using Data Disaster Recovery (DBS).
How do I configure RAM authorization to back up or restore data across Alibaba Cloud accounts?
Log on to the Resource Access Management (RAM) console using the Alibaba Cloud account that owns the source database instance.
NoteEnsure the account has
AliyunDBSDefaultRolepermissions.In the navigation pane on the left, click .
Create a RAM role:
Click Create Role and set Principal Type to Cloud Account.
For Principal Name, select
Current account 164882xxxxand click OK.In the dialog box, enter a role name, such as
ram-for-dbs, and click OK.
Grant permissions to the role:
On the details page for the role you created, click the Permissions tab and then click Grant Permission.
In the panel that appears, set Permission Type to System Policy.

Select the required policies based on the Database Location.
RDS Instance:
AliyunRDSReadOnlyAccessandAliyunVPCReadOnlyAccess.Self-managed database connected via an Express Connect circuit, a VPN Gateway, or a Smart Access Gateway:
AliyunVPCReadOnlyAccessPolarDB:
AliyunPolardbFullAccess
Click OK.
Edit the trust policy:
In the basic information section of the role, click .
On the Edit Trust Policy page, click JSON Editor. Copy and paste the code below into the box:
Replace
<Account ID>with the ID of the Alibaba Cloud account that manages the backup schedule.{ "Statement": [ { "Action": "sts:AssumeRole", "Effect": "Allow", "Principal": { "RAM": [ "acs:ram::<Account ID>:root" ], "Service": [ "<Account ID>@dbs.aliyuncs.com" ] } } ], "Version": "1" }
Click OK to complete the RAM authorization.
How do I back up and restore data across Alibaba Cloud accounts?
Configure cross-account backup
In the Database Location section, select a destination instance that supports the cross-account feature. Then, click Cross Alicloud instance.

Enter the following information:
Cross Alicloud UID: The ID of the Alibaba Cloud account that owns the source database.
Role name: The name of the role that you created in the source account, such as
ram-for-dbs. This role must have the required trust policy.

Configure cross-account restoration
For detailed instruction, see Configure a backup schedule and restore data.
You cannot migrate backup sets across Alibaba Cloud accounts in the console.
How do I back up a database across accounts using a public endpoint?
How do I automatically archive backup sets to a backup server?
How do I modify the backup lifecycle?
Log on to Data Management (DMS) 5.0.
In the top navigation bar, choose .
NoteIf you use the DMS console in simple mode, move the pointer over the
 icon in the upper-left corner of the DMS console and choose .
 In the Actions column of the target backup schedule, click Manage to go to the Configure Task page.
In the Lifecycle Information section, click Edit Lifecycle.
Set the retention period for full or incremental backups, and then click Save.
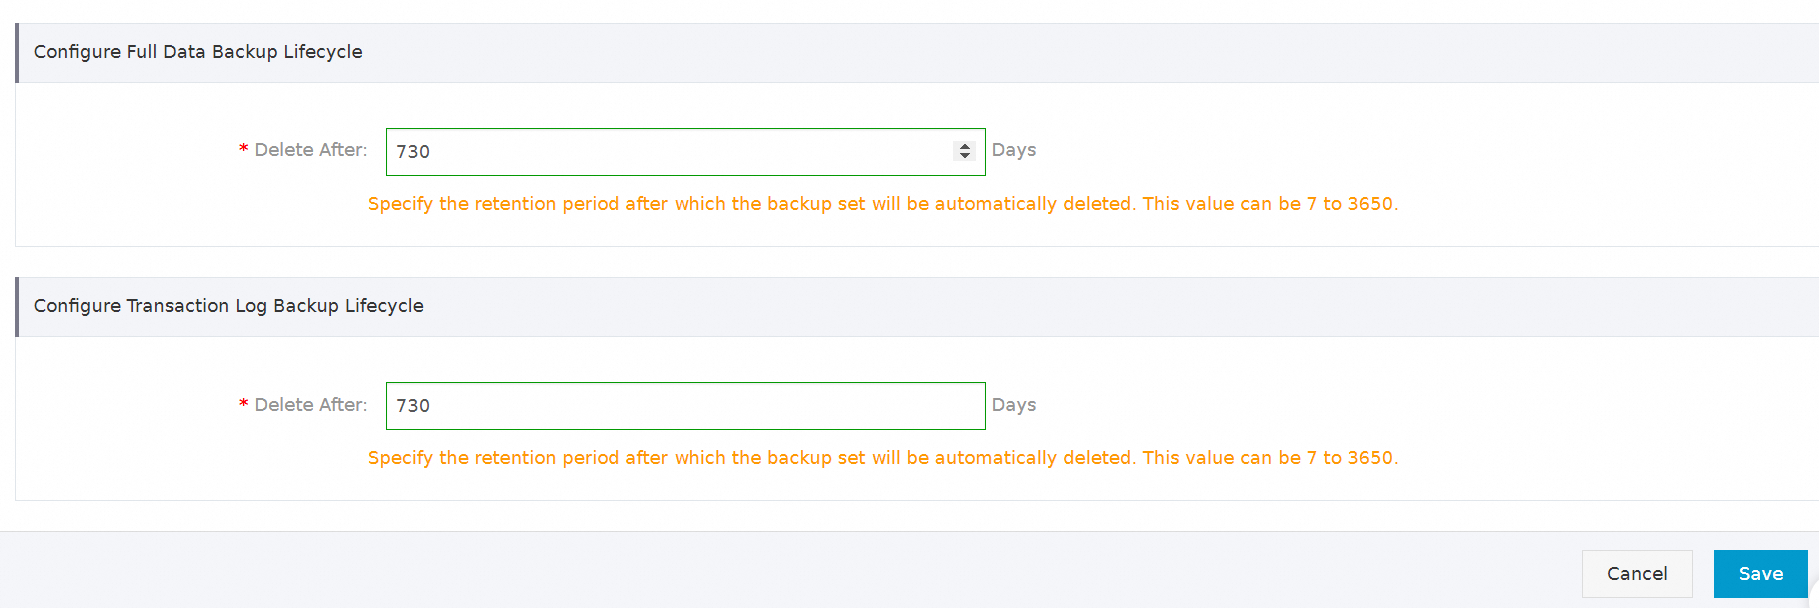 Important
The minimum retention period is 7 days and the maximum is 3,650 days. After the retention period expires, the backup set is automatically deleted and cannot be restored.
If you do not enable incremental backup, the console displays only the lifecycle configuration for full backups. To learn how to enable incremental backup, see Enable or disable incremental log backup.