If you want to implement automated operations from source code building, image pushing to application deployment, you can use Jenkins to create a continuous integration or continuous delivery (CI/CD) pipeline of images. After you commit source code to GitLab, Container Registry automatically uses the source code to build an image. Then, Container Service for Kubernetes (ACK) pulls the image to deploy an application and Container Registry sends an event notification to the DingTalk group.
Prerequisites
Git, GitLab, and Jenkins are installed.
NoteJDK8 instead of JDK11 is installed on GitLab. Some GitLab plug-ins cannot run on JDK11.
An ACR Enterprise Edition instance is created, and Internet access is enabled for the instance. For more information, see Create a Container Registry Enterprise Edition instance and Configure access over the Internet.
An ACK cluster that resides in the same region as the Advanced Edition instance of Container Registry Enterprise Edition is created. For more information, see Create an ACK managed cluster.
A DingTalk chatbot is created. The webhook URL and secret token of the DingTalk chatbot are recorded. For more information, see Step 1: Create a DingTalk chatbot.
To use the pipeline feature of Container Registry, you must upgrade the instance to the Advanced Edition. For more information, see Billing rules.
Use Jenkins to create a CI pipeline of images
After you commit source code to GitLab, Container Registry automatically uses the source code to build an image. After you scan the image, Container Registry automatically sends an event notification to the DingTalk group.
Create a project in GitLab.
Log on to GitLab.
In the top navigation bar of GitLab console, choose .
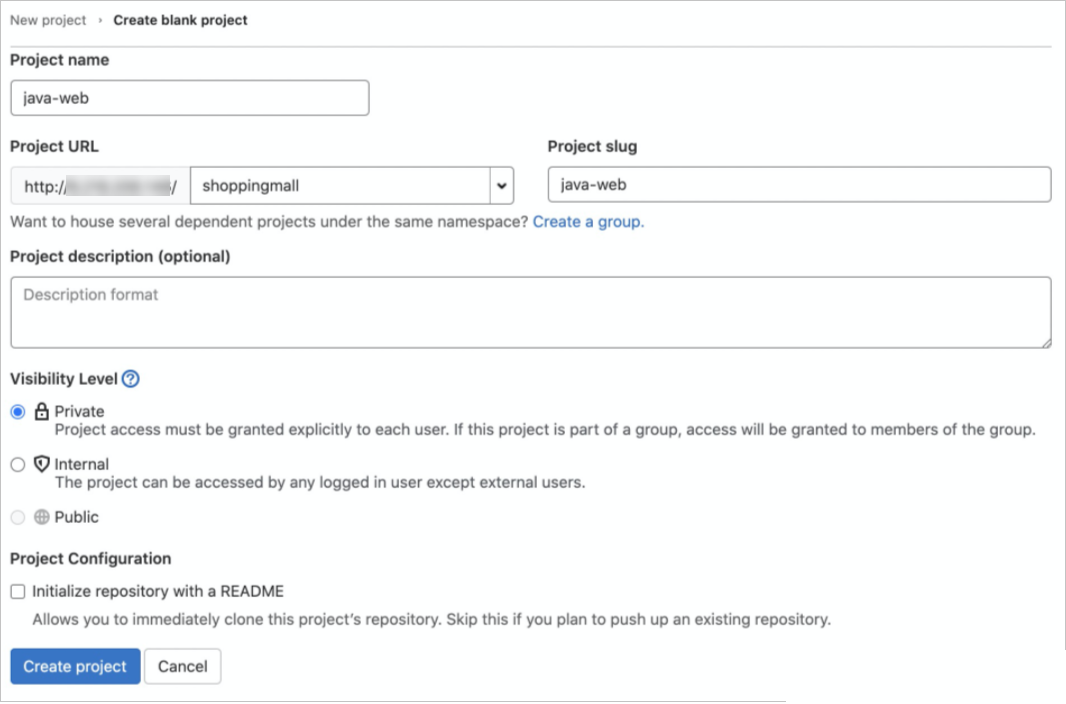
On the Your projects page, click New Project in the upper-right corner and then click Create blank project.
On the Create blank project page, configure the Project name, Project URL and Project slug parameters, set Visibility Level to Private, and then click Create project.
Create Dockerfile, pom.xml, DemoApplication.java, and HelloController.java files on your on-premises computer.
Dockerfile
FROM registry.cn-hangzhou.aliyuncs.com/public-toolbox/maven:3.8.3-openjdk-8-aliyun AS build
COPY src /home/app/src
COPY pom.xml /home/app
RUN ["/usr/local/bin/mvn-entrypoint.sh","mvn","-f","/home/app/pom.xml","clean","package","-Dmaven.test.skip=true"]

FROM registry.cn-hangzhou.aliyuncs.com/public-toolbox/openjdk:8-jdk-alpine
COPY --from=build /home/app/target/demo-0.0.1-SNAPSHOT.jar /usr/local/lib/demo-0.0.1-SNAPSHOT.jar
EXPOSE 8080
ENTRYPOINT ["java","-jar","/usr/local/lib/demo-0.0.1-SNAPSHOT.jar"]
pom.xml
<?xml version="1.0" encoding="UTF-8"?>
<project xmlns="http://maven.apache.org/POM/4.0.0" xmlns:xsi="http://www.w3.org/2001/XMLSchema-instance"
    xsi:schemaLocation="http://maven.apache.org/POM/4.0.0 https://maven.apache.org/xsd/maven-4.0.0.xsd">
    <modelVersion>4.0.0</modelVersion>
    <parent>
        <groupId>org.springframework.boot</groupId>
        <artifactId>spring-boot-starter-parent</artifactId>
        <version>2.6.1</version>
        <relativePath/> <!-- lookup parent from repository -->
    </parent>
    <groupId>com.example</groupId>
    <artifactId>demo</artifactId>
    <version>0.0.1-SNAPSHOT</version>
    <name>demo</name>
    <description>Demo project for Spring Boot</description>
    <properties>
        <java.version>1.8</java.version>
    </properties>
    <dependencies>
        <dependency>
            <groupId>org.springframework.boot</groupId>
            <artifactId>spring-boot-starter-freemarker</artifactId>
        </dependency>
        <dependency>
            <groupId>org.springframework.boot</groupId>
            <artifactId>spring-boot-starter-web</artifactId>
        </dependency>

        <dependency>
            <groupId>org.projectlombok</groupId>
            <artifactId>lombok</artifactId>
            <optional>true</optional>
        </dependency>
        <dependency>
            <groupId>org.springframework.boot</groupId>
            <artifactId>spring-boot-starter-test</artifactId>
            <scope>test</scope>
        </dependency>
        <dependency>
            <groupId>org.apache.logging.log4j</groupId>
            <artifactId>log4j-core</artifactId>
            <version>2.13.2</version>
        </dependency>
    </dependencies>

    <build>
        <plugins>
            <plugin>
                <groupId>org.springframework.boot</groupId>
                <artifactId>spring-boot-maven-plugin</artifactId>
                <configuration>
                    <excludes>
                        <exclude>
                            <groupId>org.projectlombok</groupId>
                            <artifactId>lombok</artifactId>
                        </exclude>
                    </excludes>
                </configuration>
            </plugin>
        </plugins>
    </build>

</project>
DemoApplication.java
package com.example.demo;

import org.springframework.boot.SpringApplication;
import org.springframework.boot.autoconfigure.SpringBootApplication;

import java.util.TimeZone;

@SpringBootApplication
public class DemoApplication {

    public static void main(String[] args) {
        TimeZone.setDefault(TimeZone.getTimeZone("Asia/Shanghai"));
        SpringApplication.run(DemoApplication.class, args);
    }

}
HelloController.java
package com.example.demo;

import lombok.extern.slf4j.Slf4j;
import org.springframework.web.bind.annotation.RequestMapping;
import org.springframework.web.bind.annotation.RestController;

import javax.servlet.http.HttpServletRequest;
import java.text.SimpleDateFormat;
import java.util.Date;

@RestController
@Slf4j
public class HelloController {

    @RequestMapping({"/hello", "/"})
    public String hello(HttpServletRequest request) {
        return "Hello World at " + new SimpleDateFormat("yyyy-MM-dd HH:mm:ss").format(new Date());
    }
}
Run the following command to upload the build file to GitLab:
cd java-web  # Go to the directory where the building file resides.
git remote set-url origin http://8.218.20*.***/shoppingmall/java-web.git
git push origin master
* [new branch]      master -> master
Create a pipeline to build images in Jenkins.
Configure the Secure Shell (SSH) key pair of GitLab in Jenkins.
Log on to Jenkins.
In the left-side navigation pane of the Jenkins dashboard, click Manage Jenkins.
In the Security section, click Manage Credentials.
In the Stores scoped to Jenkins section, click Jenkins in the Store column, and then click Global credentials.
In the left-side navigation pane, click Add Credentials.
Set the Kind parameter to SSH Username with private key, enter values for the Description and Username parameters, select Enter directly, and then click OK.
On the Global credentials page, the ID of the credential is automatically generated. Record the ID.
Create a pipeline.
In the left-side navigation pane of the Jenkins dashboard, click New Item.
Enter a name for the pipeline, select Pipeline, and then click OK.
Click the Build Triggers tab, select Build when a change is pushed to GitLab, and then select Push Events.
Record the webhook URL to the right of Build when a change is pushed to GitLab.
Click Advanced and then click Generate in the lower-right corner of Secret token.
Record the secret token that is generated by Jenkins.
Click the Pipeline tab, and replace the values of the parameters in the following template with your actual values. Copy the content that you modified to the code editor, and click Save.
def git_auth_id = "6d5a2c06-f0a7-43c8-9b79-37b8c266****" # The ID of the credential.
def git_branch_name = "master" # The name of the branch.
def git_url = "git@172.16.1*.***:shoppingmall/java-web.git" # The address of the GitLab repository.
def acr_url = "s*****-devsecops-registry.cn-hongkong.cr.aliyuncs.com" # The endpoint of the image repository.
def acr_username = "acr_test_*****@test.aliyunid.com" # The username of the container image.
def acr_password = "HelloWorld2021" # The password of the container image.
def acr_namespace = "ns" # The name of the namespace.
def acr_repo_name = "test" # The name of the image repository.
def tag_version = "0.0.1" # The tag of the container image.
node {

    stage('checkout git repo') {
        checkout([$class: 'GitSCM', branches: [[name: "*/${git_branch_name}"]], extensions: [], userRemoteConfigs: [[credentialsId: "${git_auth_id}", url: "${git_url}"]]])
    }
    stage('build image') {
        sh "sudo docker build -t java-web:${tag_version} ."
        sh "sudo docker tag java-web:${tag_version} ${acr_url}/${acr_namespace}/${acr_repo_name}:${tag_version}"
    }
    stage('push image') {
        sh "sudo docker login --username=${acr_username} --password=${acr_password} ${acr_url}"
        sh "sudo docker push ${acr_url}/${acr_namespace}/${acr_repo_name}:${tag_version}"
    }
}
Add the webhook URL to GitLab.
Log on to GitLab.
On the Projects page, click the name of the project that you created.
In the left-side navigation pane, choose . Enter the webhook URL and secret token, clear Enable SSL verification, and then click Add webhooks.
Create an event notification rule.
Log on to the Container Registry console.
In the top navigation bar, select a region.
In the left-side navigation pane, click Instances.
On the Instances page, click the Enterprise Edition instance that you want to manage.
In the left-side navigation pane of the instance details page, choose .
On the Event Rules tab, click Create Rule.
In the Event Scope step of the Create Rule wizard, enter a value for the Rule Name parameter, set the Event Type parameter to The image is scanned, select Scan Completed, set Effective Scope to Namespace, select ns as the name of the namespace, and then click Next.
In the Event Notification step, set Notification Method to DingTalk, enter the webhook URL and secret token of the DingTalk chatbot, and then click Save.
Trigger image building.
Run the following command and replace the value of the parameter in the HelloController.java file with your actual value. Commit the file to GitLab to trigger image build.
vim java/com/example/demo/HelloController.java # Replace the value of the parameter in the HelloController.java file with your actual value.
git add . && git commit -m 'commit' && git push origin # Commit the file to GitLab.
Wait a while. In the left-side navigation pane of the details page of the Container Registry Enterprise Edition instance, choose . On the right side of the page that appears, click the test repository. In the left-side navigation pane of the management page of the repository, click Tags. An image is generated on the Tags page.
Configure security scan.
On the Tags page, click Security Scan in the Actions column of the image.
On the Security Scan page, click Scan Now.
After the image is scanned, Container Registry sends a notification to the DingTalk group.
Use Jenkins to create a CD pipeline of images
After you commit source code in GitLab, Container Registry automatically uses the source code to build an image. After the image is built, the delivery chain is automatically triggered. After the delivery chain is executed, an HTTP request is automatically sent to Jenkins. Then, A Deployment in ACK is triggered to pull the image again to deploy the application.
Create an application.
Log on to the ACK console.
In the left-side navigation pane of the ACK console, click Clusters.
On the Clusters page, find the cluster that you want to manage and click the name of the cluster or click Details in the Actions column. The details page of the cluster appears.
In the left-side navigation pane of the details page, choose .
On the Deployments page, select a value for Namespace, then click Create from YAML.
On the Create page, select Custom from the Sample Template drop-down list, copy the following content to the template, and then click Create.
NoteIf you do not enable the pulling images without secrets feature in ACK and Container Registry, you must enable the access over the Internet feature in Container Registry and set the image type to public. For more information, see Configure access over the Internet.
apiVersion: apps/v1
kind: Deployment
metadata:
  creationTimestamp: null
  labels:
    app: demo
  name: demo
spec:
  replicas: 3
  minReadySeconds: 5
  progressDeadlineSeconds: 60
  revisionHistoryLimit: 5
  selector:
    matchLabels:
      app: demo
  strategy:
    rollingUpdate:
      maxUnavailable: 1
    type: RollingUpdate
  template:
    metadata:
      annotations:
        prometheus.io/port: "9797"
        prometheus.io/scrape: "true"
      creationTimestamp: null
      labels:
        app: demo
    spec:
      containers:
      - image: s*****-devsecops-registry.cn-hongkong.cr.aliyuncs.com/ns/test:0.0.1
        imagePullPolicy: Always
        name: demo
        ports:
        - containerPort: 8080
          name: http
          protocol: TCP
        readinessProbe:
          initialDelaySeconds: 5
          tcpSocket:
            port: 8080
          timeoutSeconds: 5
        resources:
          limits:
            cpu: "2"
            memory: 512Mi
          requests:
            cpu: 100m
            memory: 64Mi
status: {}
---
apiVersion: v1
kind: Service
metadata:
  name: demo-svc
spec:
  selector:
    app: demo
  ports:
    - protocol: TCP
      port: 80
      targetPort: 8080
---
apiVersion: extensions/v1beta1
kind: Ingress
metadata:
  name: demo
  labels:
    app: demo
spec:
  rules:
    - host: app.demo.example.com
      http:
        paths:
          - backend:
              serviceName: demo-svc
              servicePort: 80
---
On the Deployments page, click the name of the application demo. Click the Access Method tab.
Obtain the external endpoint on the Access Method tab.
Enter the following content for the local host.
<The external endpoint> app.demo.example.comEnter app.demo.example.com in the address bar of the browser.
 If a page appears as shown in the preceding figure, the application is deployed.
Create an application trigger.
On the Deployments page, click the name of the application demo.
On the details page of the application, click the Triggers tab. Then, click Create Trigger.
In the Create Trigger dialog box, set Action to Redeploy and click OK.
Obtain the webhook URL on the Triggers tab.
Create a pipeline.
Log on to Jenkins.
In the left-side navigation pane, click New Item.
Enter a name for the pipeline and click Pipeline.
Click the Build Trigger tab and select Generic Webhook Trigger.
In the Generic Webhook Trigger section, you can obtain the webhook URL of the HTTP request, which is
JENKINS_URL/generic-webhook-trigger/invoke. In this example, the generic webhook token is set tohelloworld2021. Therefore, the webhook URL isJENKINS_URL/generic-webhook-trigger/invoke?token=helloworld2021.Click the Pipeline tab, and replace the generic webhook token and webhook URL in the following template with your actual values. Copy the content that you modified to the code editor, and click Save.
pipeline {
  agent any
  triggers {
    GenericTrigger(
     genericVariables: [
      [key: 'InstanceId', value: '$.data.InstanceId'],
      [key: 'RepoNamespaceName', value: '$.data.RepoNamespaceName'],
      [key: 'RepoName', value: '$.data.RepoName'],
      [key: 'Tag', value: '$.data.Tag']
     ],
     causeString: 'Triggered on $ref',
     token: 'helloworld2021', # The generic webhook token. Replace the token with your actual value.
     tokenCredentialId: '',
     printContributedVariables: true,
     printPostContent: true,
     silentResponse: false,
     regexpFilterText: '$ref'
    )
  }
  stages {
    stage('Some step') {
      steps {
        sh "echo 'will print post content'"
        sh "echo $InstanceId"
        sh "echo $RepoNamespaceName"
        sh "echo $RepoName"
        sh "echo $Tag"
        sh "echo 'redeploy to ACK or you can deoloy to other platforms use before message'"
        sh "curl 'https://cs.console.alibabacloud.com/hook/trigger?token=g****' # Replace the webhook URL with your actual value.
        sh "echo 'done'"
      }
    }
  }
}
Creates a pipeline. For more information, see Create a delivery chain.
Creates an event notification rule.
In the left-side navigation pane of the management page of the Container Registry Enterprise Edition instance, choose .
On the Event Rules tab, click Create Rule.
In the Event Scope step of the Create Rule wizard, enter a name for the Rule Name parameter, set Event Type to The delivery chain is processed, select Success, set Effective Scope to Namespace, select ns from the Namespace drop-down list, and then click Next.
In the Event Notification step, set the Notification Method parameter to HTTP, enter the webhook URL that you obtained in Step 3, and then click Save.
Run the following command and replace the value of the parameter in the HelloController.java file with your actual value. Commit the code to GitLab to trigger image build.
vim java/com/example/demo/HelloController.java # Replace the value of the parameter in the HelloController.java file with your actual value.
git add . && git commit -m 'add update' && git push origin   # Commit the file to GitLab.
After the image is built, the delivery chain is triggered. After the delivery chain is executed, a Deployment in ACK is triggered to pull the image again to deploy the application.
Run the following command to check whether the application is redeployed.
curl app.demo.example.comIf the command output changes, the application is redeployed.