A fully managed service instance is a service entity created by a customer based on a Compute Nest service. The software and resources are deployed within the accounts of the service providers. This topic describes how to create a fully managed service instance.
Background information
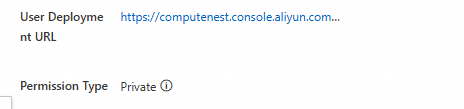
If you create a service instance through a Compute Nest deployment URL, you can use either a customer deployment URL or a service provider deployment URL.
Customer Deployment URL: After deployment, the status is Pending Deployment. Because the service provider's resources are used, the service provider must confirm the deployment. For more information, see Create a service instance by using a customer deployment URL.
Service Provider Deployment URL: The service provider must enter the customer ID when creating the instance to help the customer complete the deployment. For more information, see Create a service instance by using a service provider deployment URL.
If you create a service instance through an Alibaba Cloud Marketplace Product URL (searched on the homepage or provided by the service provider), you can skip the Pending Deployment state. For more information, see Create a service instance from Alibaba Cloud Marketplace.
This topic describes only the general process for deploying service instances. For specific deployment details, see the corresponding service instance deployment documentation.
Create a service instance by using a customer deployment URL
Go to the service instance deployment page by using the deployment URL of the Compute Nest service provided by your service provider.
In the Region drop-down list, select the region in which you want to deploy the service instance.
If you do not select a region, the region in which the service is deployed is used by default when the instance is deployed.
Optional: If the service can be accessed from virtual private clouds (VPCs) by using PrivateLink, you must configure the parameters described in the following table in the Network Settings section.
You can configure up to 10 VPCs based on your business requirements.
Parameter
Description
VPC
The ID of the VPC that is used to access the service. If no VPC is available in the drop-down list, you can click Create VPC to go to the Create VPC page and create a VPC. For more information, see Create a VPC with an IPv4 CIDR block or Create a VPC with an IPv6 CIDR block.
Security Group
The ID of the security group that is used to access the service. If no security group is available in the drop-down list, you can click Security Group to go to the Create Security Group page and create a security group. For more information, see Create a security group.
Zone and vSwitch
The zone and vSwitch that are used to access the service. If you want to access the service from multiple zones and vSwitches, click Add VSwitch to add zones and vSwitches.
Optional: In the Tags And Resource Groups section, specify the resource group to which the created resources belong and the tags that are added to the resources.
Click Next: Confirm Order. On the page that appears, check the service instance information.
NoteFor fully managed services, resources are deployed in the service provider's account. You do not need to pay for the resources, so resource price previews are not displayed.
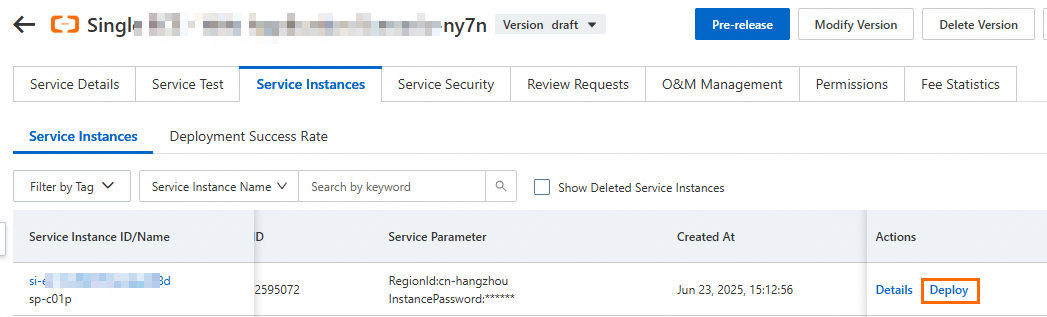
Click Create Now. After the service instance is created, click View Service to view the status of the service instance.
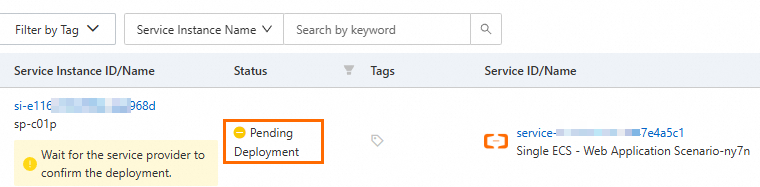
When the service status is Pending Deployment, you need to contact the service provider to click Deploy in the Service Instance section for the target service instance to complete the deployment.
NoteThe service instance parameters that you need to configure vary based on the service type. The parameters displayed in the console prevail.
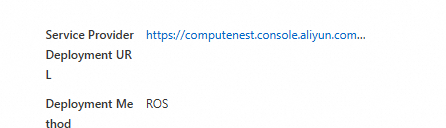
Create a service instance by using a service provider deployment URL
The service provider clicks the Service Provider Deployment URL to go to the service instance deployment page.
On the Create Service Instance page, enter the Customer ID.
ImportantThe service provider must verify the accuracy of the Customer ID.
In the Region drop-down list, select the region in which you want to deploy the service instance.
If you do not select a region, the region in which the service is deployed is used by default when the instance is deployed.
Optional: If the service can be accessed from virtual private clouds (VPCs) by using PrivateLink, you must configure the parameters described in the following table in the Network Settings section.
You can configure up to 10 VPCs based on your business requirements.
Parameter
Description
VPC
The ID of the VPC that is used to access the service. If no VPC is available in the drop-down list, you can click Create VPC to go to the Create VPC page and create a VPC. For more information, see Create a VPC with an IPv4 CIDR block or Create a VPC with an IPv6 CIDR block.
Security Group
The ID of the security group that is used to access the service. If no security group is available in the drop-down list, you can click Security Group to go to the Create Security Group page and create a security group. For more information, see Create a security group.
Zone and vSwitch
The zone and vSwitch that are used to access the service. If you want to access the service from multiple zones and vSwitches, click Add VSwitch to add zones and vSwitches.
Optional: In the Tags And Resource Groups section, specify the resource group to which the created resources belong and the tags that are added to the resources.
Click Next: Confirm Order. On the confirmation page, check the Service Instance Information and Price Preview, and then click Create Now.
After the service instance is created, view the status of the created service instance on the Service Instance page.
NoteThe service instance parameters that you need to configure vary based on the service type. The parameters displayed in the console prevail.
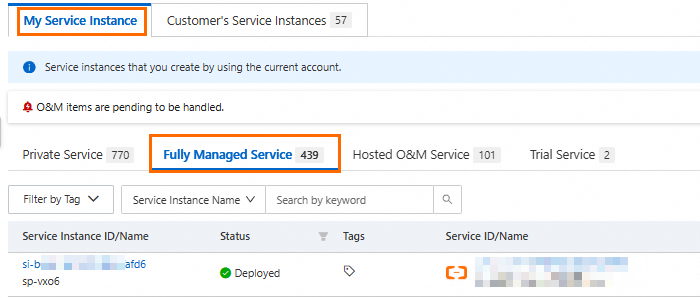
Customers can view their instances on the My Service Instances tab.
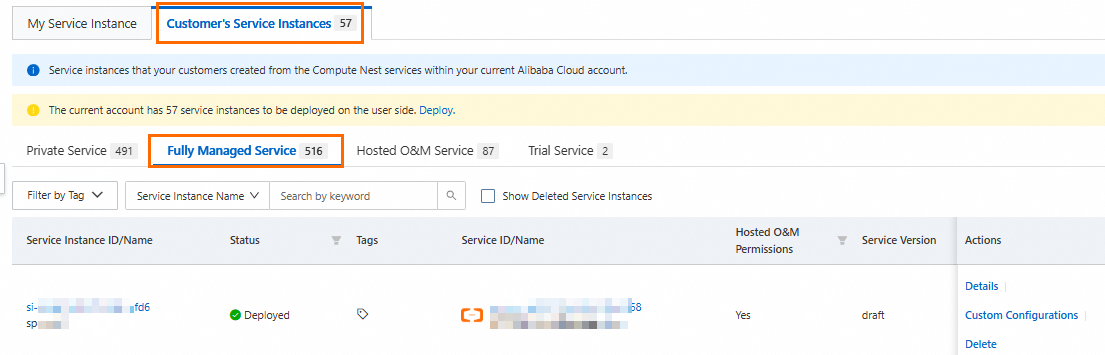
Service providers can view customer instances on the Customer Service Instances tab.
Create a service instance from Alibaba Cloud Marketplace
Go to the product details page by using one of the following methods:
Find the product in Alibaba Cloud Marketplace.
Go to the homepage of Alibaba Cloud Marketplace.
Enter the name of the product that you want to purchase in the search box and click the search icon.
Find the product that you want to purchase and click the product.
Obtain the URL of the associated product from your service provider and go to the page to which the URL redirects.
On the product page, select the purchase information for the product and click Buy Now.
On the Confirm Order page, confirm the product information and configure the cloud resource information. After confirmation, pay for the product.
After payment is complete, Compute Nest automatically starts creating the service instance. You can view the deployment details by performing the following operations:
Log on to the Alibaba Cloud Marketplace console.
On the Purchased Services page, find the product you just purchased. In the Actions column, click Go To Compute Nest To Deploy Or View Deployment Details.