UModel Explorer serves as the graphical management interface for UModel, allowing you to visualize and modify various model elements with ease.
Homepage
The Homepage provides a centralized workspace for viewing and editing UModel elements, streamlining your modeling activities within a single, intuitive environment.
UModel Explorer entry point
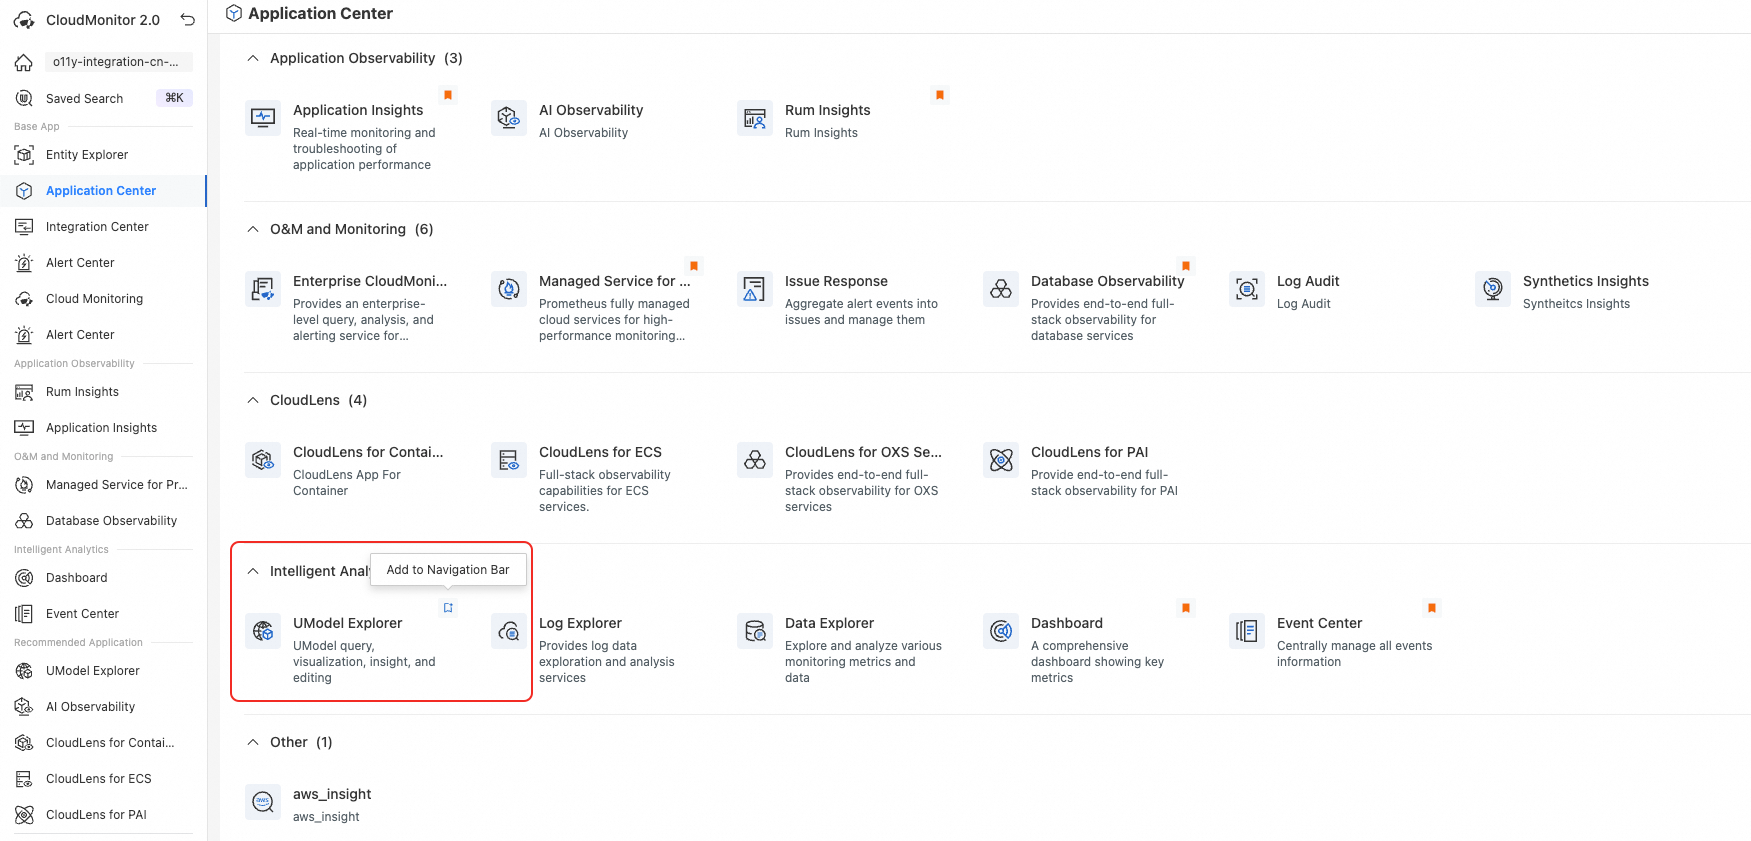
Log on to the Cloud Monitor 2.0 console, and select a workspace. In the left navigation pane, choose .
You can pin it to the Workspace App sidebar.
Control panel (top left)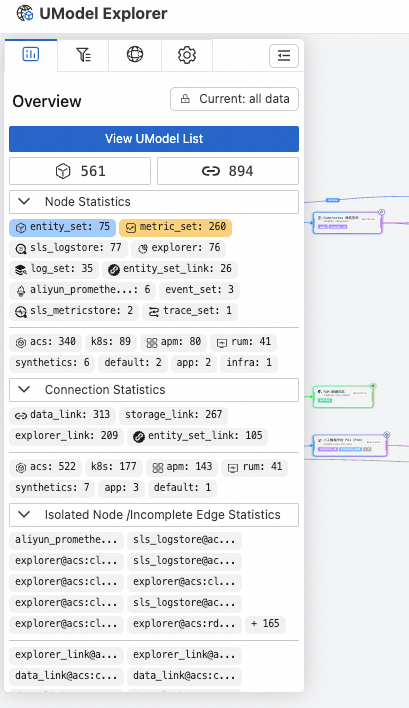
Click the ![]() icon to collapse or expand the control panel.
icon to collapse or expand the control panel.
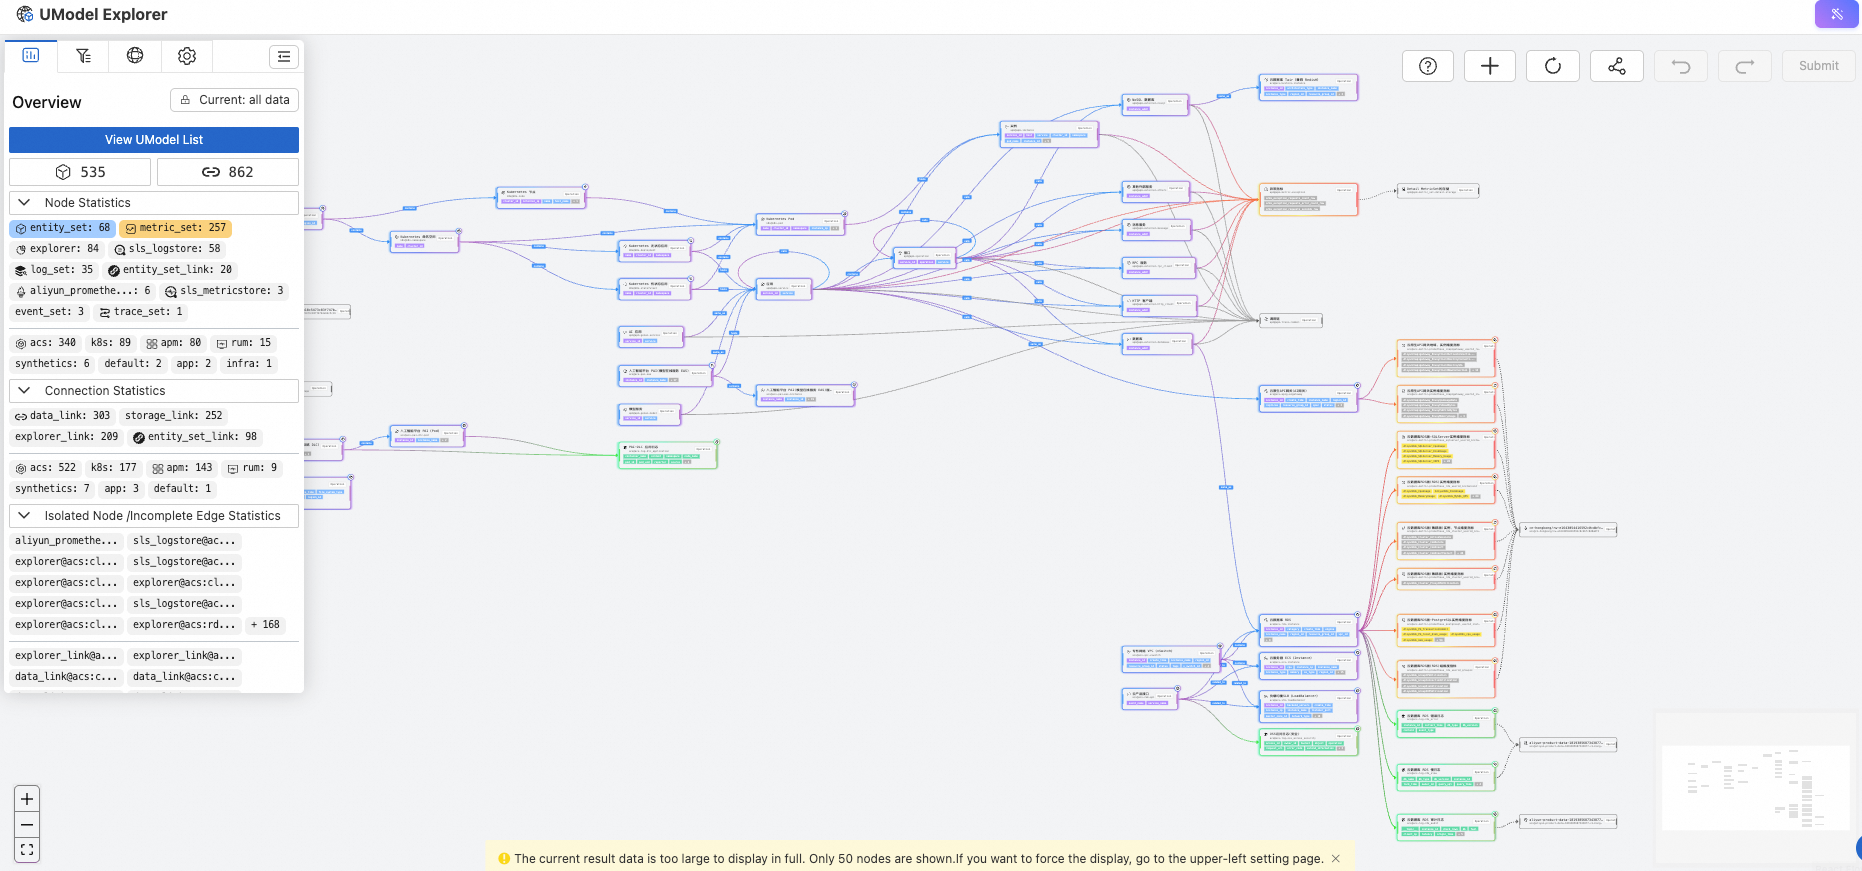
Overview page
The Overview page provides statistics for the current workspace, enabling you to analyze model metrics at a glance. You can choose to view global statistics or refine your results using available filters.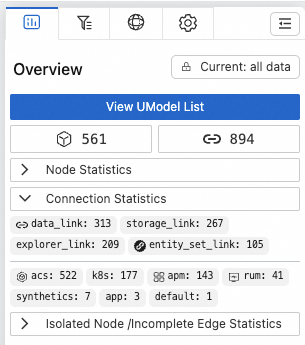
Statistics are organized into three categories: nodes, links, and isolated elements. Please note that elements of the entity_set_link type are counted as both nodes and links.
UModel list view
Click View UModel List on the Overview page to open the UModel list view.
At the top of the page, you can filter UModel elements by type, domain, or by searching for specific text within the elements.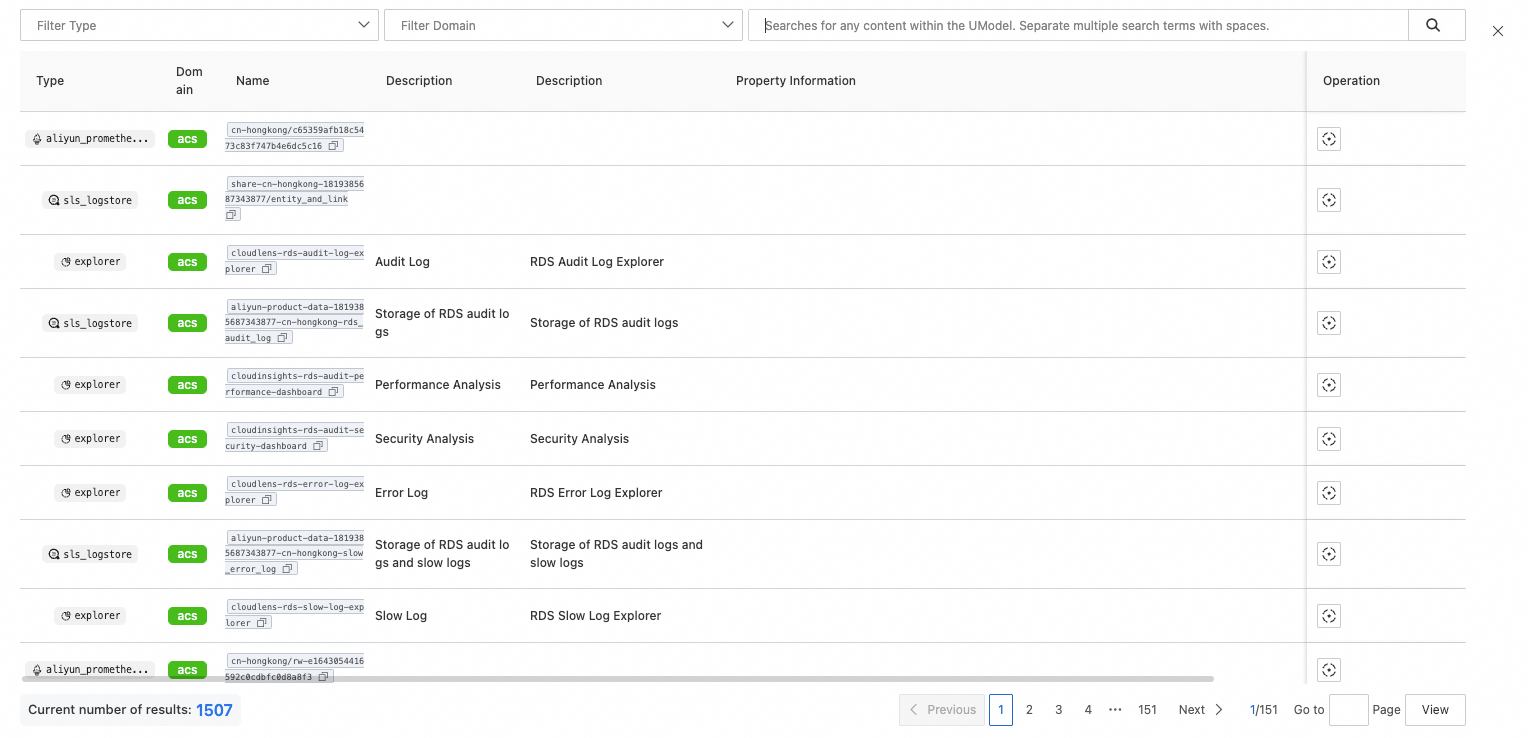
The table contains general UModel information and specific information for certain nodes.
In the Actions column, click the ![]() icon to focus on the UModel element on the homepage.
icon to focus on the UModel element on the homepage.
Filter page
The Filter page provides four types of filters. The first three filters, Node type, Domain, and Full-text search, are grouped together. The relationship between values within the same filter type is OR, and the relationship between different filter types is AND. For the full-text search filter, you must press Enter after you type a keyword to submit the search.
The focus filter is independent, mutually exclusive, and has the highest priority. If a focus filter is active, only the focus filter is applied.
After you change the filter settings, click Apply.
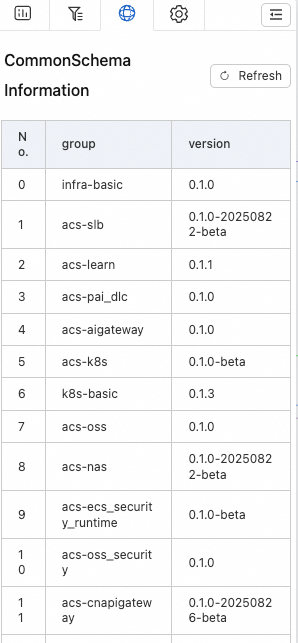
CommonSchema information page
In Alibaba Cloud observability services, UModel includes default data known as a public UModel or CommonSchema. This public UModel data is referenced in the workspace as a CommonSchemaRef. When you run a query, UModel instances are dynamically generated, and a common_schema_info field is added to the metadata of the element to provide additional information.
In UModel Explorer, the CommonSchema information page shows the CommonSchemas that are used by the current workspace and indicates if any local conflicts with them exist.
Settings page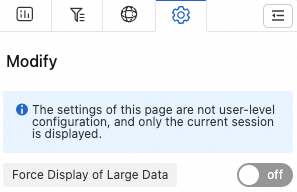
This page displays settings that control how data is displayed. These settings apply only to the current session and are not saved to your user profile.
Note: If the message "The current result set is too large to display completely. Only 50 nodes are shown. To force display all, go to the settings page in the upper left." appears at the bottom of the homepage, you can adjust the settings on this page to display all results.
Warning: Forcing the display of a large amount of data when the workspace contains a large amount of UModel data may cause rendering lag and negatively affect display performance.
Best practice: Use a fixed focus or filter to narrow the scope, then turn on the switch to display all data. After you observe the results, turn off the switch immediately.
Minimap (bottom right)
The minimap lets you quickly browse the overall graph structure and pan the view.
Action bar (top right)
 : Operation instructions
Feature
Operation
Create a new node
Click Create on the top action bar.
Create a node while creating an edge by dragging. When you drag to an empty space, you can choose to create a new node.
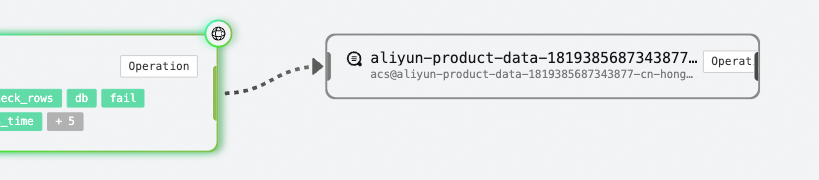
Create an edge
Find the two nodes to link. Drag the connection point on the right side of the source (src) node (a thicker line, where the mouse pointer becomes a crosshair) to the connection point on the left side of the destination (dest) node.
Drag the connection point on the right side of the src node to any empty space to connect to an existing node or create a new one.
Copy a node
Select the copy option from the node's action buttons.
Delete a node
Click a node and press
Backspaceto cascade delete related edges.Select the delete option from the node's action buttons.
Delete an edge
Click an edge and press
Backspace. : Create Node button. After you click this button, the view focuses on the new node, and you can begin editing it.
 : Refreshes the data and updates the homepage display.
 : Generates a shareable link that includes the current filter information and display configuration.
 : Undoes or redoes pending changes.
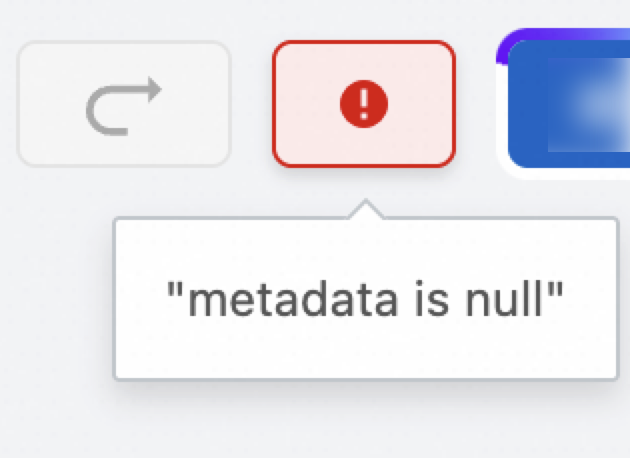
 : After you make adjustments, click Submit to commit the changed UModel elements to the workspace.
The commit preview indicates deletions (D, red), additions (A, green), and modifications (M, yellow-brown), and displays the differences.
Note: This interface is for preview only. To make adjustments, click the locate button in the upper-right corner of the tab to focus on the element that you want to adjust.
If you think another user might modify the UModel content in the workspace while you are editing, click Sync Latest Data before you commit to check for new changes.
If all modifications are correct, click Execute Changes.
The operations are executed in batches. The commits are processed in the order of deletions, additions, and modifications. Deletions are processed one element per batch. Additions and modifications are processed in batches of 10 changes. If a batch fails, subsequent executions are stopped, and an error message is displayed.
If a commit fails, view the error message and make the necessary changes.
After you click OK, successfully committed batches are no longer displayed in the commit preview.
The cause of the error is described in the error message at the bottom.
After you close the window, the error message is displayed in the action bar.
 After you make the necessary changes, you can submit them again.
Content viewing and form editing
UModel Explorer provides a form editing feature that supports filter interactions for UModel elements.
Click any non-action area of a node or an edge to display its detailed content on the right.
Each type of UModel element has a different schema that includes common UModel element resources and fields specific to that type. You can view the description of each field in the tooltip of the field title. If a validation error occurs while you are editing, a message is displayed at the bottom of the form. After you finish editing, click Submit to save the changes for the node.
Note: CommonSchemas cannot be modified.
Operations on nodes
The node action buttons allow you to copy or delete a single node or its incoming and outgoing edges.
Keyboard deletion
Select a node or edge, and then press the backspace key.
Visual operations
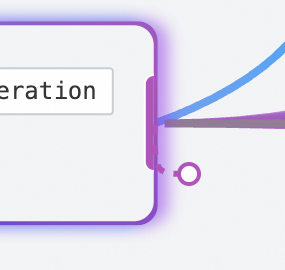 Move the mouse pointer over the action handle on the right side of a node. When the pointer changes to a crosshair, you can draw lines to create links.
Direct linking by drawing lines
On the homepage, find the two nodes you want to link. Drag from the right side of the source (src) node to the left side of the destination (dest) node. 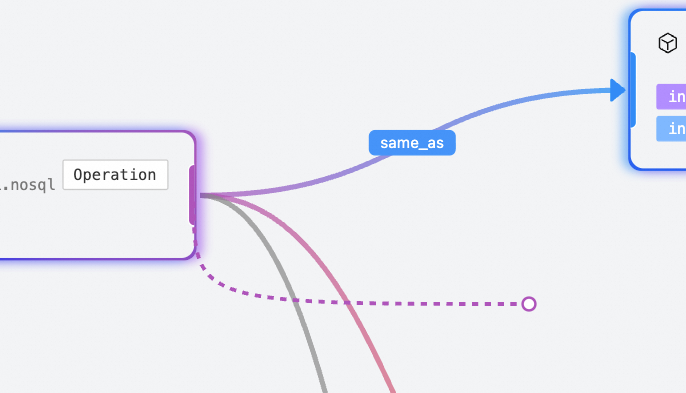 Note: After you create a link by drawing a line, the association is set to a default value. This default value may not fully utilize the modeling capabilities of UModel. You must click the edge and edit its properties to configure it.
Draw a line and link to multiple existing nodes
When you release the mouse button, a Select or create linked object virtual node opens. 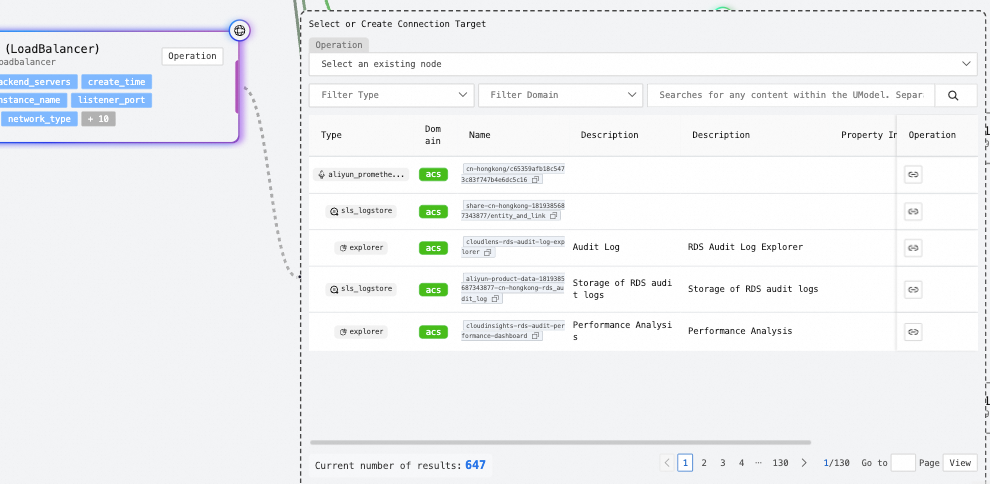 You can then search for and link multiple elements.
The selected items are displayed at the bottom. After you make your selections, click Confirm. The view then focuses on the newly created edges.
Note: Similarly, after you create the links, the association is set to a default value. This default value may not fully utilize the modeling capabilities of UModel. You must click the edge and edit its properties to configure it.
Draw a line to create and link a new node
In the pop-up window, click the Create new node tab.
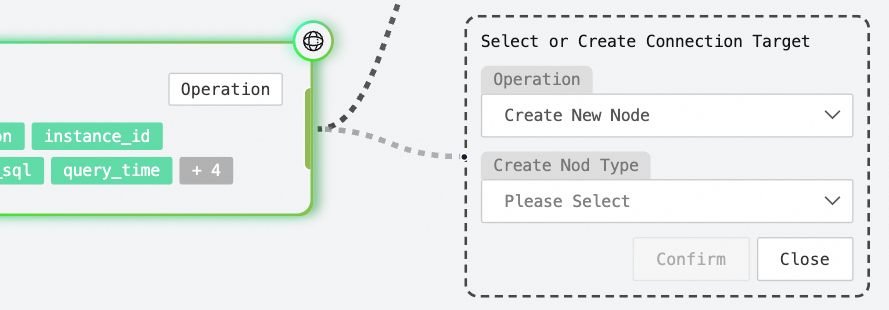
Note: Similarly, after you create the link and node, their properties are set to default values. This may not fully utilize the modeling capabilities of UModel. You must click the edge and the node to edit their properties.
Specialized operations
Specific UModel elements have unique capabilities. For example, an EntitySet lets you navigate to or quickly query related entities, and a MetricSet lets you perform time-series metric analysis.
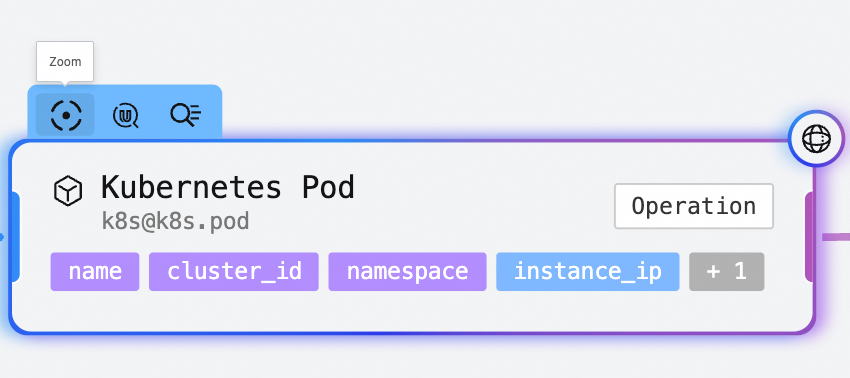
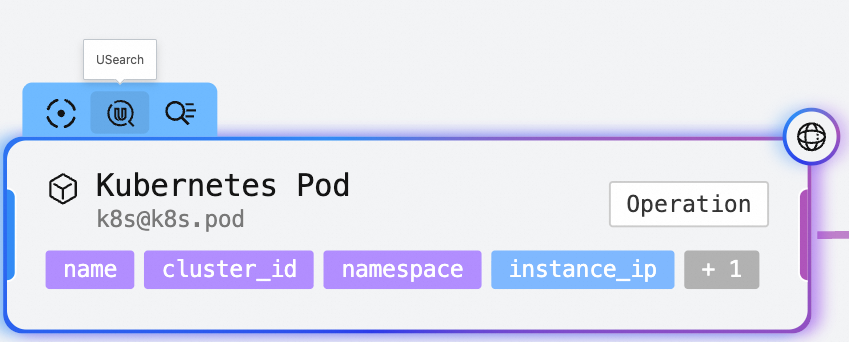
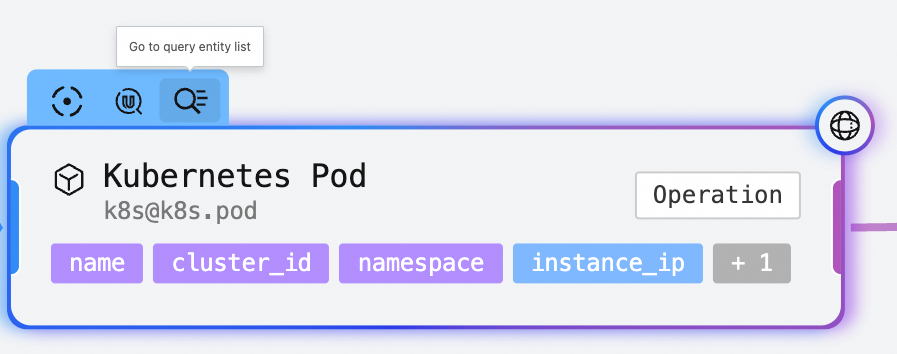
Move the mouse pointer over a UModel node to display operations in the upper-left corner.
All nodes have a focus operation. When you click the focus icon, the UModel element is added to the focus filter criteria.
EntitySet
Usearch
For more information, see the USearch topic.
Jump to query entity list
MetricSet analysis
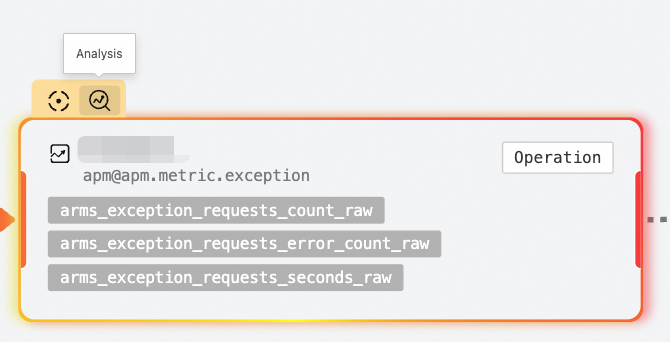
In the MetricSet analysis interface, you can perform a comprehensive analysis of MetricSet information. This includes advanced operations such as drill-down, smart drill-down, smart grouping, and smart analysis. The interface also supports year-over-year and month-over-month comparisons.
For more information about operations in the MetricSet analysis interface, see the MetricSet Explorer user guide.