Cloud Migration Hub provides multiple verification methods for database and object storage data sources to ensure data consistency between sources and destinations after migration.
Workflow
The data verification process includes the following steps:
Step 1: Install a data verification agent. Deploy an agent on a server connected to both data sources and destinations. Because verification involves sensitive data, we recommend deploying the agent on an ECS instance to prevent data leaks.
Step 2: Configure a data source and create a verification plan. Specify the data scope, verification method, and agent to perform the verification.
Step 3: Start verification. Send a verification command to the agent. The agent returns results automatically after verification completes.
Step 4: View results. View verification results and details in the Cloud Migration Hub console.
These steps provide GUI-based data consistency verification to ensure smooth data cutover.
Feature overview
Scenarios
Cloud Migration Hub provides a lightweight data verification feature for database and object storage migration scenarios. After migration completes, the feature samples data to check consistency between source and destination. During system cutover windows, it performs quick verification after system shutdown to provide real-time quality assurance.
-
Verification timing
Start verification when the following conditions are met:
-
Migration is complete on both the data source and destination.
-
Incremental synchronization or migration is complete.
-
-
Precautions
Verifying during active migration (full or incremental) may cause the following issues because data is still changing:
-
Inaccurate verification results
-
Data consistency misjudgment
-
Migration process interference
-
Cloud Migration Hub uses a lightweight verification algorithm that maintains high accuracy while minimizing resource overhead.
Supported services and verification methods
Database services
|
Supported service |
Count |
TopN |
SumX |
CheckSum |
ObjectStore |
|
MySQL |
Obtains the number of rows in a table. |
Obtains the first n rows in a table for comparison. |
Obtains the sum of specified fields in a table. |
Obtains the checksum of a table. |
Not supported. |
|
Redis |
Compares the value sizes of a specified key. |
Compares the n value attributes of a specified key. |
Compares the values of keys that are specified or sampled between source and destination ends. For example, you can specify 100 keys. |
Not supported. |
Not supported. |
|
MongoDB |
Obtains the number of documents in a collection. |
Obtains the first n documents in a collection for comparison. |
Obtains the sum of specified fields in a collection. |
Not supported. |
Not supported. |
|
Elasticsearch |
Obtains the number of documents in an index. |
Obtains the first n documents in an index for comparison. |
Not supported. |
Not supported. |
Not supported. |
For ordered data of Redis, the TopN method is used for verification. For unordered data of Redis, the Count method is used.
Object storage services
|
Supported service |
ListObject |
ContentCheck |
Inventory |
|
Alibaba Cloud Object Storage Service (OSS) |
Compares the names and sizes of all objects in a bucket. The sizes are measured in bytes. |
Performs MD5 verification on each object in the report generated by the online migration service. |
Compares objects based on the inventory lists that are generated. If inconsistent objects exist, the getObject operation is called for secondary verification. |
|
Huawei Cloud Object Storage Service (OBS) |
Compares the names and sizes of all objects in a bucket. The sizes are measured in bytes. |
Performs MD5 verification on each object in the report generated by the online migration service. |
Compares objects based on the inventory lists that are generated. If inconsistent objects exist, the getObject operation is called for secondary verification. |
|
Amazon Simple Storage Service (Amazon S3) |
Compares the names and sizes of all objects in a bucket. The sizes are measured in bytes. |
Not supported. |
Compares objects based on the inventory lists that are generated. If inconsistent objects exist, the getObject operation is called for secondary verification. |
|
Tencent Cloud Object Storage (COS) |
Compares the names and sizes of all objects in a bucket. The sizes are measured in bytes. |
Performs MD5 verification on each object in the report generated by the online migration service. |
Compares objects based on the inventory lists that are generated. If inconsistent objects exist, the getObject operation is called for secondary verification. |
Procedure
Apply for and view a license
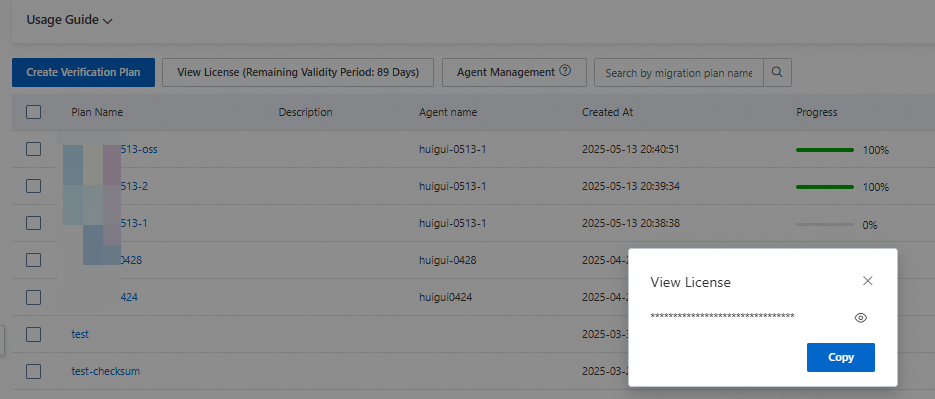
Log on to the Cloud Migration Hub console. In the left-side navigation pane, choose Migration Capability > Data Verification. Click Apply for a License to generate a license that protects agents from unauthorized use.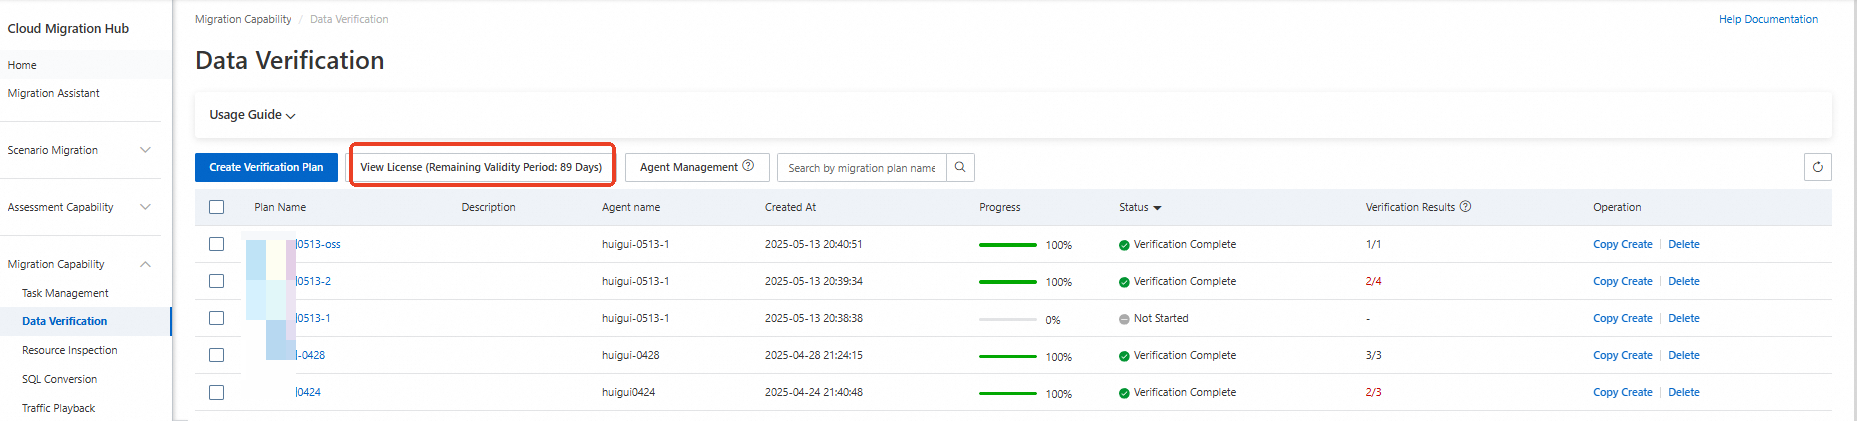
The license is valid for 90 days by default. Click View License to copy the license content.
Manage data verification agents
After you apply for a license, deploy a data verification agent on one or more servers based on your business requirements.
Recommended OS: CentOS or Alibaba Cloud Linux.
Network requirement: The server must connect to the data source.
Cloud Migration Hub supports automatic and manual agent deployment.
-
If you want to deploy an agent on an Alibaba Cloud ECS instance with Cloud Assistant installed, we recommend that you deploy the agent by using the automatic method. By default, Cloud Assistant is installed on Alibaba Cloud ECS instances.
-
If you want to deploy an agent on a third-party cloud server that is connected to an Alibaba Cloud virtual private cloud (VPC) or on an Alibaba Cloud ECS instance on which Cloud Assistant is not installed or fails to be installed due to specific reasons, we recommend that you deploy the agent by using the manual - private network method.
-
If you want to deploy an agent on a third-party cloud server that is not connected to Alibaba Cloud VPCs and uses a public IP address, we recommend that you deploy the agent by using the manual - public network method.
Automatic deployment
Supported only in the China (Hangzhou), China (Shanghai), China (Zhangjiakou), China (Shenzhen), and China (Ulanqab) regions. Contact online after-sales for other regions.
Notes:
-
Only Alibaba Cloud ECS instances are supported.
-
Activate PrivateLink before deploying an agent.
-
If you use PrivateLink to implement connectivity, a reverse endpoint is created within your account. You are charged for the endpoint. We recommend that you release it when it is no longer needed.
After preparing the ECS instance, click Agent Management.

In the panel that appears, click Agent Installation. 
In the dialog box that appears, set the Installation method parameter to Automated Deployment, enter an agent name, select the region in which you want to deploy the agent and the ECS instance on which you want to install the agent, and then click Installation.
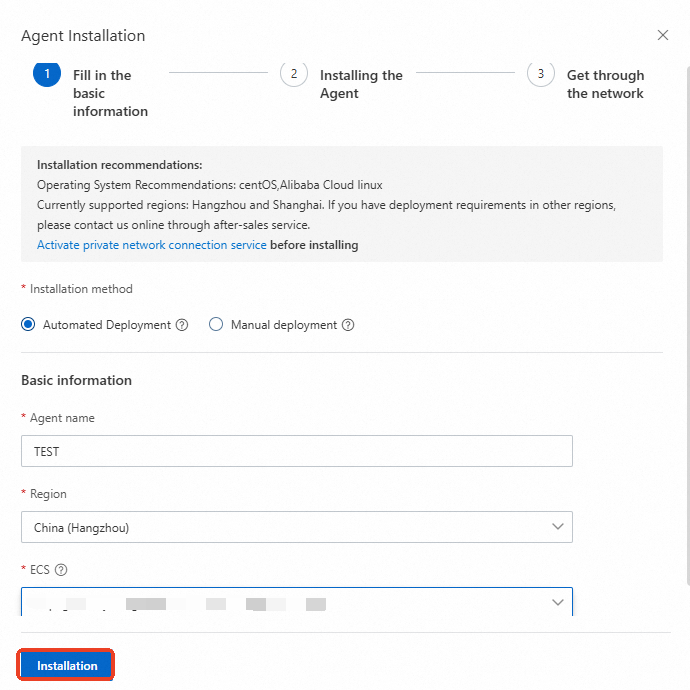
View the deployment progress during the process.
After deployment, the agent appears in the agent list.

Notes:
-
If you use PrivateLink to implement connectivity, a reverse endpoint is created within your account. You are charged for the endpoint. We recommend that you release it when it is no longer needed.
Manual deployment
Manual - public network
Notes:
-
You can use servers on any platform or in data centers as jump servers. Ensure Cloud Migration Hub can access your servers over the Internet.
After preparing the ECS instance, click Agent Management.
In the panel that appears, click Agent Installation.
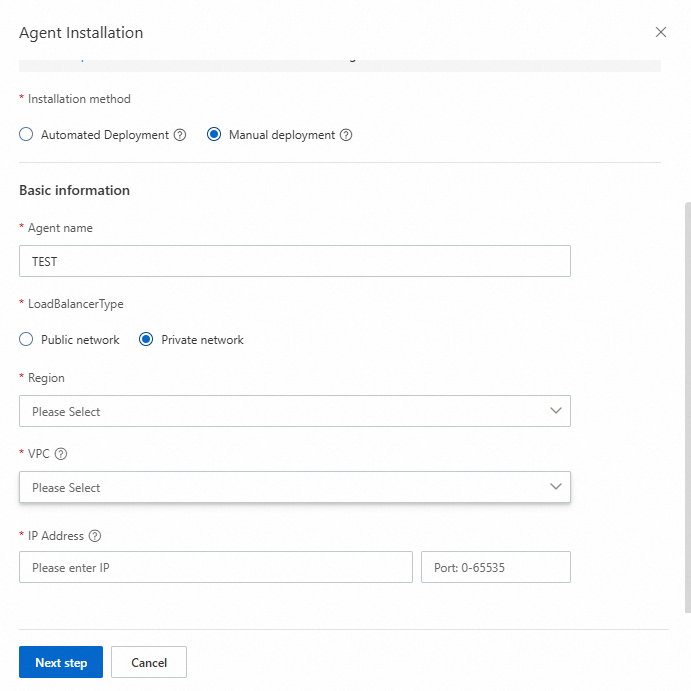
In the dialog box that appears, set the Installation method parameter to Manual deployment, enter an agent name, set the LoadBalancerType parameter to Public network, enter an IP address and a port number, and then click Next step.
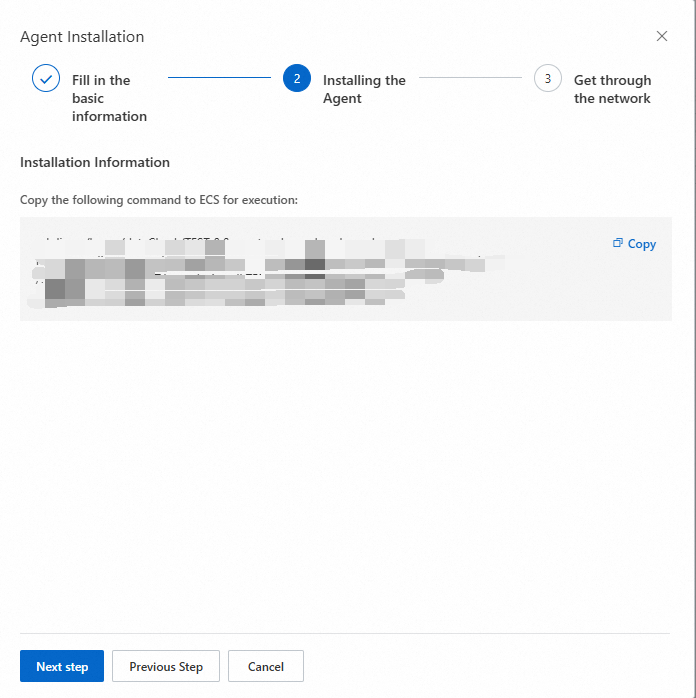
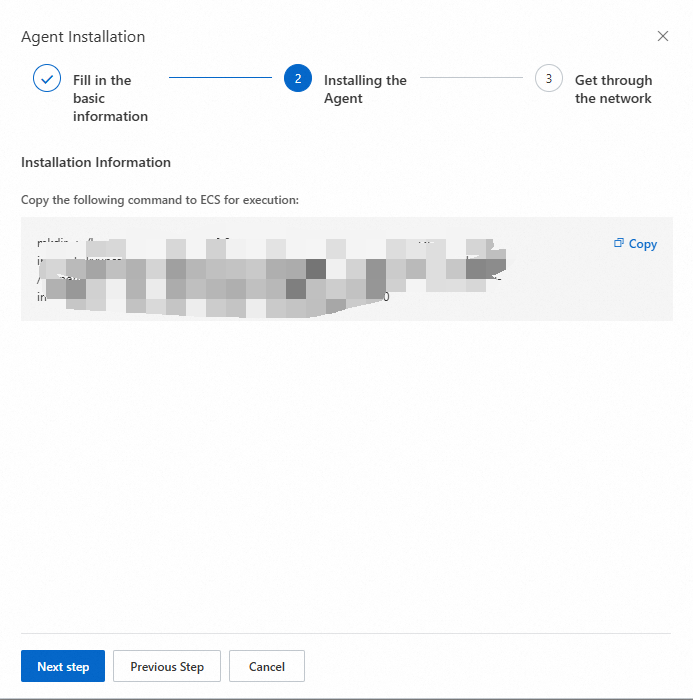
In the Installing the Agent step, an installation command is displayed. Click Copy to copy the command and then run the command on the ECS instance to install the agent.
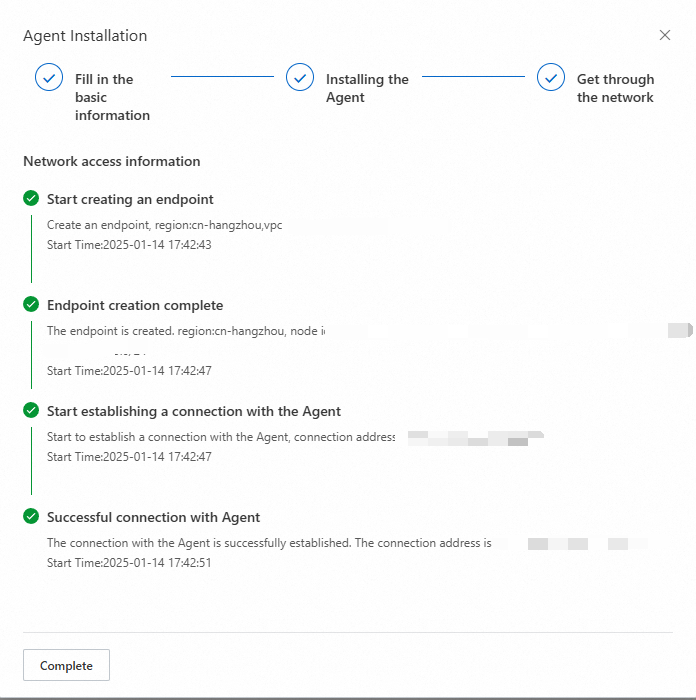
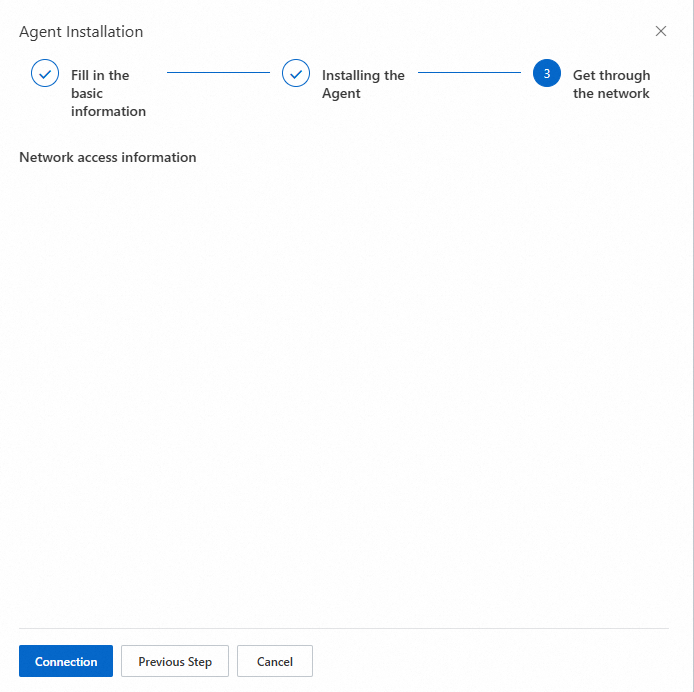
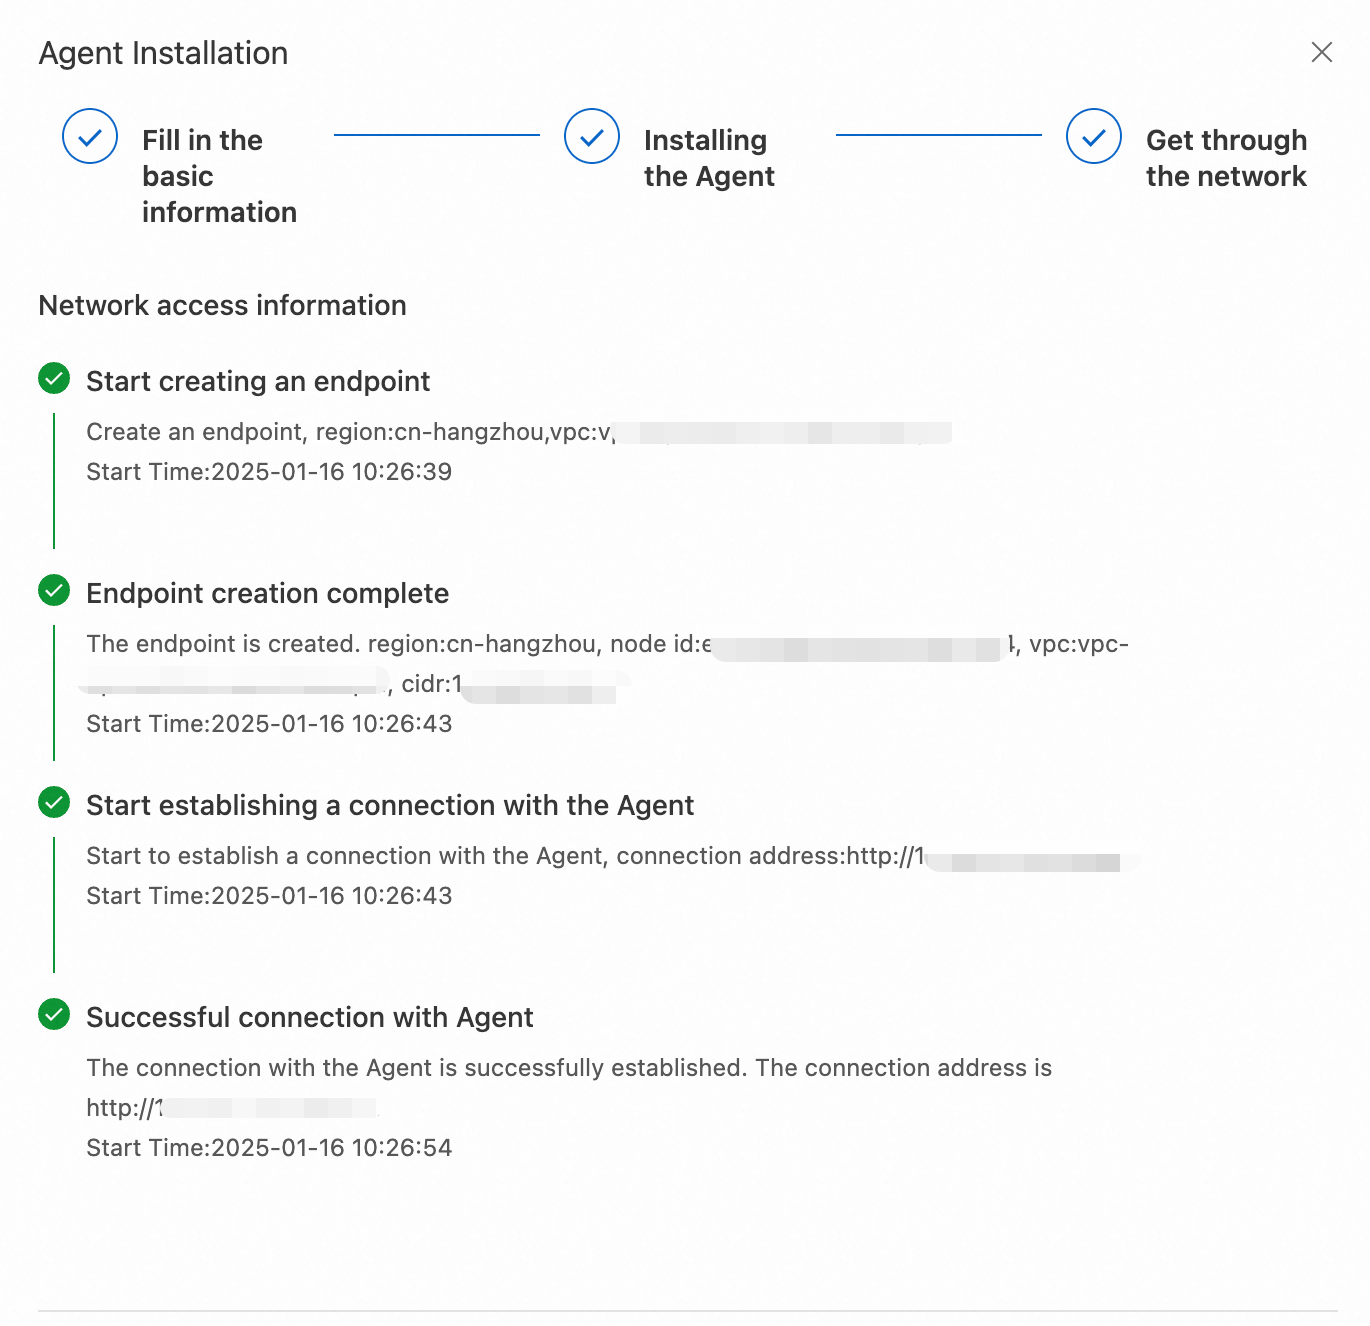
After the agent is installed, click Next step. In the Get through the network step, click Connection to connect to the agent.
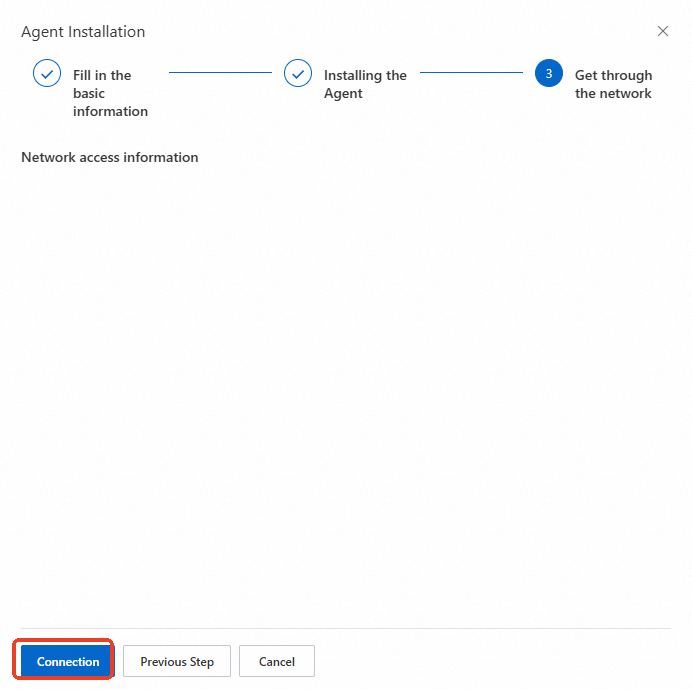
View the connection progress online.
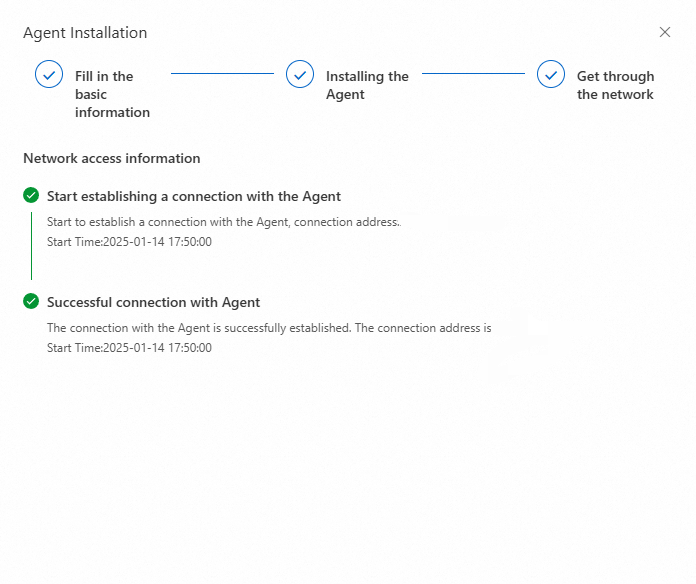
After deployment, the agent appears in the agent list.
Manual - private network
Supported only in the China (Hangzhou), China (Shanghai), China (Zhangjiakou), China (Shenzhen), and China (Ulanqab) regions. Contact online after-sales for other regions.
Notes:
-
You can use Alibaba Cloud ECS instances or third-party cloud servers as jump servers. Ensure your servers are connected to Alibaba Cloud VPCs.
-
Activate PrivateLink before deploying an agent.
After preparing the ECS instance, click Agent Management.
In the panel that appears, click Agent Installation.
In the dialog box that appears, set the Installation method parameter to Manual deployment, enter an agent name, set the LoadBalancerType parameter to Private network, select a region and a VPC, enter an IP address and a port number, and then click Next step.
In the Installing the Agent step, an installation command is displayed. Click Copy to copy the command and then run the command on the ECS instance to install the agent.
After the agent is installed, click Next step. In the Get through the network step, click Connection to connect to the agent.
View the connection progress online.
 After deployment, the agent appears in the agent list.
Notes:
-
If you use PrivateLink to implement connectivity, a reverse endpoint is created within your account. You are charged for the endpoint. We recommend that you release it when it is no longer needed.
Agent management operations
Stop
If you deploy an agent by using the automatic method and the agent is in the Online state, you can click Stop to stop the agent.

After the agent is stopped, it stops running on the ECS instance and its status changes to Stop in the agent list. Verification tasks using an agent in the Stop state cannot be started.
Start
If an agent is in the Stop state, you can click Start to start the agent.
 After the agent is started, the status of the agent changes to Online.
Delete
If you no longer need an agent, delete it from the agent list.

Reconnect and copy a start command
If an agent is manually deployed and is disconnected, the status of the agent changes to Offline. You can click Copy Start Command and run the command on the related ECS instance. Then, click Reconnect to establish a new connection between Cloud Migration Hub and the agent.

After the connection is established, the status of the agent changes to Online.

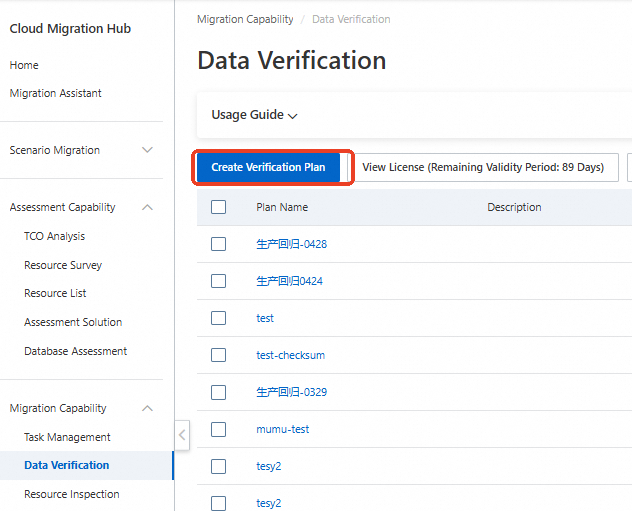
Create a verification plan
Create a verification plan
The following example uses OSS. For other services, follow the on-screen instructions in the Cloud Migration Hub console.
After your agent is online and connected, click Create Verification Plan and configure the parameters in the panel that appears.
 Configure the Select Data Source parameter and the related parameters. Then, click Test data connection. After the test is successful, click Confirm to start data parsing.

The preceding figure shows only the data source configuration. To verify data between source and destination, configure both.
Wait for data parsing to complete. The verification plan is then created. 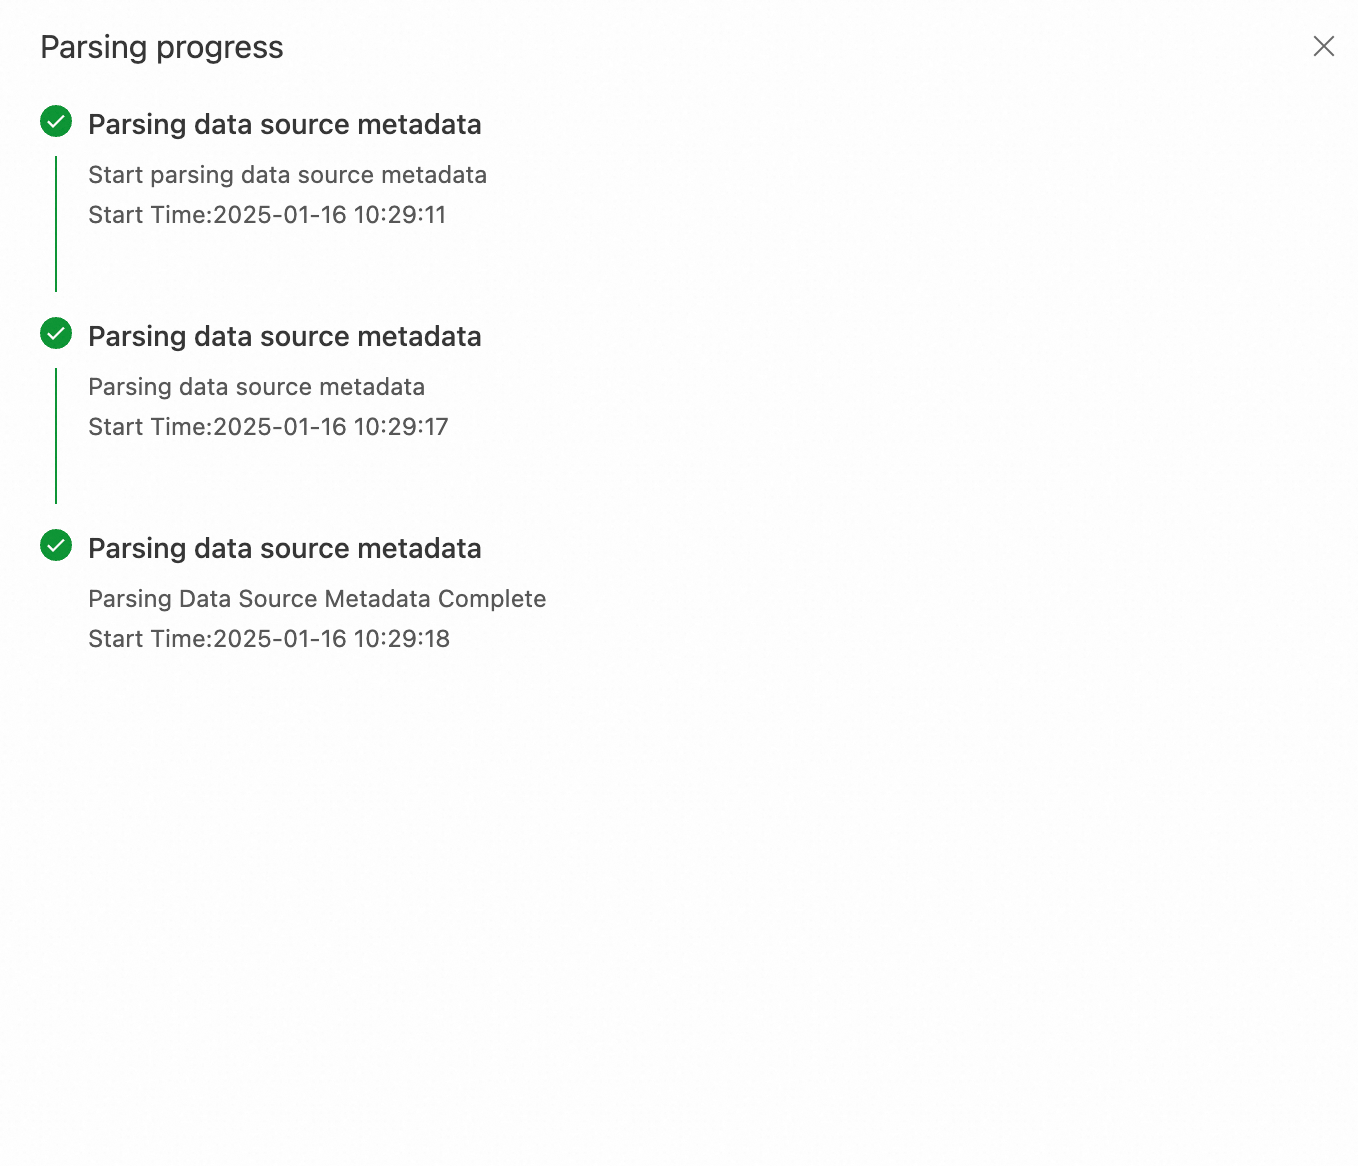
Create a data verification task
Click the verification plan name to go to the details page.
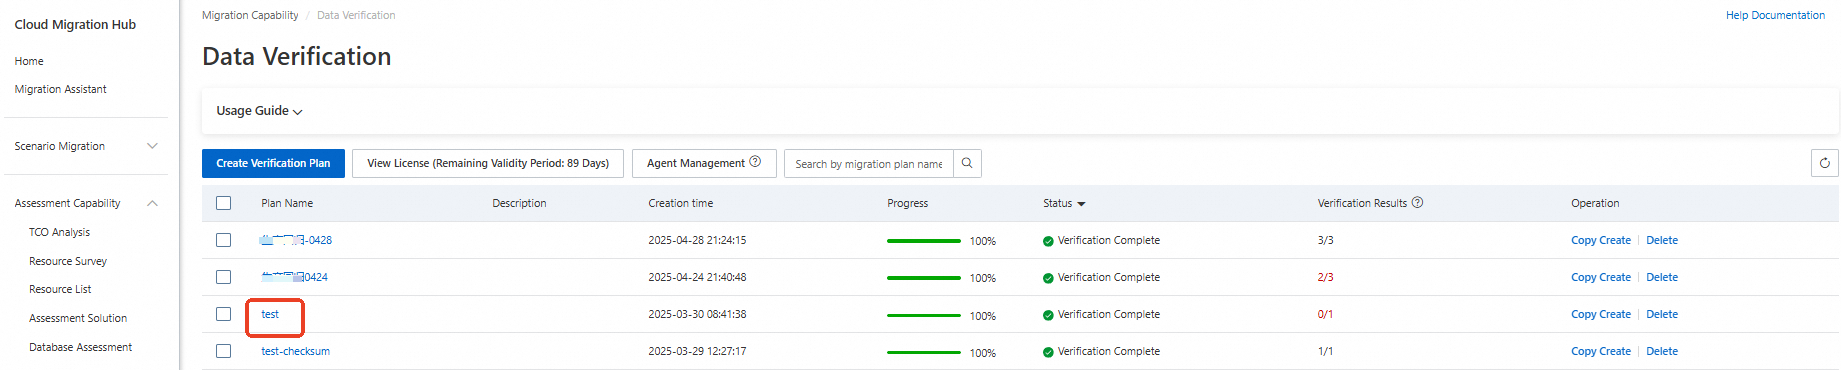
On the details page, view your agent information. A verification plan supports only one agent. Click New Task to create a verification task.
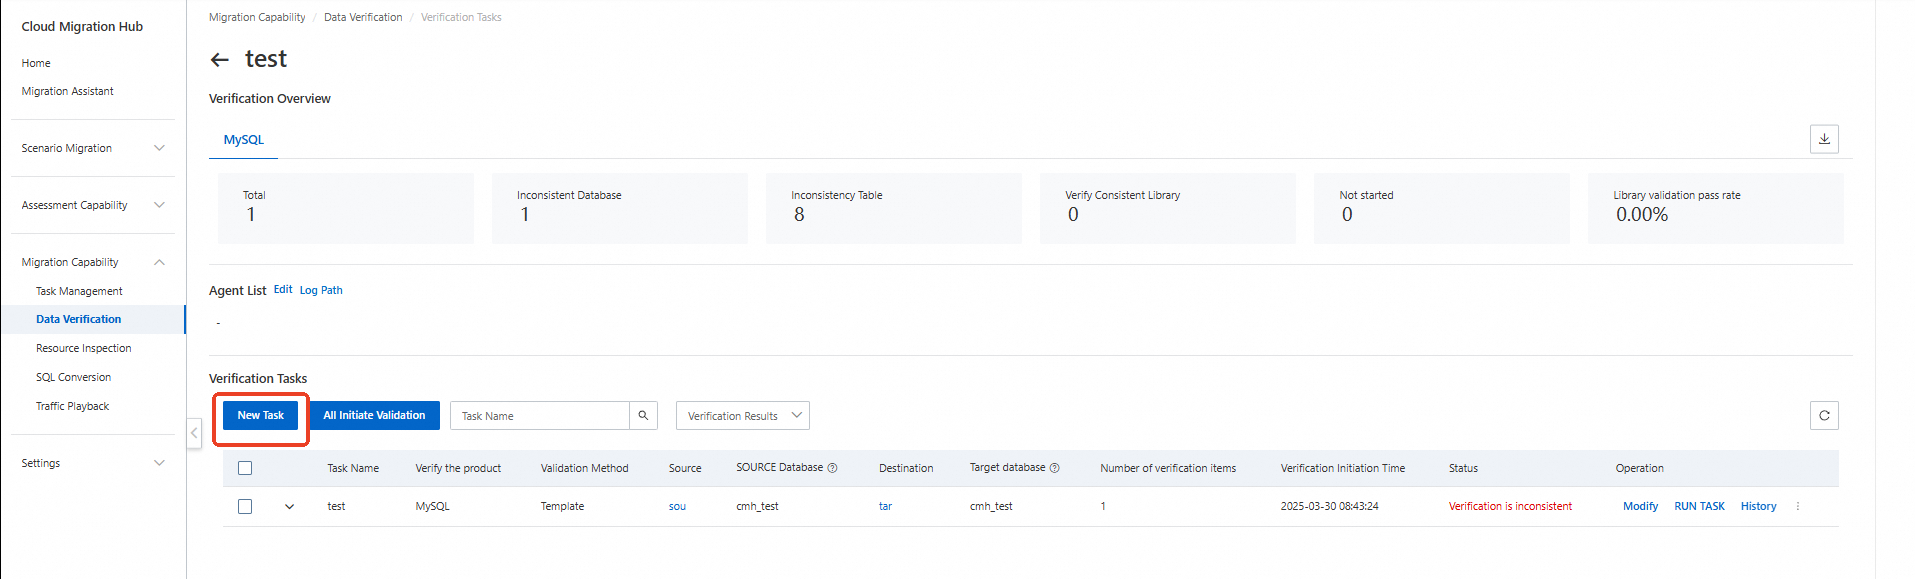
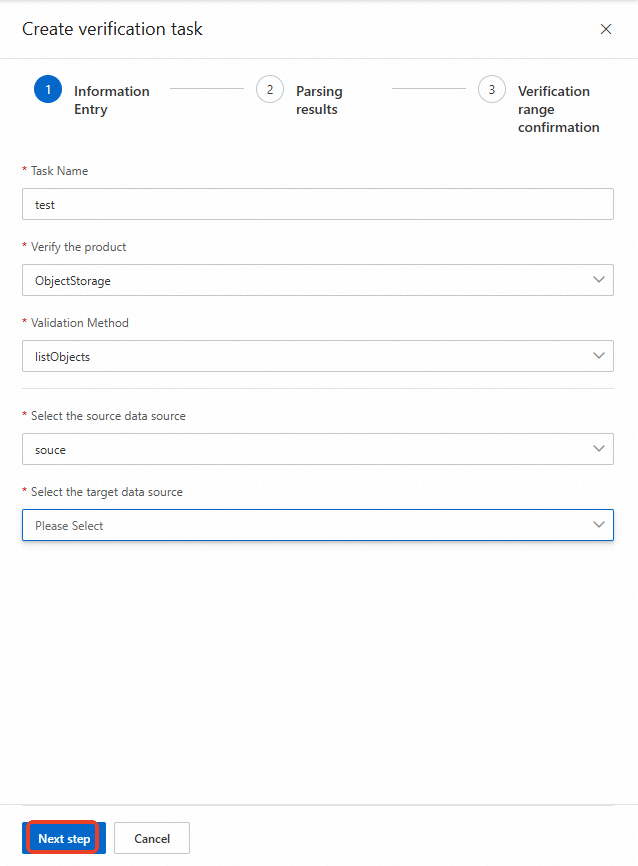
In the Information Entry step, select a service based on your data source, choose a verification method, configure the parameters, and click Next step.
In the Parsing results step, configure the parameters and click Next step.
In the Verification range confirmation step, confirm the information and click Determine.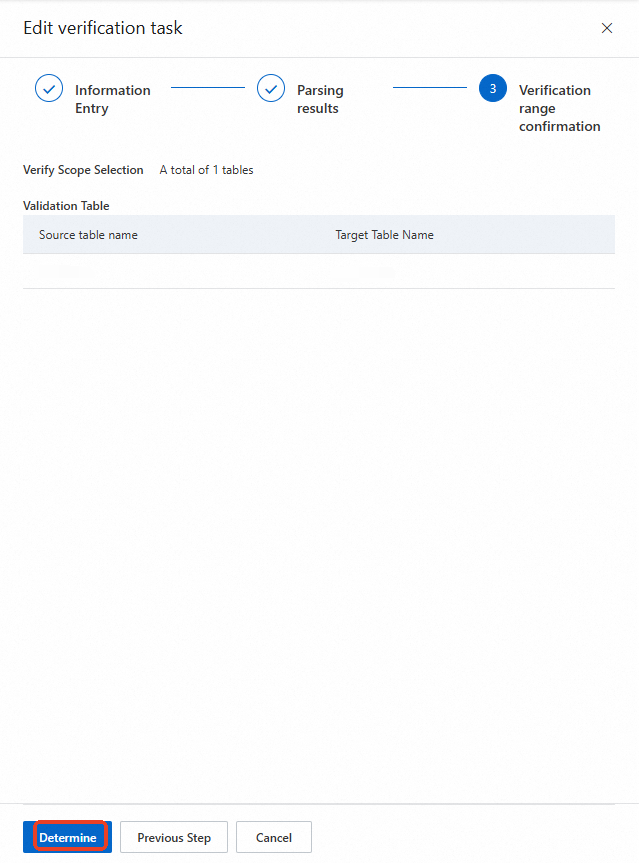
Start the data verification task
After creating the task, click All Initiate Validation to start all tasks, or select specific tasks and click Check Initiate Validation.
The task enters the Validation in state. Refresh the page to view the result.
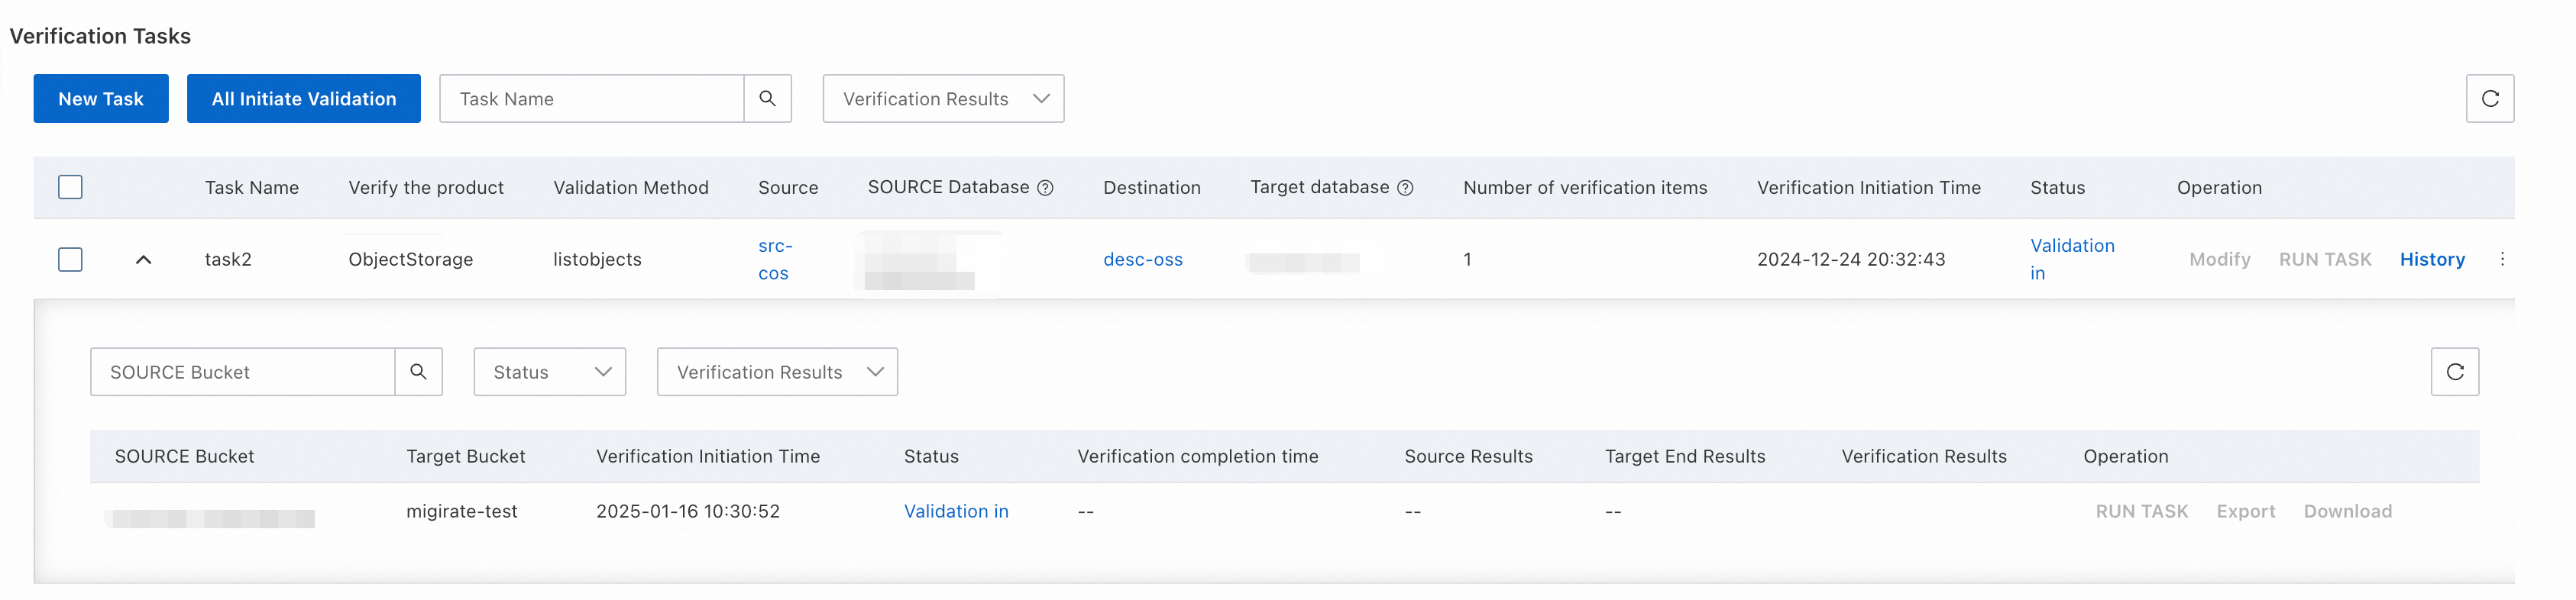
If the result does not meet requirements, adjust the data and click RUN TASK to restart.
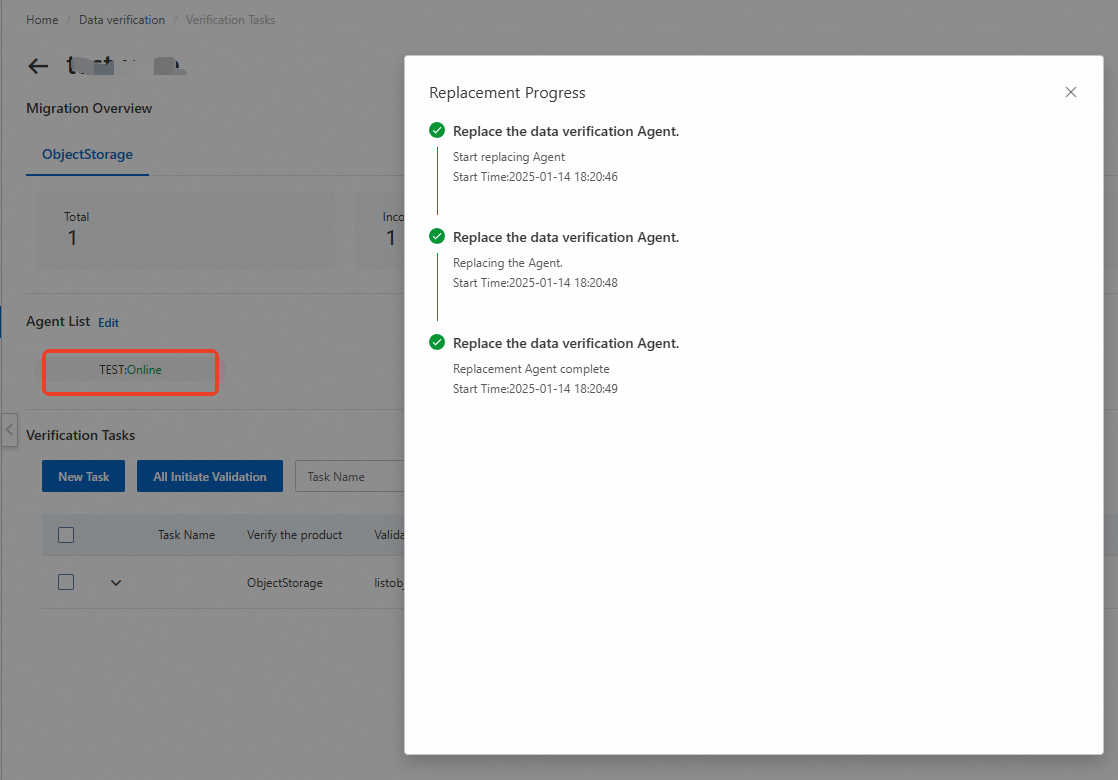
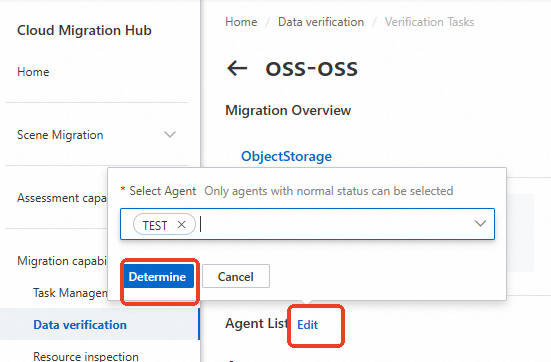
Change the agent
To change the agent, click Edit next to Agent List. Select the required agent and click Determine. A verification plan supports only one agent. Selecting multiple agents causes an error.
The new agent checks connectivity with the source and destination. If no errors occur, the change is successful.