This guide walks you through setting up pay-as-you-go Cloud Firewall to protect your Internet-facing assets, from enabling firewalls to reviewing your first bill.
In this guide, you will learn how to:
Enable firewalls and add assets for protection
Configure intrusion prevention to detect and block threats
View traffic statistics to monitor network activity
Create access control policies to manage traffic flow
Set up notifications for security events
View and understand your pay-as-you-go bills
Flowchart

Prerequisites
Purchase Cloud Firewall with the pay-as-you-go billing method. For details, see Purchase Cloud Firewall.
Step 1: Enable firewalls
The first time you log on to the Cloud Firewall console after purchase, a dialog box prompts you to add assets. Click Automatic Full Access for Internet-facing Assets or Quick Manual Access for Internet-facing Assets to add the assets you want to protect.
If you selected Automatic Protection for Assets on the buy page, all new assets are automatically added to Cloud Firewall. If you did not select this option, go to Firewall Settings > Internet Firewall in the left-side navigation pane and enable protection for new assets manually. For details, see Internet Firewall.
Step 2: Configure intrusion prevention
(Optional) Configure intrusion prevention policies
Cloud Firewall includes a built-in intrusion prevention system (IPS) that detects and intercepts malicious traffic and attacks in real time. The IPS identifies request payloads and malicious files containing trojans and webshells, and blocks intrusions based on threat intelligence. Detection relies on threat intelligence, intrusion prevention rules, intelligent model-based recognition algorithms, and the virtual patching feature. For details, see IPS configuration.
The threat detection engine operates in two modes: Monitor Mode and Block Mode.
In Monitor Mode, Cloud Firewall generates alerts for malicious traffic only.
In Block Mode, Cloud Firewall generates alerts and automatically blocks attack payloads.
Cloud Firewall provides different levels of Block Mode for different attack types. The following table describes the usage scenarios for each level.
__
Start with Monitor Mode when you modify prevention configurations. After a trial run, analyze false positives, then switch to Block Mode based on the results.
For more information about intrusion prevention, see the following topics:
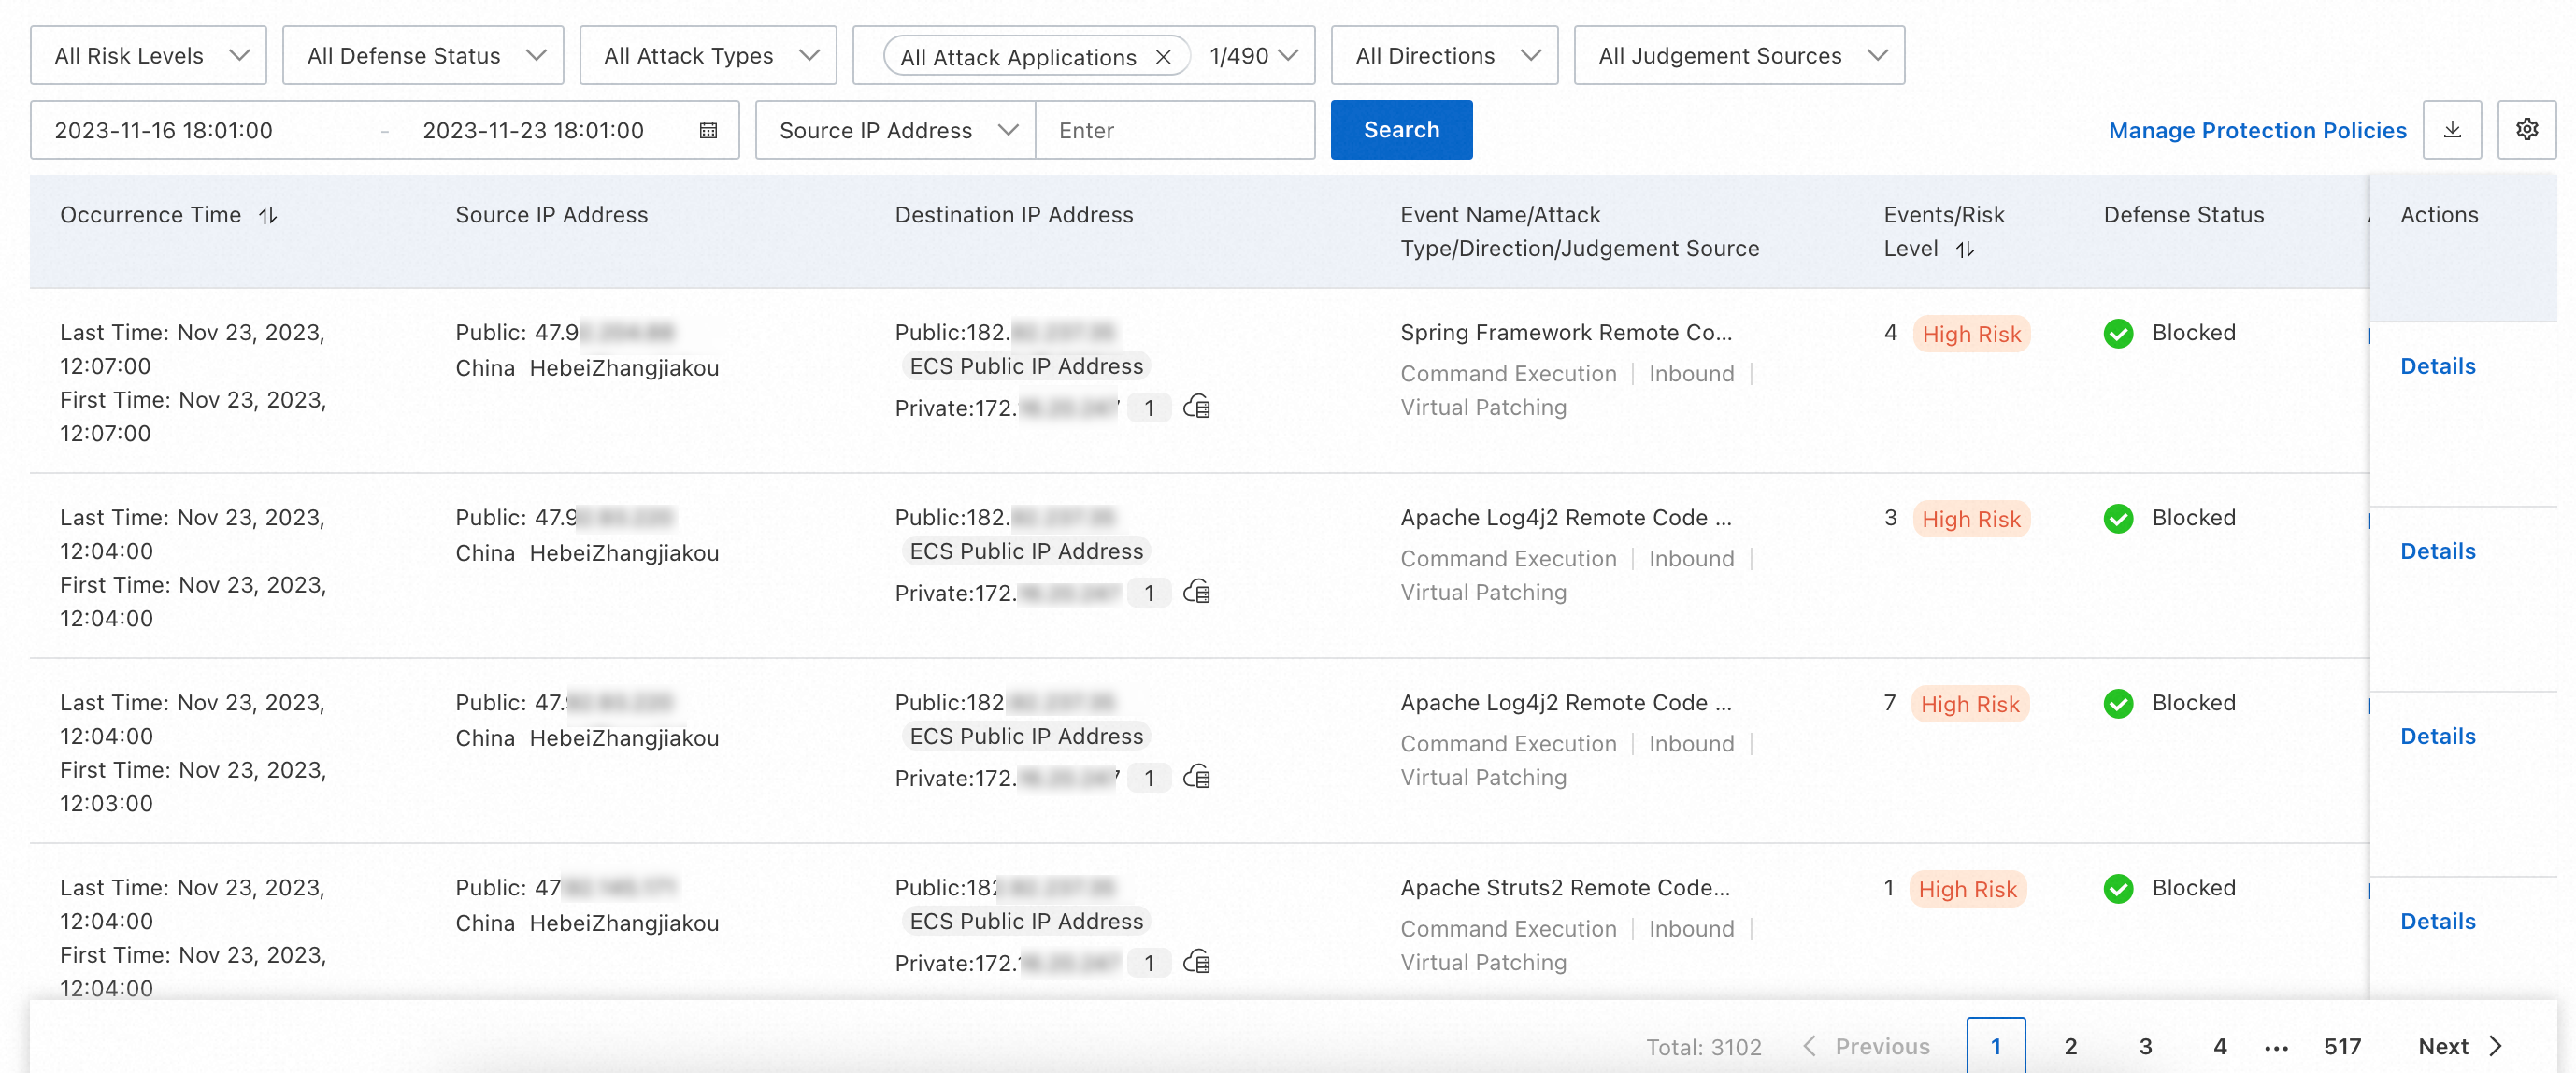
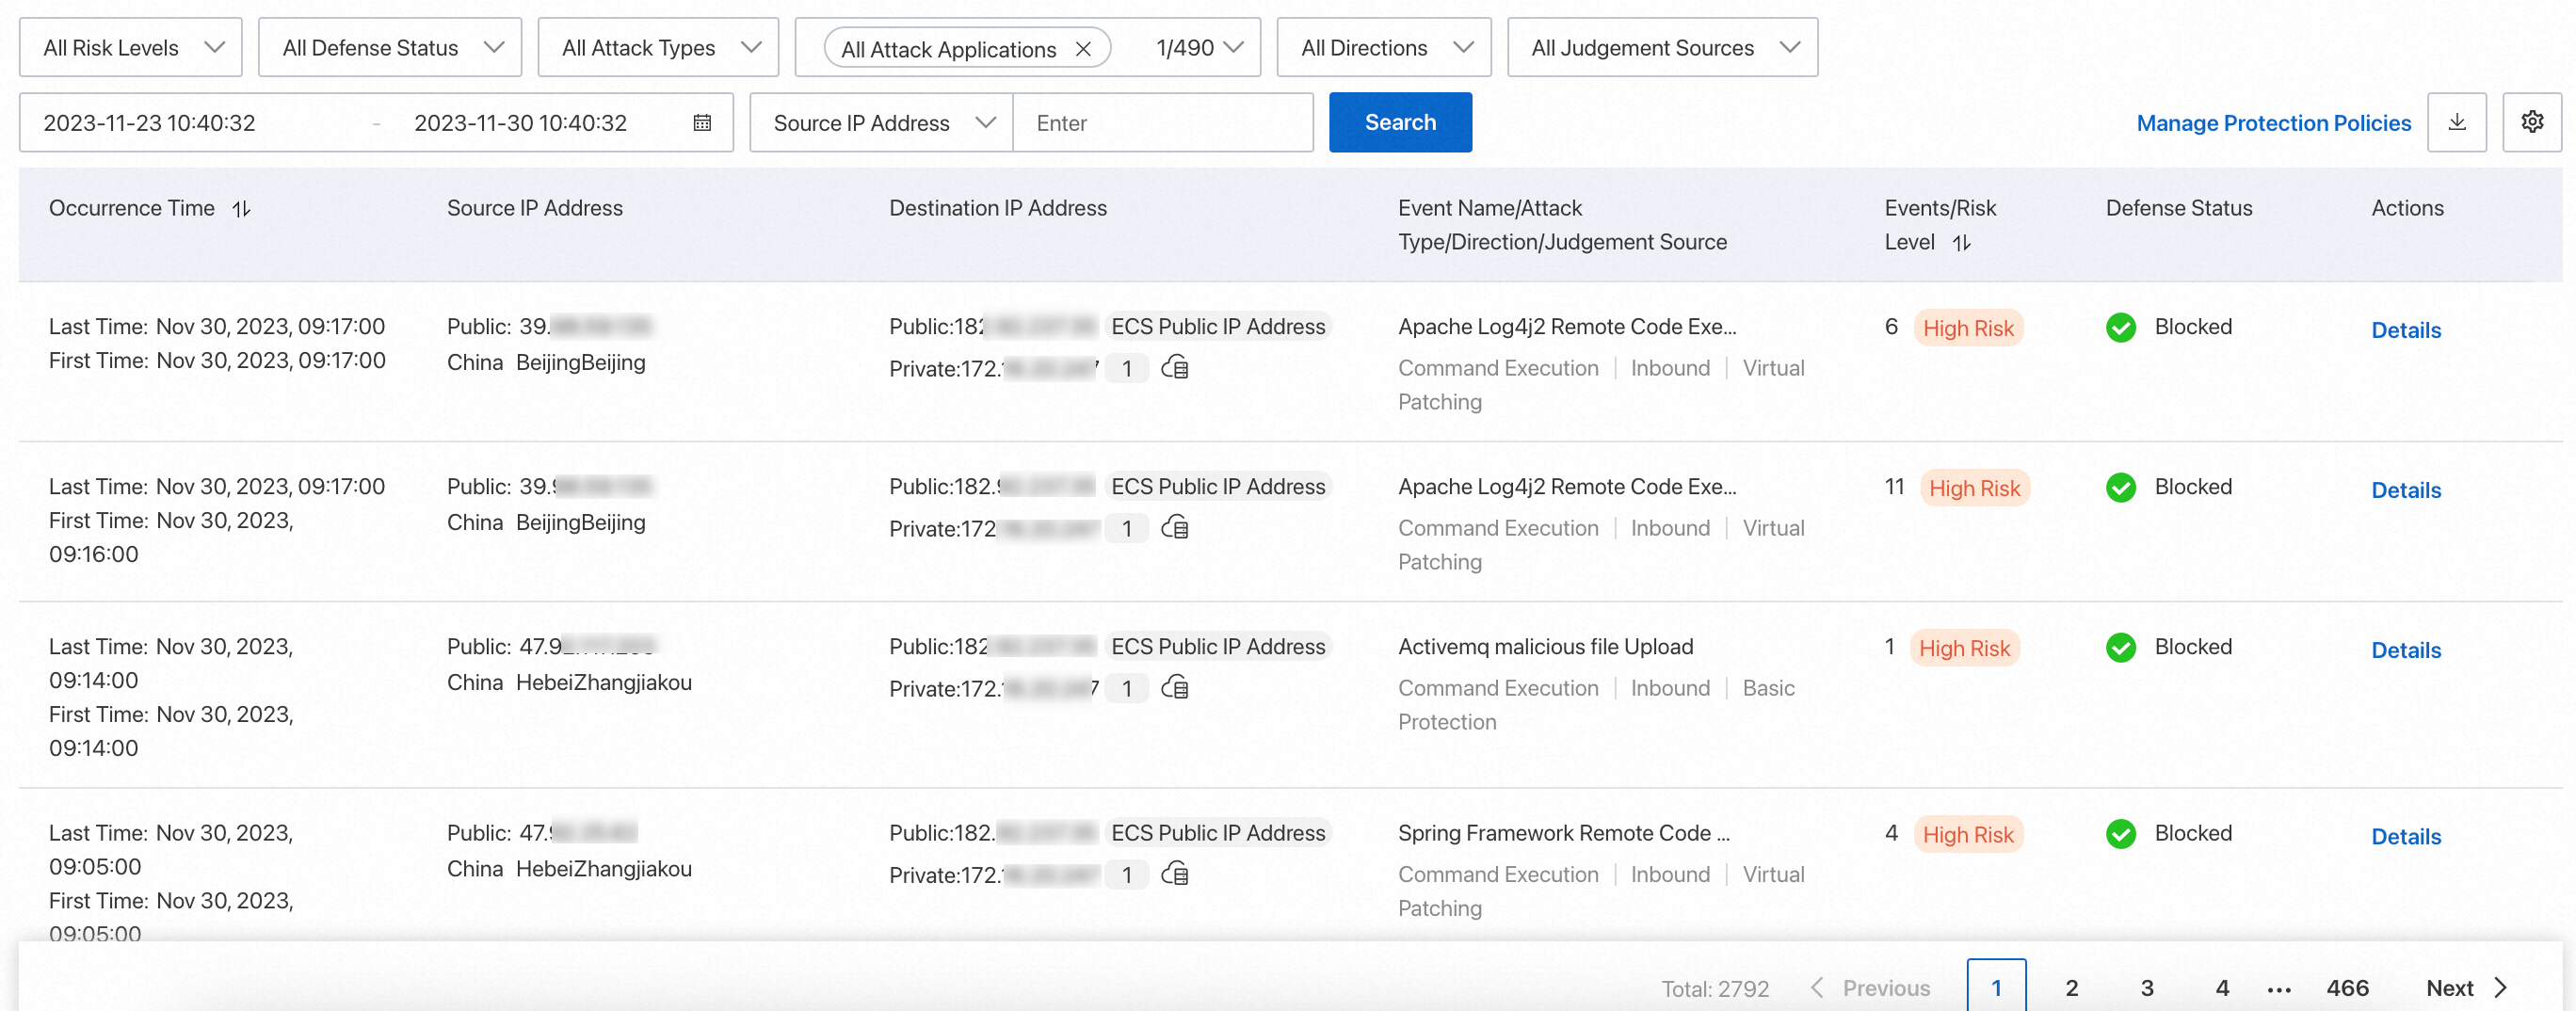
View intrusion prevention results
Log on to the Cloud Firewall console.
In the left-side navigation pane, choose Detection and Response > IPS.
Review the intrusion prevention results, including source IP addresses, destination IP addresses, applications, sources, and blocking event details.
For details, see Intrusion prevention.
Step 3: View traffic statistics
Traffic analysis provides real-time statistics such as outbound connections and Internet exposures. Use these statistics to monitor traffic and identify anomalies.
Review traffic statistics before you configure access control policies. These statistics provide the context needed to set appropriate rules.
| Feature | Description | Details |
|---|---|---|
| Outbound Connection | View domain names and IP addresses of cloud assets. Check outbound access control policies based on intelligence tags, access details, and logs. | Outbound Connection |
| Internet Exposure | View services, ports, public IP addresses, and cloud service information exposed on the Internet. Strengthen access control policies based on recommended intelligent policies and open public IP address information. | Internet Exposure |
Step 4: Create access control policies
Configure access control policies
Without an access control policy, Cloud Firewall allows all traffic. Configure access control policies for the Internet firewall to manage access between your Internet-facing assets and the Internet.
| Scenario | Description | Details |
|---|---|---|
| Create policies | Create inbound and outbound access control policies for the Internet firewall. | Create access control policies for the Internet firewall |
| Example configurations | Allow inbound Internet traffic over specific ports, restrict an ECS instance to access a specific domain name only, or deny traffic between ECS instances in different VPCs. | Configure access control policies |
| MongoDB protection | Defend against unauthorized access to MongoDB databases. | Defend against unauthorized access to MongoDB databases |
View hit details of an access control policy
An access control policy takes effect immediately after creation.
Log on to the Cloud Firewall console.
In the left-side navigation pane, choose Access Control > Internet Border.
Check the hit details of a policy in the Hits/Last Hit At column.
For details, see Create access control policies for the Internet firewall.

Step 5: Configure notifications
Configure notifications to receive alerts when asset attack risks occur or new assets are added. This helps you analyze asset status and handle exceptions promptly. For details about supported notification types and configuration steps, see Notifications.
Step 6: View pay-as-you-go bills
The billing cycle for pay-as-you-go Cloud Firewall is one day. Bills are generated and fees are deducted from your account balance at 18:00 the next day.
Log on to the Cloud Firewall console.
In the left-side navigation pane, choose System Settings > Bill Management.
On the Bill Management page, view usage details for pay-as-you-go Cloud Firewall, including protected asset statistics, enabled features, and traffic data.
Click View Bill Details to open the Expenses and Costs console. For details, see Bill details.
References
For frequently asked questions about pay-as-you-go Cloud Firewall, see Pre-sales FAQ.
For a complete list of supported features, see Functions and features.
To reduce costs, consider using pay-as-you-go savings plans. See Pay-as-you-go savings plan.
To switch from pay-as-you-go to subscription billing, see Upgrade or downgrade Cloud Firewall.
To release Cloud Firewall when you no longer need it, see Release Cloud Firewall.