After you back up an SQL Server database to a backup vault using Cloud Backup, you can restore the database to the source SQL Server instance or to another registered SQL Server instance.
Prerequisites
The SQL Server database has been backed up using the Cloud Backup console. For more information, see Back up an SQL Server database.
The destination SQL Server instance is in the Online state. The restore job fails if the destination SQL Server instance is in an abnormal state. For more information, see Database Backup FAQ.
Billing
Data restoration is free of charge.
Usage notes
The backup and restoration speeds of Cloud Backup are based on data from a lab environment and are for reference only. For more information, see Database backup and restoration speeds.
To restore data to a new SQL Server instance, you must register the instance in the Cloud Backup console and make sure its status is Online.
To perform a point-in-time recovery, you must enable log backup.
If you select an incremental backup to restore an SQL Server database, the corresponding full backup is also restored automatically. You do not need to restore the full backup separately before you restore the incremental backup.
To restore an SQL Server database to a different instance, make sure the source and destination instances have the same SQL Server version.
Before restoring the master database, Cloud Backup automatically restarts SQL Server and switches it to single-user mode.
Restoration scope
Restorable databases
Restore user-created databases and the master, model, and msdb system databases. When you restore a system database, you cannot restore it using a different name.
Recovery points
Restore a database to a specific point in time or to a specific backup checkpoint Log Sequence Number (LSN).
Create an SQL Server restore job
To restore a backed-up database, perform the following steps:
Log on to the Cloud Backup console.
In the navigation pane on the left, choose . In the top navigation bar, select the region where the database instance resides, and then click SQL Server. Click the ECS Database Instance or Local Database Instance tab. Find the target SQL Server instance and click Restore in the Actions column.
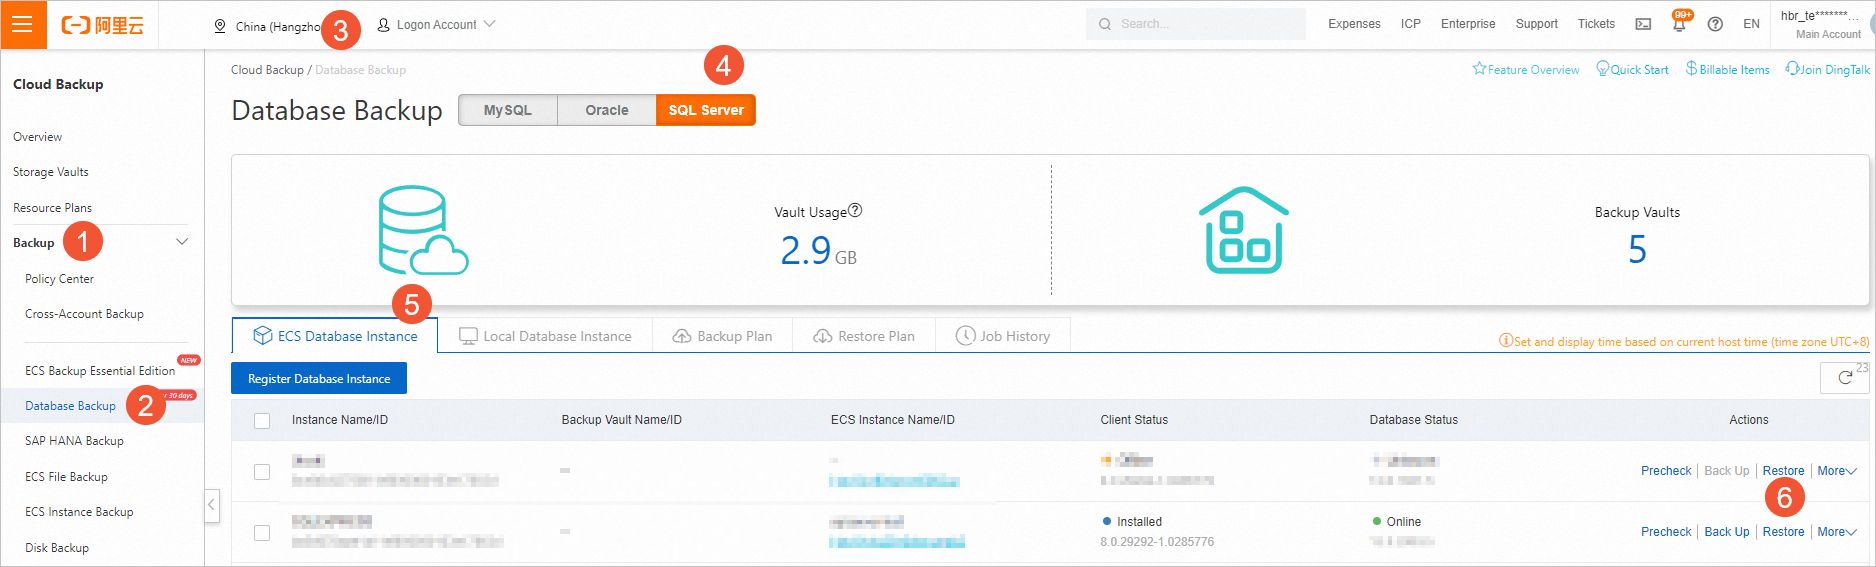
In the Create Restore Job panel, configure the parameters in the wizard.
Configure the content to be restored and click Next.
Parameter
Description
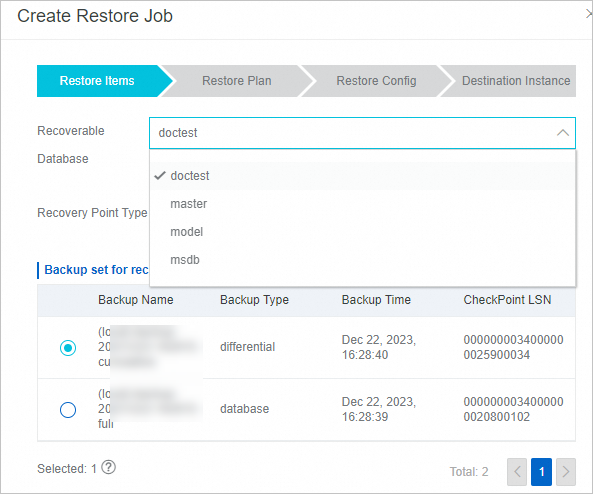
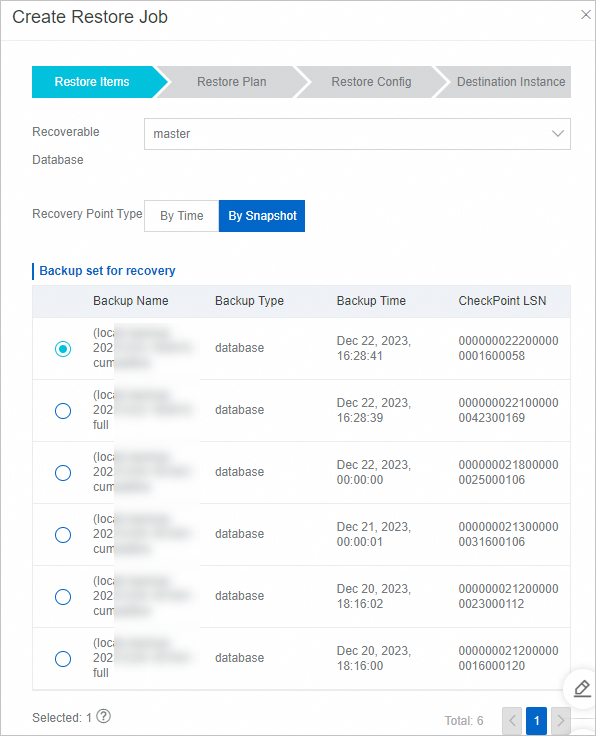
Recoverable Database
Select the database to restore from the list.
Recovery Point Type
Specify the type of backup point.
To restore from a specific point in time, select By Time.
To restore from a specific backup file, select By Snapshot. In the backup set, click the target backup file.
Set the Plan Name for the restore job, configure the job to start immediately, and then click Next.
NoteYou can only start the restoration immediately. You cannot schedule a restoration time.
Configure the Restore Config parameters and click Next.
Parameter
Description
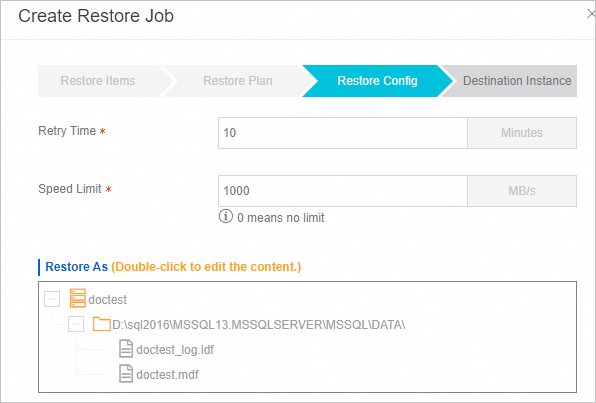
Retry Time
The interval at which to reconnect to the database after a disconnection during restoration. Unit: minutes.
Speed Limit
The amount of data to restore per second. Unit: MB/s. A value of 0 means no limit.
To prevent database performance issues caused by a large amount of data being restored, set a reasonable throttling value.
Restore As
The name of the database after restoration.
ImportantWhen Backup Point Type is set to Specific Backup:
System databases: You cannot change the database name, data file path, data file name, or log file name.
Non-system databases: You can edit these configuration items.
When Backup Point Type is set to Specific Time, the database name, data file path, data file name, and log file name are not displayed on the Restore Configuration tab for both system and non-system databases.
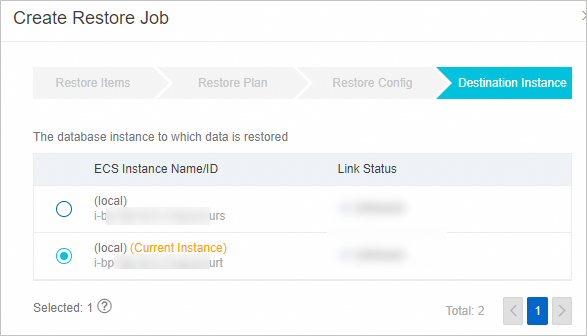
Select the destination instance for the restoration and click Create.
Select the destination database instance for the restoration. By default, the source SQL Server instance is selected. You can also restore the database to another registered SQL Server instance.
NoteYou can select the Only Check Offline Instance option to view offline instances. You can restore data of these offline instances to the new instance where the new client is installed, implementing cross-instance data restoration. For more information, see Description of the Only Check Offline Instance feature.
After the restore job is created, the system automatically starts to restore the database. On the Restore Plan tab, view the progress of the restore job.
