After you use Cloud Backup to back up an Oracle database to a backup vault, you can restore the database to the source instance or to another registered instance.
Prerequisites
You have backed up an Oracle database in the Cloud Backup console. For more information, see Back up an Oracle database.
The destination Oracle database must be Online. Otherwise, the restore job will fail. For more information, see FAQ about database backup.
Billing
The restore feature is free of charge.
Usage notes
The backup and recovery speeds of Cloud Backup are based on data from a lab environment and are for reference only. For more information, see Database backup and recovery speeds.
To restore data to a new instance, you must first register it in the Cloud Backup console and ensure that its status is Online.
Restore scope
Recovery Point
You can restore data to any specified point in time.
Restore Items
You can restore a database instance, control file, PFILE/SPFILE, and password file.
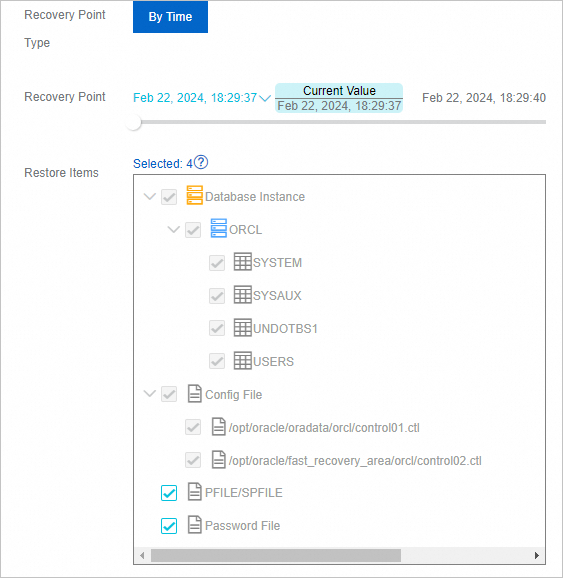
Create an Oracle restore job
To restore a database, follow these steps:
Log on to the Cloud Backup console.
In the navigation pane on the left, choose , select your region, and then click Oracle. Click the ECS Database Instance or Local Database Instance tab. Find the target instance and click Restore in the Actions column.
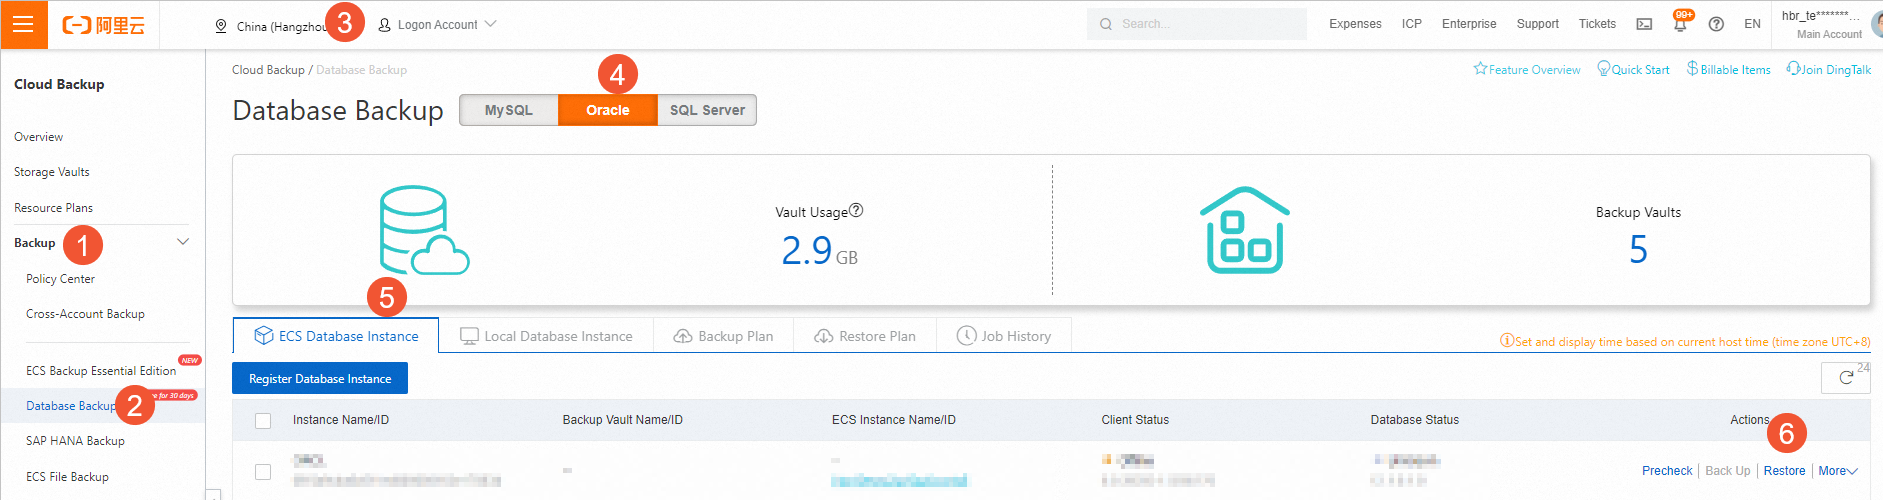
In the Create Restore Job panel, follow the configuration wizard.
Configure Recovery Point and Restore Items, and then click Next.
Drag the slider on the timeline to specify a Recovery Point for the database. Select the items to restore. You can restore a database instance, a control file, a PFILE/SPFILE, and a password file.
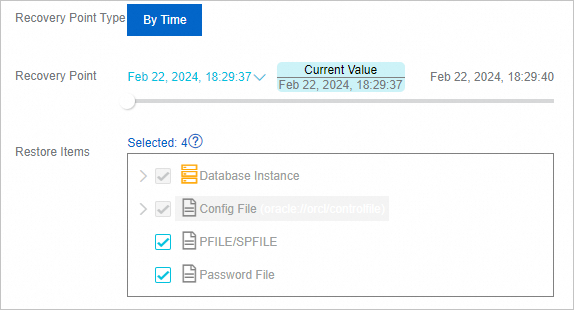
Configure a Plan Name for this restore job, and then click Next.
Restore jobs start immediately. Scheduling is not currently supported.
Configure the settings in the Restore Config step, and then click Next.
Parameter
Description
Concurrent Threads
The number of concurrent threads for data restoration.
Retry Time
The interval in minutes between reconnection attempts if the database connection is lost during the restore.
Speed Limit
The maximum data transfer rate for the restore, in MB/s. Set to 0 for no limit.
Select a destination instance for the restore, and then click Create.
Select the destination instance for the restore. By default, the source instance is selected. You can also restore to another registered instance.
NoteYou can select the Only Check Offline Instance option to find an offline instance. You can restore data from an offline instance to a new instance with a new client installed. This enables cross-instance data recovery. For more information, see FAQ about database backup.
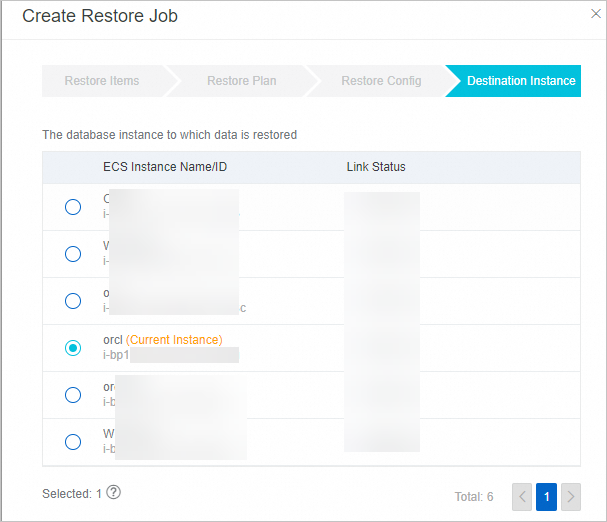
After the restore job is created, the system automatically starts the restore process. You can monitor the job on the Restore Plan tab. When the job finishes, its status changes to Completed.
 Important
If a restore job for an Oracle Real Application Clusters (RAC) database or an Oracle Data Guard standby database fails, it might be because password-free logon was used during instance activation. To fix this, in the Actions column of the target database, click More > Reactivate. Reactivate the instance using its username and password, then retry the job.
After the restore is complete, you can log on to the Oracle database to verify the data.