This component sends messages through Messenger and lets users reply using Messenger-specific features.
Component information
|
Icon |
Name |
|
|
Send a Messenger Message |
Prerequisites
To configure this component, access the flow canvas by using an existing flow or creating a new one.
Go to the canvas of an existing flow
In the
Create a new flow to open its canvas. For more information, see Create a flow.
Procedure
-
On the canvas, click the Send a Messenger Message component icon to view its configuration panel on the right.
In the send settings section on the right-side configuration panel, set action to reply. In the message settings section, set message type to Text and enter the message in the content field. Available variables include incomingMessage, accountId, and customerId. After you complete the configuration, click save at the top of the page.
-
Configure the component data as required. For detailed configuration instructions, see Parameter description.
-
After you complete the configuration, click Save. In the dialog box that appears, click Save.
Configuration
Available variables
The available variables section contains default variables that you can use in the flow. You can also add custom variables on the settings page by clicking the insert variable button. The new variables appear in the available variables list. For more information about how to use available variables, see Use available variables.
Send settings
Select a send action: From/To or Reply.
From/To
If the trigger type is Manual, you must select From/To.
Send type | Description | Example |
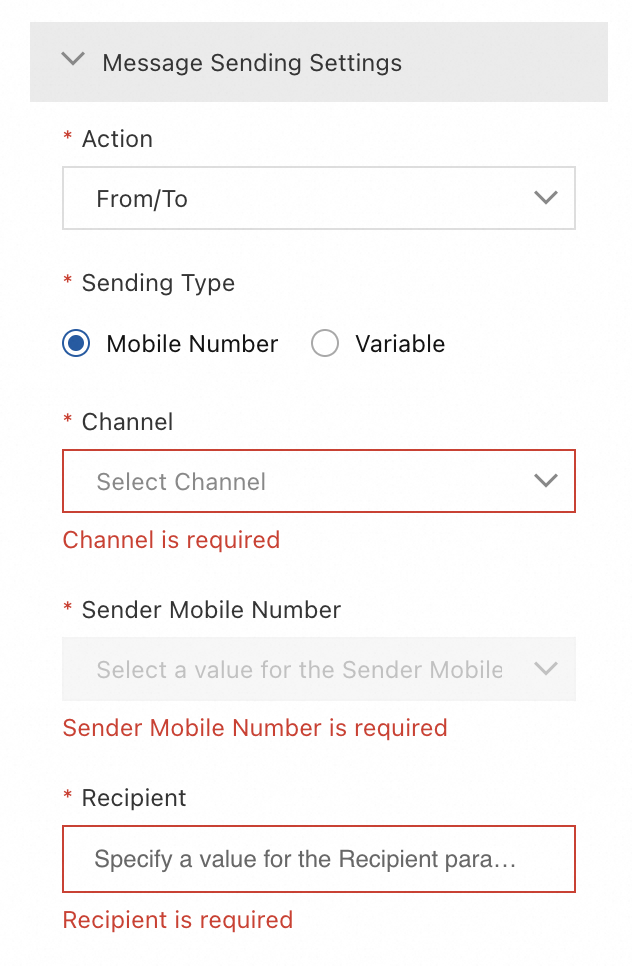
If the send type is Mobile Number | When the send type is Mobile Number, select a channel and a sender number. The channel must be approved and the number must be active and connected. For the recipient number, you can enter a fixed value or insert a variable. |
|
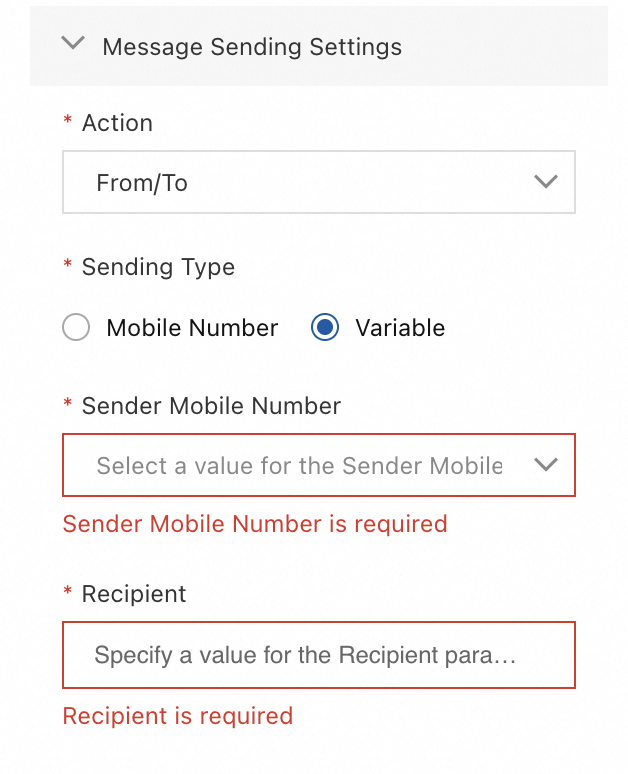
If the send type is Variable | When the send type is Variable, select the sender's mobile number from the drop-down list. For the recipient number, you can enter a fixed value or insert a variable. |
|
Reply
This action uses the WABA and number associated with the current flow to reply to user-initiated messages. No further configuration is needed.
Message settings
These settings determine the type of message to send. Options include: Text, Media, Quick Reply, and Template Message.
Text
If you select Message Type as the message type, the component sends a plain text message. You must enter the message Text, which can include variables.
Media
If you select Message Type as the message type, you can choose a media type: Media, Image, Audio, or Video. Enter the URL of the media file in the File field.
Quick Reply
When you select Quick Reply for Message Type, the Reply Type can be set to Text and Quick Reply or Media and Quick Reply.
Text and Quick Reply
You must manually enter the Button Type, Text Button, and Button with Image, and insert variables as needed. The Button Type can be Text Button or Button with Image.
Select Text and Quick Reply as the Reply Type. You can add multiple buttons by clicking + Add Button or remove existing buttons by clicking Delete. In the timeout settings section, you can enable the Undelivery Branch. In the interactive reply settings section, you can enable Interactive reply-based branching and Branch for Interactive Reply Wait Timeout. Set the waiting time for interactive reply (90 seconds by default) and configure a custom output variable name.
Media and Quick Reply
The Media Type can be Image, Audio, or Video. You must manually enter the Media URL, Button Name, and Image URL. The Button Type can be Text Button or Button with Image.
The button name you set here is used as the name for the corresponding branch when you enable Interactive Reply Settings in the Interactive Reply-based Branch.
Template Message
Select Template Message for Message Type. For Template type, you can select Regular Template or Media Template.
Regular Template
You must manually enter details such as the Image URL, Message Title, and Subtitle. The Button Type can be Reply Button, Call Button, or URL Button.
-
For the Call button, you must enter a Mobile Number.
-
For a URL Button, you must enter a Button URL.
After you configure Template 1, click Add Template to configure Template 2 if needed.
Select Regular Template as the Template Type and provide a Button Title (required). You can insert variables into the input fields and click Add Button to add more buttons.
Media Template
-
The Media Type can be Image or Video. You must manually enter the Media URL.
-
The Button Type can be Reply Button, Call Button, or URL Button.
-
If you select Call Button, you must enter a Mobile Number.
-
If you select URL Button, you must enter a Button URL.
-
After you select Media Template as the Template Type, you must provide a Button Title (required). You can insert variables into the Media URL and Button Title fields to add dynamic parameters.
Timeout settings
You can enable the Undelivery Branch. If enabled, you can set a custom timeout period and configure actions in the branch for undelivered messages. For example, if a message is not delivered within the timeout period, you can use a "Send SMS" component to send a follow-up message by SMS.
Interactive reply settings
These settings apply only when the message type is Quick Reply or Template Message.
|
Setting |
Description |
Example |
|
Interactive reply-based branching |
When enabled, the component creates separate output branches based on the buttons or list options in the interactive message, allowing you to configure a unique path for each reply. |
For example, if your Quick Reply has "Order Status" and "Talk to Agent" buttons, enabling this setting creates two corresponding output branches, allowing you to build a different flow for each user choice. |
|
Branch for Interactive Reply Wait Timeout |
When enabled, this creates a "No Reply" branch to define the flow when a user does not reply within the specified timeout. You must set a timeout duration in the waiting time for interactive reply setting. If this branch is enabled but contains no components, the main flow proceeds to the next step after the timeout. |
If a user does not reply within the timeout period, this branch is triggered. You can then add components to this branch, such as a message to prompt the user again. |
|
Waiting time for interactive reply |
Specifies the waiting duration before a timeout occurs. You can set the time in seconds, minutes, or hours. After the timeout period ends, the flow configured in the "No Reply" branch is triggered. |
For example, set it to 90 seconds. |
|
Custom output variable name |
Defines a custom variable to store the user's selection. The new variable appears in the available variables list and can be used in subsequent steps of the flow. |
For example, enter |
Advanced settings
Parameter | Description |
Status Report | If you enable the Status Report feature, you must provide a URL to receive status reports. |
Track ID | A custom identifier used to tag and track a specific message. |