The Remediation Center is a centralized portal for addressing governance risks. It provides three core features: single-item remediation, batch remediation, and remediation history.
Single-item remediation
Use this mode to address detected risks one by one.
Log on to the Cloud Governance Center console.
In the left-side navigation pane, choose .
In the item list on the left, browse or search for a check item. Fuzzy keyword matching is supported. For example, search for "identity".
If the
 icon appears next to a check item, it supports Quick Fix.
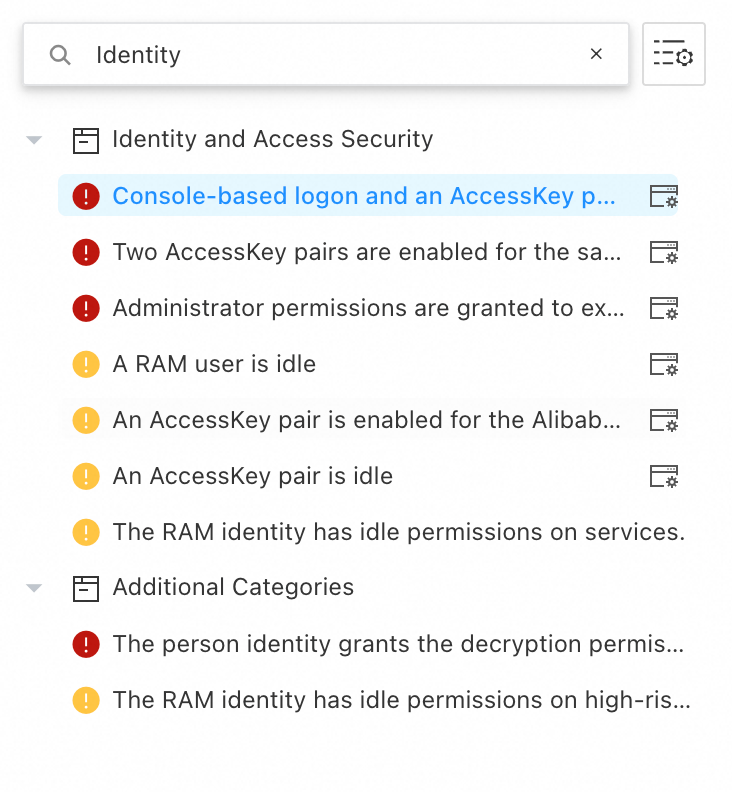
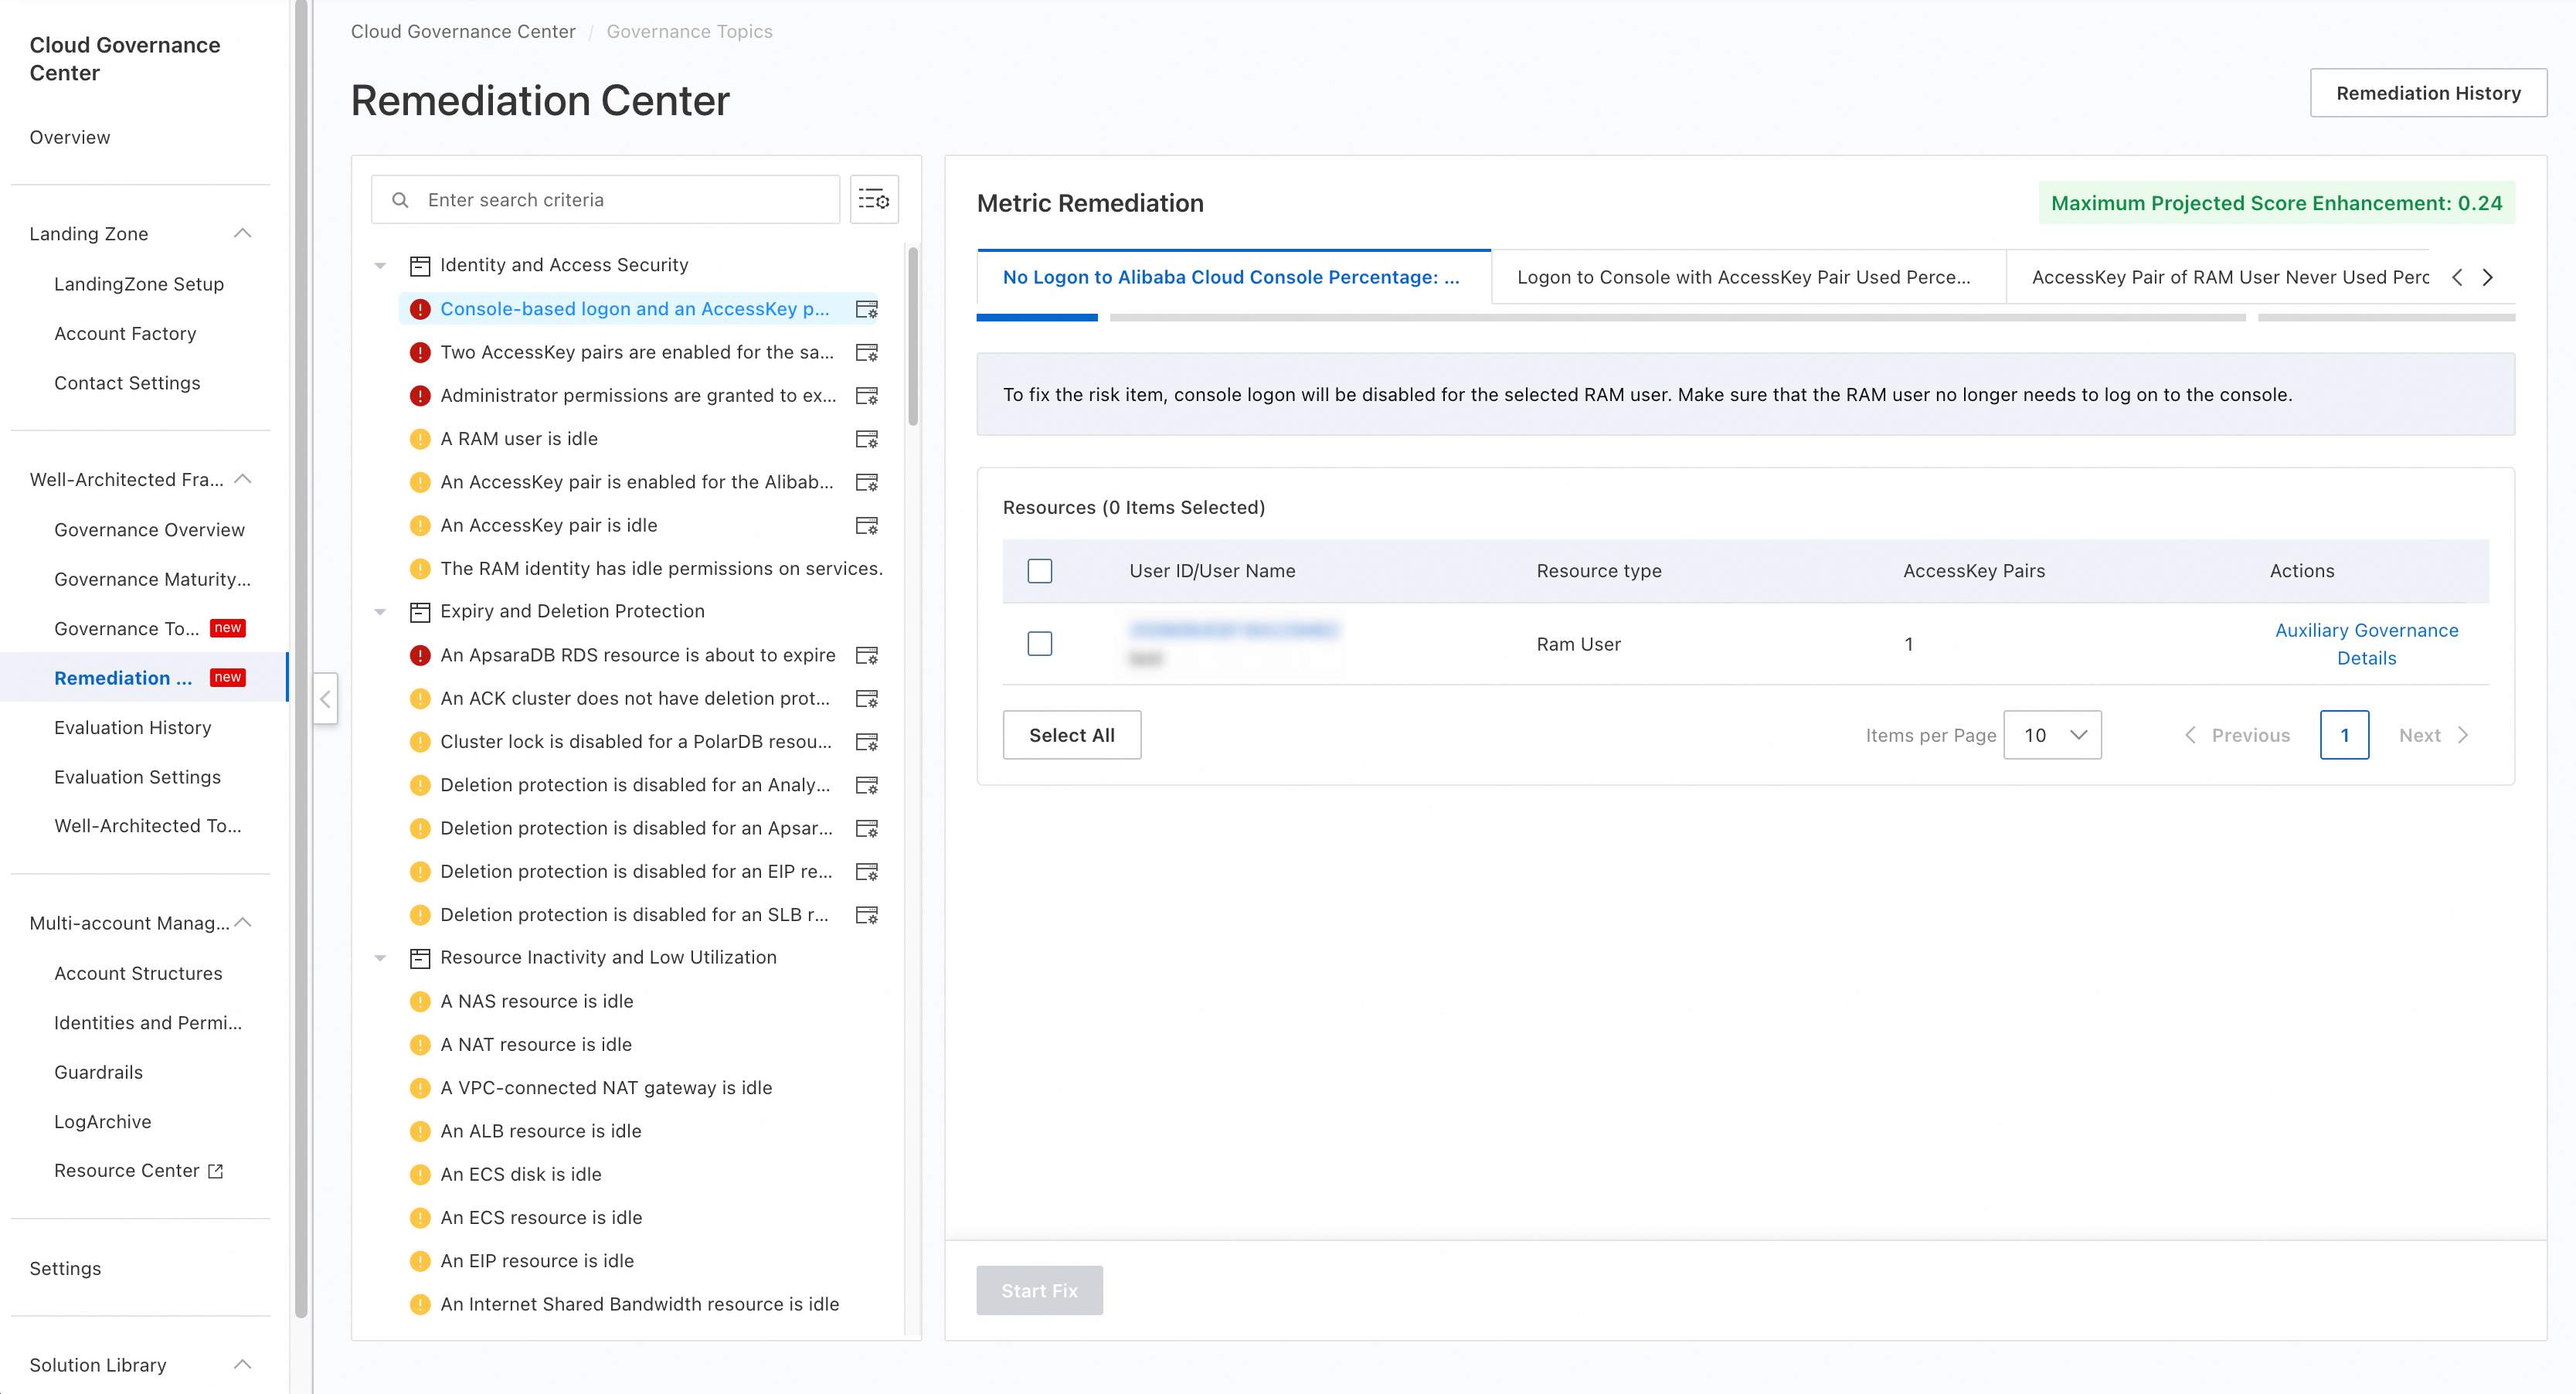
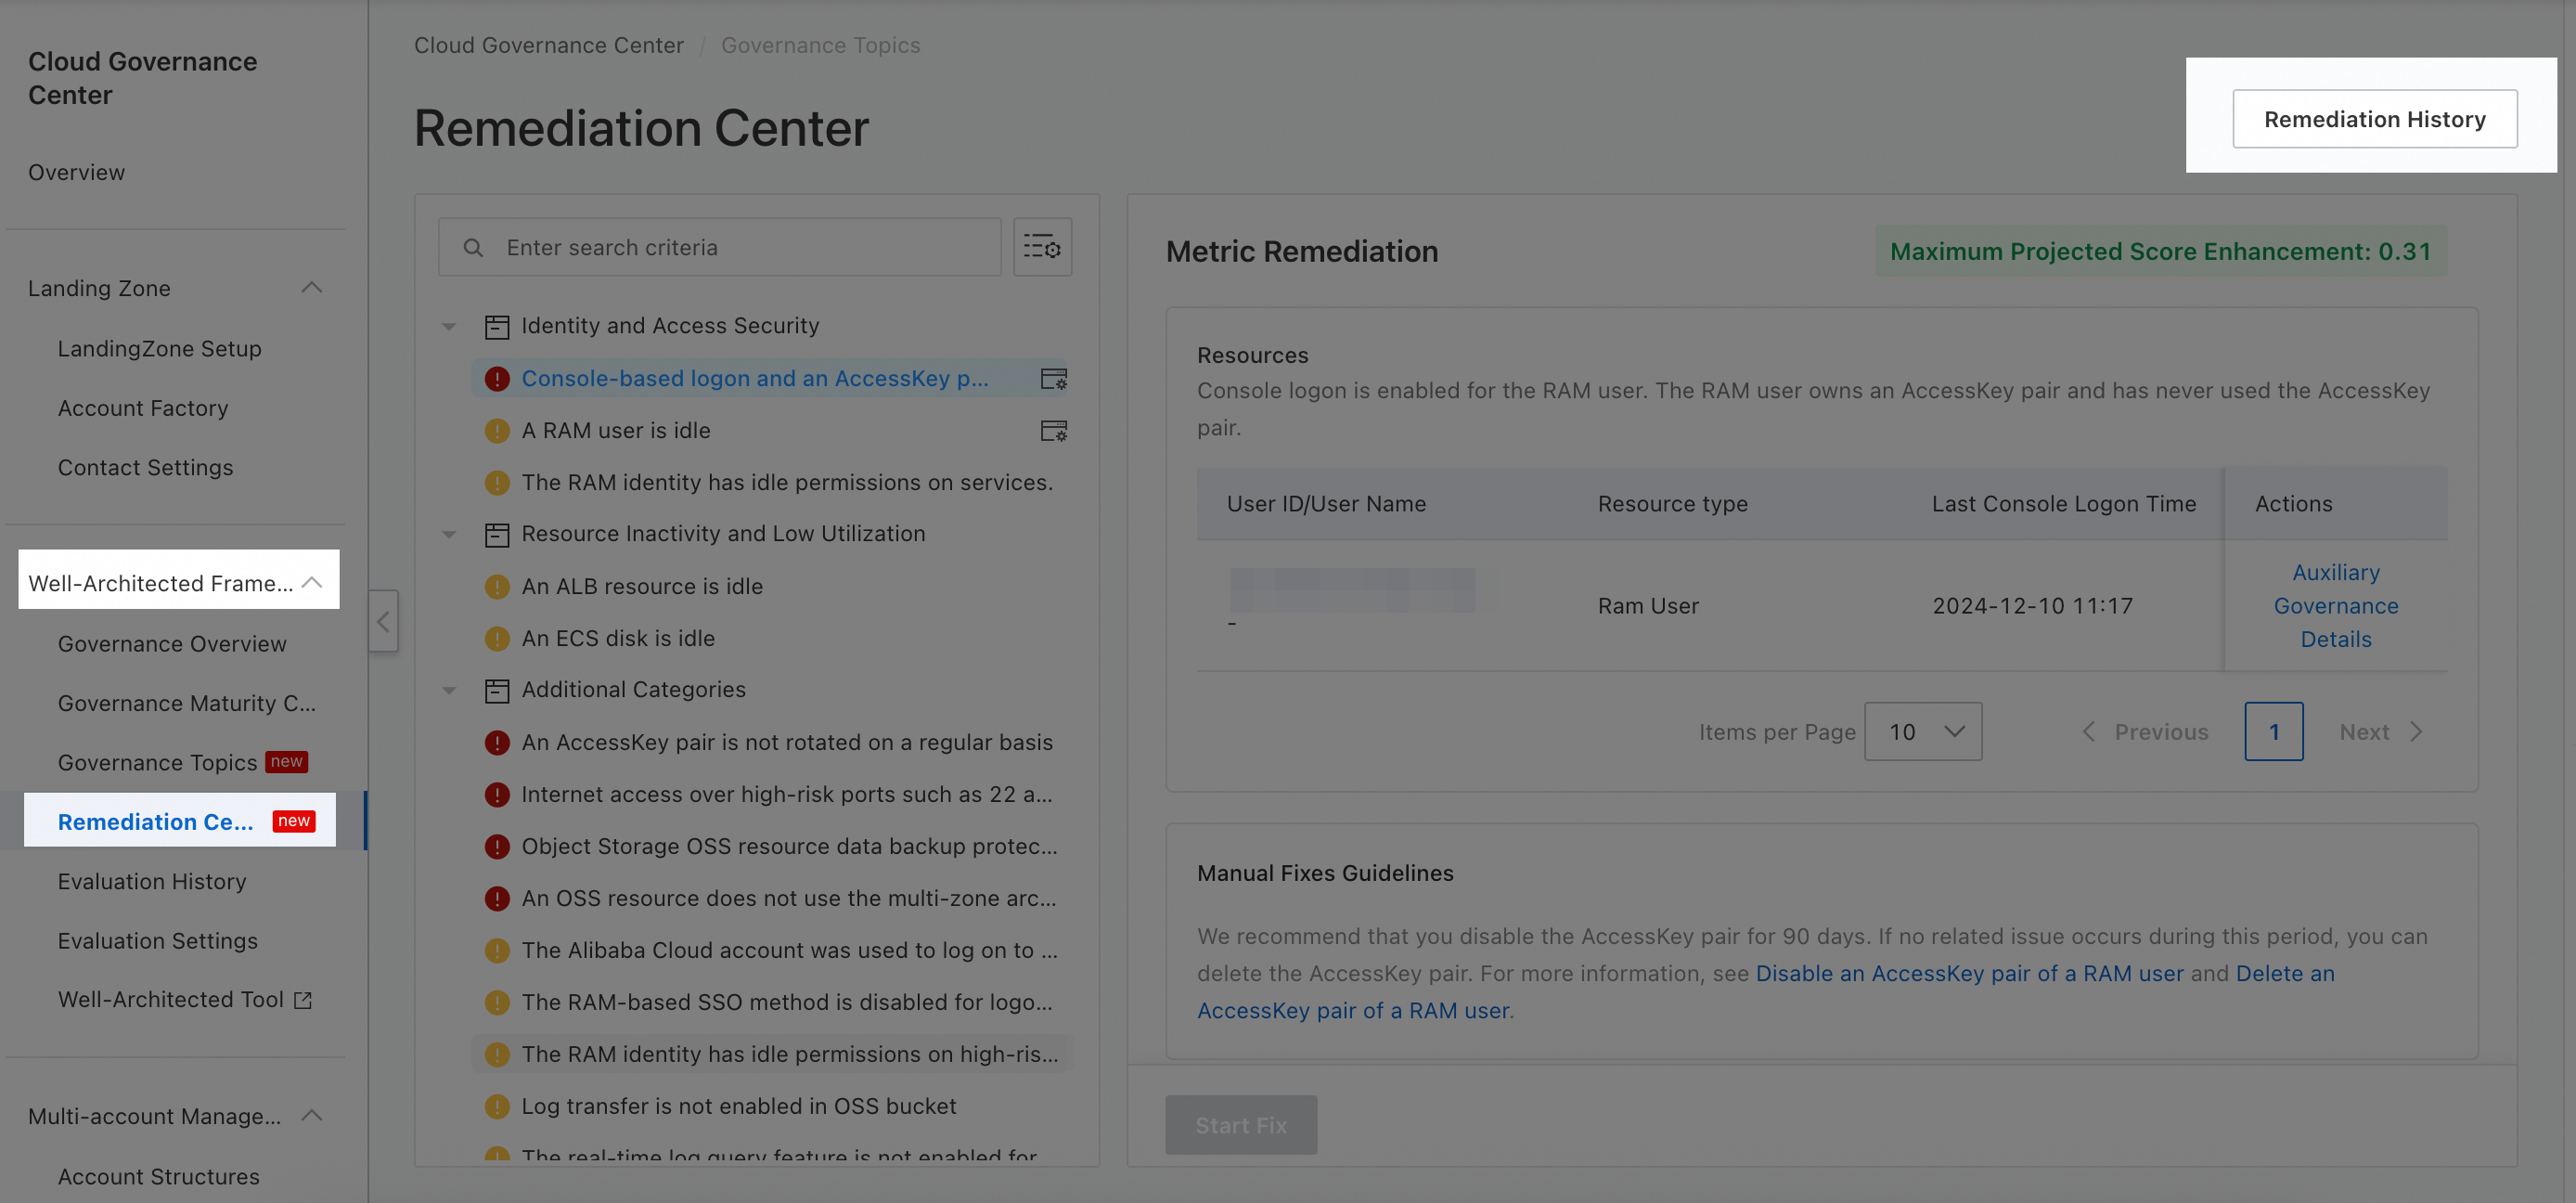
Click a check item to go to the remediation workspace.
If the item and all of its resources support quick remediation, select the resources that you want to remediate. The Start Fix button at the bottom of the page becomes enabled. Click Start Fix and confirm the action to run an automatic remediation task.
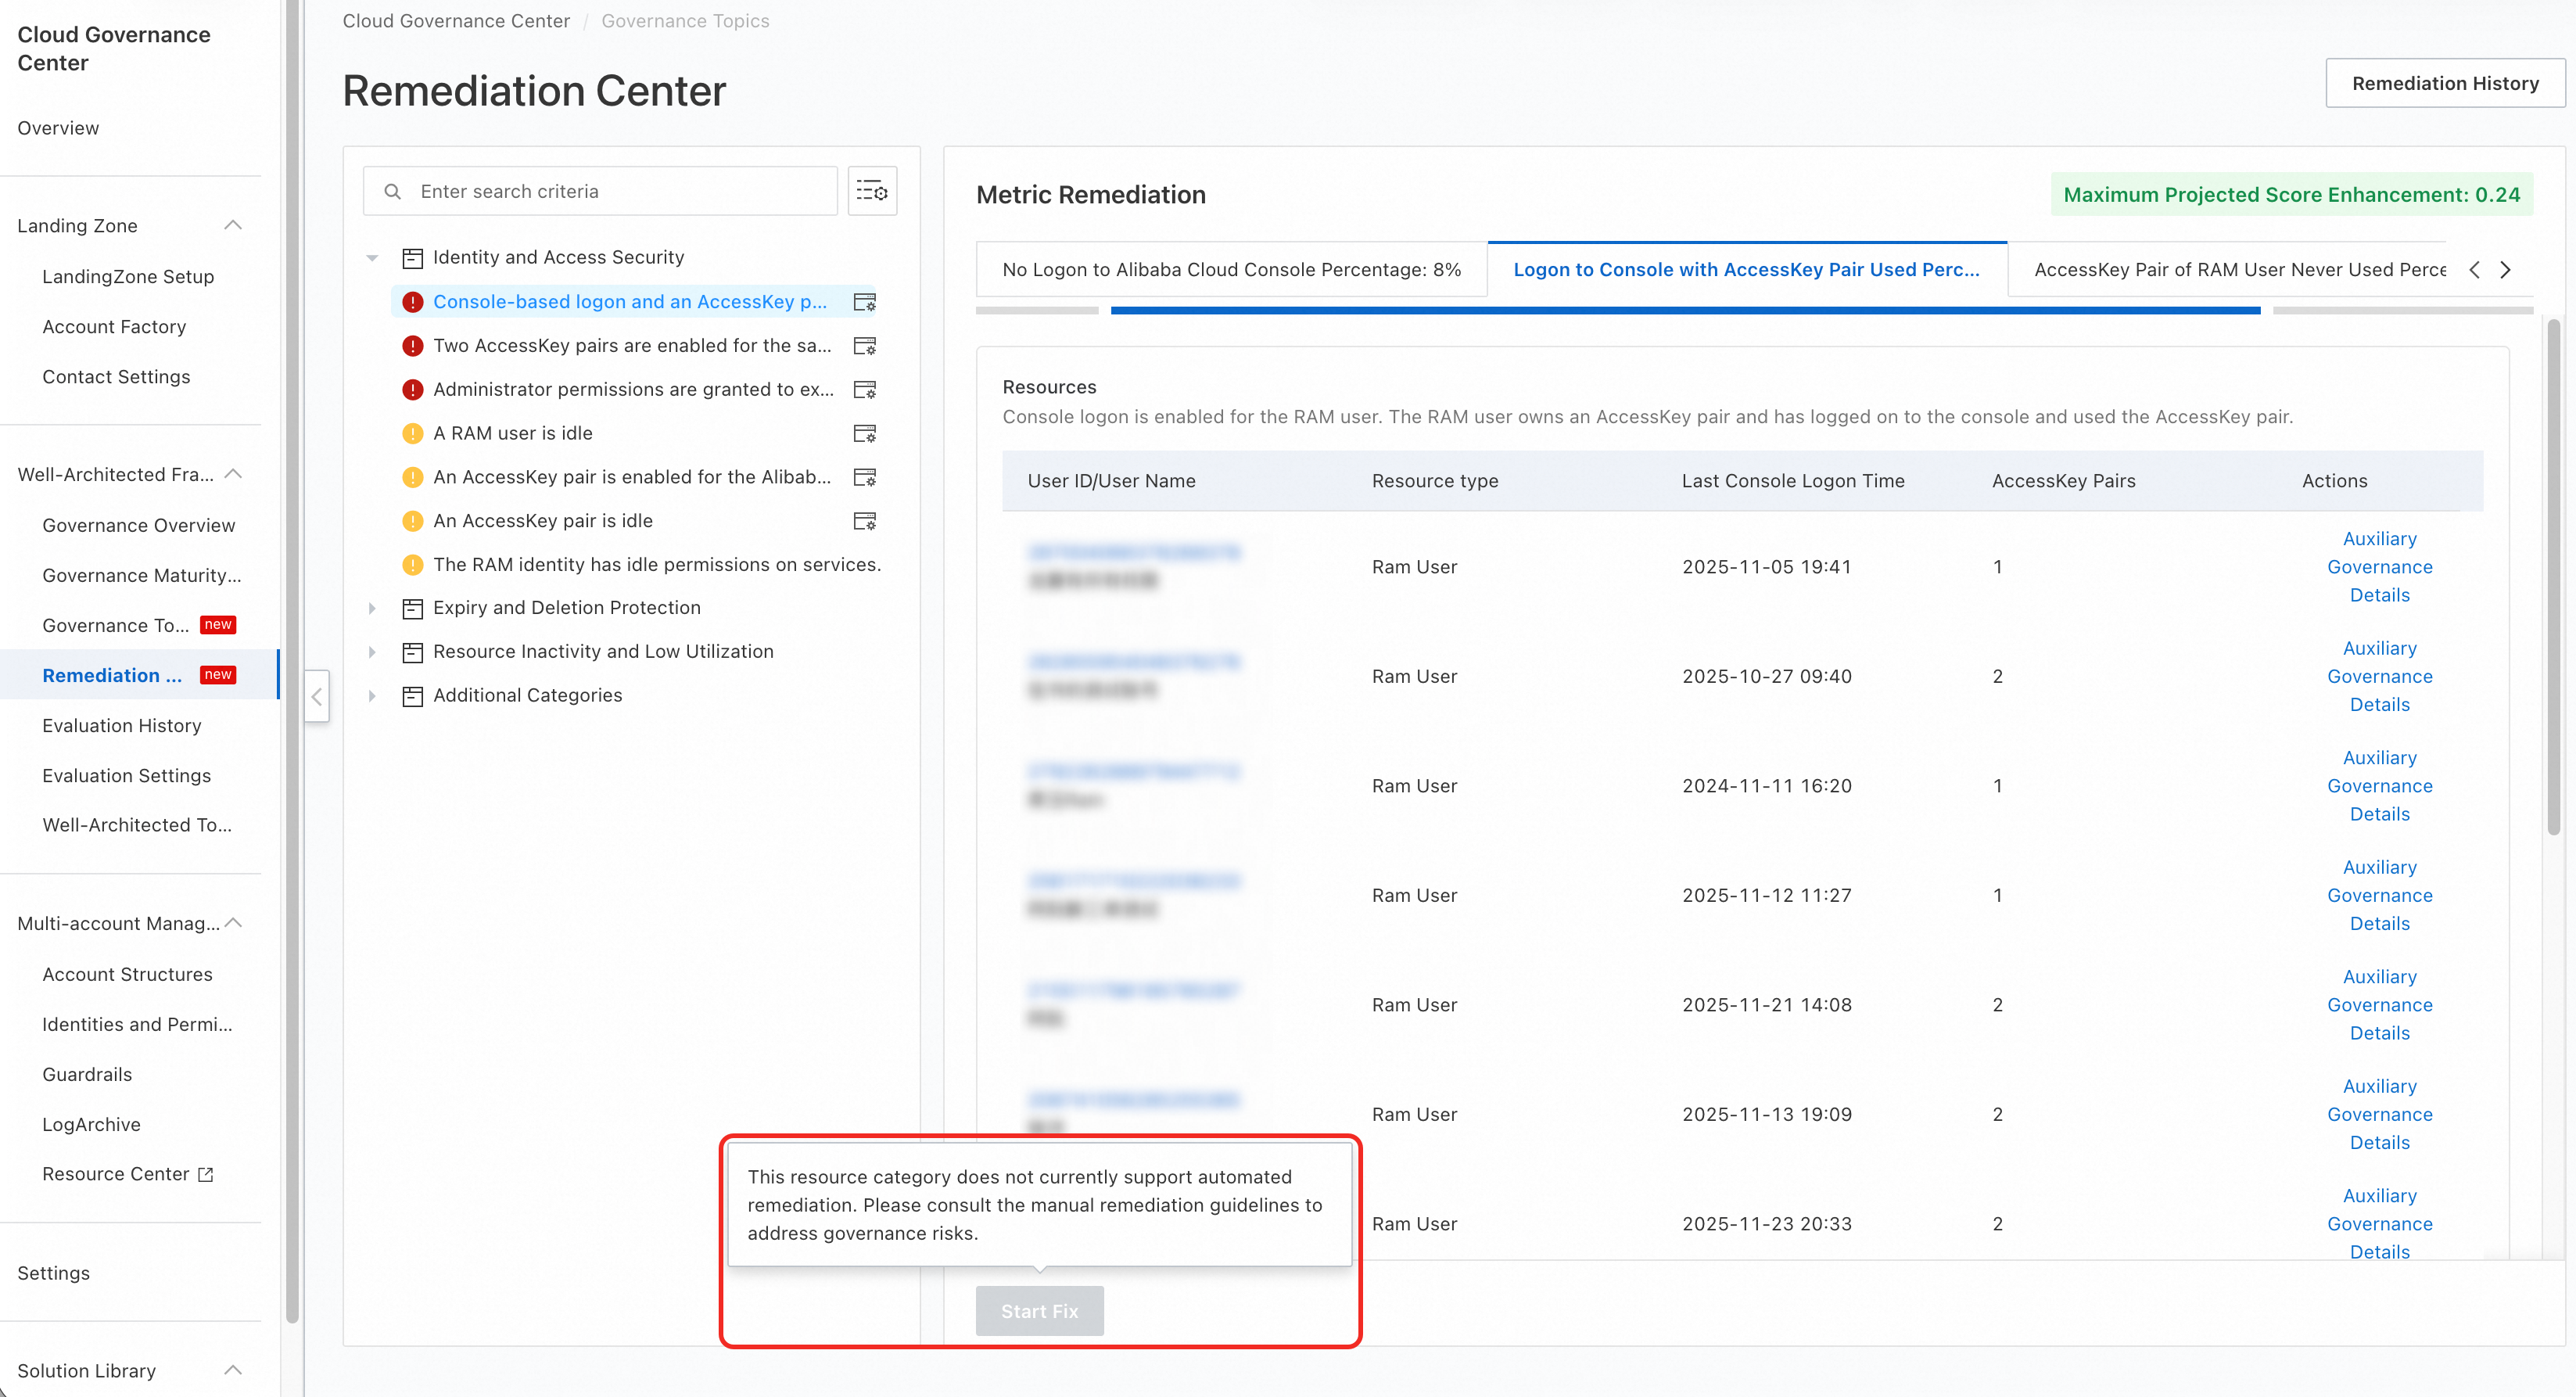
If an item supports quick remediation but some of its resources do not, you cannot select those resources in the list. If you hover over the Start Fix button, the following message appears: These resources do not support quick remediation. Follow the manual remediation guidelines to resolve the risks.
For these resources, you must follow the provided guidelines to perform manual remediation.
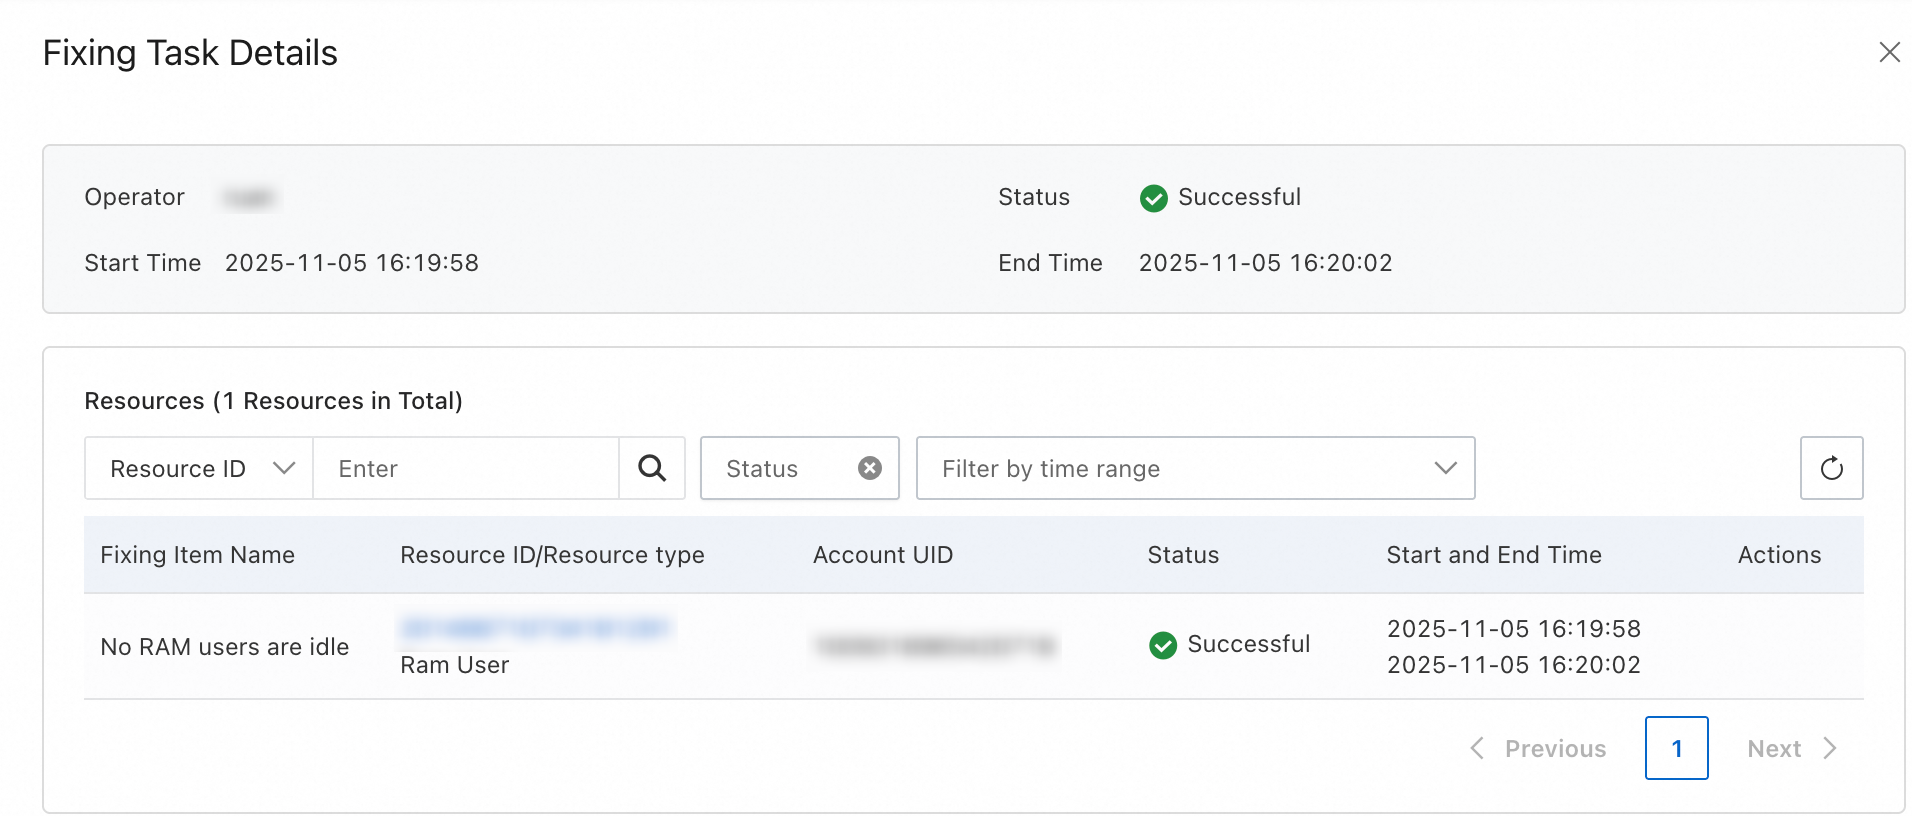
After the remediation is complete, click Remediation History in the upper-right corner of the workspace. You can view the remediation records.
NoteOnly quick remediation records appear in the history. Manual remediation is not recorded.
Batch remediation
Use batch remediation to address multiple risks simultaneously.
Only items and resources that support quick remediation can be addressed in batch. Other risks must be remediated manually.
Log on to the Cloud Governance Center console.
In the left-side navigation pane, choose .
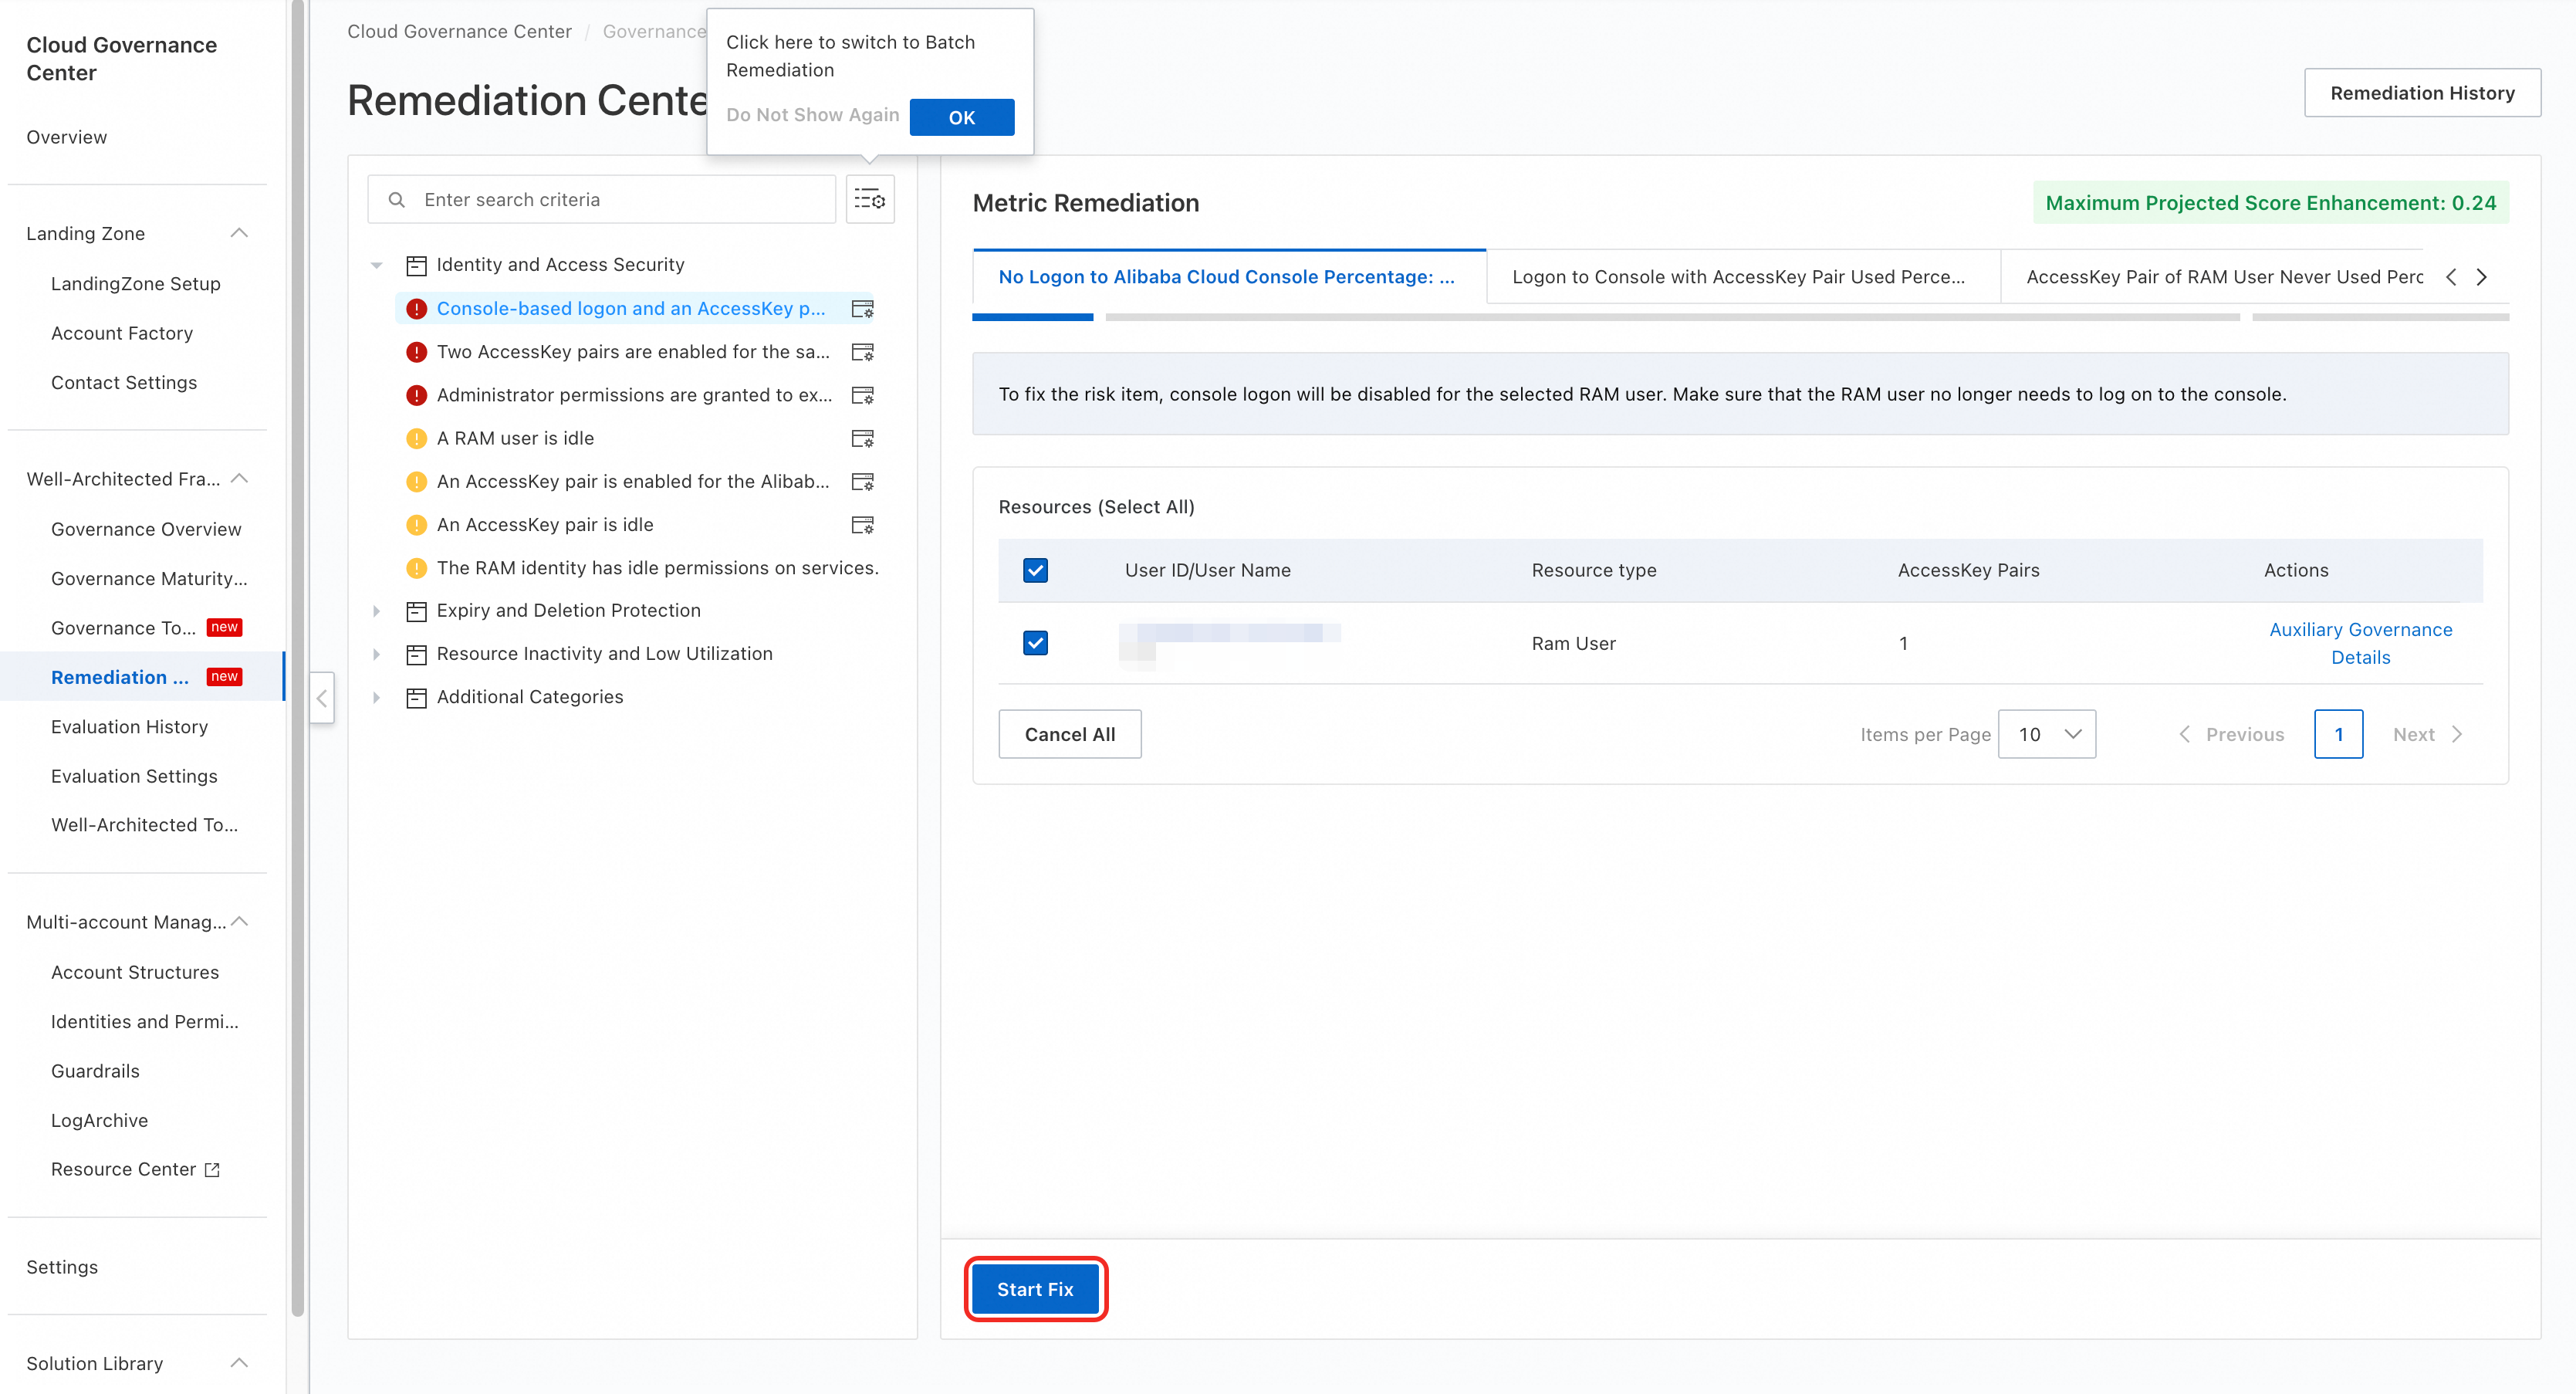
Click the
 icon to the right of the filter box to switch to batch remediation mode.
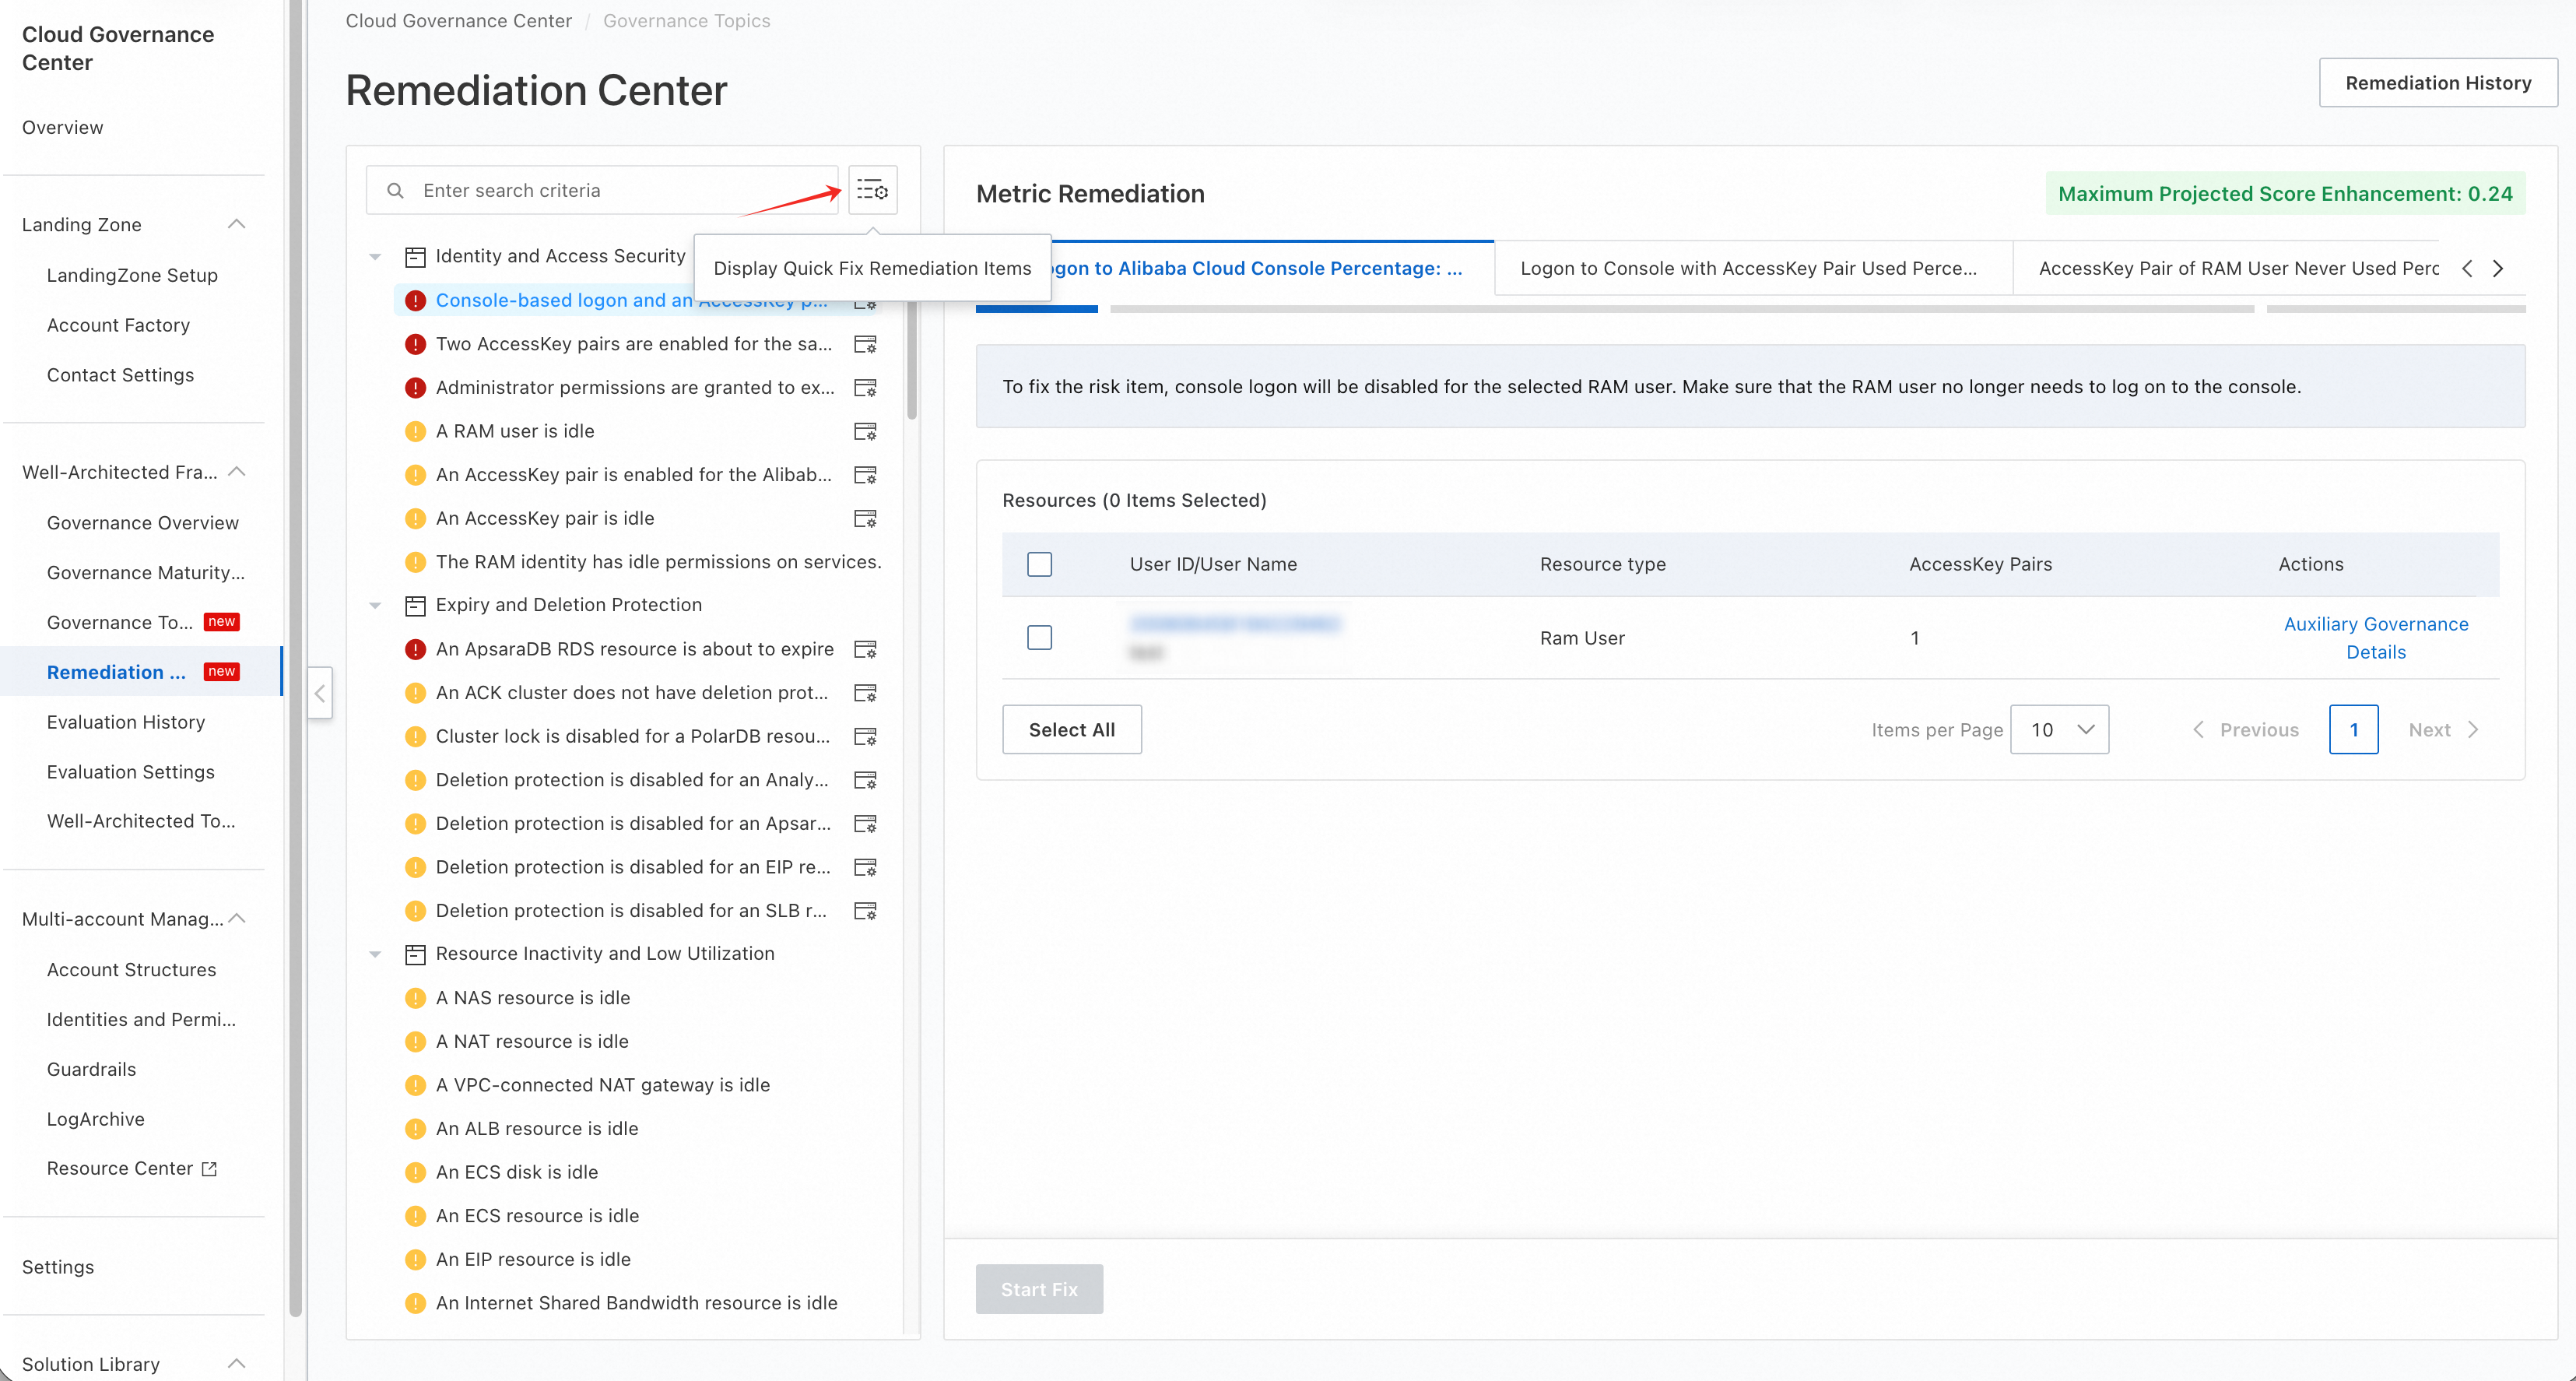
In batch remediation mode:
The upper-right corner of the remediation workspace shows the estimated total score increase after the selected items are remediated.
You can click a governance spotlight name to add all its items to the workspace for batch quick remediation.
The bottom of the workspace shows the number of items and resources to be remediated.
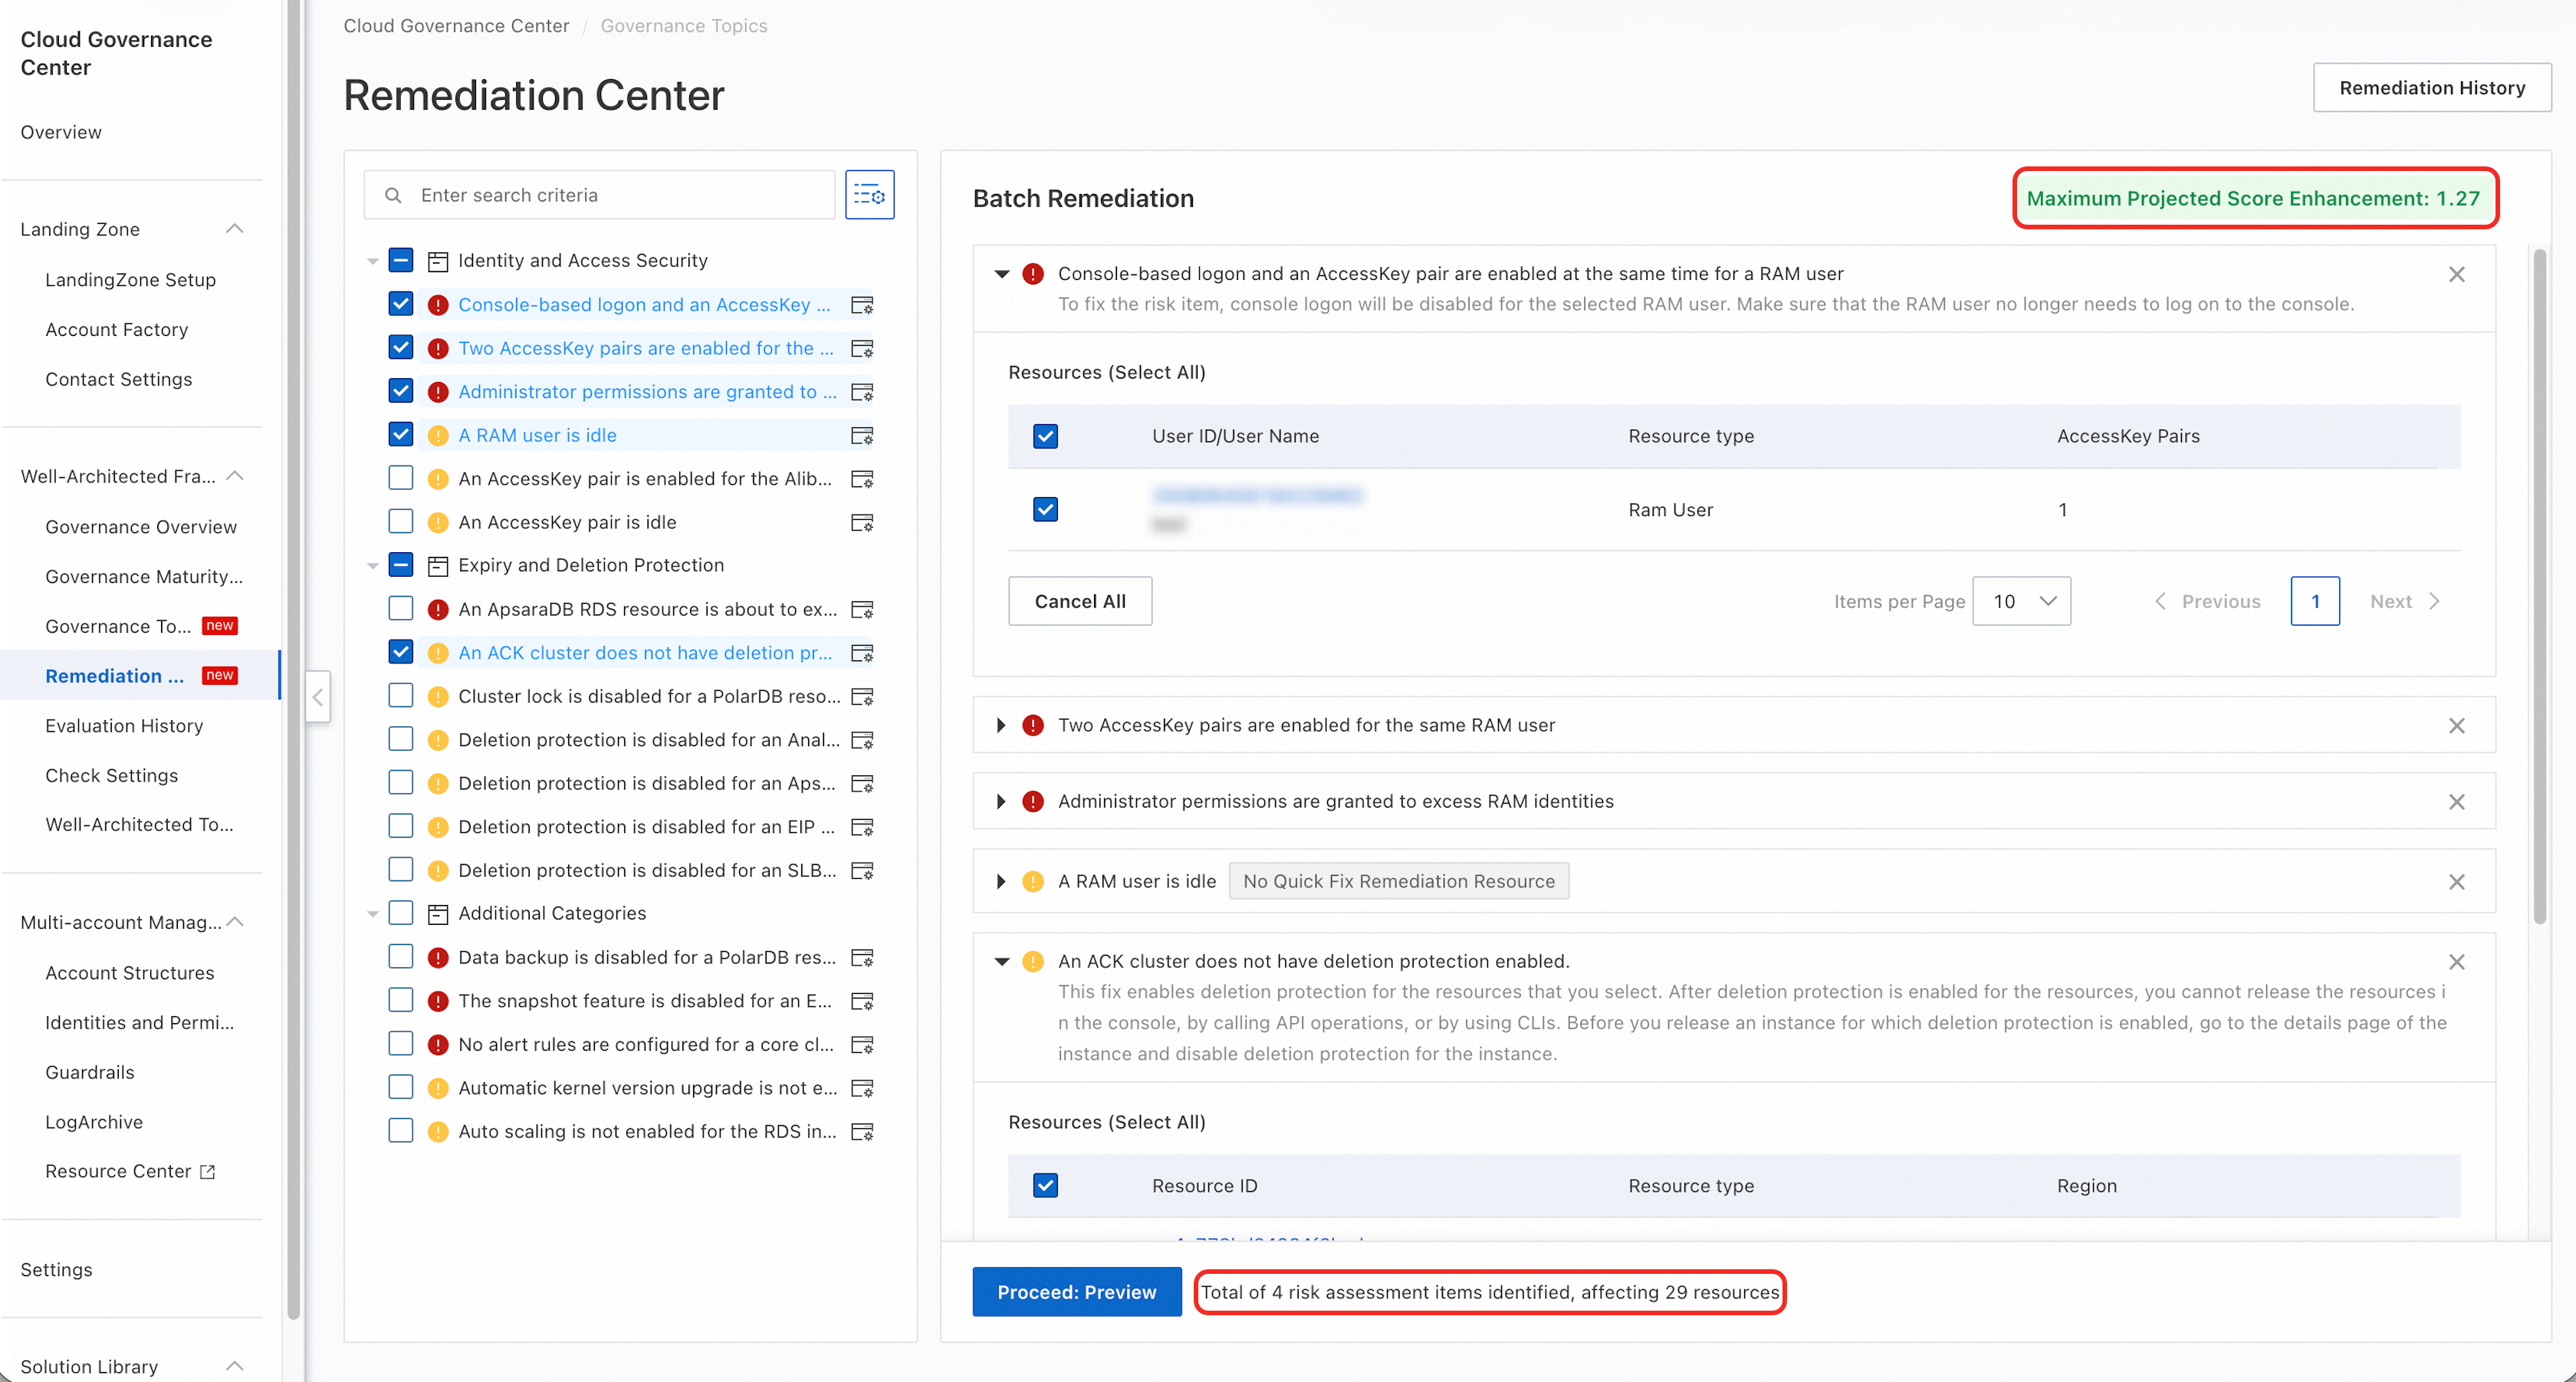
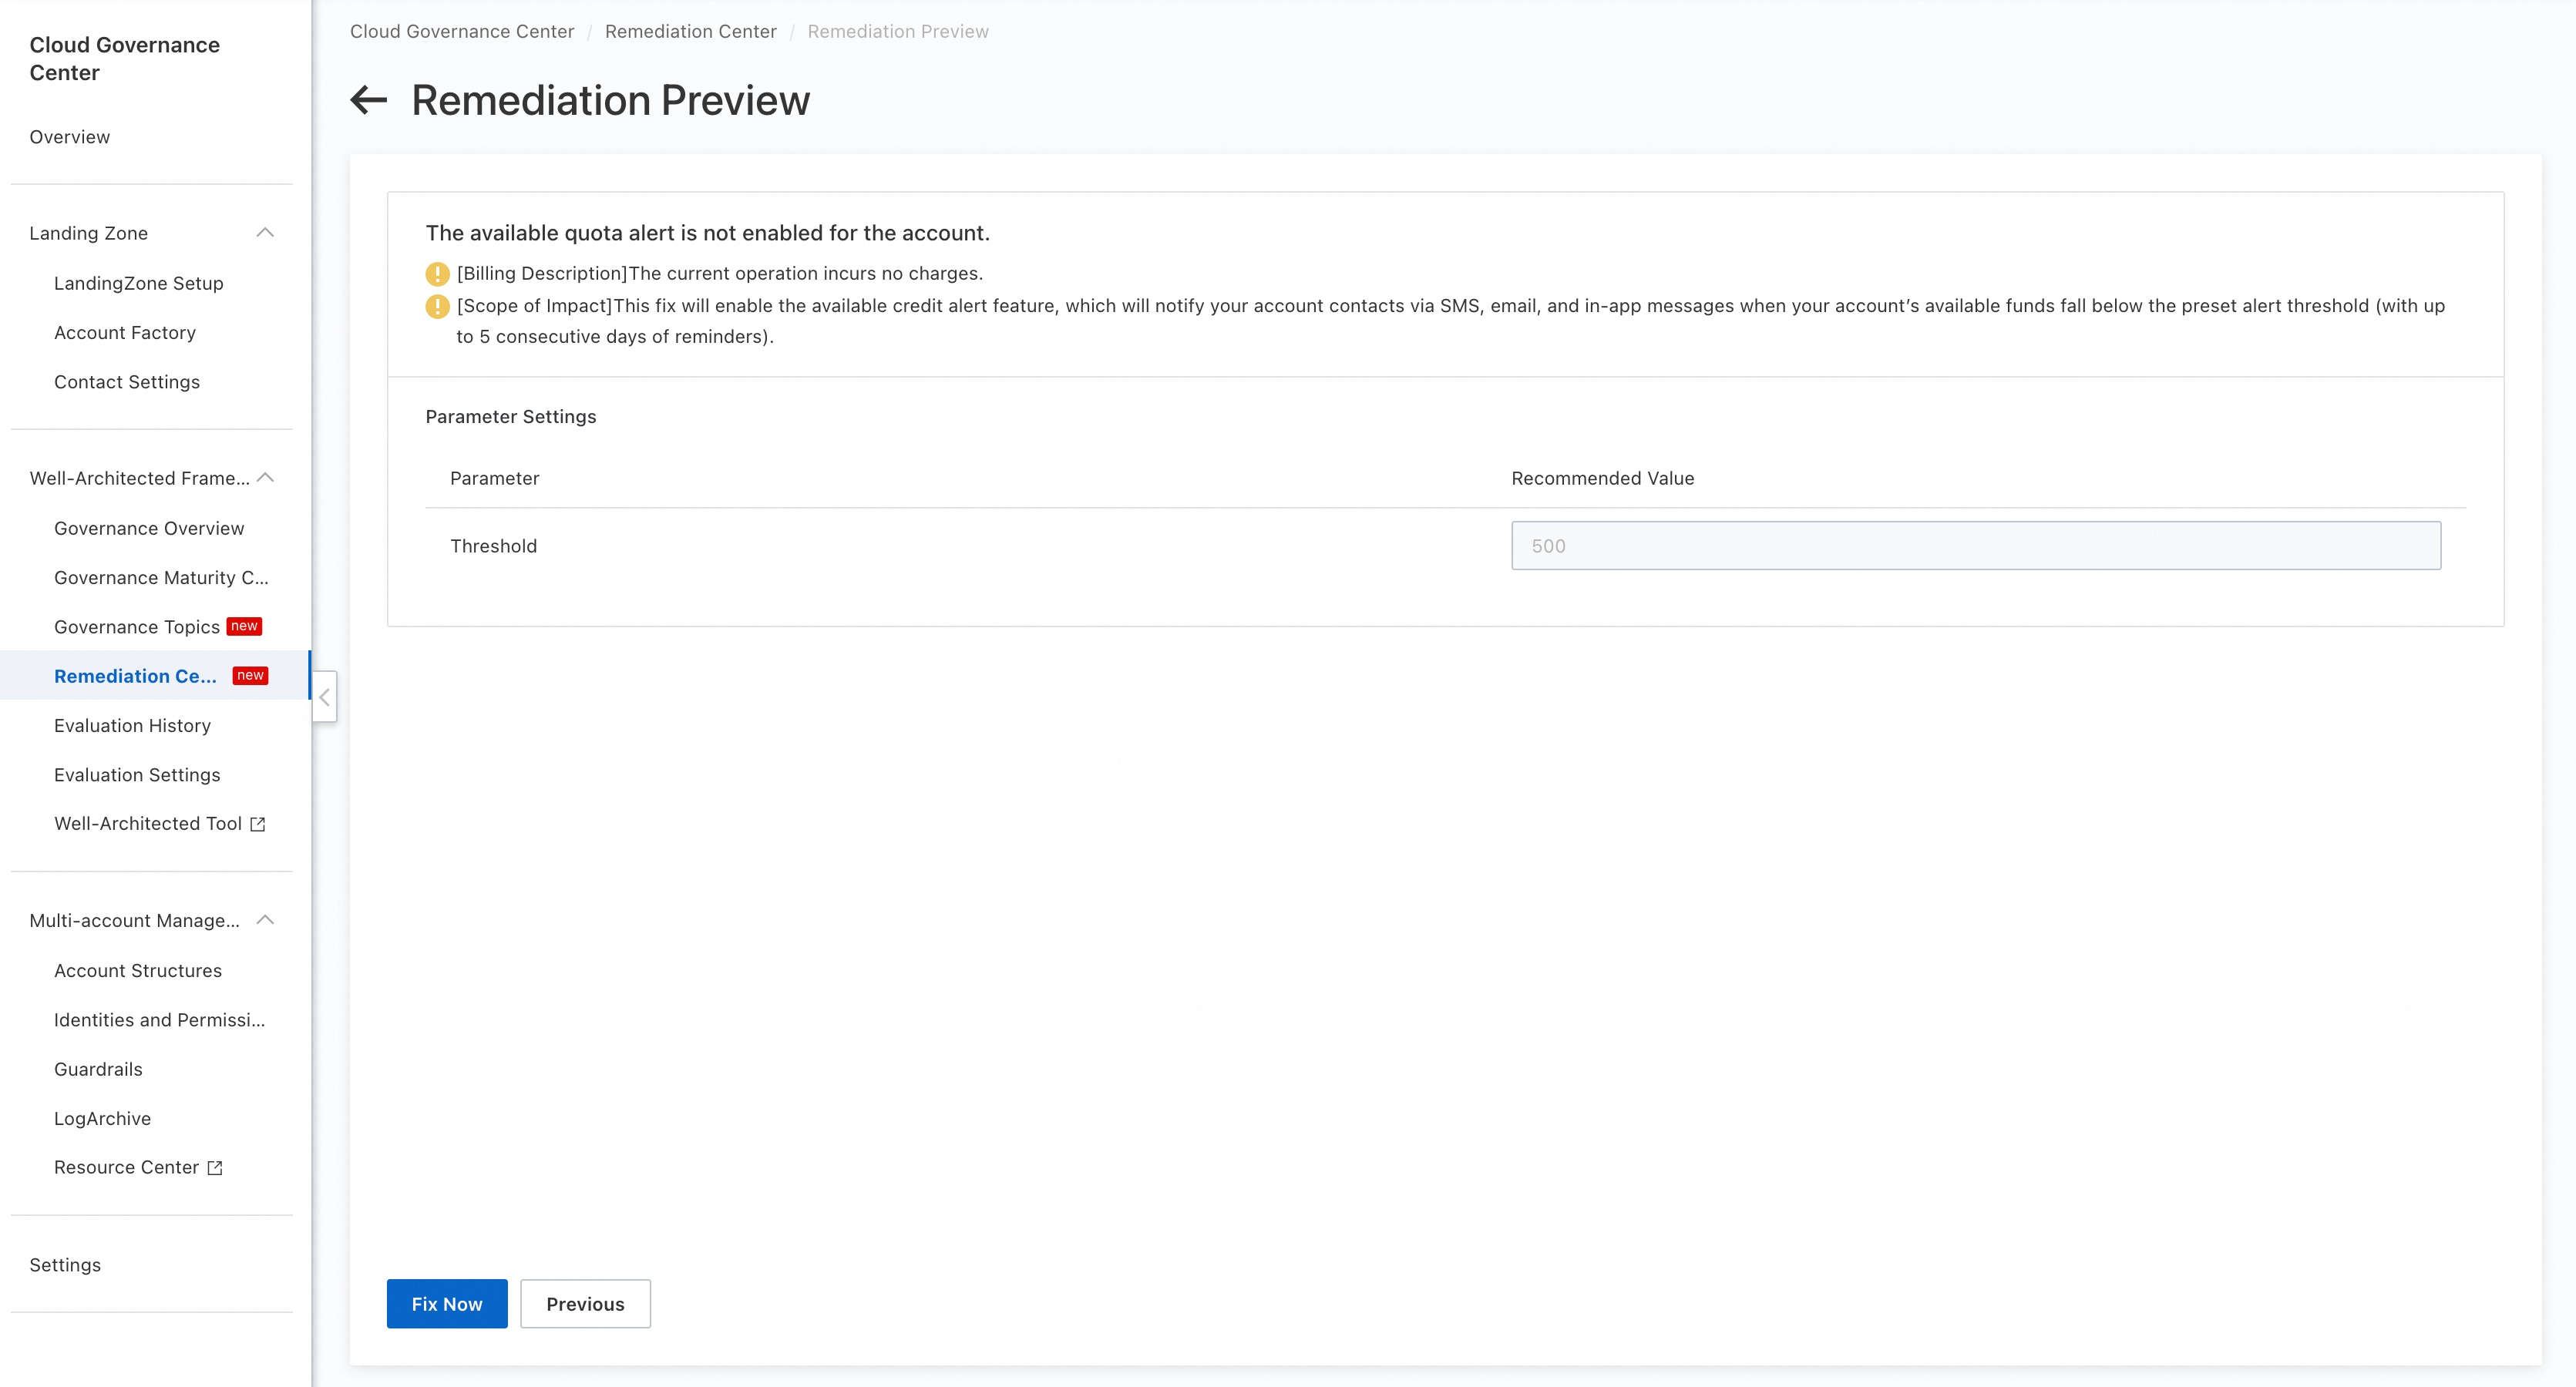
After you select the items and enter the parameters in the workspace, click Proceed: Preview to open the Remediation Preview page.
On the Remediation Preview page, you can review the remediation list and the impact scope. If the information is correct, click Fix Now to remediate the items in a batch.
After the remediation is complete, click Remediation History in the upper-right corner of the workspace. Then, you can view the remediation records on the Remediation History page.
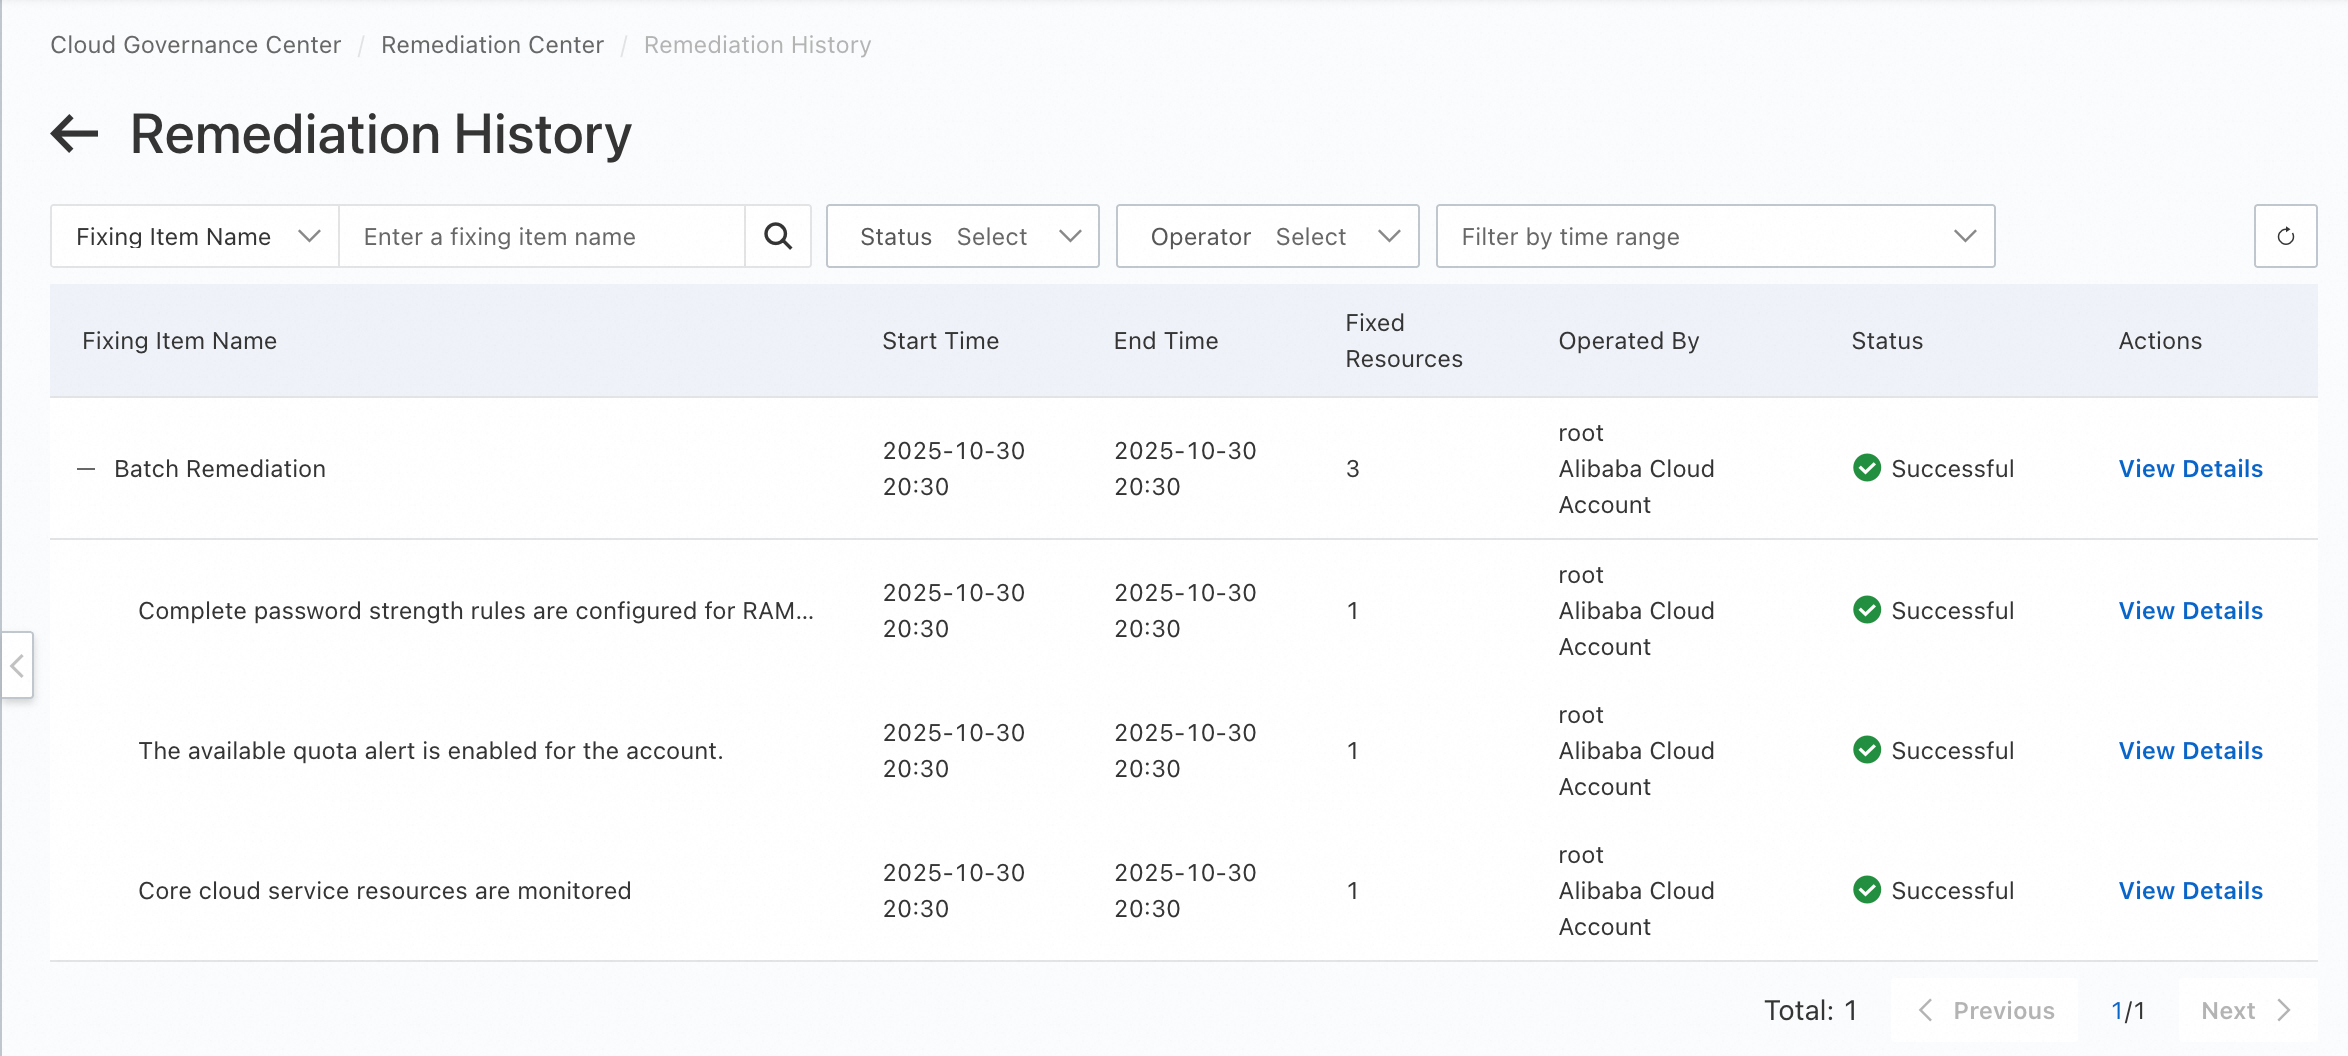
View the remediation history
Log on to the Cloud Governance Center console.
In the left-side navigation pane, choose .
Click Remediation History in the upper-right corner of the workspace.
On the Remediation History page, you can view all automatic remediation records. Click View Details in the Actions column to view the details of the automatic remediation task.
For more information, see Quickly fix risk items.
Recheck
After you complete the remediation, a recheck prompt is displayed in the upper-right corner of the Remediation Center page. Click the Recheck to trigger a new governance maturity check. Your governance maturity score is then updated based on the remediation results.
This operation takes a few minutes to complete. We recommend that you recheck only after you have finished all remediation tasks.
