View instance count changes in a scaling group
Scaling group monitoring lets you view how the instance count fluctuates across different states. This helps you understand resource utilization within the scaling group over a specific period.
Procedure
This topic describes how to view instance count changes for ECS instances or ECI instances in a scaling group.
Log on to the Auto Scaling console.
In the navigation pane on the left, click Scaling Groups.
In the top navigation bar, select a region.
Find the scaling group that you want to manage and open its details page in one of the following ways:
In the Scaling Group Name/ID column, click the ID of the scaling group.
In the Actions column, click Details.
-
At the top of the page, click the Monitoring tab.
-
View the instance count and distribution in the scaling group.
This example shows how to view the instance count in an ECS scaling group and the instance distribution in a specific zone.
-
Set the time range for the monitoring data.
-
Manual refresh: You can select a preset time range, such as 1 Hour, 6 Hours, 12 Hours, 1 Day, or 1 Week. You can also select a custom time range within the last month.
-
Auto refresh: When enabled, the page automatically refreshes the monitoring data every five seconds.
-
-
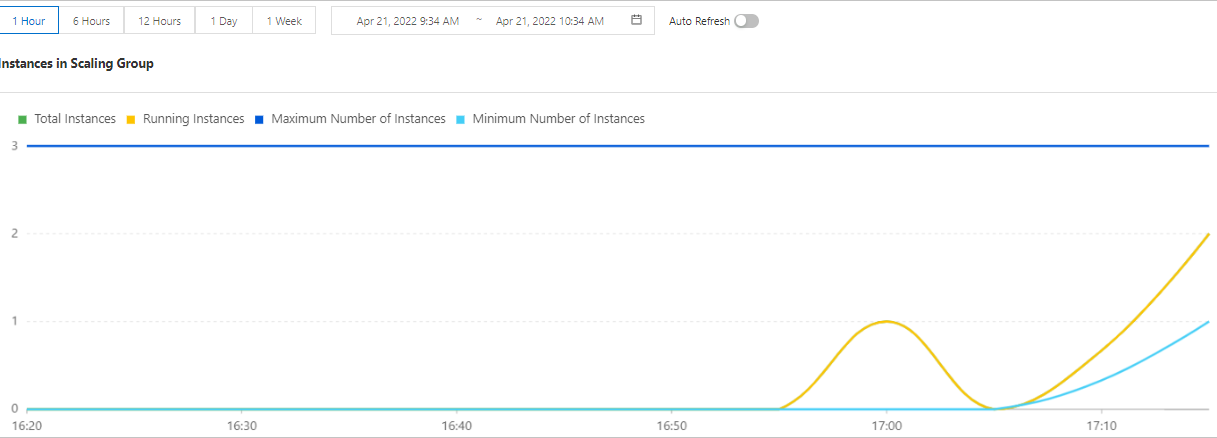
In the area, you can view the changes in the instance count of the scaling group.
The following figure shows an example of a 1-hour monitoring period.
-
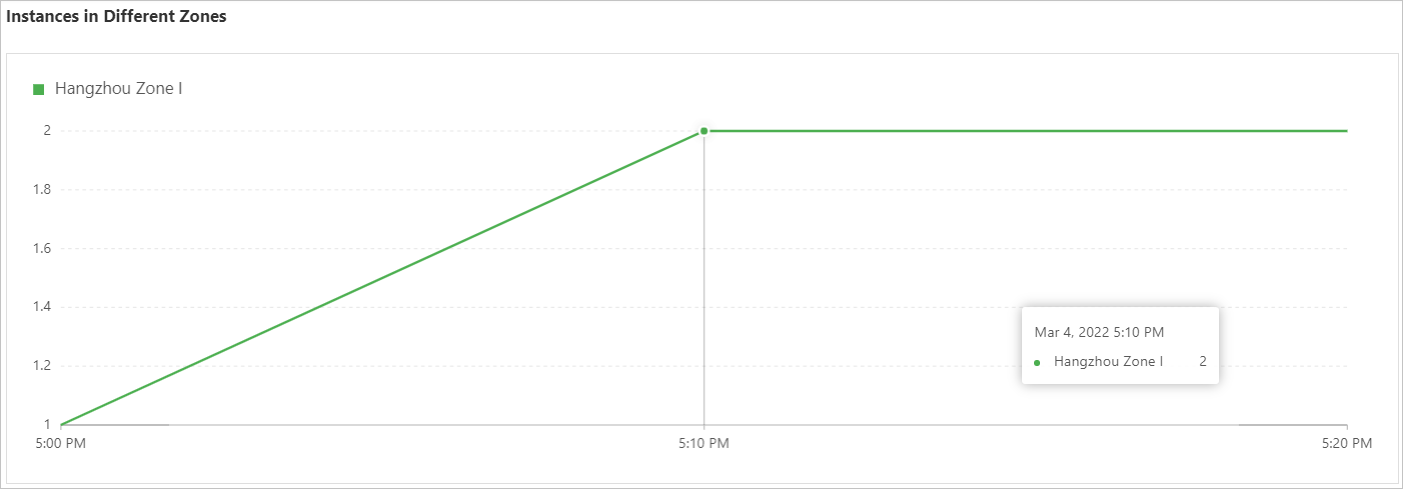
In the section, you can view the distribution of instances in the scaling group across different zones.
The following figure shows an example for a zone in Hangzhou.
-