Argo Rollouts is a Kubernetes controller and set of CRDs. Using it with Alibaba Cloud Service Mesh (ASM) lets you implement powerful canary releases to update applications safely. This strategy allows you to gradually direct a small percentage of user traffic to a new version, monitor its performance, and then progressively roll it out to all users. This approach minimizes the risk of deployment failures, ensures service stability, and provides a seamless user experience, allowing you to iterate on applications while maintaining business continuity.
Prerequisites
-
An ASM instance of version 1.12.4.50 or later is created. For more information, see Create an ASM instance.
-
You have connected to the ASM instance using kubectl. For more information, see Use kubectl on the control plane to access Istio resources.
Preparations
Install Argo Rollouts
To install Argo Rollouts, follow these steps. For more information, see the official Argo Rollouts documentation.
-
Run the following commands to install the Argo Rollouts controller.
kubectl create namespace argo-rollouts kubectl apply -n argo-rollouts -f https://github.com/argoproj/argo-rollouts/releases/latest/download/install.yaml -
Run the following command to install the Argo Rollouts plugin for kubectl.
The plugin simplifies rollout management with kubectl.
brew install argoproj/tap/kubectl-argo-rollouts
Enable data plane KubeAPI access
-
Log on to the ASM console. In the left-side navigation pane, choose .
-
On the Mesh Management page, click the name of the ASM instance. In the left-side navigation pane, choose .
-
To the right of Enable Data-plane KubeAPI access, click Enable.
-
In the dialog box that appears, click Submit.
Canary release
This topic demonstrates how to perform a canary release by creating stable and canary versions of an application and then gradually shifting traffic to the canary version. For more information about canary releases, see and Configure a canary release.
Step 1: Create the Rollout and Service resources
-
Create the Rollout resource.
-
Create a file named rollout.yaml with the following content.
The
strategyfield defines the release strategy. The following describes key parameters:-
setWeight: Specifies the percentage of traffic to route to the canary version. -
pause: Ifdurationis not set, a manual update is required. Ifdurationis set, the system waits for the specifieddurationto perform an automatic update.
-
-
Run the following command to deploy the Rollout resource to the cluster.
kubectl apply -f rollout.yaml
-
-
Create the Service resources.
-
Create a file named service.yaml with the following content.
apiVersion: v1 kind: Service metadata: name: istio-rollout-canary spec: ports: - port: 80 targetPort: http protocol: TCP name: http selector: app: istio-rollout --- apiVersion: v1 kind: Service metadata: name: istio-rollout-stable spec: ports: - port: 80 targetPort: http protocol: TCP name: http selector: app: istio-rollout -
Run the following command to deploy the Service resources to the cluster.
kubectl apply -f service.yaml
-
Step 2: Create Istio resources
-
Create a virtual service.
Because you enabled data plane KubeAPI access, you can use the data plane's KubeConfig file to access Istio resources in ASM, such as VirtualService, Gateway, and DestinationRule resources. Alternatively, you can create Istio resources in the ASM console or with the ASM KubeConfig.
-
Create a file named istio-rollout-vsvc.yaml with the following content.
apiVersion: networking.istio.io/v1alpha3 kind: VirtualService metadata: name: istio-rollout-vsvc spec: gateways: - istio-rollout-gateway hosts: - '*' http: - match: - uri: prefix: / name: primary route: - destination: host: istio-rollout-stable weight: 100 - destination: host: istio-rollout-canary -
Run the following command to deploy the istio-rollout-vsvc virtual service.
kubectl apply -f istio-rollout-vsvc.yaml
-
-
Create a gateway.
-
Create a file named istio-rollout-gateway.yaml with the following content.
apiVersion: networking.istio.io/v1beta1 kind: Gateway metadata: name: istio-rollout-gateway spec: selector: istio: ingressgateway servers: - hosts: - '*' port: name: http number: 80 protocol: HTTP -
Run the following command to deploy the istio-rollout-gateway.
kubectl apply -f istio-rollout-gateway.yaml
-
Step 3: Create an ASM Gateway
Create an ASM Gateway that listens on port 80 to serve as the entry point for test traffic.
-
Log on to the ASM console. In the left-side navigation pane, choose .
-
On the Mesh Management page, click the name of the ASM instance. In the left-side navigation pane, choose .
-
On the Ingress Gateway page, click Create. Set the basic parameters for the gateway, and then click Create.
The following table describes the key parameters. For more information, see Create an ingress gateway.
Parameter
Description
Name
Enter ingressgateway.
Gateway types
Select North-South IngressGateway.
Port Mapping
Click Add Port. In the new row, set Protocol to HTTP and Service Port to 80.
Step 4: Check the Rollout status
Run the following command to check the status of the Rollout resource.
kubectl argo rollouts get rollout istio-rolloutExpected output:
kubectl argo rollouts get rollout istio-rollout
Name:            istio-rollout
Namespace:       default
Status:          Healthy
Strategy:        Canary
  Step:          18/18
  SetWeight:     100
  ActualWeight:  100
Images:          argoproj/rollouts-demo:blue (stable)
Replicas:
  Desired:       1
  Current:       1
  Updated:       1
  Ready:         1
  Available:     1

NAME                                       KIND        STATUS     AGE  INFO
⟳ istio-rollout                            Rollout     Healthy  52s
└──# revision:1
   └──⧉ istio-rollout-7f96d86486           ReplicaSet  Healthy  52s  stable
      └──□ istio-rollout-7f96d86486-vpqvb  Pod         Running  52s  ready:2/2
Step 5: Test the initial state of the Rollout
-
Obtain the IP address of the ASM Gateway.
-
Log on to the ASM console. In the left-side navigation pane, choose .
-
On the Mesh Management page, click the name of the ASM instance. In the left-side navigation pane, choose .
-
Find the target gateway and get its IP address from the Service address column.
-
-
In your web browser, enter http://<IP_address_of_ASM_Gateway>/.
The page displays a grid of squares. This page concurrently calls http://<IP_address_of_ASM_Gateway>/color to fill the squares with the returned color. In the
istio-rolloutRollout, the specified color isblue. Because the canary release has not started, all squares are blue.The LATENCY slider is set to 0s and the ERROR slider is set to 0%. All squares are filled with blue, indicating the initial state is normal.
Step 6: Update the Rollout
In this example, the color yellow represents the canary version. You will gradually change the color of the squares at http://<IP_address_of_ASM_Gateway>/ from blue to yellow, which demonstrates the canary release.
-
Update the image version.
-
Run the following command to update the image version.
kubectl argo rollouts set image istio-rollout "*=argoproj/rollouts-demo:yellow" -
Check the container image versions.
-
Log on to the ACK console. In the left navigation pane, click Clusters.
-
On the Clusters page, click the name of your cluster. In the left navigation pane, click .
-
In the Name column, check the image versions of the target pods.
A pod for the yellow version (canary version) is created, while the pod for the blue version (stable version) still exists.
-
-
-
In your browser, access http://<IP_address_of_ASM_Gateway>/.
The result shows that 10% of the squares are now yellow. In Service Mesh, the weights in the VirtualService resource have been updated. The weight for the stable (blue) version is changed from 100 to 90, and the weight for the canary (yellow) version is changed from 0 to 10. The Argo Rollouts controller automatically modifies the VirtualService weights based on the
setWeightvalue of10in the first step of the Rollout. Because thepausefield for this step is empty, you must manually promote the rollout to proceed to the next step. -
Promote the canary release.
-
Run the following command to promote the canary release.
kubectl argo rollouts promote istio-rollout -
In your browser, access http://<IP_address_of_ASM_Gateway>/.
The weights in the VirtualService resource continue to update according to the steps defined in the Rollout. Because subsequent steps in Step 1 specify a
durationfor thepausefield, the rollout proceeds automatically after each specified delay.The grid displays a mix of blue and yellow-green squares, indicating that the old version (blue) and the canary version (yellow-green) are handling traffic simultaneously.
-
-
Verify that the canary release is complete.
-
After a while, refresh the browser page at http://<IP_address_of_ASM_Gateway>/.
All squares are now yellow.
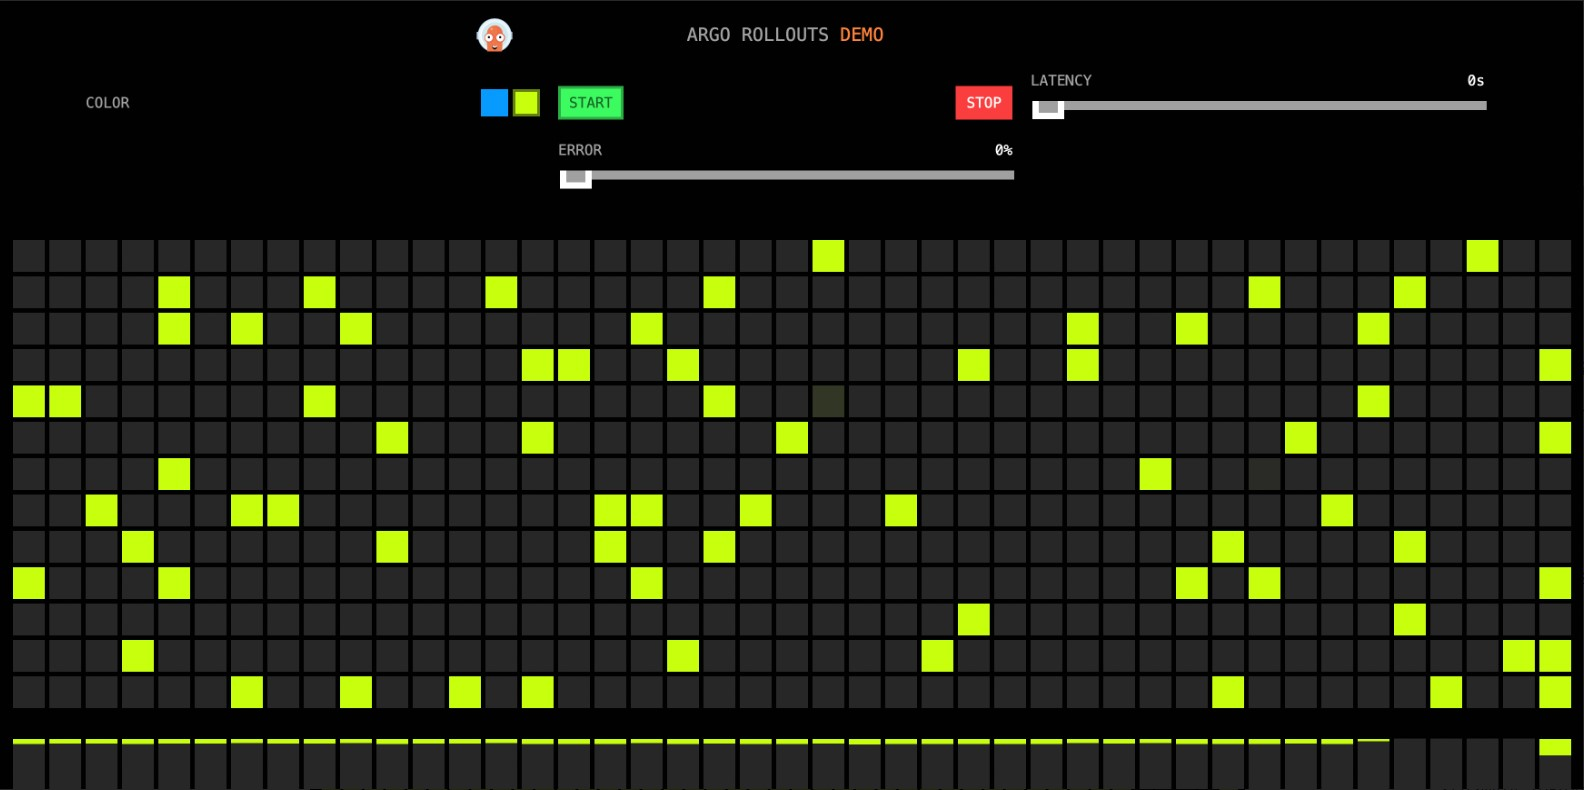
-
Run the following command to check the final status of the Rollout resource.
kubectl argo rollouts get rollout istio-rollout --watchExpected output:
Name:            istio-rollout
Namespace:       default
Status:          Healthy
Strategy:        Canary
  Step:          18/18
  SetWeight:     100
  ActualWeight:  100
Images:          argoproj/rollouts-demo:yellow (stable)
Replicas:
  Desired:       1
  Current:       1
  Updated:       1
  Ready:         1
  Available:     1

NAME                                       KIND        STATUS        AGE  INFO
⟳ istio-rollout                            Rollout     Healthy     48m
├──# revision:4
│  └──⧉ istio-rollout-5fcf5864c4           ReplicaSet  Healthy     27m  stable
│     └──□ istio-rollout-5fcf5864c4-vw6kh  Pod         Running     26m  ready:2/2
├──# revision:3
│  └──⧉ istio-rollout-897cb5b6d            ReplicaSet  • ScaledDown  27m
└──# revision:1
   └──⧉ istio-rollout-7f96d86486           ReplicaSet  • ScaledDown  48m
The output shows that the image for the stable version has been updated to
yellow.
-
Use Prometheus to enable automatic rollback
During a canary release, you can run the kubectl argo rollouts abort istio-rollout command to manually roll back to the stable version. You can also integrate with Prometheus to automatically roll back the application if its health metrics become abnormal. When an automatic rollback occurs, the release is marked as Degraded.
-
Enable Prometheus in ASM. For more information, see Integrate Managed Service for Prometheus to monitor ASM instances or Monitor ASM instances with a self-managed Prometheus instance.
-
Configure an Argo AnalysisTemplate.
-
Create a file named istio-success-rate.yaml with the following content.
Set the
addressfield in the AnalysisTemplate to your ASM Prometheus endpoint.apiVersion: argoproj.io/v1alpha1 kind: AnalysisTemplate metadata: name: istio-success-rate spec: args: - name: service - name: namespace metrics: - name: success-rate initialDelay: 60s interval: 20s successCondition: result[0] > 0.90 provider: prometheus: address: http://xxx.aliyuncs.com:9090/api/v1/prometheus/ query: >+ sum(irate(istio_requests_total{ reporter="source", destination_service=~"{{args.service}}.{{args.namespace}}.svc.cluster.local", response_code!~"5.*"}[40s]) ) / sum(irate(istio_requests_total{ reporter="source", destination_service=~"{{args.service}}.{{args.namespace}}.svc.cluster.local"}[40s]) ) -
Run the following command to deploy the Argo AnalysisTemplate.
kubectl apply -f istio-success-rate.yaml
-
-
Associate the AnalysisTemplate with the Rollout resource.
-
Create a file named rollout.yaml with the following content.
In the
strategysection, add ananalysisblock to enable monitoring and automatic rollbacks, starting from the second step. The initial image is set to yellow. -
Run the following command to update the Rollout resource.
kubectl apply -f rollout.yaml
-
-
Run the following command to update the image to the orange version.
kubectl argo rollouts set image istio-rollout "*=argoproj/rollouts-demo:orange"In your browser, access http://<IP_address_of_ASM_Gateway>/.
The grid on the Argo Rollouts Demo page shows mostly yellow-green squares (stable version) with a few orange squares (canary version), indicating that the canary release has started and the new version is receiving a small percentage of traffic. The LATENCY value is 0s and the ERROR value is 0%.
-
Manually promote the release.
-
Run the following command to promote the canary release.
After you run the command, the rollout proceeds automatically. Starting from the second step, Prometheus monitors the rollout. If the success rate of the canary version falls to 90% or below, an automatic rollback is triggered.
kubectl argo rollouts promote istio-rollout -
Run the following command to watch the status of the rollout.
kubectl argo rollouts get rollout istio-rollout --watchExpected output:
Name:            istio-rollout
Namespace:       default
Status:          ◌ Progressing
Message:         waiting for all steps to complete
Strategy:        Canary
  Step:          5/18
  SetWeight:     30
  ActualWeight:  30
Images:          argoproj/rollouts-demo:orange (canary)
                 argoproj/rollouts-demo:yellow (stable)
Replicas:
  Desired:       1
  Current:       2
  Updated:       1
  Ready:         2
  Available:     2

NAME                                       KIND           STATUS        AGE    INFO
⟳ istio-rollout                            Rollout        ◌ Progressing 2m23s
├──# revision:2
│  ├──⧉ istio-rollout-5b7b8669fb           ReplicaSet     Healthy     107s   canary
│  │  └──□ istio-rollout-5b7b8669fb-c7w5q  Pod            Running     107s   ready:2/2
│  └──α istio-rollout-5b7b8669fb-2         AnalysisRun    ◌ Running     78s    4
└──# revision:1
   └──⧉ istio-rollout-5fcf5864c4           ReplicaSet     Healthy     2m23s  stable
      └──□ istio-rollout-5fcf5864c4-z8l8n  Pod            Running     2m23s  ready:2/2
-
-
Simulate a failure.
During the progressive release, you can manually inject errors to test the automatic rollback. After you increase the error rate to 100%, all canary (orange) squares are outlined in red, indicating an error. After a short period, the application automatically rolls back to the stable (yellow) version.