WebSocket is a computer communications protocol that provides full-duplex communication channels over a single Transmission Control Protocol (TCP) connection. WebSocket is located at the application layer in the Open Systems Interconnection (OSI) model. WebSocket allows a server to push data to clients. Services that comply with WebSocket are WebSocket services. This topic shows you how to use an ingress gateway to access a WebSocket service in a Service Mesh (ASM) instance.
Prerequisites
Step 1: Deploy a sample application
Use kubectl to connect to the Container Service for Kubernetes (ACK) cluster. For more information, see Obtain the kubeconfig file of a cluster and use kubectl to connect to the cluster.
Use the following content to create a YAML file named tornado:
apiVersion: v1
kind: Service
metadata:
  name: tornado
  labels:
    app: tornado
    service: tornado
spec:
  ports:
  - port: 8888
    name: http
  selector:
    app: tornado
---
apiVersion: apps/v1
kind: Deployment
metadata:
  name: tornado
spec:
  replicas: 1
  selector:
    matchLabels:
      app: tornado
      version: v1
  template:
    metadata:
      labels:
        app: tornado
        version: v1
    spec:
      containers:
      - name: tornado
        image: registry.cn-beijing.aliyuncs.com/aliacs-app-catalog/tornado:lastest
        imagePullPolicy: Always
        ports:
        - containerPort: 8888
---
Run the following command to create the tornado application:
kubectl apply -f tornado.yaml
Step 2: Configure a routing rule
Log on to the ASM console.
In the left-side navigation pane, choose .
On the Mesh Management page, find the ASM instance that you want to configure. Click the name of the ASM instance or click Manage in the Actions column.
Create an Istio gateway.
On the details page of the ASM instance, choose in the left-side navigation pane. On the page that appears, click Create from YAML.
On the Create page, select default from the Namespace drop-down list and copy the following content to the code editor. Then, click Create.
apiVersion: networking.istio.io/v1alpha3
kind: Gateway
metadata:
  name: tornado-gateway
spec:
  selector:
    istio: ingressgateway
  servers:
  - port:
      number: 80
      name: http
      protocol: HTTP
    hosts:
    - "*"
Set the
numberparameter to80. This way, the WebSocket service can receive inbound or outbound HTTP and TCP traffic over port 80.
Create a virtual service.
On the details page of the ASM instance, choose in the left-side navigation pane. On the page that appears, click Create from YAML.
On the Create page, select default from the Namespace drop-down list and copy the following content to the code editor. Then, click Create.
apiVersion: networking.istio.io/v1alpha3
kind: VirtualService
metadata:
  name: tornado
spec:
  hosts:
  - "*"
  gateways:
  - tornado-gateway
  http:
  - match:
    - uri:
        prefix: /
    route:
    - destination:
        host: tornado
      weight: 100
Set the
hostsparameter to*. This way, all requests can access the WebSocket service.
Step 3: Query the IP address of the ingress gateway
Method 1: by using the ASM console
Log on to the ASM console. In the left-side navigation pane, choose .
On the Mesh Management page, click the name of the ASM instance. In the left-side navigation pane, choose .
On the Ingress Gateway page, obtain Service address.
Method 2: by using the ACK console
Log on to the ACK console. In the left-side navigation pane, click Clusters.
On the Clusters page, find the cluster you want and click its name. In the left-side pane, choose .
On the Services page, select istio-system from the Namespace drop-down list. In the External IP column, view the IP address of port 80 for the istio-ingressgateway.
Step 4: Use the ingress gateway to access the WebSocket service
Enter http://<IP address of the ingress gateway> in the address bars of four different browsers.
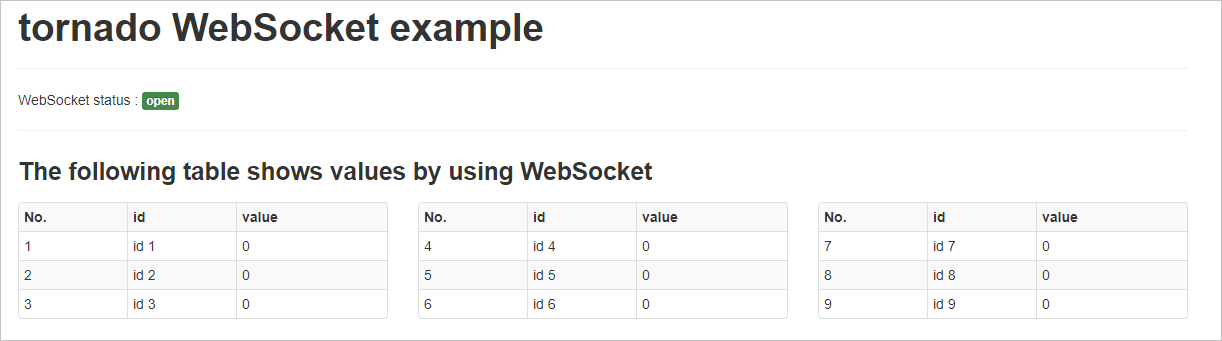
Run the following commands to access the WebSocket service:
curl "http://<IP address of the ingress gateway>/api?id=8&value=300"curl "http://<IP address of the ingress gateway>/api?id=5&value=600"curl "http://<IP address of the ingress gateway>/api?id=1&value=200"curl "http://<IP address of the ingress gateway>/api?id=3&value=290"View the data of the WebSocket service in the four browsers. The data of the WebSocket service in the four browsers is updated at the same time, and the same data is displayed.
Step 5: Switch to the WebSocket Secure (wss) protocol
Create a server certificate and private key for the ingress gateway. For more information, see Step 1: Prepare server certificates and private keys for multiple servers.
Make sure that a secret that contains the server certificate and private key is created in the istio-system namespace of the ACK cluster, and the secret is named as myexample-credential.
Modify the routing rule created in Step 2: Configure a routing rule.
Example of the YAML file:
apiVersion: networking.istio.io/v1alpha3
kind: Gateway
metadata:
  name: tornado-gateway
spec:
  selector:
    istio: ingressgateway
  servers:
  - port:
      number: 80
      name: http
      protocol: HTTP
    hosts:
    - "*"
  - hosts:
    - "*"
    port:
      name: https
      number: 443
      protocol: HTTPS
    tls:
      credentialName: myexample-credential
      mode: SIMPLE
Step 6: Use the wss protocol to access the WebSocket service
Modify the hosts file on your computer to resolve the a.aliyun.com domain name to the IP address of the ingress gateway. Make sure that you can use the domain name in the certificate created in substep 1 of Step 5 to access the ingress gateway.
Enter https://a.aliyun.com in the address bars of four different browsers.
Run the following commands to access the WebSocket service:
curl -k "https://<IP address of the ingress gateway>/api?id=8&value=300"curl -k "https://<IP address of the ingress gateway>/api?id=5&value=600"curl -k "https://<IP address of the ingress gateway>/api?id=1&value=200"curl -k "https://<IP address of the ingress gateway>/api?id=3&value=290"View the data of the WebSocket service in the four browsers. The data of the WebSocket service in the four browsers is updated at the same time, and the same data is displayed.